
LEGO Pokémon Up-Scaled Red Minifigure 40868 Build Review
Red's cap was the part I expected to recognize immediately. I did not expect it to be my favorite assembly.
LEGO Pokémon Up-Scaled Red Minifigure 40868 takes the familiar Trainer outfit, yellow backpack and Poké Ball and gives them the proportions of an oversized LEGO minifigure. The outfit brings a little of that early Pokémon adventure to the shelf, while the big claw-shaped hands keep it unmistakably LEGO.
I built all nine bags on October 8, 2026. The repeated legs were my least enjoyable section, but the backpack, printed face and surprisingly interesting cap gave the build more personality. My overall set rating is 7.2/10.
Red is ready for his next adventure, complete with his cap, backpack and Poké Ball.
At a Glance
Set: LEGO Pokémon Up-Scaled Red Minifigure, 40868
Pieces: 930
Numbered bags: 9
LEGO age recommendation: 10+
LEGO listed dimensions: Over 27 cm high, 17 cm wide and 12 cm deep
Build date: October 8, 2026
Total logged bag time: 1:30:06, hours:minutes:seconds
Bag-average difficulty: 3.1/10
Bag-average repetition: 3.7/10
Bag-average dexterity: 3.4/10
Stickers applied across the primary build: 0
Instruction complexity: 1/10
Overall set rating: 7.2/10
Instruction steps: 342 main numbered steps in the supplied booklet
What the Build Is Like
Red grows from the feet up: right leg, waist, second leg, torso frame, then the vest and backpack. Both arms and hands are built together in Bag 6. The head, hair and Poké Ball follow before the final bag finishes his cap.
Most of the build was straightforward for me. The repeated lower-body work was the least interesting stretch, while the torso connections needed the closest orientation checks. The instructions remained clear even where a connection needed a tighter squeeze.
There is no need to identify Red as Ash to make the figure familiar. This is the Pokémon game Trainer named on the set, with an outfit that becomes clearer as the layers arrive.
The nine numbered bags and instruction booklet before the Red build begins.
Bag-by-Bag Build Notes
Bag times below are minutes:seconds. Difficulty, repetition and dexterity scores are out of 10; higher scores mean more demand or repetition.
Bag 1: Red's Right Leg
Logged bag time: 09:35 | Difficulty: 2.1/10 | Repetition: 2.6/10 | Dexterity: 3.1/10 | Stickers: 0
We begin with Red's right leg. This was a straightforward opening bag, building up the blue foot and leg before the curved upper pieces gave it that familiar minifigure shape.
The main finger work came from inserting the Technic pieces and placing bricks beneath the Technic rotation joint. Nothing felt particularly difficult, but those connections needed a little more care than the surrounding brick stacking. The two red axles remain visible at this stage, ready for the next assembly.
The first leg is complete, with its connection axles still exposed.
Bag 2: The Waist and Central Support
Logged bag time: 06:43 | Difficulty: 2.9/10 | Repetition: 3.4/10 | Dexterity: 3.3/10 | Stickers: 0
Bag 2 builds Red's waist and the central support that brings the legs and torso together. The blue hip assembly joins the first leg, with the upright connections left ready for the body above.
This was another straightforward bag and my quickest at 6 minutes, 43 seconds. Red is still on one leg for now, but the lower body's structure is becoming clear.
Bag 2 adds the hip assembly above the first leg.
Bag 3: The Second Leg
Logged bag time: 06:55 | Difficulty: 2.1/10 | Repetition: 3.6/10 | Dexterity: 3.1/10 | Stickers: 0
The second leg felt almost identical to the first. The blue layers, rounded upper section and connection work are familiar by now. The two red axle pieces left visible on the first leg are not repeated in quite the same way here, and the completed leg attaches easily to the waist.
This is straightforward building, but returning to the same leg was my least enjoyable part of the set. The repeat is noticeable, even though it is only the second leg. By step 102, both feet are on the table and I am ready to move on to Red's outfit.
Both legs are now joined to the hip assembly.
Bag 4: Inside the Torso
Logged bag time: 14:30 | Difficulty: 4.2/10 | Repetition: 5/10 | Dexterity: 5.6/10 | Stickers: 0
Now we build the torso's internal frame. This is more varied than a glance at the repeated red layers might suggest: a sloping outer shape, different internal supports, and Technic connections that need the correct orientation before the body closes around them.
The diagonal connections deserve a closer look. The instructions show them clearly, so my 1/10 instruction-complexity rating still feels right, but clear diagrams do not remove the finger work. At 14 minutes, 30 seconds, this was my longest bag and it retains my highest dexterity score, 5.6/10.
There is recurring work, but the frame and its different supports also provide some variety. I like keeping a photograph of this stage because the vest soon hides much of it.
The torso's internal connections remain visible before the vest panels are added.
Bag 5: Vest Details and the Backpack
Logged bag time: 11:03 | Difficulty: 2.3/10 | Repetition: 3.3/10 | Dexterity: 1.9/10 | Stickers: 0
Bag 5 finishes the torso and attaches it to the legs. The vest gains its red panels, white front details and collar, while the yellow backpack and curved straps add another recognizable part of Red's outfit.
I particularly enjoyed assembling the backpack. It gives the figure something to appreciate from behind, rather than saving all the detail for the front. The torso joins the lower body at step 193, and Red starts looking much more like himself.
Red's vest and yellow backpack straps take shape in Bag 5.
The backpack was one of my favorite details to assemble in Bag 5.
Bag 6: Both Arms and Hands
Logged bag time: 10:18 | Difficulty: 3.5/10 | Repetition: 4.8/10 | Dexterity: 4.2/10 | Stickers: 0
Both of Red's arms and hands come together in this bag. The skin-colored sections meet the rounded black sleeves, and the large claw-shaped hands finish the oversized minifigure look.
Because the arms are mirrored builds within the same bag, the repetition was more noticeable to me here. I still found the assembly enjoyable and easy to follow. A few tight squeezes pushed my dexterity score up to 4.2/10, but they stayed manageable.
With both arms attached, the Trainer has his familiar silhouette. He is just missing a fairly important detail: his head.
Both arms and the oversized minifigure hands are attached by the end of Bag 6.
Bag 7: The Head and Printed Face
Logged bag time: 08:35 | Difficulty: 2.7/10 | Repetition: 4.4/10 | Dexterity: 3.3/10 | Stickers: 0
We start Red's head around its circular lower connection, then build up the structure for the face and surrounding details. The large sloped face piece is printed, which made me happy. Lining up a face sticker this size would not have been my idea of a Pokémon victory.
I enjoyed this bag. The way the instructions organized the assembly helped break up the repeated work, although there was still a noticeable volume of duplicate steps. My repetition score landed at 4.4/10.
The head is still unfinished in this progress photo, so you can see the face and some of the structure before the hair and cap complete it.
Red's printed face takes shape before the hair and cap complete his head.
Bag 8: Hair and the Poké Ball
Logged bag time: 11:06 | Difficulty: 3.3/10 | Repetition: 4/10 | Dexterity: 2.1/10 | Stickers: 0
Bag 8 gives Red his hair. Brown plates and angled pieces build around the sides and back of the head, getting a pleasing amount of character from a relatively compact assembly. Several related placements repeat around the perimeter before the next details change the pace.
The head attaches at step 288, followed by the little blue-and-white vest detail. Then we build the Poké Ball, layering its red and white halves around the black band and round button. Its size and shape reminded me of the Poké Balls in the Pokémon SMART Play sets, although I did not compare dimensions or test compatibility.
The ball snapped onto Red's hand fairly easily and felt surprisingly secure when I added it. Red now has his face, hair and most important accessory. He is only one cap away from the display shelf.
Red has his hair and Poké Ball, with only the cap left to build.
Bag 9: The Cap, My Favorite Assembly
Logged bag time: 11:21 | Difficulty: 4.4/10 | Repetition: 1.8/10 | Dexterity: 4.4/10 | Stickers: 0
The final bag is all about Red's cap, and it was the highlight of the build for me. Small assemblies form the white brim, then plates and curved red pieces build the rounded crown before the cap attaches to his head.
I found the piece selection and construction more varied than much of the earlier build. It was interesting to see how those sections came together into such a recognizable shape. This bag had my highest difficulty score at 4.4/10, but also my lowest repetition score at 1.8/10. That combination suited me well.
The cap was also my biggest surprise. It is the detail that pulls the whole character together, and a great way to end the build. Hat's off to this assembly.
The cap was my favorite assembly, and it brings the finished Red together.
Build Progress
Follow Red from the first blue leg through the open torso, outfit, face and finished cap. The final photographs show the completed figure from several angles and on the shelf beside Pikachu.
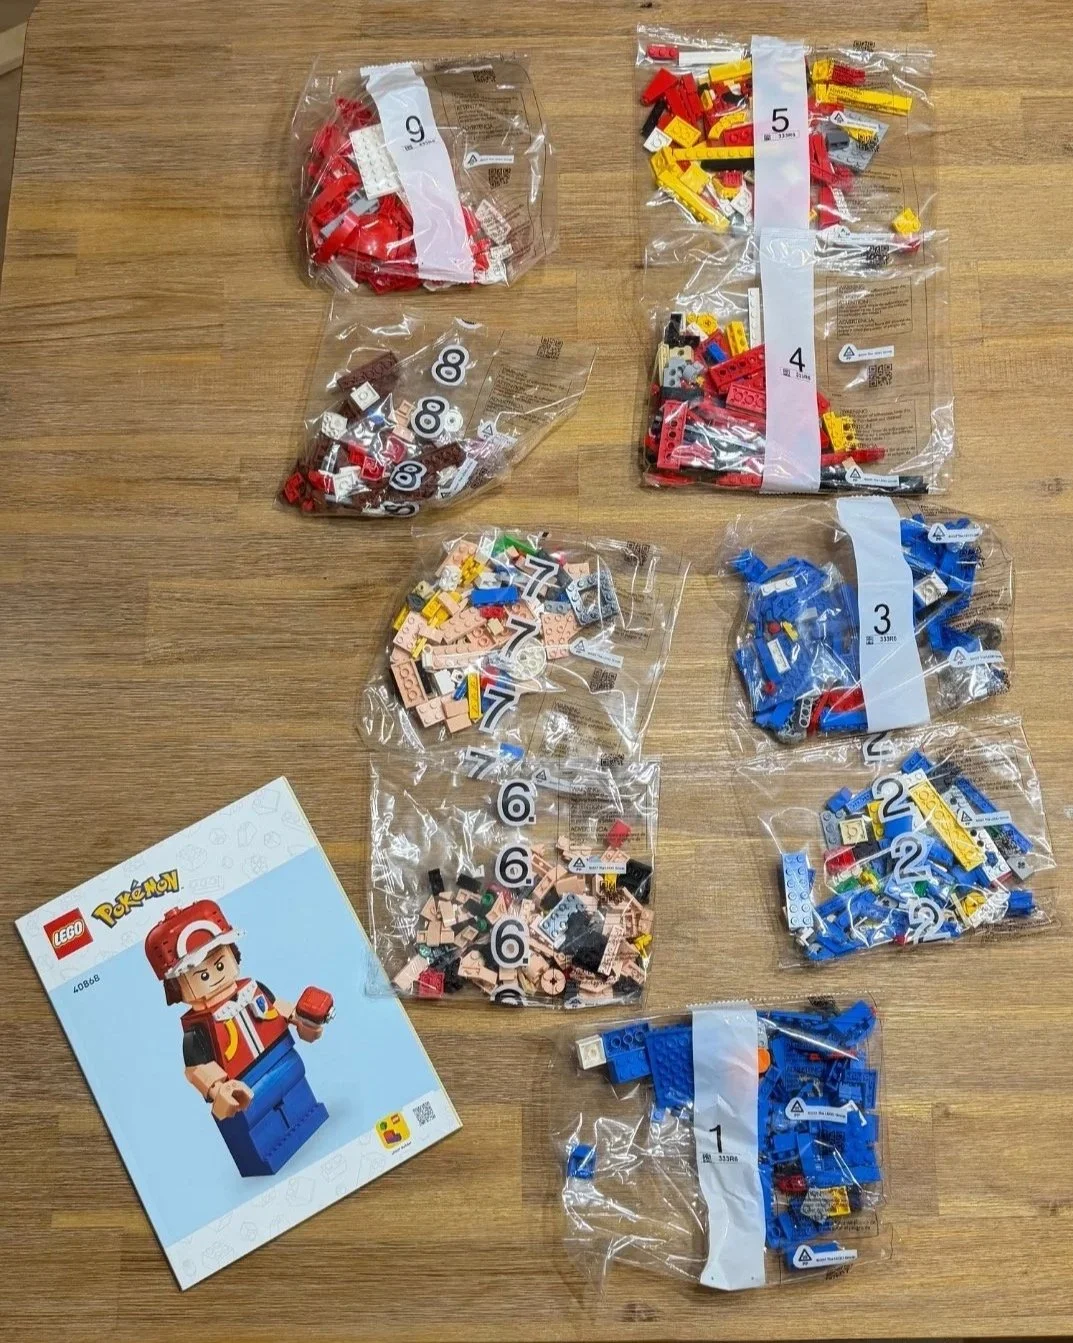
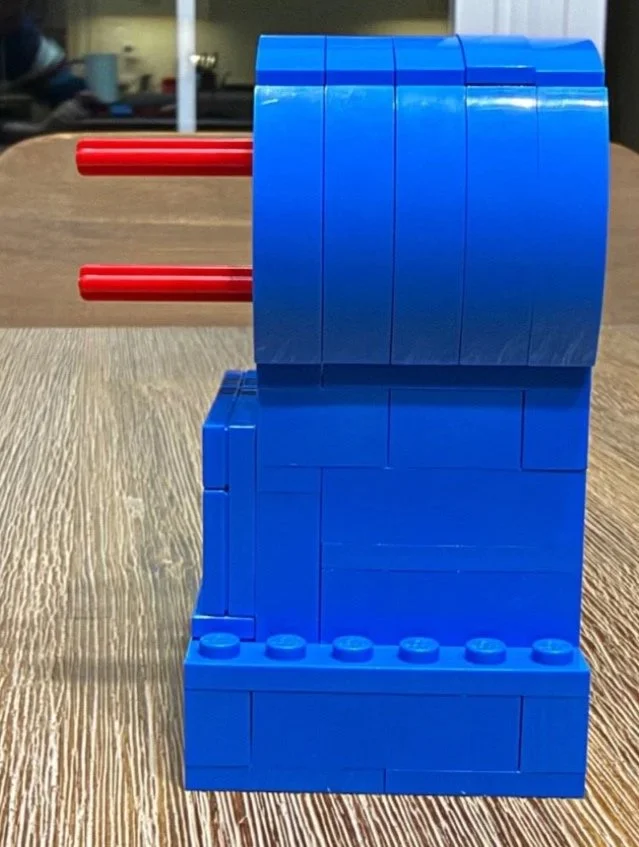
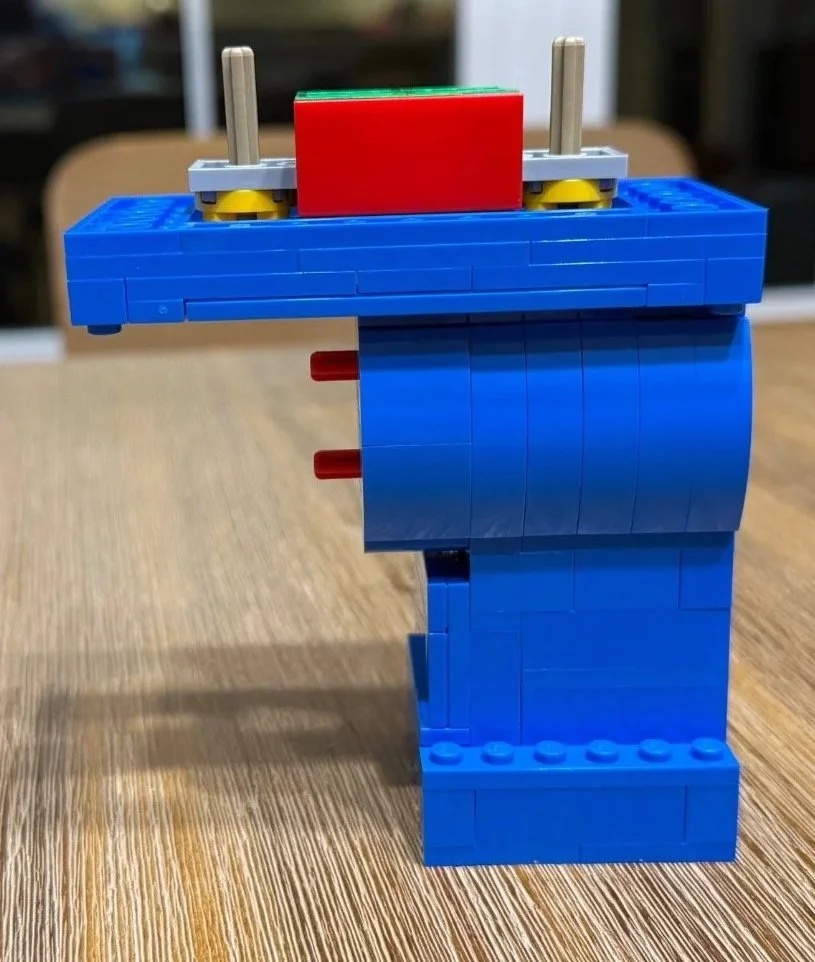
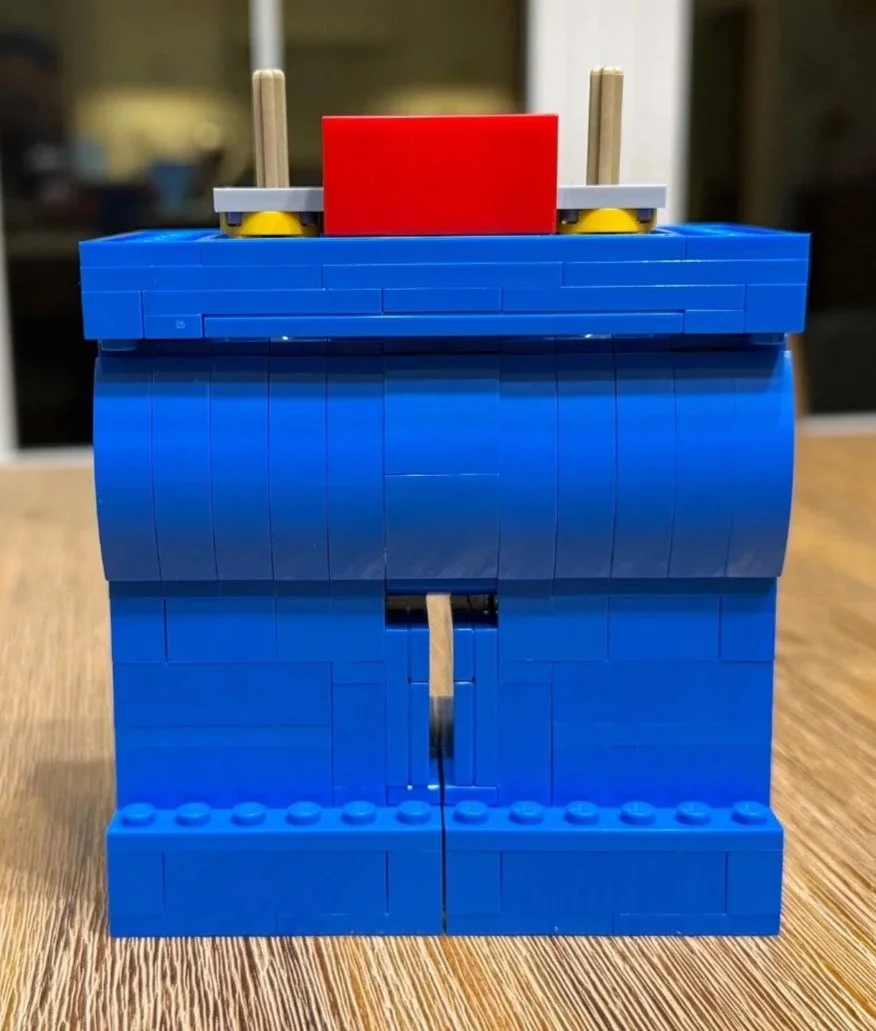
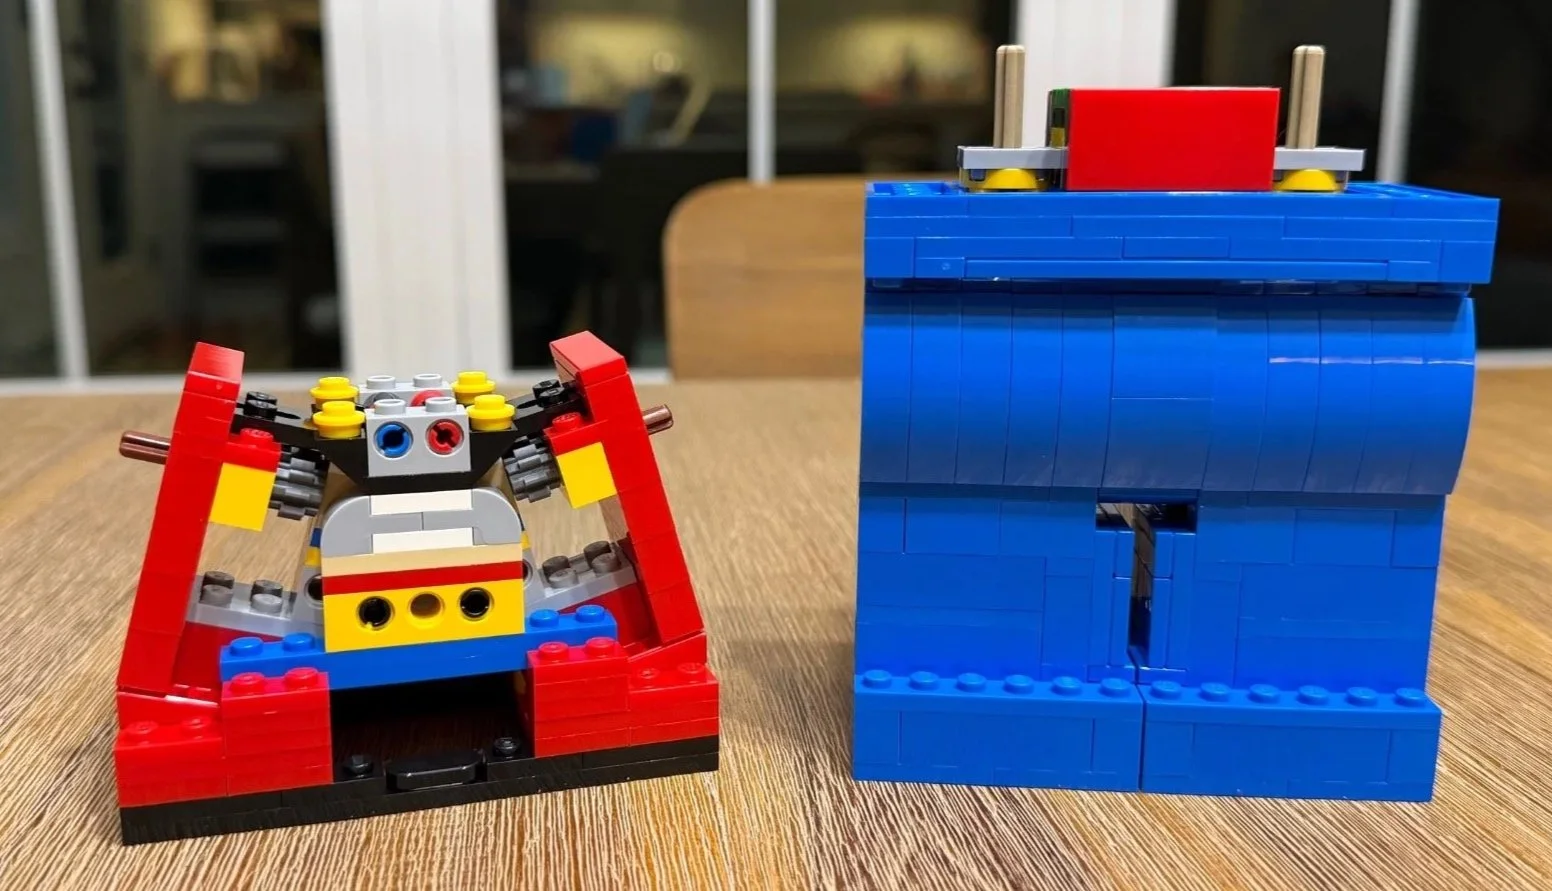
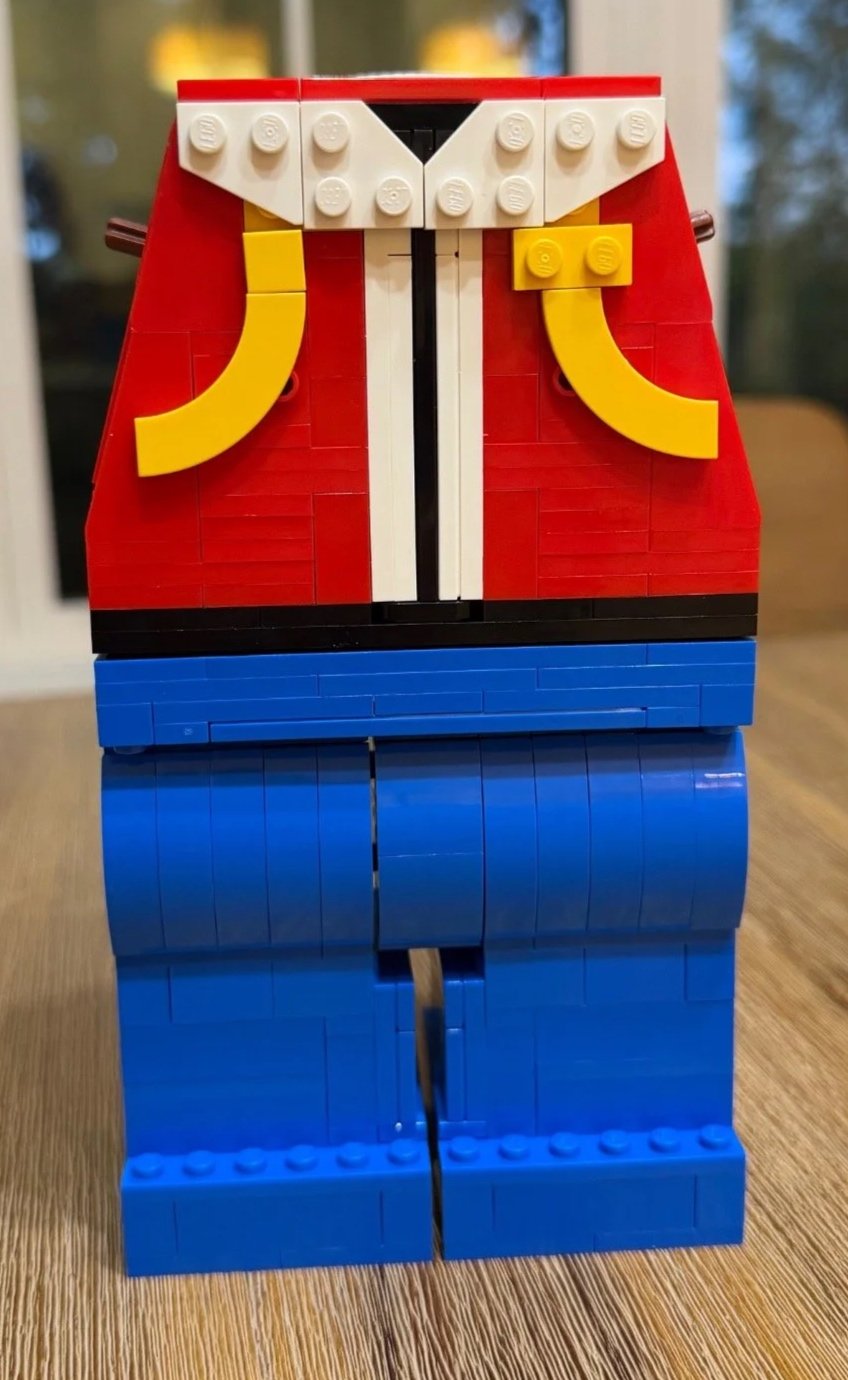
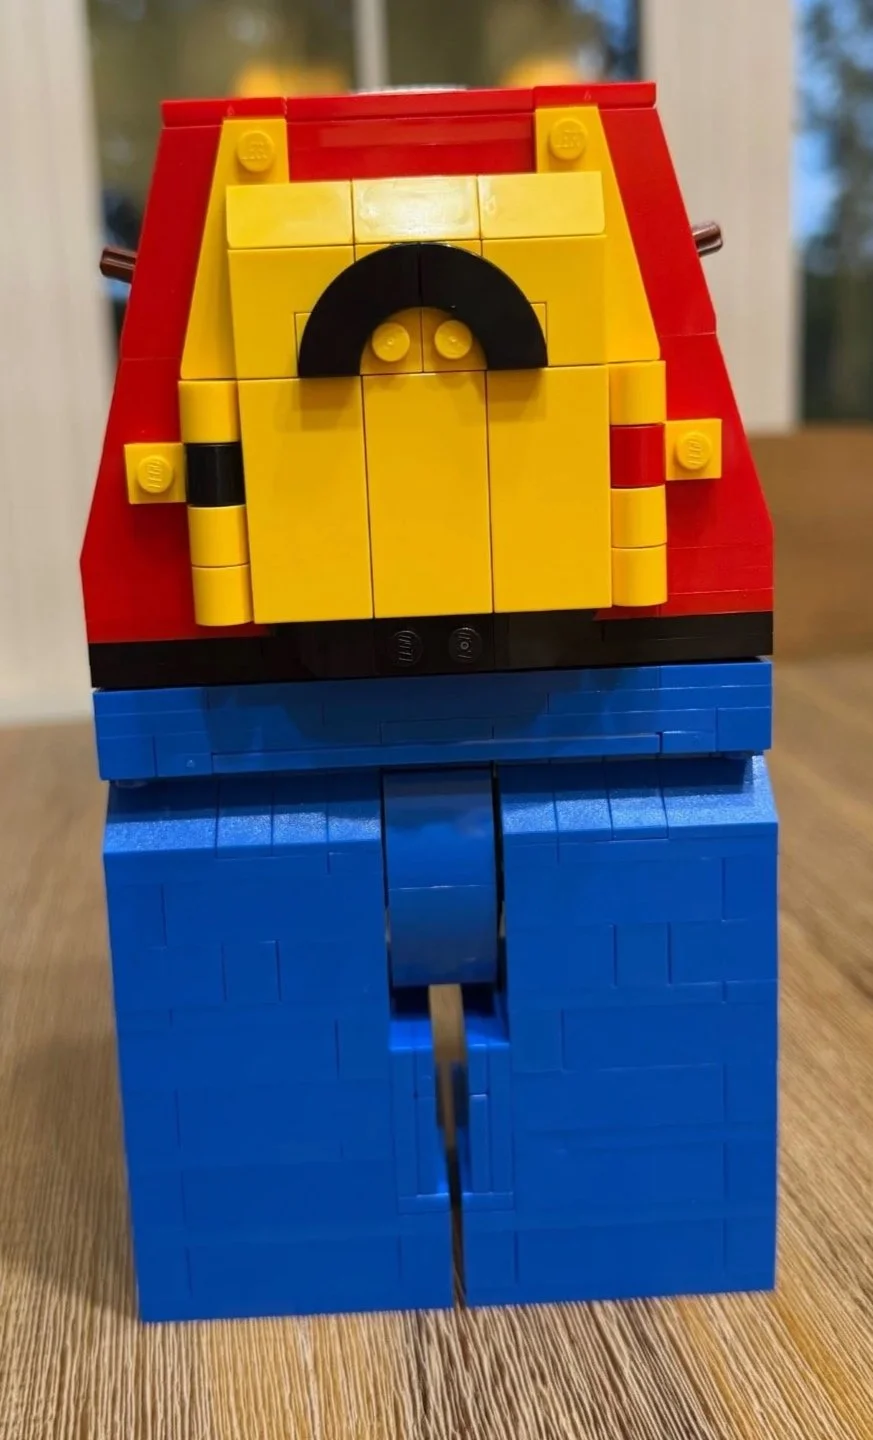
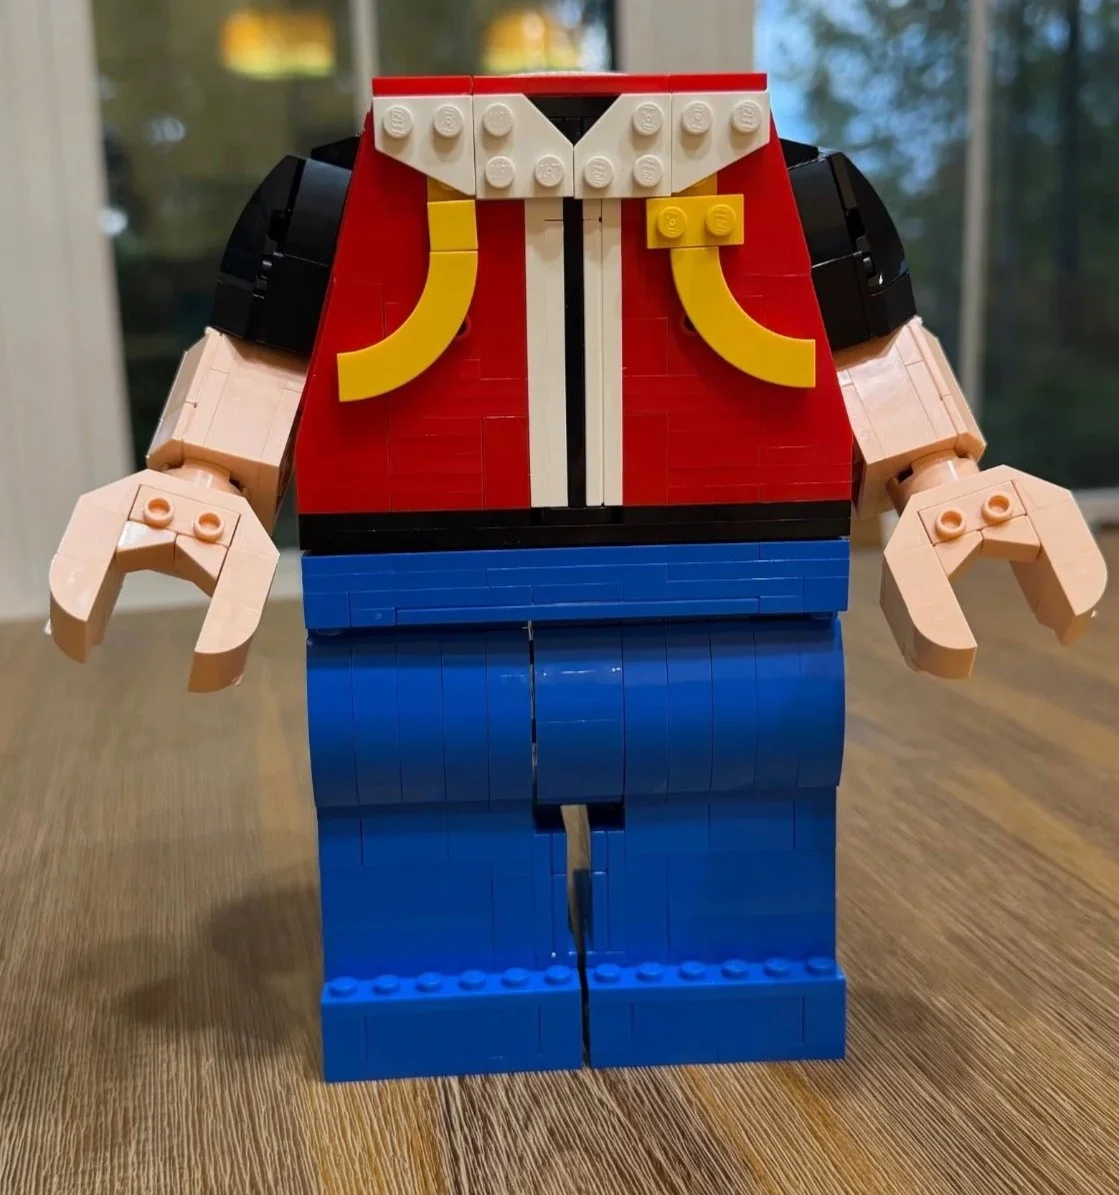
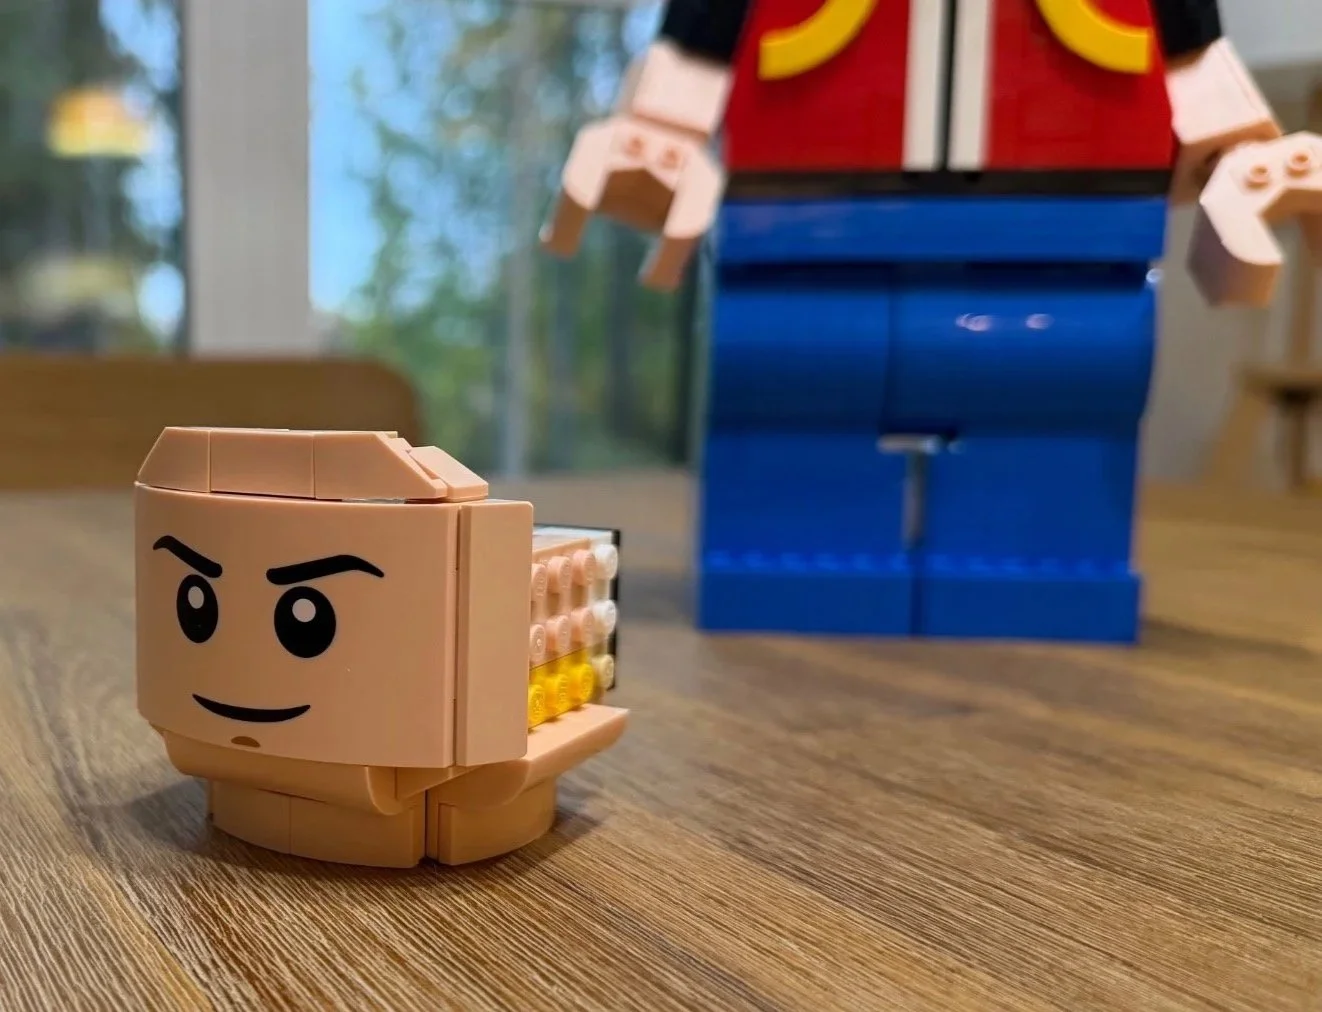
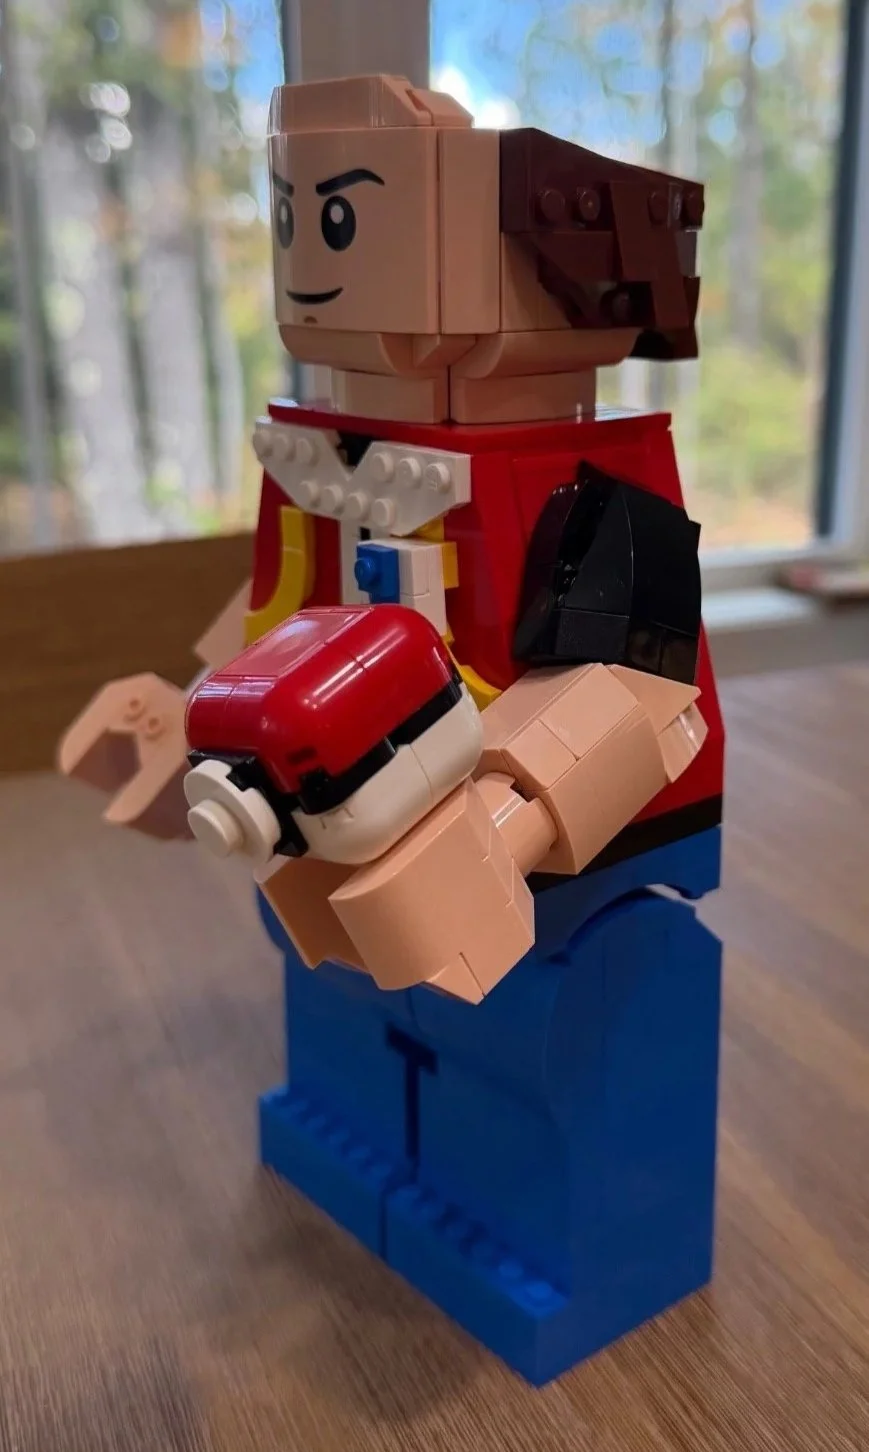
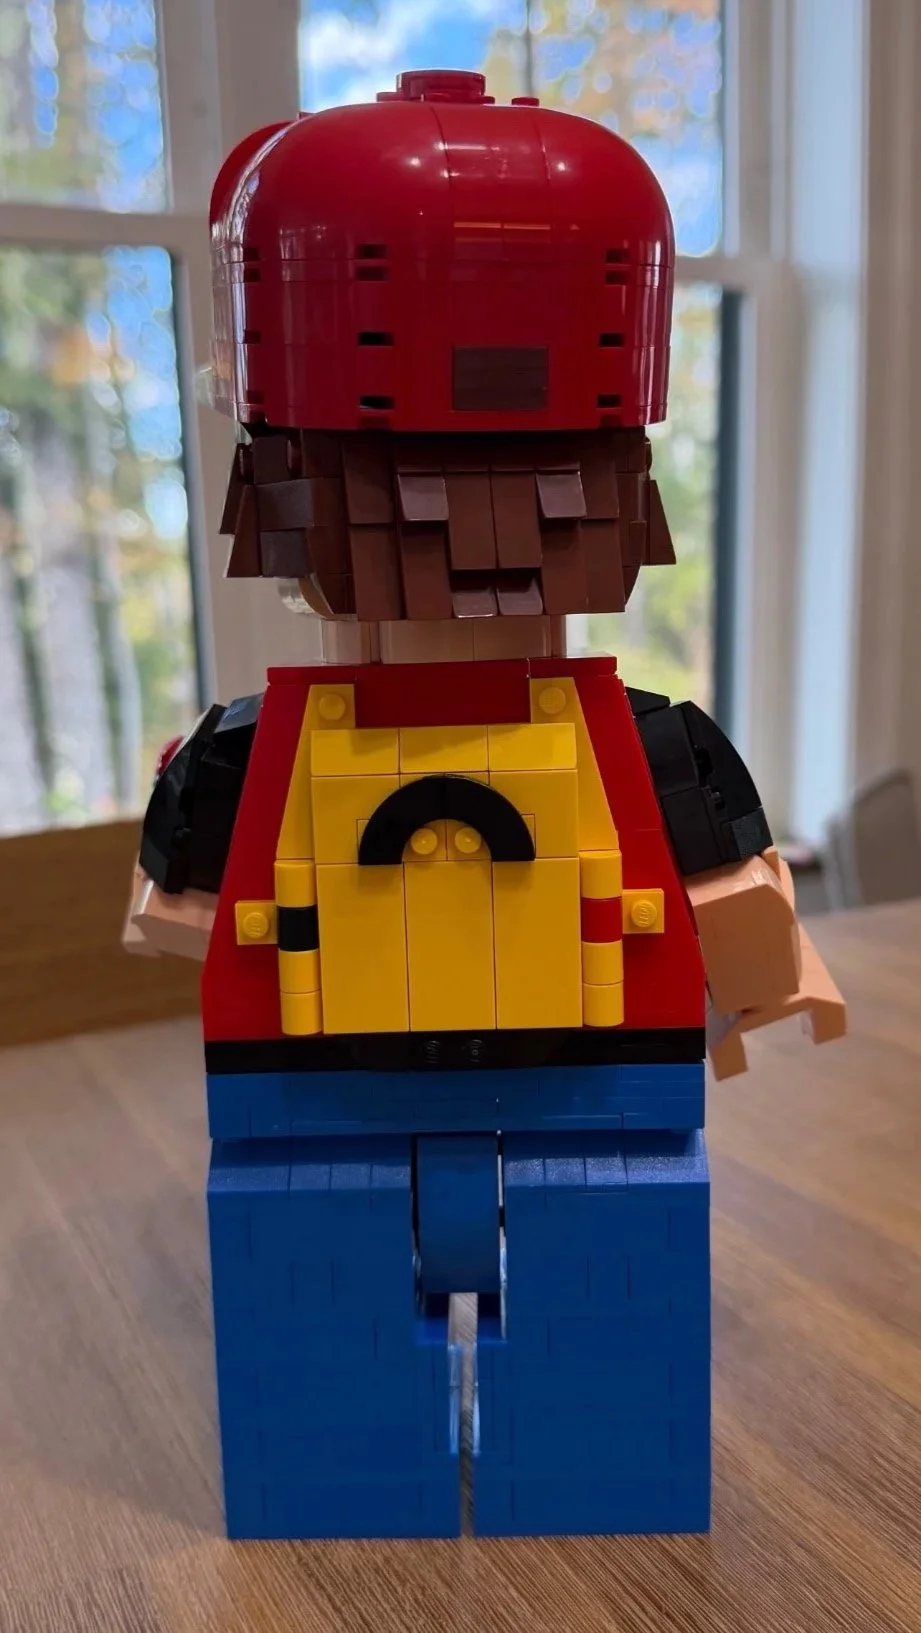
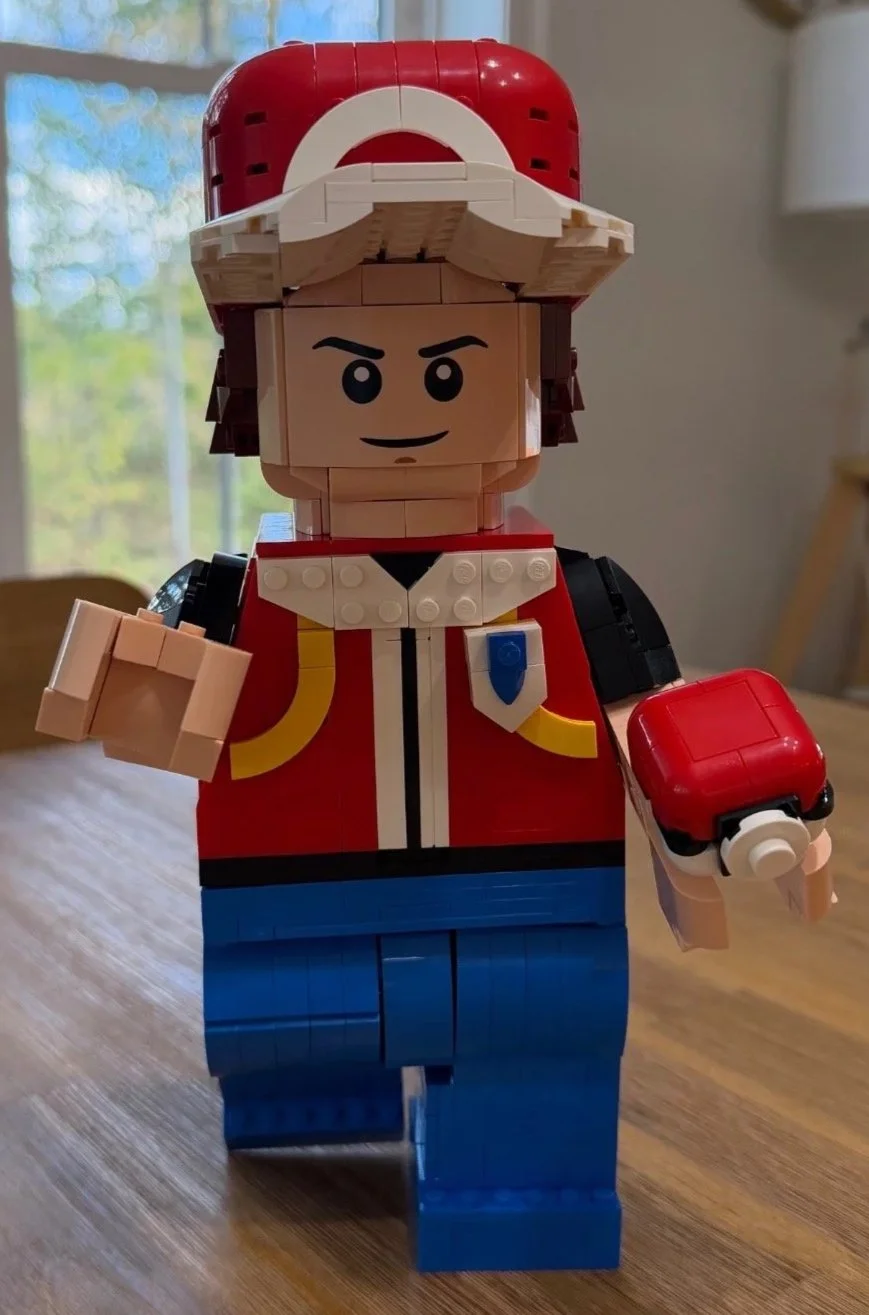
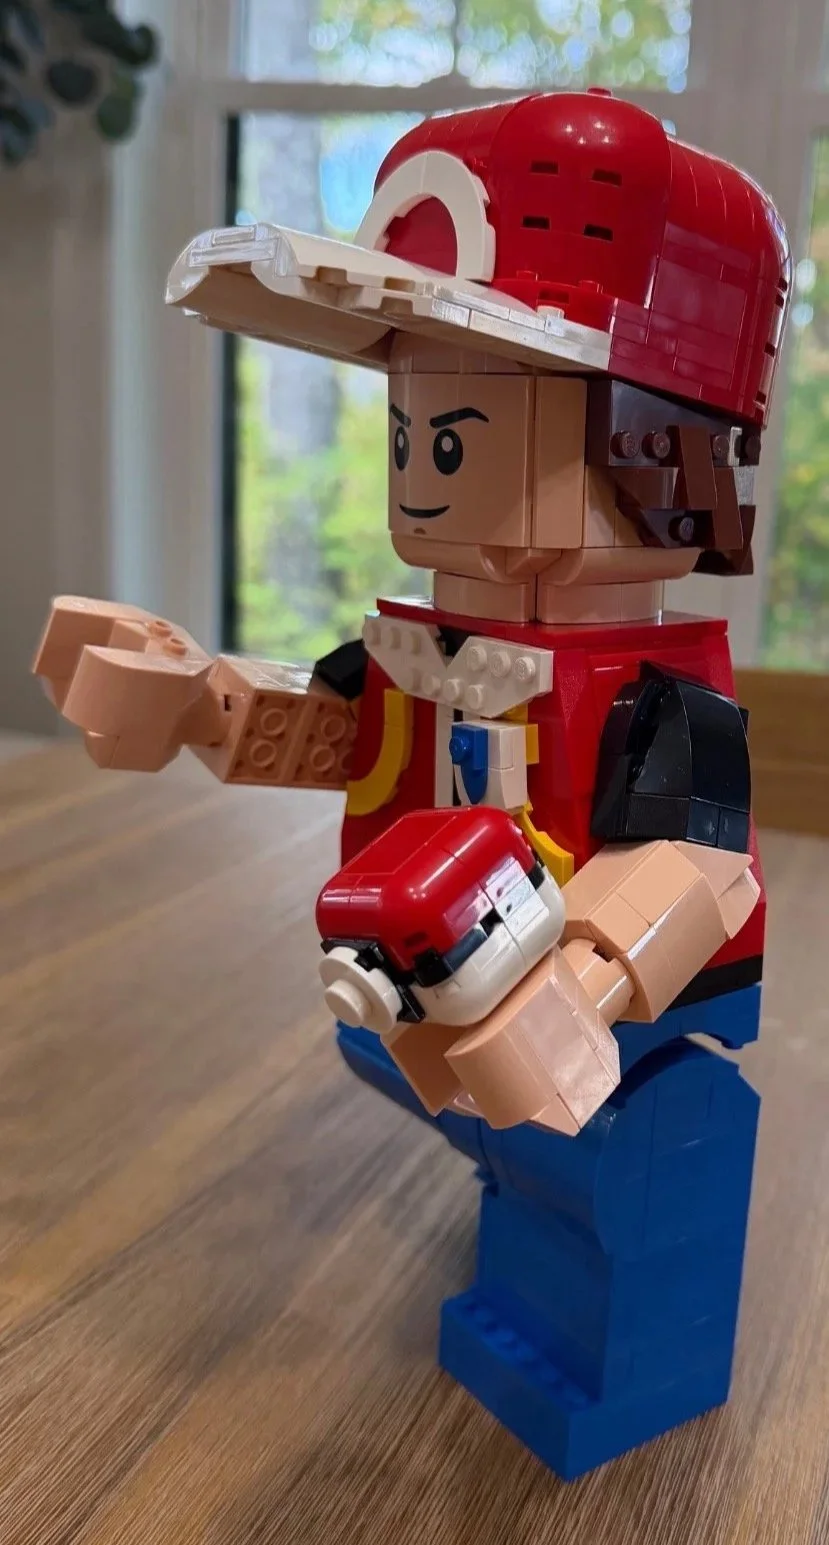
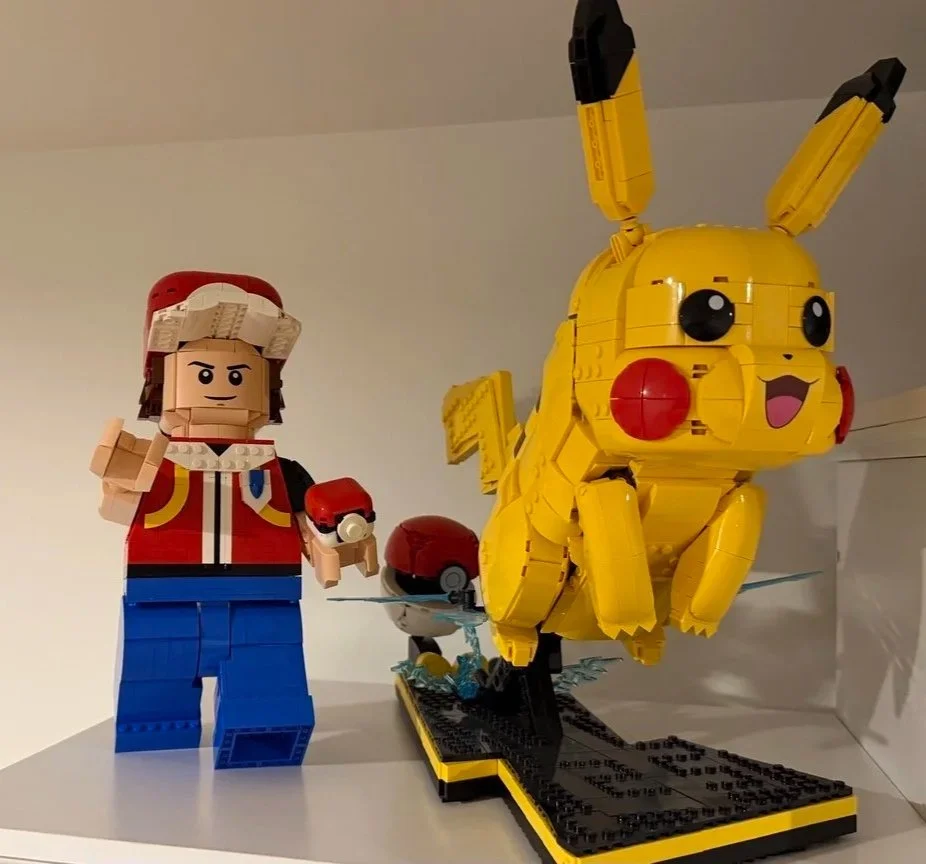
Photo 1: setup. Photos 2–4: legs and waist. Photos 5–7: torso and backpack. Photo 8: arms and hands. Photos 9–10: face, hair and Poké Ball, before the cap. Photos 11–14: finished rear, front, three-quarter and shelf-display views.
Details Worth Looking For
The Cap and Hair
The cap was my favorite assembly, and the finished figure rewards a closer look at its shape. The curved white brim and rounded red crown sit above the brown hair built in Bag 8. Together, those shapes give Red his recognizable silhouette. It is a satisfying amount of character from a few carefully arranged layers.
The Backpack and Vest Details
The yellow backpack and curved straps make the rear view worth showing. I particularly enjoyed building this part of the outfit. At the front, the white collar and small blue-and-white vest detail add interest around the red panels. LEGO describes that small detail as a pin.
The Printed Face
The large sloped face piece is printed. I was glad not to have to line up a face sticker at this size, and the simple expression suits the oversized minifigure appearance. The set has no stickers, so the face is a useful example of where printed detail supports the finished character.
A Poké Ball in Either Hand
LEGO says the brick-built Poké Ball can be held in either hand, giving another option when arranging the display. On my model, it snapped onto the hand easily and felt secure, although it was still the attachment I would watch while changing the pose. The movable head, arms, hands and legs add flexibility to the finished figure.
Display and Handling
The face, cap and Poké Ball give Red a clear identity from the front. The yellow backpack and hair make the rear view worth showing as well. My finished shelf photo shows him beside Pikachu, which gives the two Pokémon builds a pleasing sense of scale.
I could stand Red upright, give him a slight running or throwing position, or have him sit. His head rotates horizontally through 360 degrees and his arms move up and down.
The overall model felt very stable. The Poké Ball-to-hand connection is its relatively weakest attachment, even though it snapped on easily and felt secure when I added it. That is the point I would watch while changing the pose. I did not record a shipping, drop, restoration or disassembly test.
The finished rear view shows the backpack and the hair beneath Red's cap.
Red joins Pikachu on my Pokémon display shelf, ready for their next adventure.
What Should a Builder Pay Attention To?
Check the diagonal Technic connections inside the torso before the next layers hide them. The directions show the orientation clearly; take advantage of that before pressing each assembly fully into place.
The legs and mirrored arms supply most of the familiar repeated work. Some leg connections and tighter arm fittings asked for more finger control, but the build became more varied when I reached the backpack, face and cap.
My Verdict
My overall set rating is 7.2/10. Red is a characterful display figure, and I enjoyed seeing the familiar Trainer outfit take shape in oversized LEGO form. The backpack was a pleasure, the printed face saved me a sticker, and the cap gave the final bag the most interesting assembly of the set.
The legs were my least enjoyable section. That did not make them difficult, but the repeated construction was noticeable. The reviewed equal-weight bag averages are 3.1/10 difficulty, 3.7/10 repetition and 3.4/10 dexterity. My separate instruction-complexity rating remains 1/10.
I would recommend Red to Pokémon fans and builders who enjoy up-scaled minifigures. LEGO's age guidance is 10+, and most of my build felt approachable. The cap is the section I would most happily build again.
If you want a more involved Pokémon display, read my Iconic Trainer Moments Poké Ball 72154 review. My Rayquaza 72168 review covers a very different building experience. You can also browse all build reviews.
Need Help With a LEGO Set?
Have a LEGO set waiting to be built, a model that needs rebuilding, or pieces that have become mixed together? Send The Bricksmith a few photos, the set number if you know it, and what you would like the finished result to be.
I handle assembly, rebuilding, sorting and re-bagging projects personally. A free photo assessment helps me explain the practical next step and whether the project is a good fit.