
LEGO Pokémon Rayquaza 72168 Build Review
LEGO Pokémon Rayquaza 72168 makes an impressive-looking display, but the build did not hold my attention as much as I hoped. The Sky Pillar setting, white clouds, and curved green body look good together. I just wanted more of the experience to focus on Rayquaza itself.
Across nine bags, I found some clever cloud construction, a few orientation-sensitive connections, and a fantastic final head assembly. There was also plenty of repeated tiling and body construction. Here is my bag-by-bag review, including the areas where a builder might need extra patience or help.
My overall set rating: 4/10 • Instruction complexity: 3/10 • Recorded build time: 1 hour 51 minutes 18 seconds
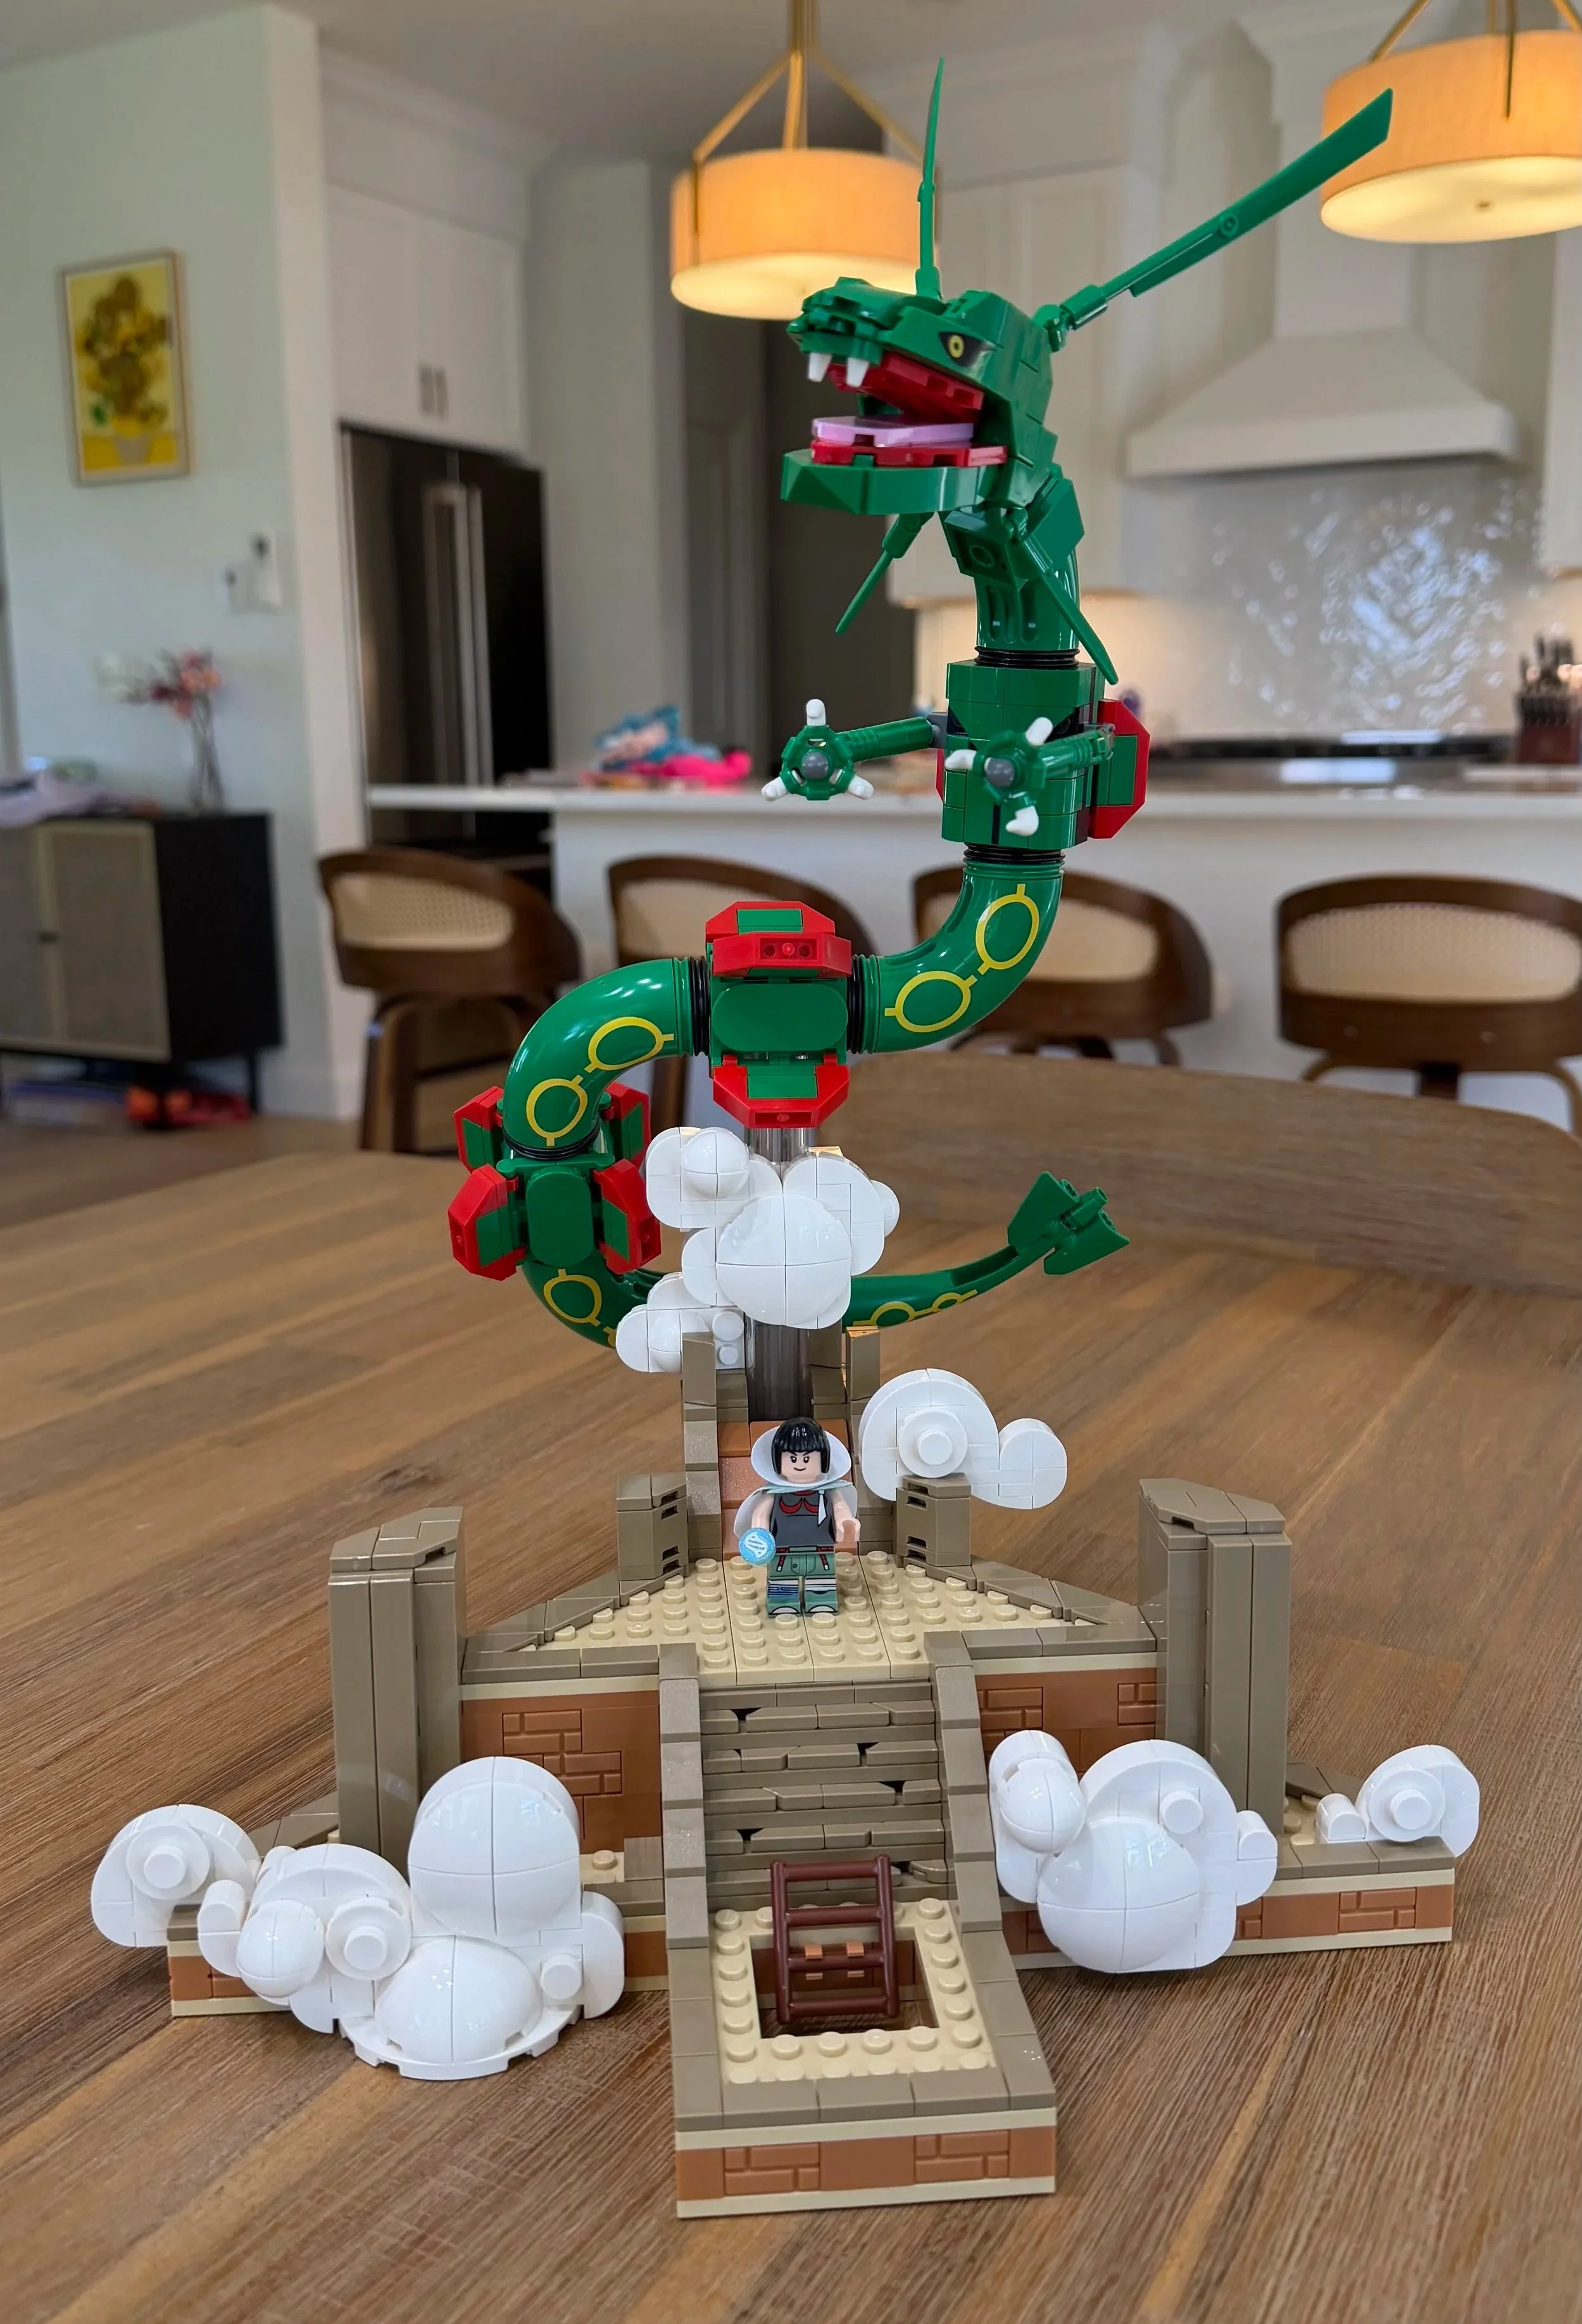
The completed Rayquaza display above Sky Pillar, with Zinnia and the cloud details below
At a Glance
Set: 72168 • LEGO Pokémon Rayquaza
Pieces and bags: 1,083 pieces • 9 numbered bags
Instructions and stickers: 532 steps in my build log • 0 stickers
My recorded build time: 1 hour 51 minutes 18 seconds
Official age guidance: 18+
Finished dimensions: Approximately 15 in (38 cm) high, 11 in (28 cm) wide, and 10.6 in (27 cm) deep
Instruction complexity: 3/10
Average build difficulty: 3.3/10
Average repetition: 5.6/10
Average dexterity demand: 3.7/10
My overall set rating: 4.6/10
What Is Rayquaza 72168 Like to Build?
This is a display-first build. The first six bags concentrate on the setting, clouds, and support structure before Rayquaza begins in Bag 7. Those first six bags took me 1 hour 11 minutes 16 seconds—roughly two-thirds of my logged bag time.
The instructions are generally straightforward. The challenge is less about understanding the steps and more about repeated placements, fragile cloud assemblies, and lining up some of the body connections correctly. Having no stickers is a welcome bonus, but it does not remove the repetition.
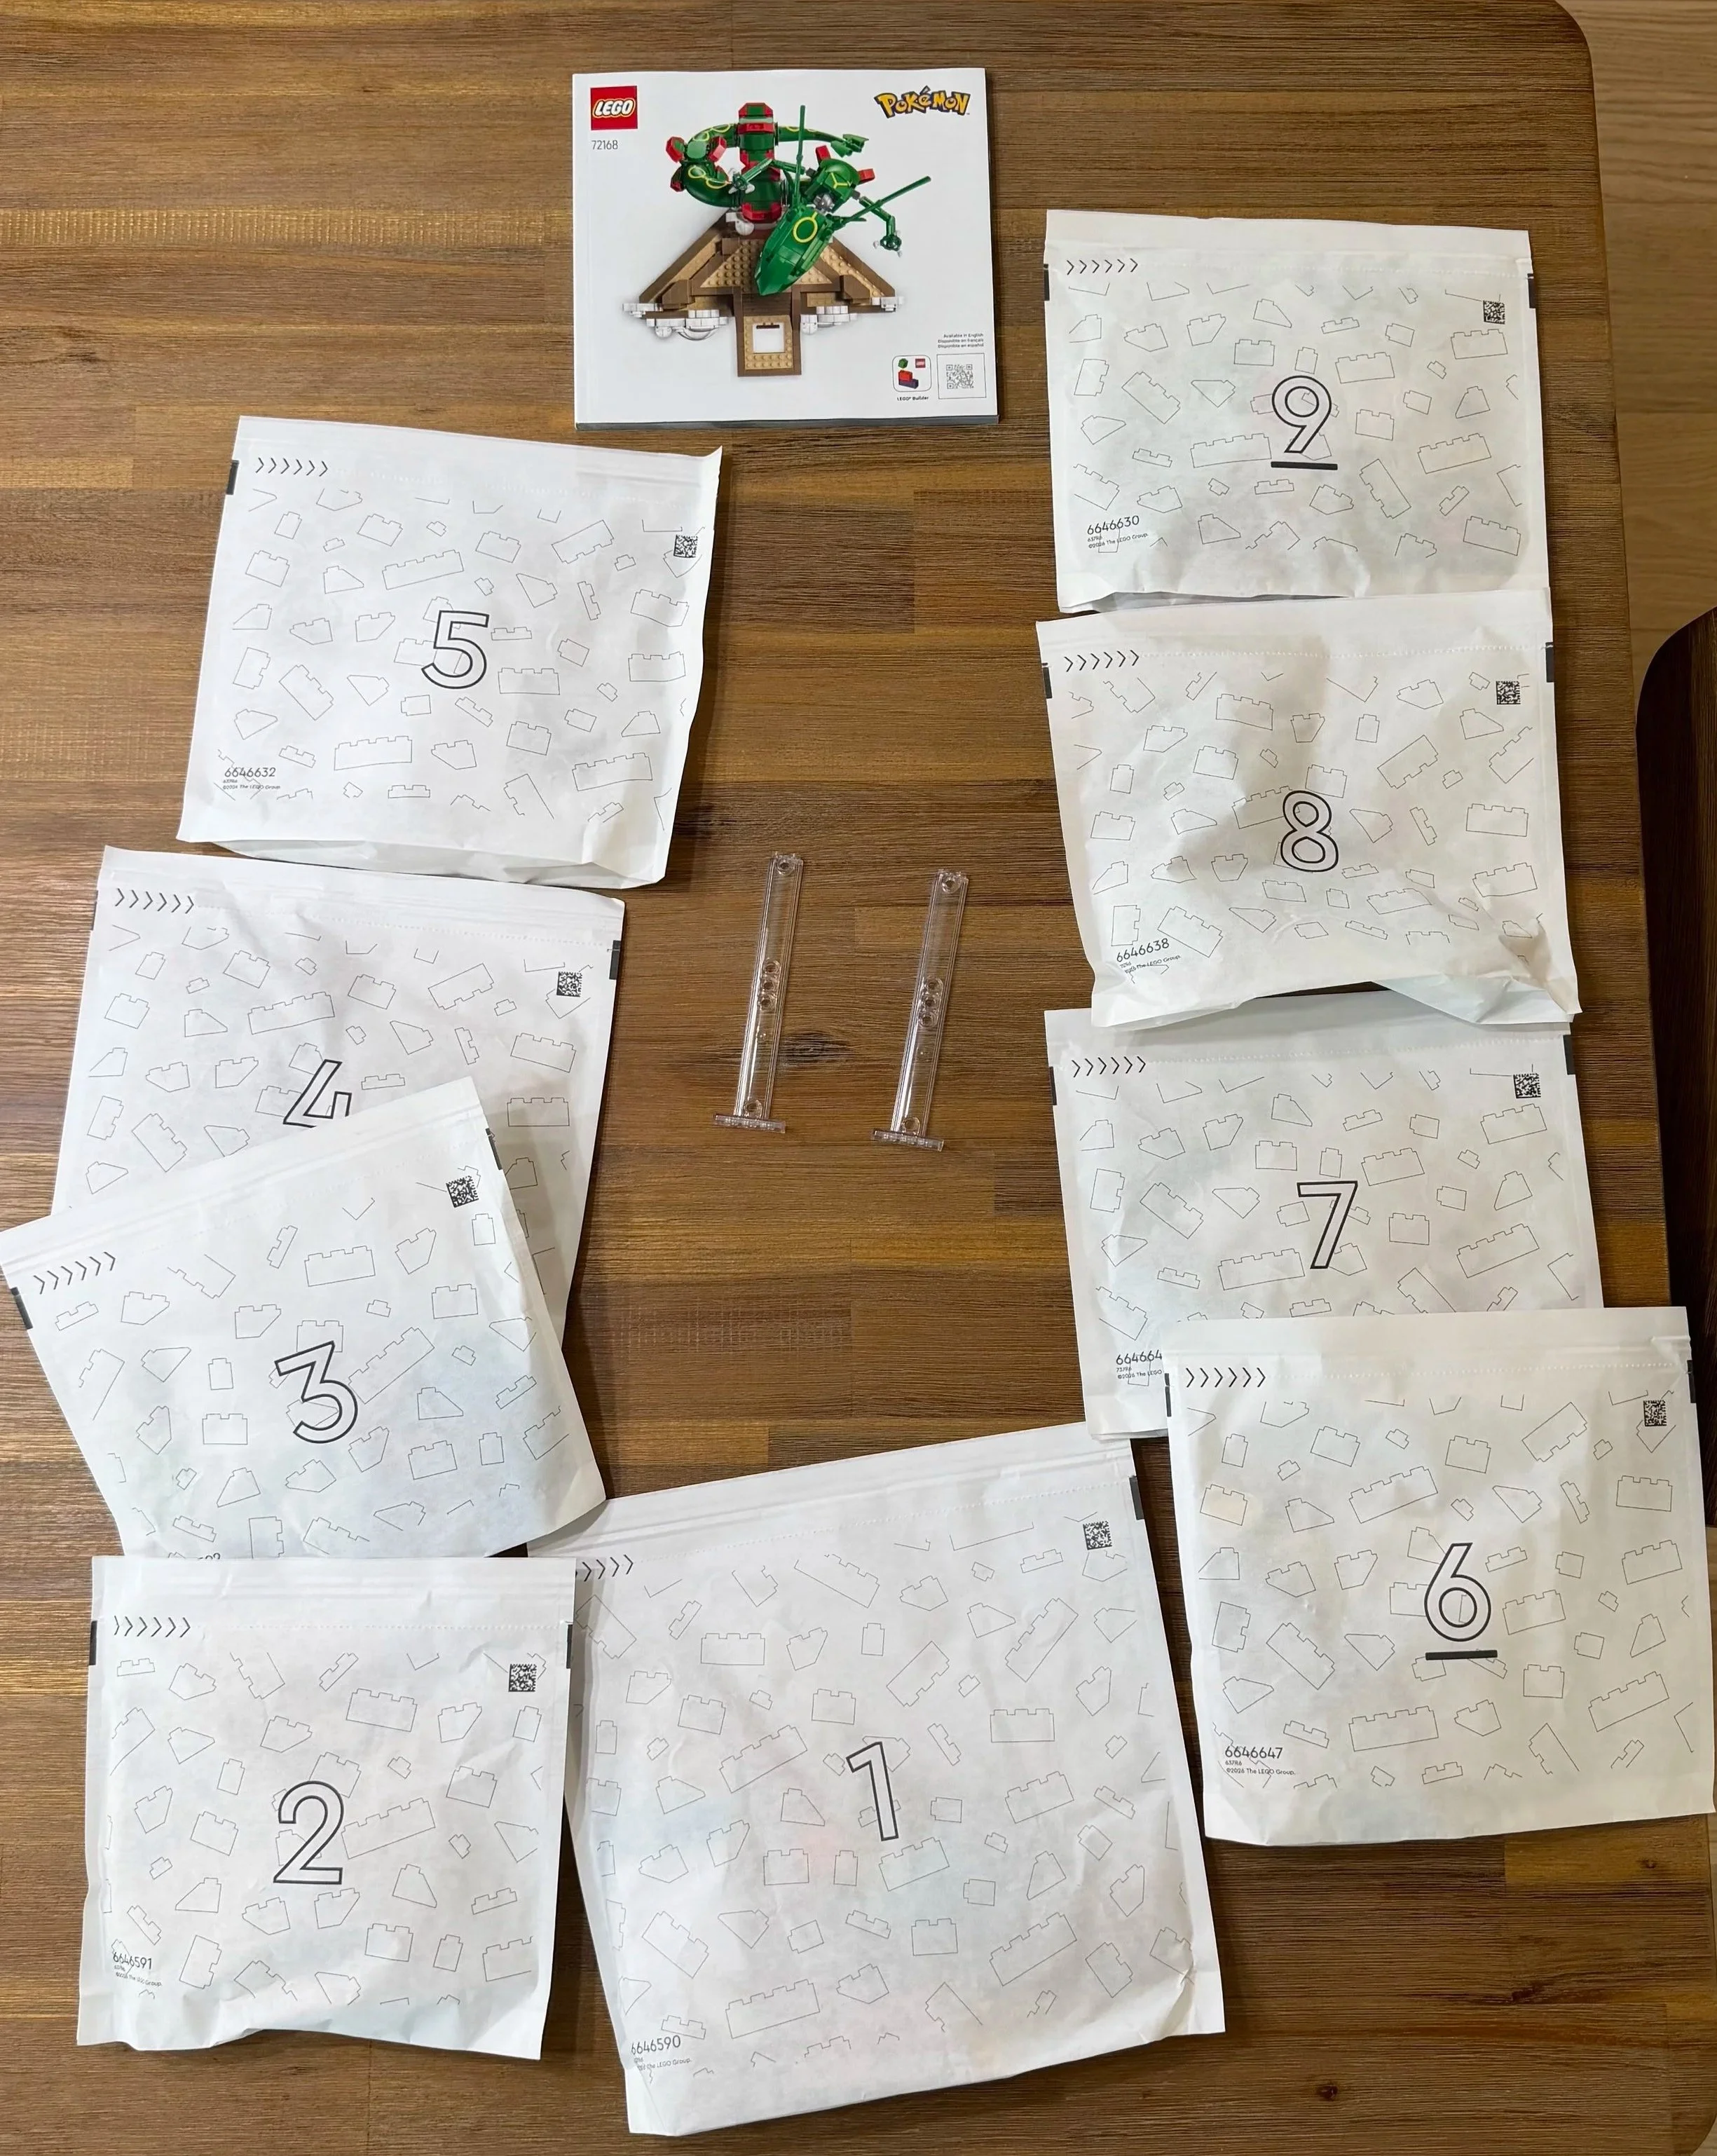
The nine-bag Rayquaza build before assembly begins.
Bag-by-Bag Build Notes
Bag 1 Zinnia and the Lower Base
My bag notes: 9 minutes 7 seconds • Difficulty 3/10 • Repetition 5/10 • Dexterity 3/10
The build starts with Zinnia and her accessory. Fitting the cloak pieces was surprisingly awkward for me, and it is the main reason this bag scores above a 1 for difficulty and dexterity.
After that, the lower base is simple and straightforward. The mirrored construction and 16 faceted 2 × 2 bricks introduce the repetition that will run through much of the setting. It is an easy start overall, with the minifigure clothing providing the only real pause.
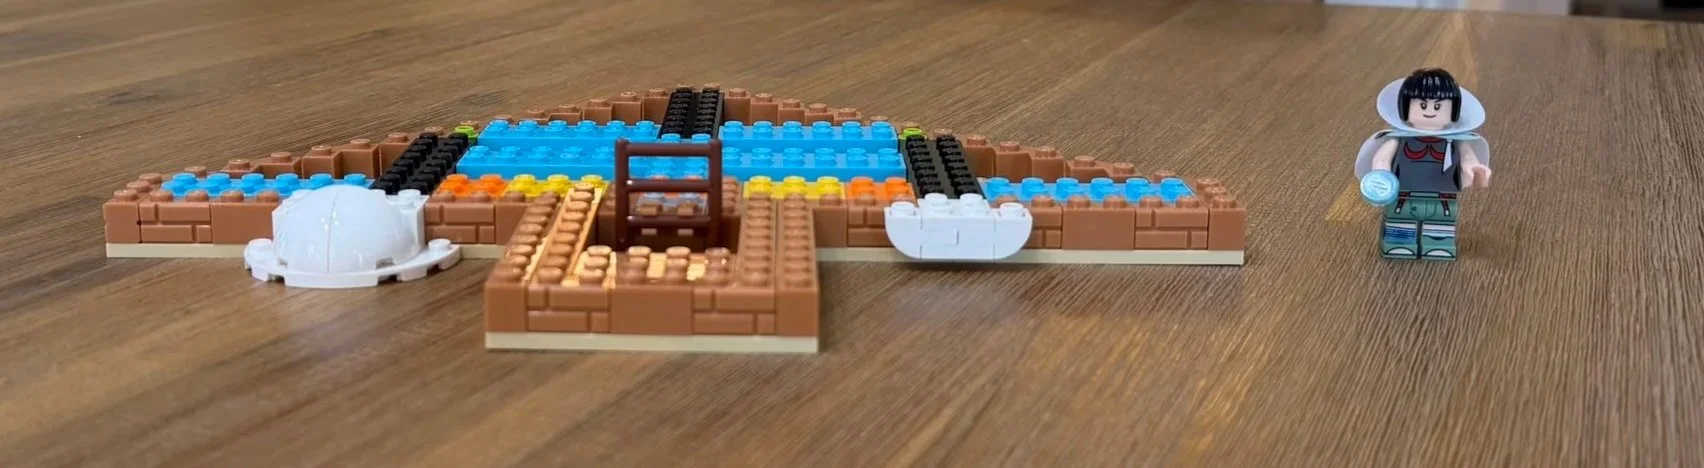
Bag 1 establishes the lower base and introduces Zinnia.
Bag 2 Tiling the Base
My bag notes: 5 minutes 38 seconds • Difficulty 1/10 • Repetition 7/10 • Dexterity 1/10
Bag 2 completes more of the base detailing. Placing 28 tan triangular 2 × 2 tiles and 16 tan 1 × 2 tiles makes this a very easy bag, but not a particularly exciting one.
The tiled border improves the appearance, so the repetition has a purpose. It is also my quickest and easiest bag of the build. There is little here that needs strength or complicated alignment—mostly patience with repeated tile placements.
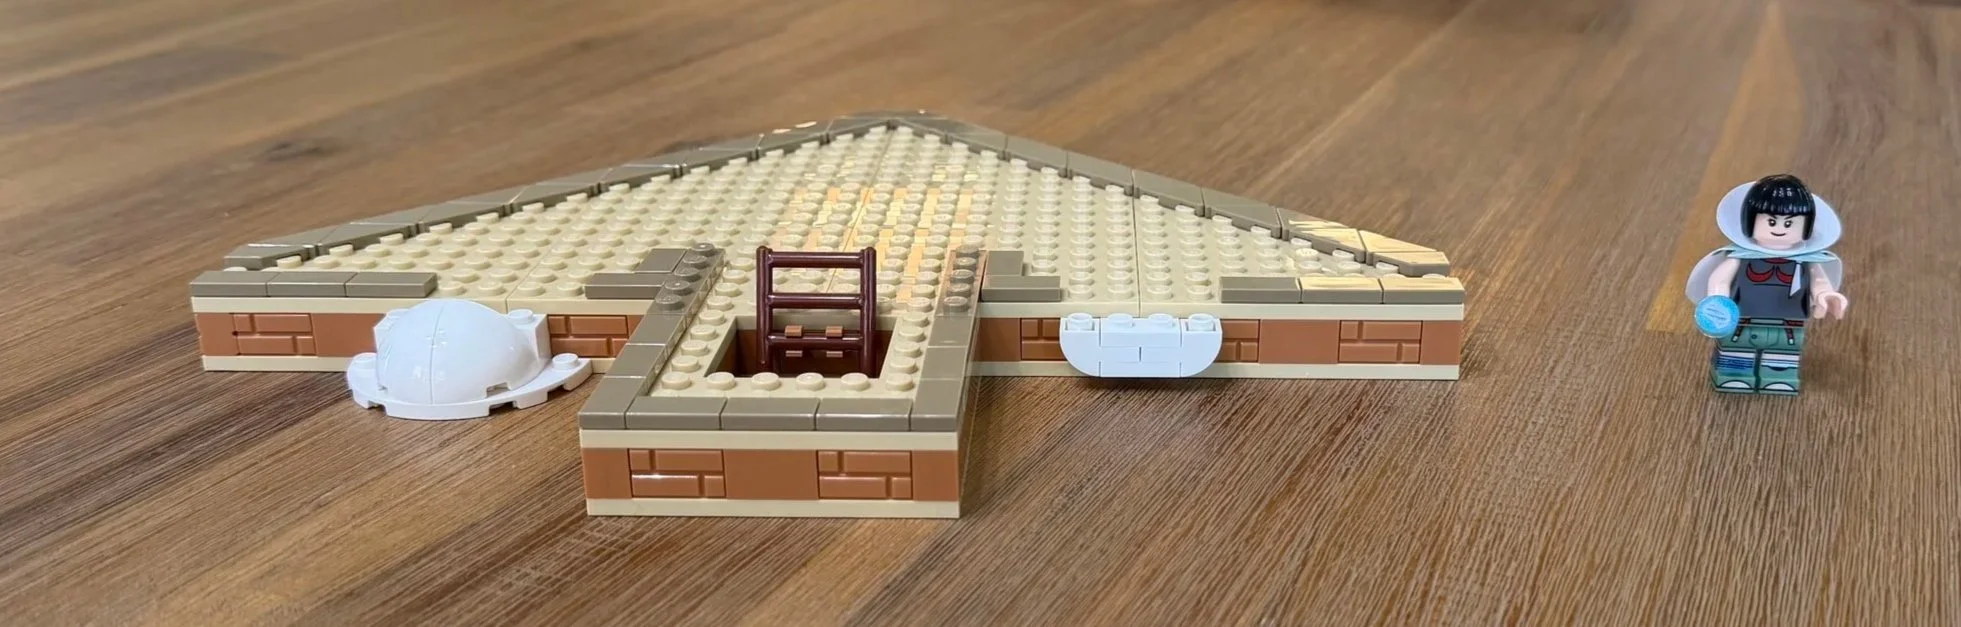
The tiled border is simple to build, but involves many repeated placements.
Bag 3 The Upper Platform and Stairs
My bag notes: 11 minutes 4 seconds • Difficulty 2/10 • Repetition 7/10 • Dexterity 1/10
We now begin the raised platform where Rayquaza will sit, with a setting that reminds me of Pokémon Emerald. The stair sections are similar, with small variations, and 24 tan 1 × 2 plates with a single stud add another round of repeated placements.
The architecture is becoming more recognizable, but this is still a low-difficulty bag. The payoff is in the finished detail rather than the variety of the building process.
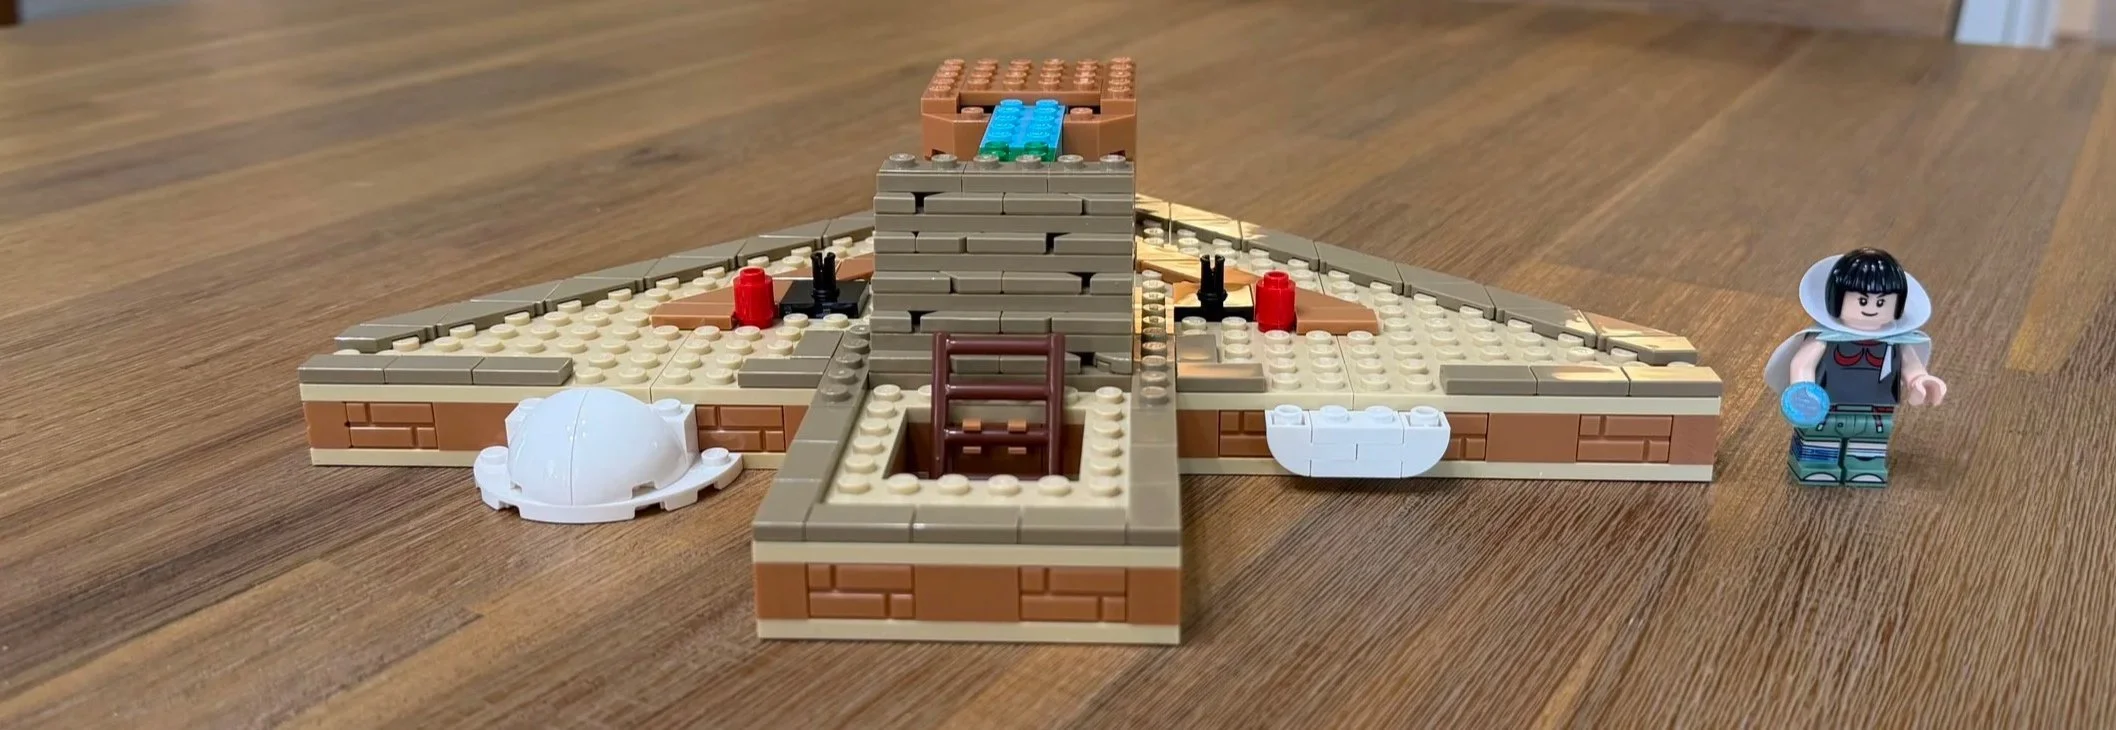
Bag 3 raises the platform and adds the stair structure.
Bag 4 Diagonal Walls and Pillar Details
My bag notes: 11 minutes 38 seconds • Difficulty 3/10 • Repetition 5/10 • Dexterity 3/10
The diagonal exterior walls are a more enjoyable assembly. There are a few tight placements when attaching them, but the angled walls and pillar details give the platform more character.
There is still mirrored construction and repeated tiling. This time, though, the sequence breaks up the repeated tasks well enough that I did not find them as frustrating. The model is starting to look like a setting rather than just a base.
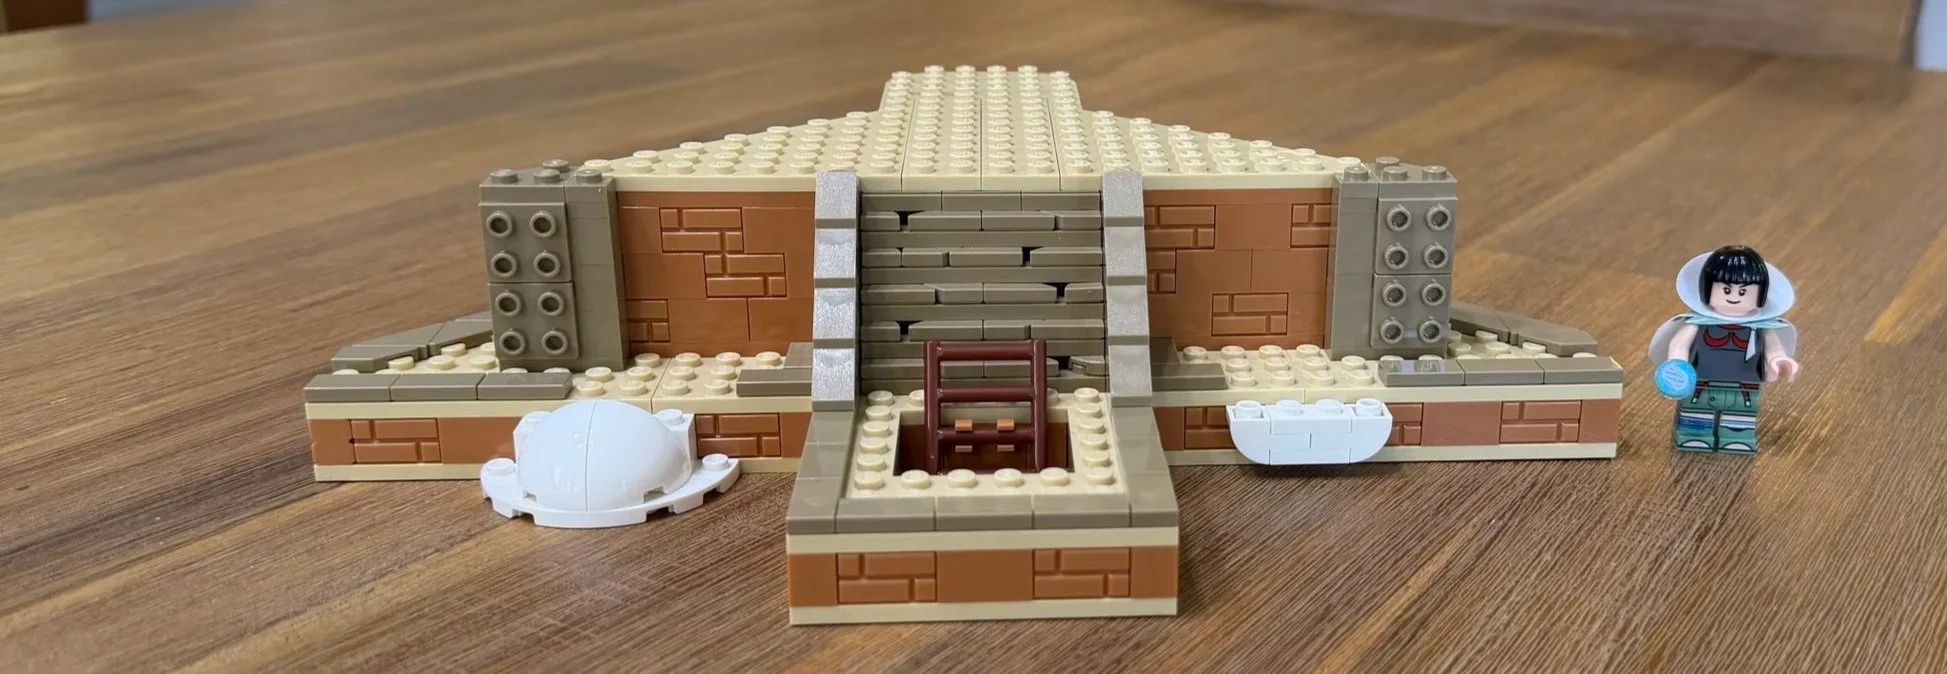
The diagonal walls give the Sky Pillar setting more definition.
Bag 5 Pillars and the First Clouds
My bag notes: 16 minutes 15 seconds • Difficulty 3/10 • Repetition 3/10 • Dexterity 5/10
Finishing the pillars and building the cloud accents makes this one of the more satisfying stages. The clouds are detailed little assemblies, with enough variation between them to keep the process interesting.
They need careful finger placement rather than a lot of force. Be particularly gentle when attaching them to the base: the cloud sections can break apart easily. I enjoyed their construction, but they are not pieces I would press into place casually.
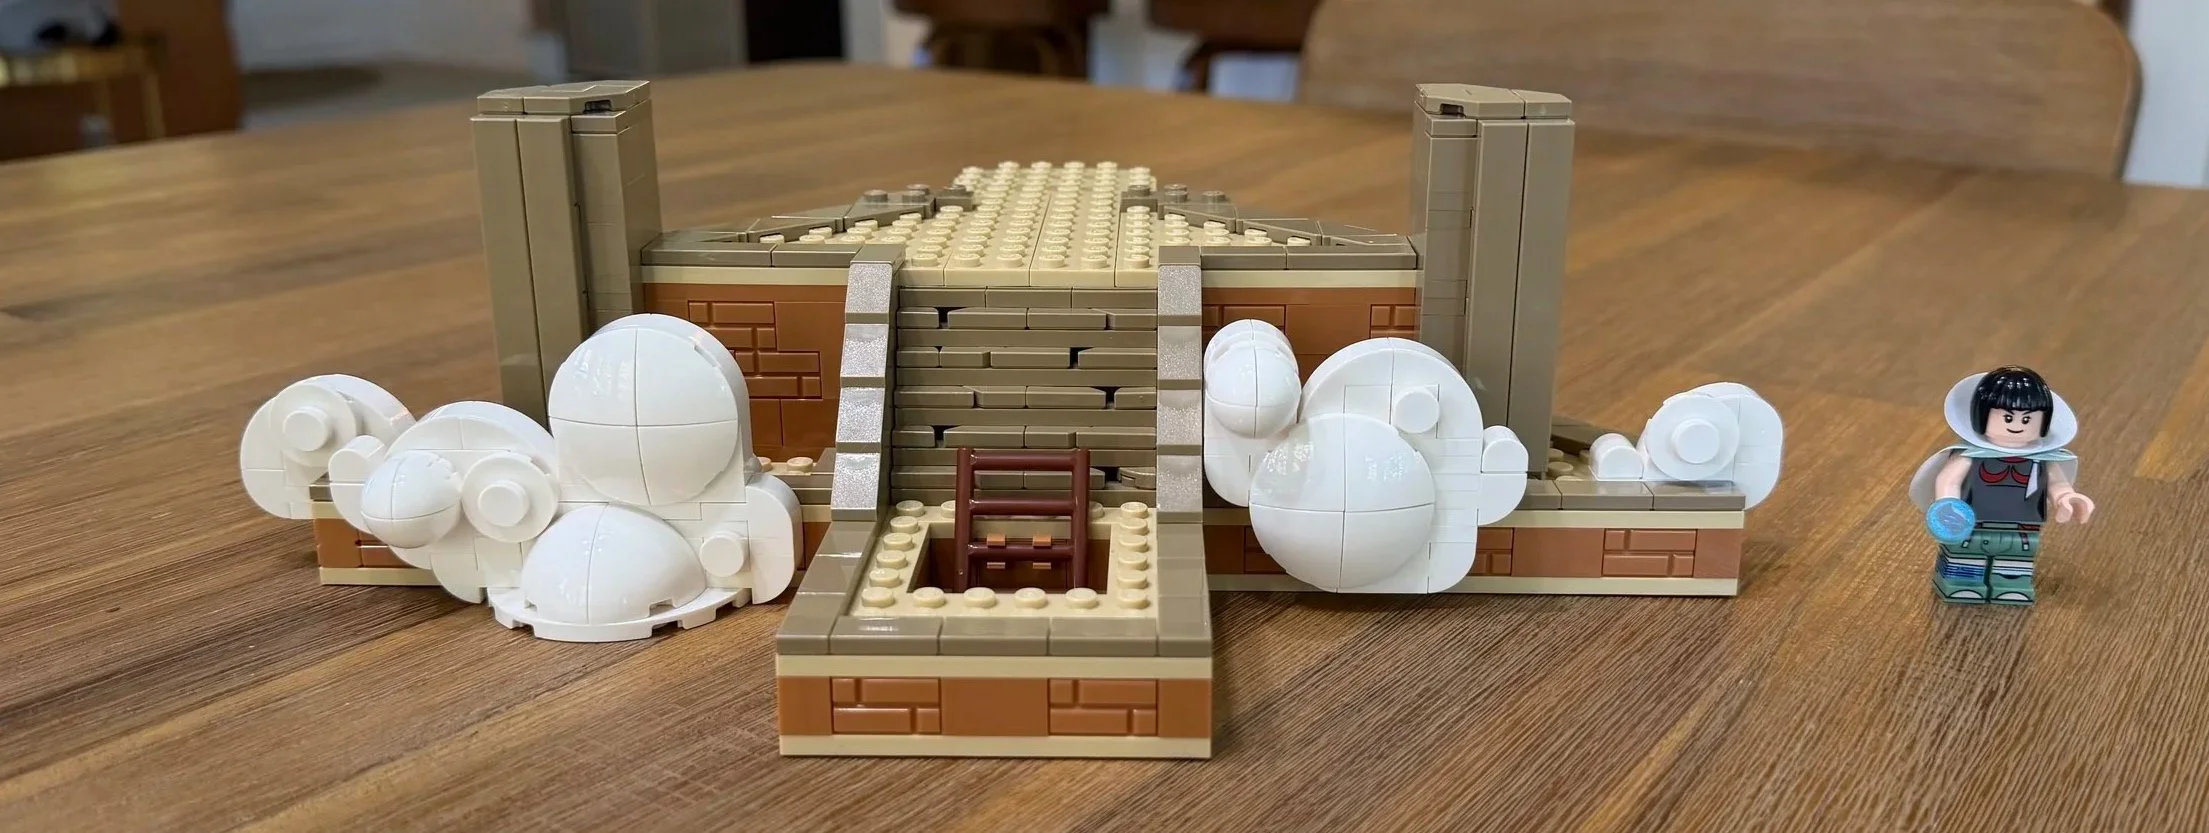
The varied cloud assemblies are a highlight, but need care when attached.
Bag 6 Completing the Setting and Clear Support
My bag notes: 17 minutes 34 seconds • Difficulty 4/10 • Repetition 4/10 • Dexterity 5/10
Bag 6 finishes more of the setting and starts the support for Rayquaza. The clear tower is straightforward to assemble and has a very satisfying click when the pieces connect.
Two identical cloud assemblies add some repetition, but I still like the way the clouds are designed. They also help disguise the clear support. The scene looks good; my frustration is that six bags have now gone into the setting before we begin the Pokémon itself.
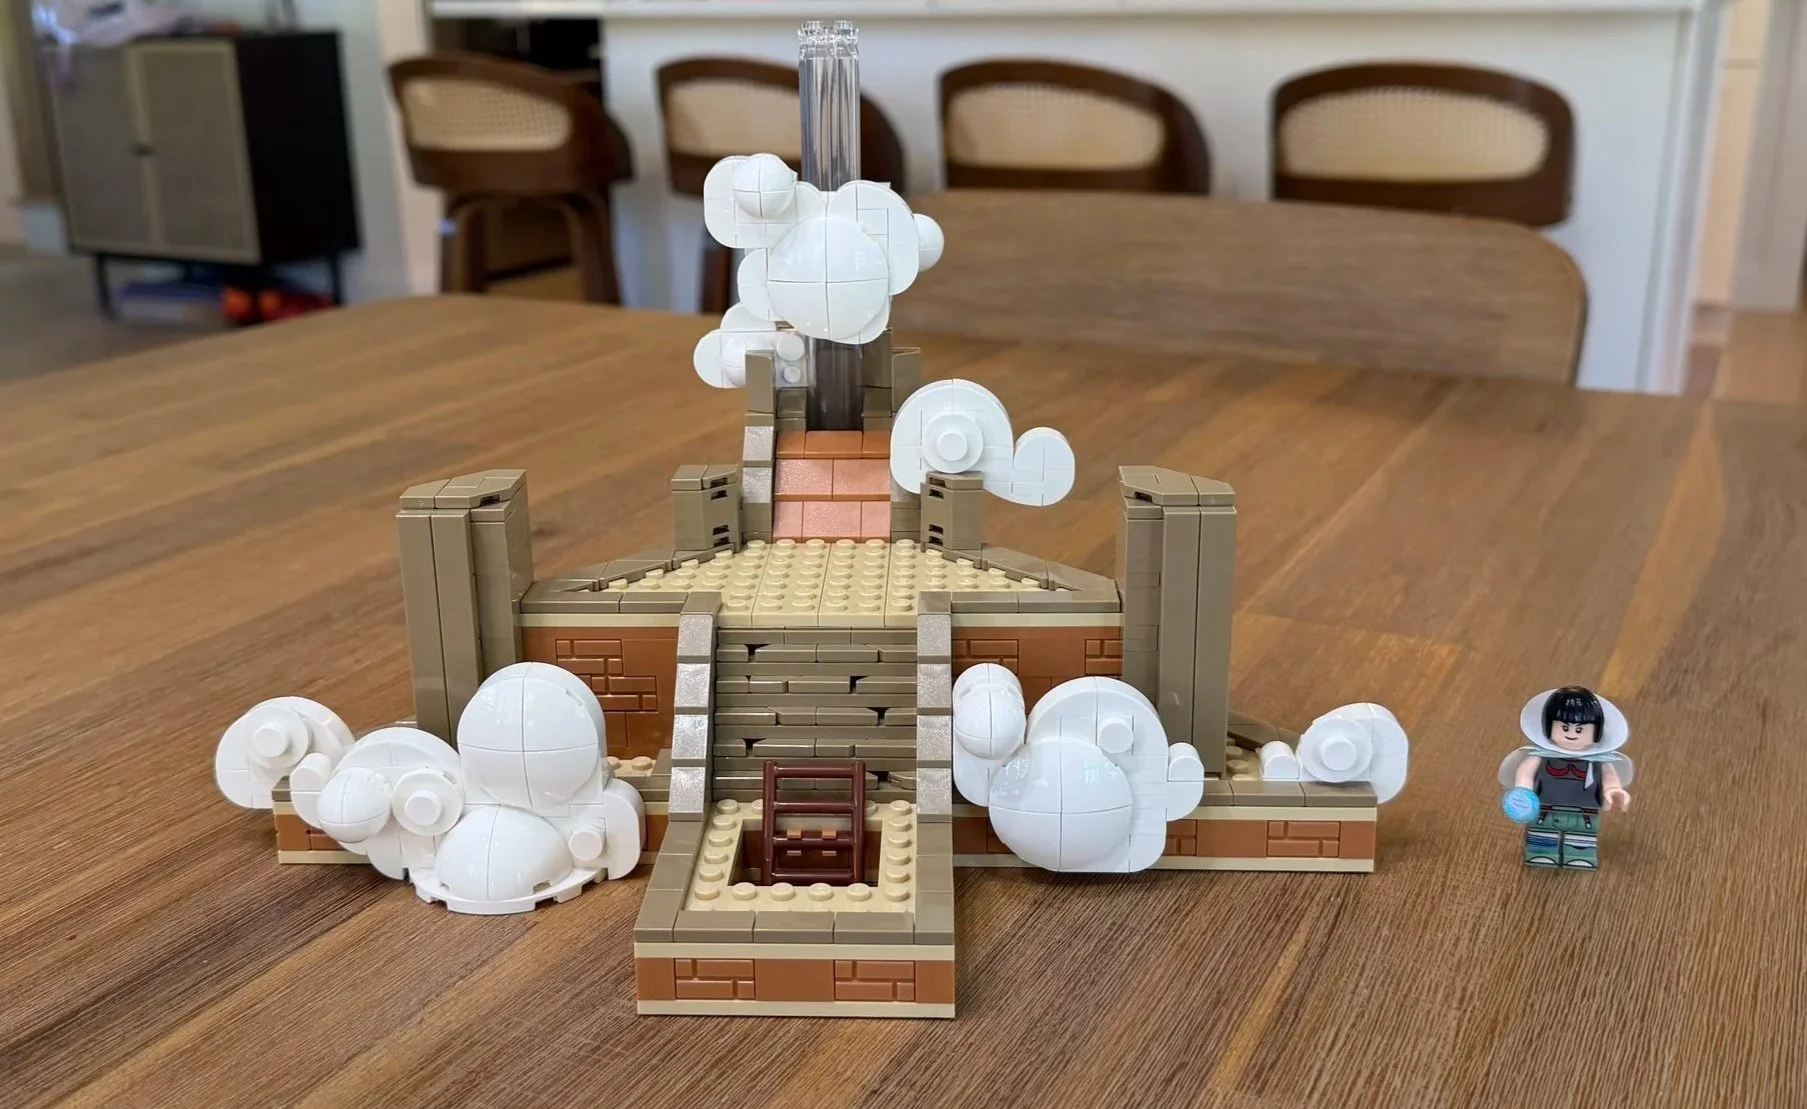
The setting and clear support are ready before Rayquaza construction begins.
Bag 7 Finally Building Rayquaza
My bag notes: 13 minutes 17 seconds • Difficulty 6/10 • Repetition 6/10 • Dexterity 5/10
This is my hardest bag. The small connector pieces need a particular orientation so their holes line up, and that alignment matters throughout this stage. I would check the direction of each connector before trying to join the assembly.
If a connection will not line up, stop and check the orientation instead of forcing it. The LEGO Builder app’s rotatable view may help you compare the assembly from another angle.” This is advice, not a claim that you used the app during this build.
The early body structure also feels flimsy while attaching it to the clear tower. Four identical body-and-fin assemblies create Rayquaza’s red-fin detail, but they bring another repeated sequence. The recognizable shape is appearing at last, although I was already wondering how much of the remaining build would repeat it.
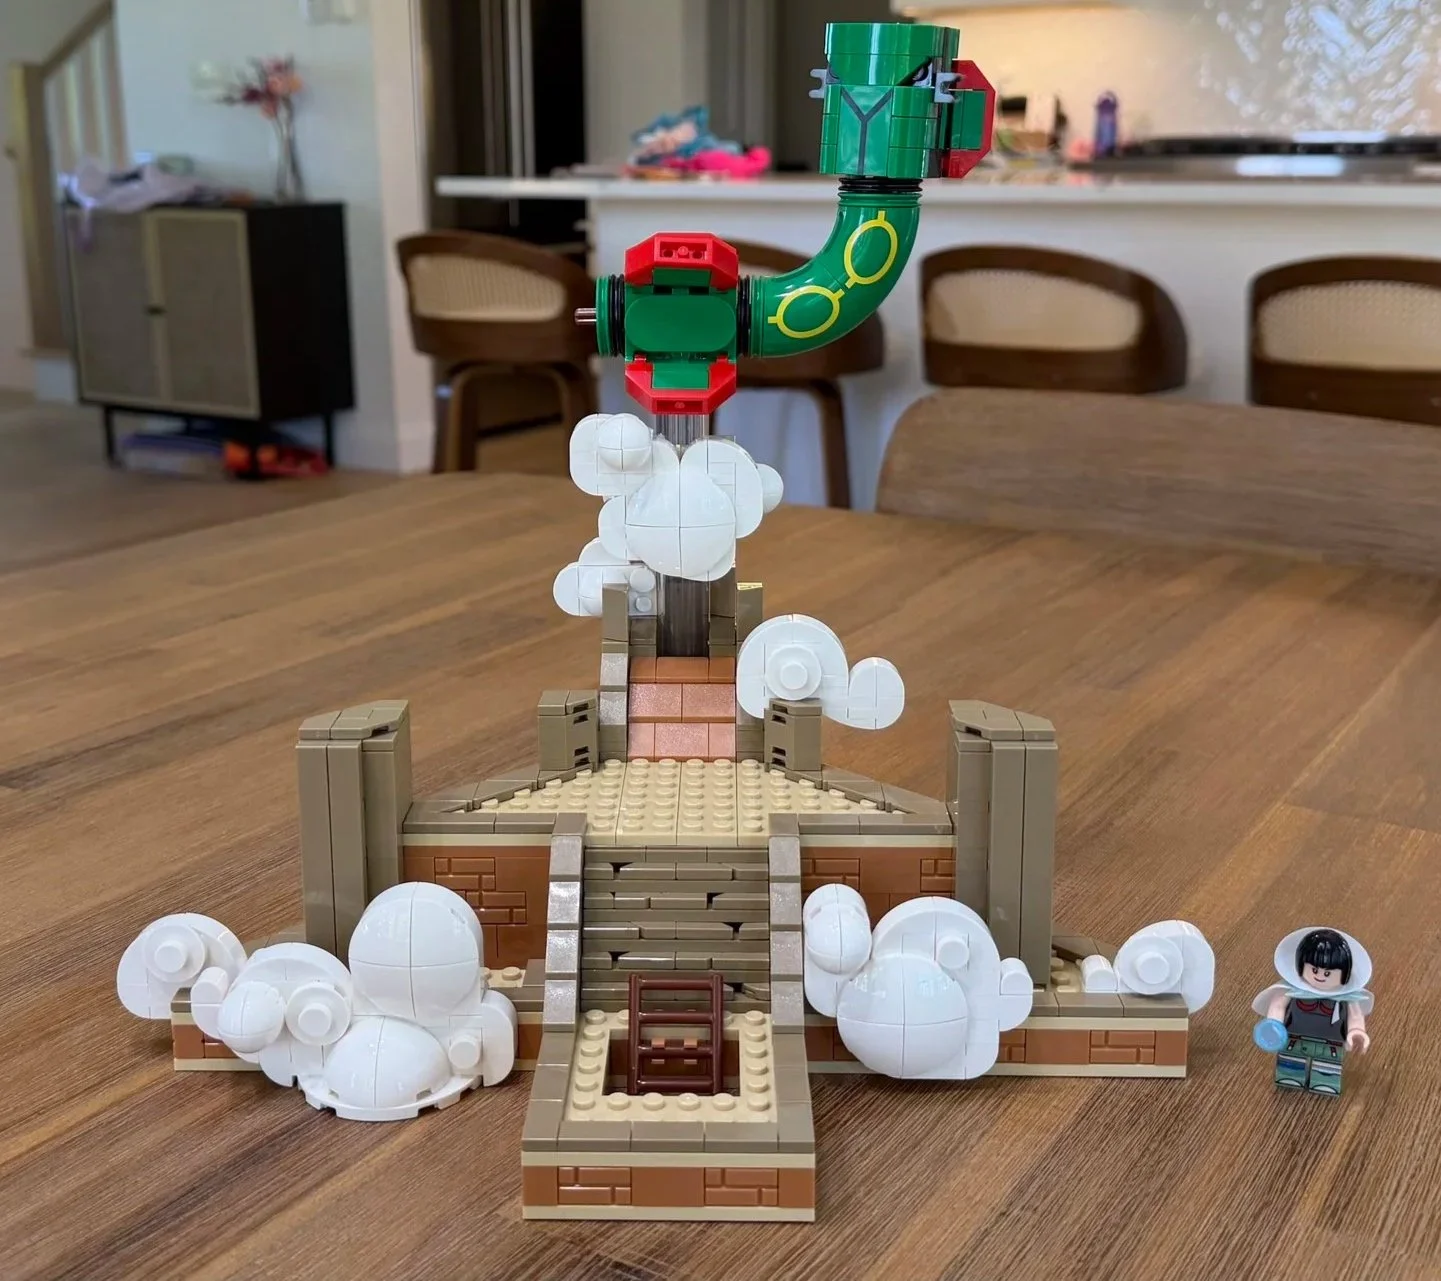
Bag 7 introduces the body and the most demanding alignment work.
Bag 8 More Body Sections and the Tail
My bag notes: 10 minutes 22 seconds • Difficulty 3/10 • Repetition 8/10 • Dexterity 4/10
My concern about repeated body construction is confirmed almost immediately. Bag 8 begins with two identical body assemblies, which make up most of the bag alongside the tail.
The finished shape looks good, and I can appreciate the design. The building experience is less enjoyable. This is my highest-repetition bag, and it is the clearest example of a result I like more than the process of getting there.
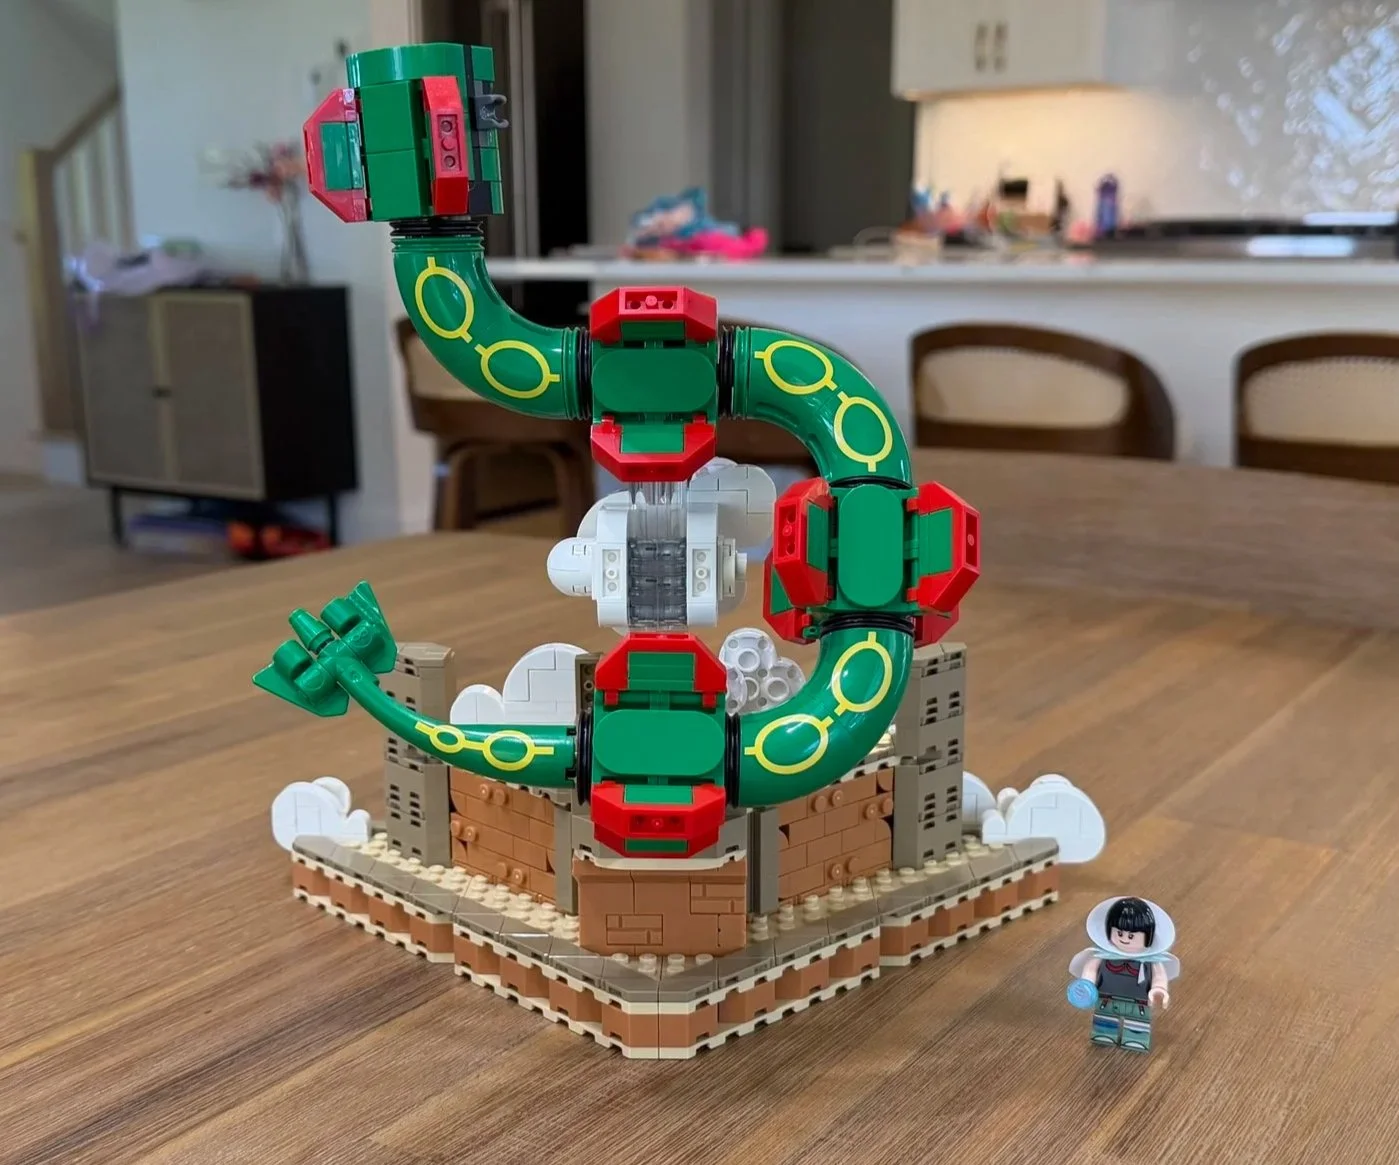
The body and tail are taking shape before the final arms, neck, and head.
Bag 9 Arms Neck and the Best Assembly
My bag notes: 14 minutes 52 seconds • Difficulty 5/10 • Repetition 5/10 • Dexterity 6/10
The two arms are fairly straightforward and remind me of building a botanical stem. They allow movement, and the neck follows with a quick assembly.
Then comes the highlight of the entire build: Rayquaza’s head. It is the most fun assembly for me and gives the model its distinct personality. After so much repeated body construction, this feels like a strong finish. My main visual criticism is the exposed gray pieces, which interrupt the otherwise recognizable green-and-red look
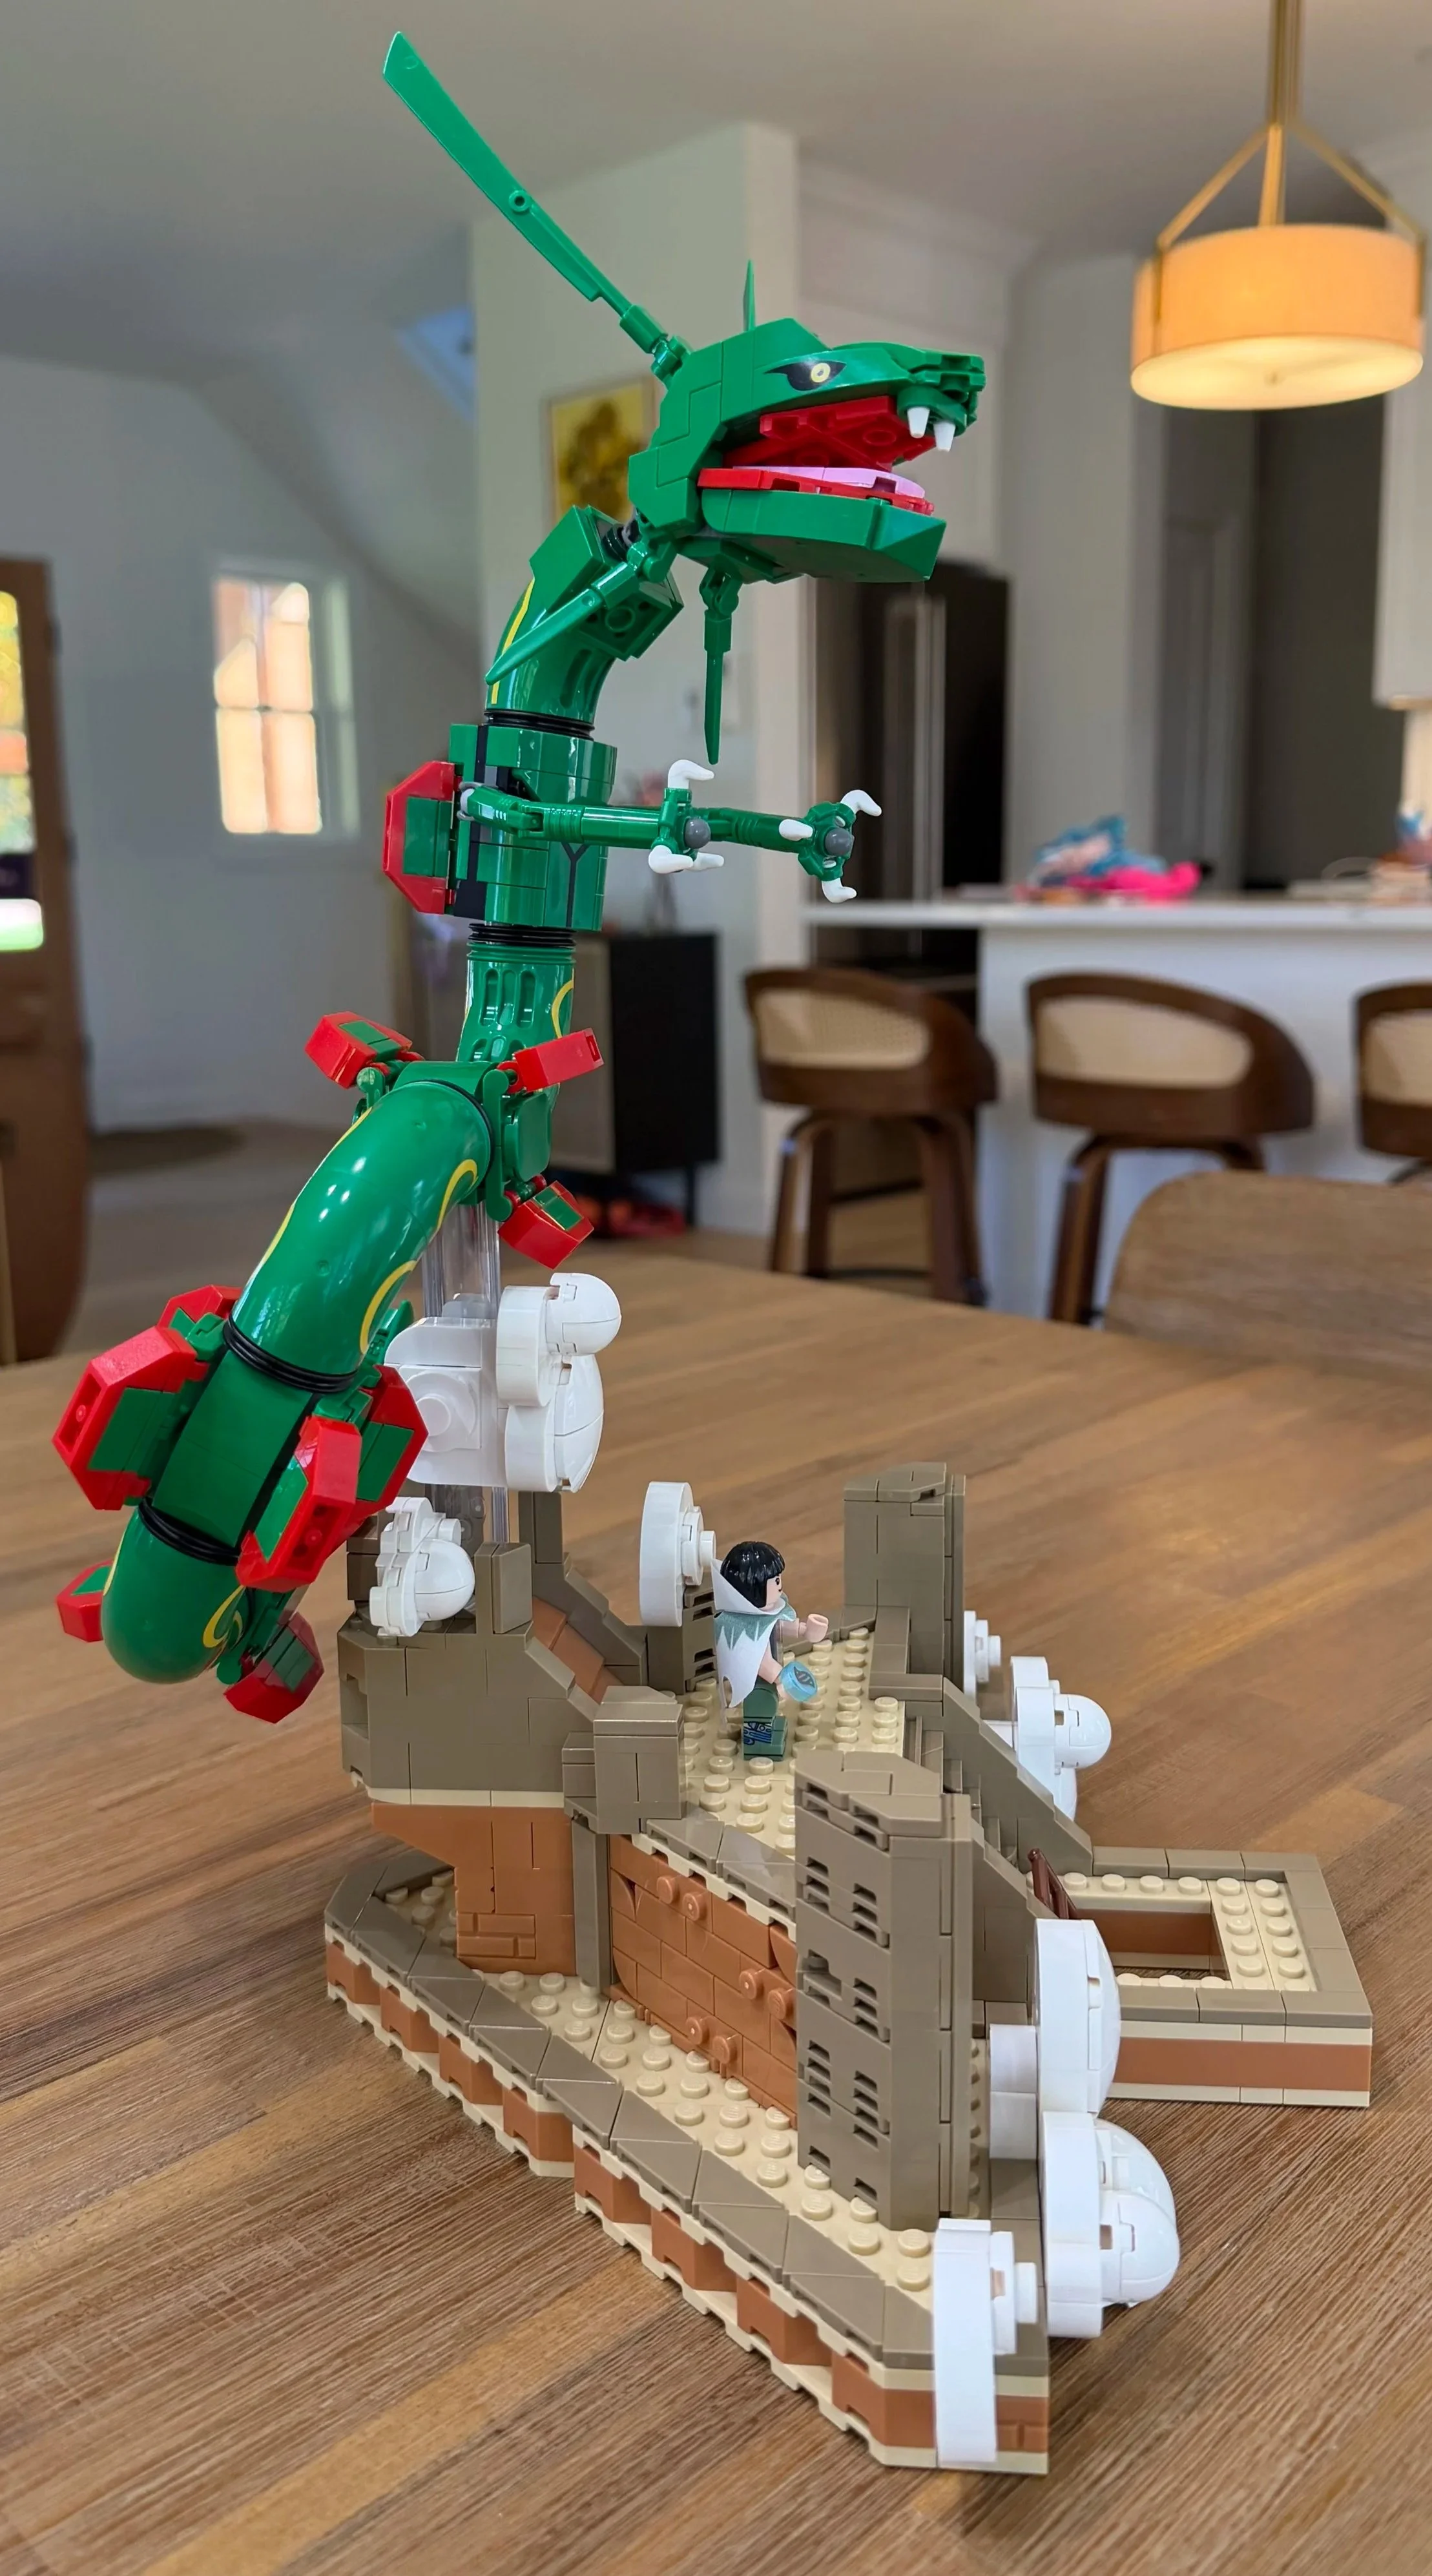
Rayquaza’s head was my favorite assembly of the build.
What Would a Customer Potentially Struggle With if They Tried This Themselves
Public heading: What would a customer potentially struggle with if they tried this themselves?
The biggest sticking points are the orientation-sensitive body connections in Bag 7 and attaching fragile cloud assemblies without knocking them apart. Zinnia’s cloak is another small, fiddly job, while Bag 9 asks for the most dexterity in my bag ratings.
Patience is just as important as technique. The repeated tiling and body sections are not always difficult, but they can make it harder to stay attentive. A builder could follow the instructions comfortably for several bags and then need help with a small alignment problem.
For a customer asking The Bricksmith to finish or restore a partially built set, I would want photos of the support connection, body sections, and damaged clouds first. Those areas would help identify whether the issue is a loose detail, an incorrectly oriented connector, or a section that needs to be rebuilt.
Display Detail and Stability
The finished display is the strongest argument for this set. The curved body, red fins, white clouds, stepped platform, and Zinnia make the scene immediately recognizable. I especially like the clouds and the way they soften the appearance of the clear support.
I still wish Rayquaza itself felt more fleshed out or detailed. Some exposed gray connections distract from the look, and the support remains visible from certain angles. The scene looks good on display, but that does not erase my reservations about the building experience.
My notes highlight fragile clouds and a flimsy early body attachment rather than a full stability test of the completed model. I would treat it as a display piece to handle carefully, not assume it is robust enough for rough play.
Moving Rebuilding and Disassembly
For moving the display, I would support the base with both hands rather than lift it by Rayquaza, the clear tower, or a cloud. The small cloud sections and projecting details are the areas I would protect first.
I have not tested shipping or fully disassembling this set. Based on the fragile cloud assemblies and the alignment work in Bag 7, I would assess it before planning transport rather than assume it could travel safely as one assembled piece. Photographs before any approved separation would help preserve the body’s orientation and the positions of the cloud details.
A restoration would also need to start with an assessment. A knocked-off cloud is a different problem from damage at the body-to-support connection. Repeated body modules may look similar, so keeping them organized and checking their direction would matter during a rebuild.
Who I Recommend It For
I would still recommend this set to a Pokémon fan—especially a Rayquaza fan—who cares more about the finished display than a consistently varied build. The recognizable scene, no-sticker construction, and excellent head assembly give it genuine appeal.
For the building experience alone, I enjoyed Arcanine and Munchlax more than Rayquaza among the three August 1 releases. If you dislike repeated tiling or mirrored body modules, this may not be the most satisfying choice.
LEGO’s official age guidance is 18+. In my opinion, an experienced younger builder could manage much of it, with adult help particularly useful for the Technic-style connections and their orientation. That is my personal assessment of the build, not a change to the official age guidance.
The scene also makes me imagine a future SMART Play version. That is something I would like to see, not a feature or compatibility I tested with this set.
Final Verdict
Final Verdict heading: Final Verdict
My overall rating is 4/10. Rayquaza looks good on display, and the clouds and head are highlights, but the long setting build and repeated body sections reduced my enjoyment. I wanted more attention on Rayquaza itself. This is a better fit for a dedicated fan seeking the finished scene than for someone looking for my favorite Pokémon building experience.
Build takeaways: Hardest bag: 7 • Easiest and quickest bag: 2 • Most repetitive bag: 8 • Highest bag dexterity demand: 9 • Favorite assembly: the head • Standout technique: the varied clouds around the clear support
Want the Finished Set Without the Build?
If you have an unfinished LEGO build or a display that needs rebuilding, The Bricksmith can start with a free photo assessment. Send clear pictures of the model and any loose sections so I can assess what work may be needed. Local service is available in the Greater Portland, Maine area; mail-in work is considered by approval.