
LEGO Pokémon Iconic Trainer Moments Poké Ball 72154 Build Review
The outside looks like a Poké Ball. The inside is what made me stop and play with it.
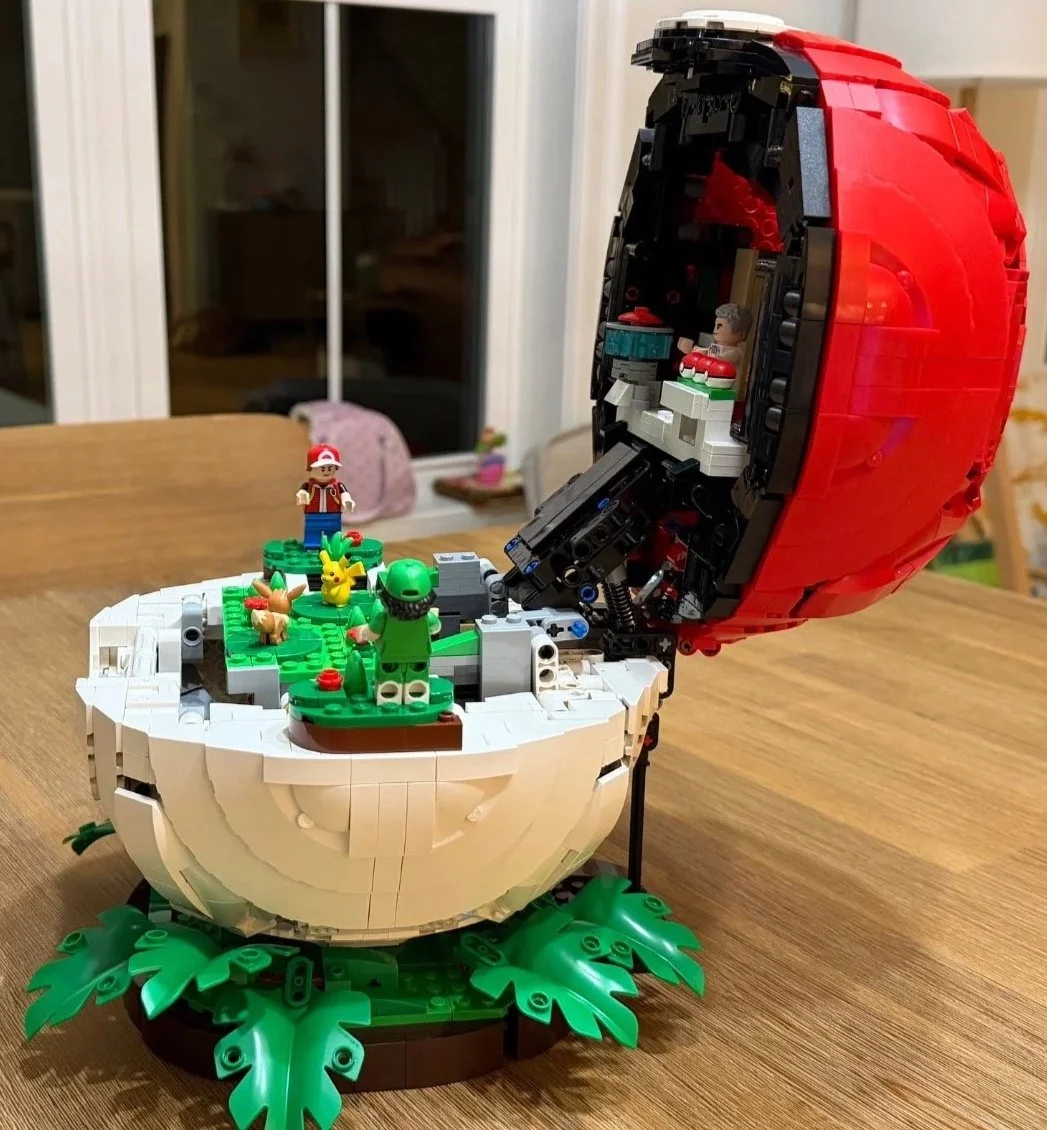
LEGO Pokémon Iconic Trainer Moments Poké Ball 72154 opens into Professor Oak's laboratory and a Pokémon battle scene, then folds neatly back into that familiar red-and-white shape. The three little Poké Balls on Oak's counter are enough to bring back the feeling of choosing a first partner. The mechanism is what makes the display worth opening again.
I built the 19 bags on October 2, 2026. There is a substantial Technic structure underneath the curved shell, and some connections asked for real patience and finger strength. The characters, tiny Poké Balls and smooth opening feature helped the finished set earn my 9.3/10 overall rating.
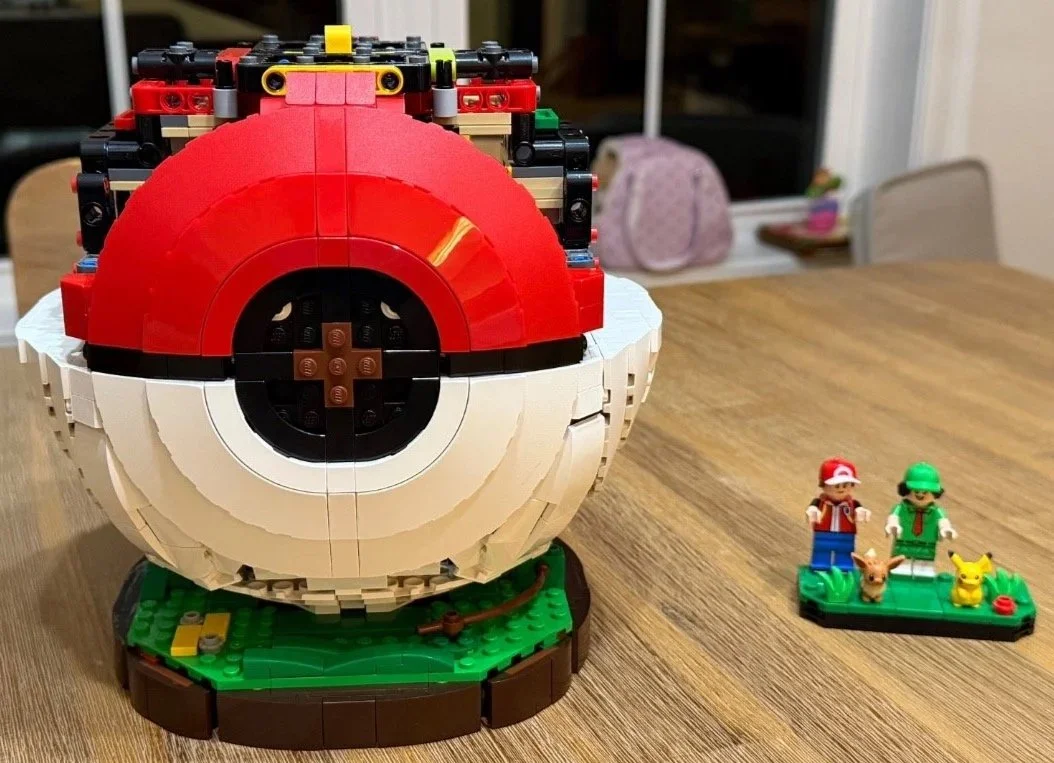
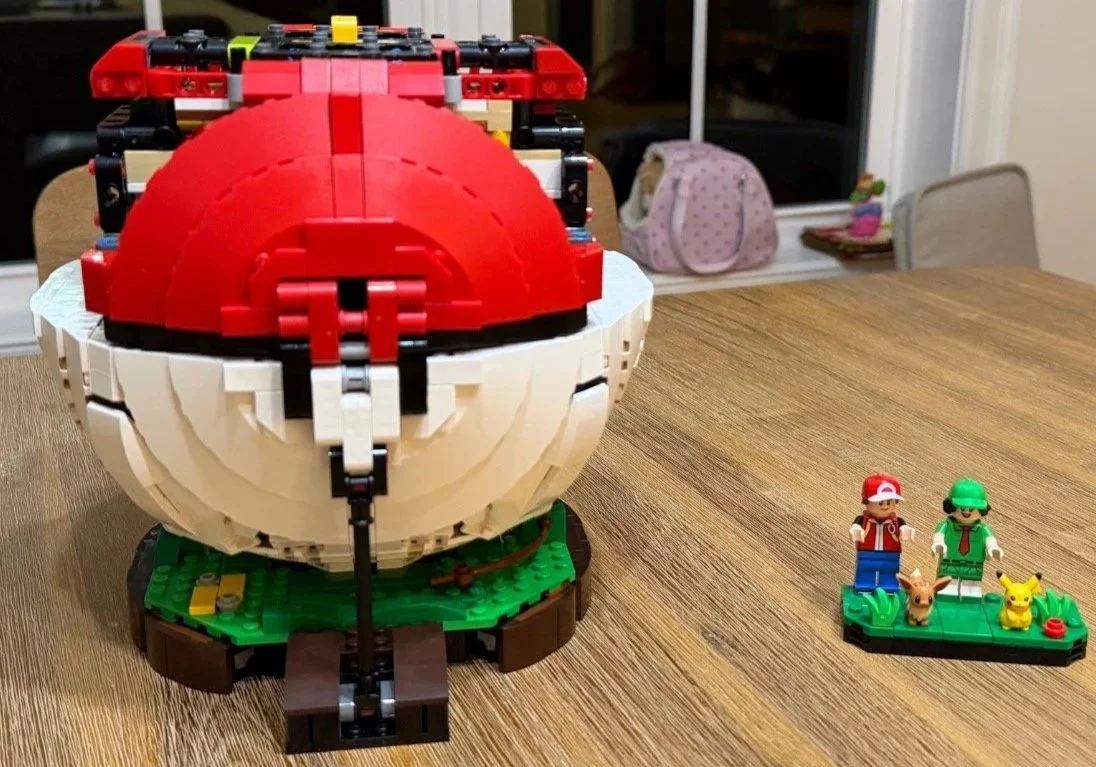
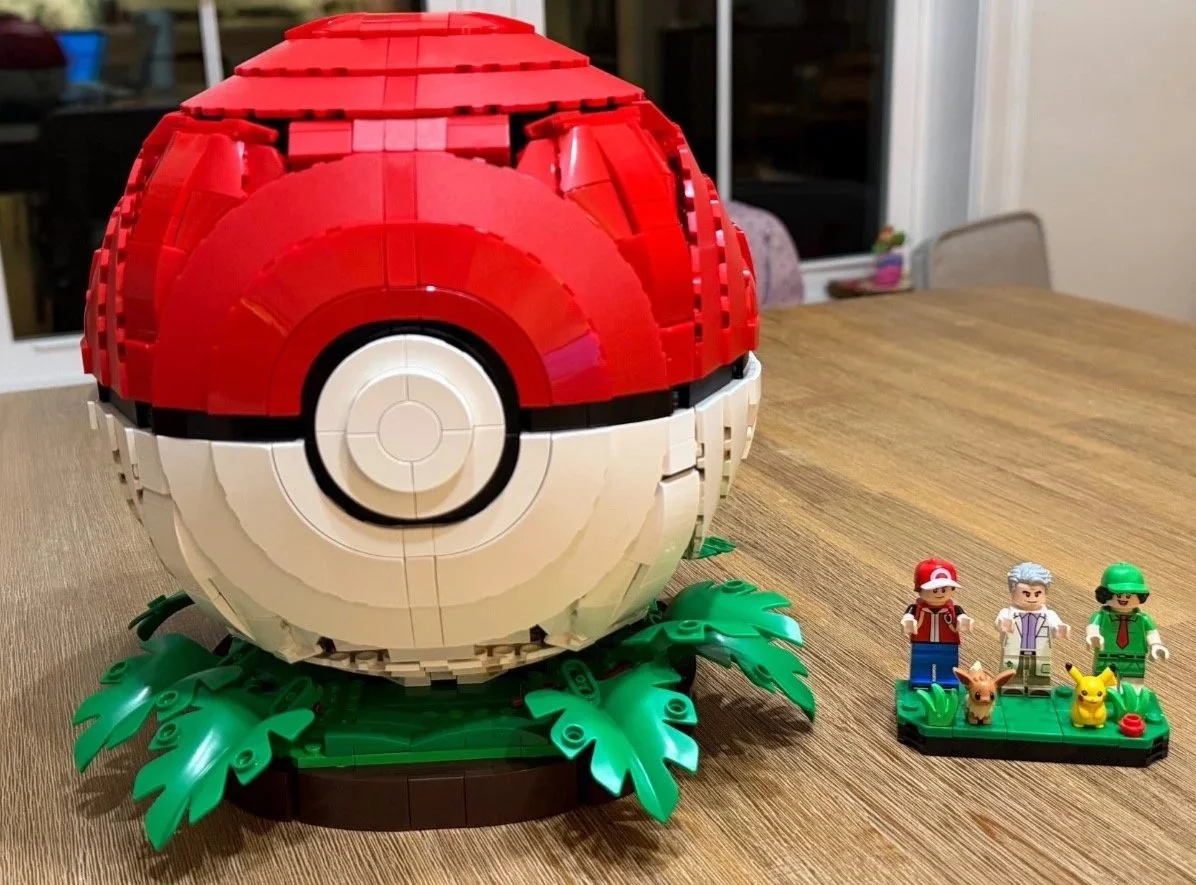
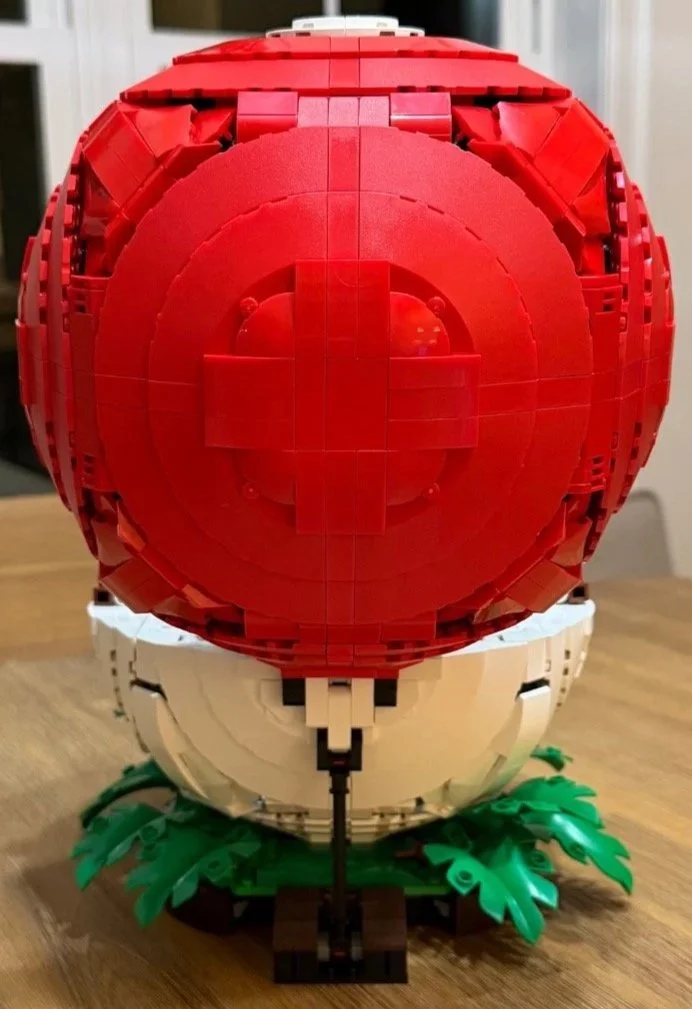
The completed Poké Ball makes a recognizable display even when closed.
At a Glance
Set: LEGO Pokémon Iconic Trainer Moments Poké Ball, 72154
Pieces: 2,386
Numbered bags: 19
LEGO age recommendation: 18+
LEGO listed dimensions: Over 22 cm high, 24 cm wide and 22 cm deep
Build date: October 2, 2026
Total logged bag time: 5:40:26, hours:minutes:seconds
Bag-average difficulty: 4.1/10
Bag-average repetition: 5.0/10
Bag-average dexterity: 5.2/10
Stickers applied across the primary build: 5
Instruction complexity: 3/10
Overall set rating: 9.3/10
Instruction steps: 588 main numbered steps across the two official booklets
What the Build Is Like
The early bags create the grassy base, the lower shell and the battle platform. The opening arm and laboratory follow, then the red upper shell gradually hides the structure. There are mirrored assemblies throughout, but the longer sequences often provide enough variety to keep them enjoyable.
Reading the instructions was usually easier than making some of the connections. The LEGO Builder app helped me check placement in the early frame. Loose sections, several connectors meeting at once and awkward access were the real obstacles.
The supporting structure pays off when the model moves. By the time I tested the opening feature in Bag 14, the earlier Technic work felt much more worthwhile.
The Build, Bag by Bag
Bag times below are minutes:seconds. Difficulty, repetition and dexterity scores are out of 10; higher scores mean more demand or repetition.
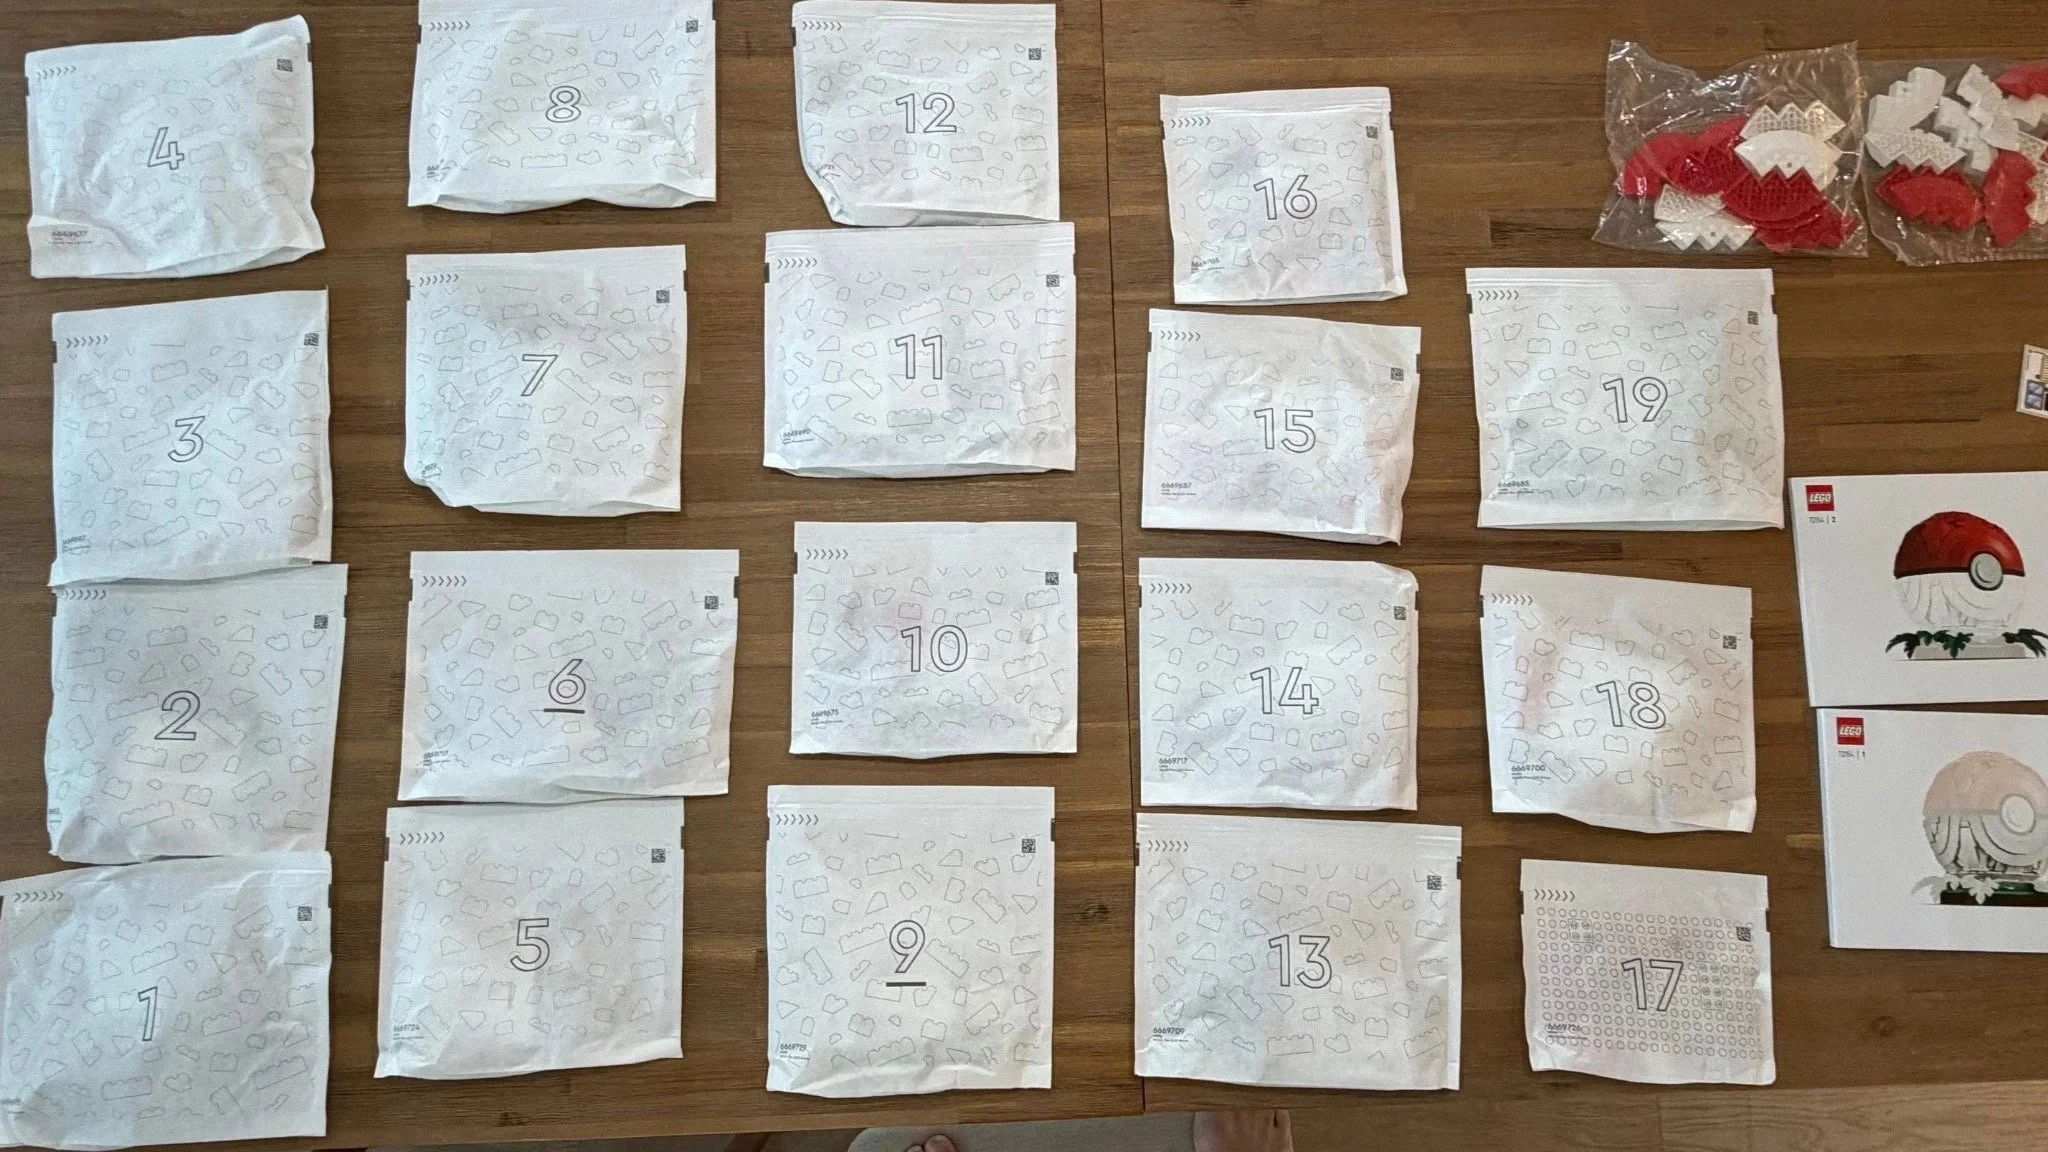
The bags and instructions before the Poké Ball build begins.
Bag 1: Red and the Display Base
Logged bag time: 20:38 | Difficulty: 2/10 | Repetition: 3/10 | Dexterity: 2/10 | Stickers: 0
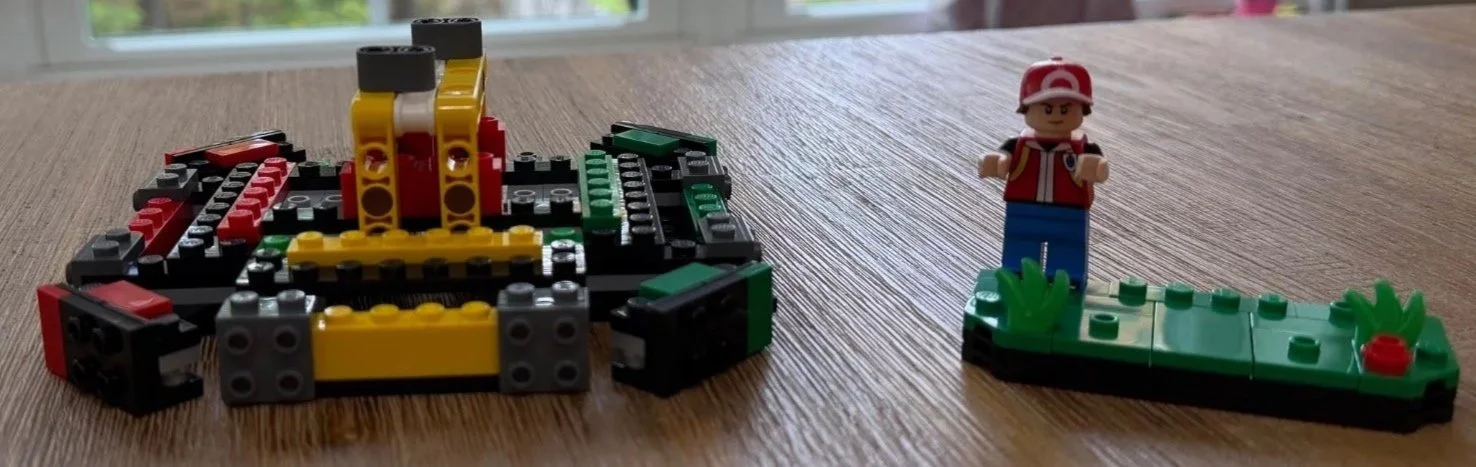
Red is the first character you build, and he is already a standout. The display base uses green and red areas to suggest the trainer battle, giving this opening section a clear visual theme.
There are identical assemblies, but enough variation between steps to keep the work enjoyable. This is a gentle start, with all three practical ratings staying low.
Red joins the display base at the start of the build.
Bag 2: The Base Perimeter
Logged bag time: 11:48 | Difficulty: 2/10 | Repetition: 4/10 | Dexterity: 2/10 | Stickers: 0
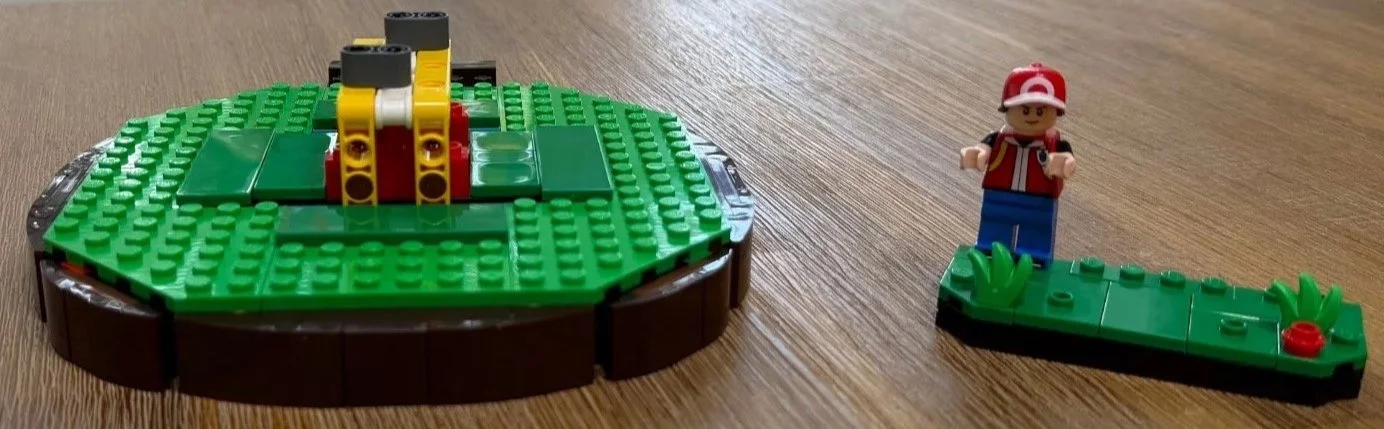
Brown slopes form the perimeter of the base before green plates cover the surface. This section feels more repetitive than Bag 1, particularly around the outer edge.
The rear platform is also completed. At this stage, I was still waiting to see how that area would fit into the mechanism.
The base perimeter and green surface are complete.
Bag 3: Eevee and the First Technic Frame
Logged bag time: 29:40 | Difficulty: 5/10 | Repetition: 3/10 | Dexterity: 8/10 | Stickers: 0
Eevee arrives at the start of Bag 3 and joins Red on the display platform. Eevee might be worth the price of admission alone. I am only partly kidding.
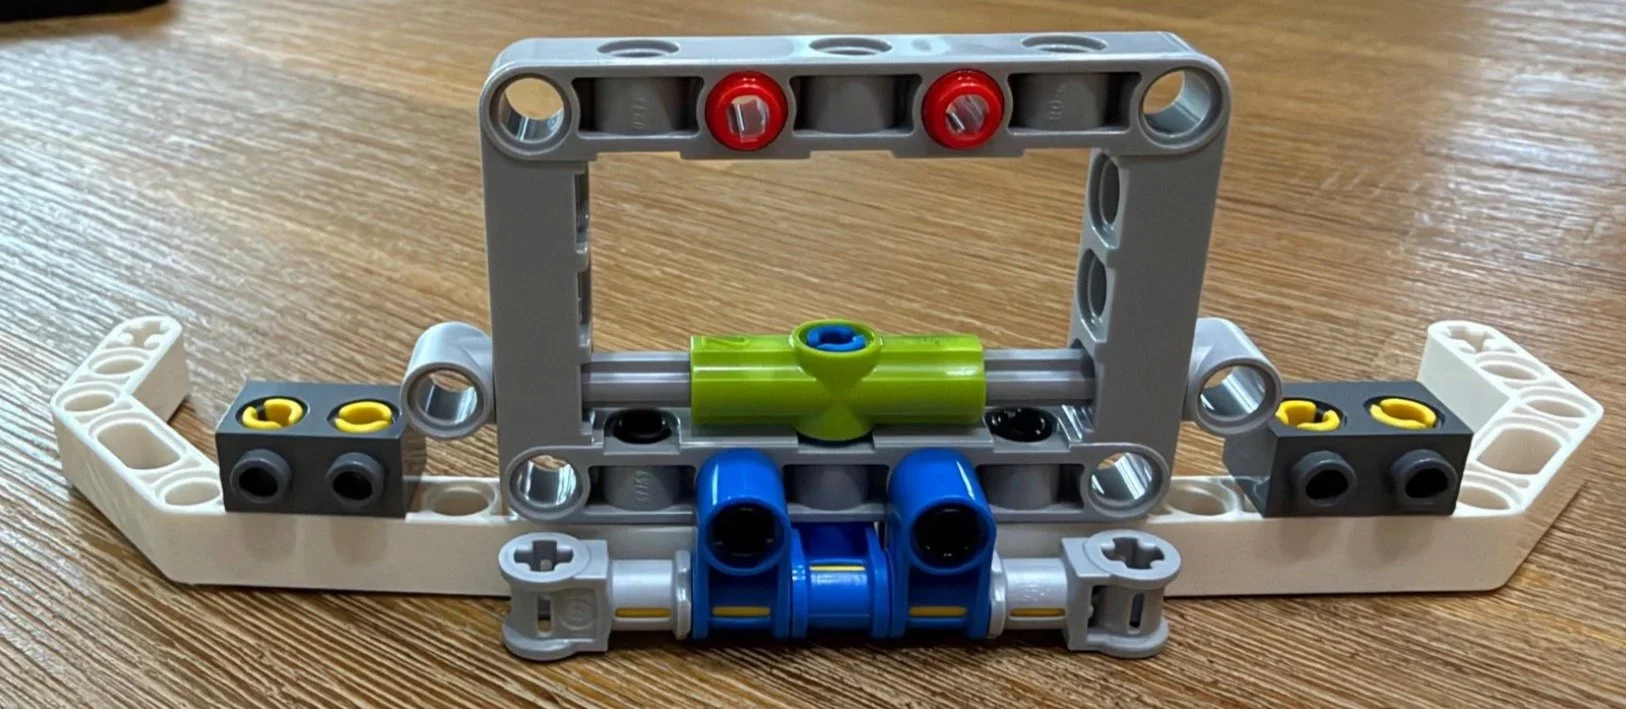
The square Technic frame makes the physical work more demanding. Several connections sit inside the frame, where getting the pieces into position is awkward. I used the LEGO Builder app to check the placement of matching parts on opposite sides. This was a fun assembly, but it needed much more finger strength and dexterity than the first two bags.
The early Technic frame includes connections inside the square structure.
The enclosed frame is the important detail here: placing a connector on its own is one thing; reaching it after the surrounding beams are in position is another. I would check the inward-facing connections before moving on.
The first major frame is mounted on the display base.
Bag 4: Demanding Lower Shell Connections
Logged bag time: 28:14 | Difficulty: 7/10 | Repetition: 4/10 | Dexterity: 9/10 | Stickers: 0
Bag 4 was one of the two hardest bags in my log. Completing the lower shell means lining up several connections at the same time while some of the parts are still loose.
The front section adds connectors of different sizes, making alignment even more frustrating. It is a bag to approach slowly, with a clear view of where each connection belongs. Its 9/10 dexterity rating was the highest of the build.
The booklet has you turn the developing structure and add several frame sections in succession. Check the axle-length diagrams and the connection points before offering up the next assembly. Trying to force a misaligned section would only make this stage harder.
Bag 4 brings several demanding lower-shell connections together.
Bag 5: Four White Corners
Logged bag time: 12:32 | Difficulty: 2/10 | Repetition: 7/10 | Dexterity: 3/10 | Stickers: 0
This entire bag builds the four corners of the lower Poké Ball. The repeated sections earn a 7/10 repetition score, although building each corner from start to finish made the process feel more manageable.
Attaching the corners gives the ball a much clearer shape. The work is simple, and the visual payoff is easy to appreciate.
Four curved corners give the lower shell its shape.
Bag 6: Side Curves and More Front Structure
Logged bag time: 13:04 | Difficulty: 5/10 | Repetition: 4/10 | Dexterity: 5/10 | Stickers: 0
The left and right curves are another mirrored pair, with enough individual steps to keep them interesting. Connecting the side assemblies is the part that needs care.
Those connections can disturb the curved sections already attached to the ball. I would watch those earlier assemblies closely while fitting the new ones. A larger Technic section then builds out more of the front.
There is a clear 2× subassembly in this section. It is useful to recognize that repeat while still treating the final attachment as the delicate part of the bag.
The side curves build out the lower shell around the frame.
Bag 7: A Second Trainer and the Battle Arena
Logged bag time: 18:12 | Difficulty: 4/10 | Repetition: 2/10 | Dexterity: 4/10 | Stickers: 0
The second trainer, the Picnicker, joins the display. The remaining work builds the Pokémon battle arena and its sliding mechanism.
I found the Technic construction here surprisingly simple. The arena attaches at the back of the ball and locks into place with two Technic rods. This bag adds a lot of purpose to the structure without becoming especially repetitive.
The battle arena and sliding structure are added in Bag 7.
Bag 8: Reinforcing the Arena
Logged bag time: 16:54 | Difficulty: 6/10 | Repetition: 7/10 | Dexterity: 8/10 | Stickers: 0
This was my most enjoyable bag so far, despite the demanding and repeated Technic assemblies. It reinforced the ball and helped keep the battle arena in place.
The repetition was noticeable, and the connections took steady hands. Seeing the structure become more secure made the effort satisfying.
The arena is reinforced as the internal structure grows.
Bag 9: Pikachu and the Lower Shell Sides
Logged bag time: 24:23 | Difficulty: 7/10 | Repetition: 7/10 | Dexterity: 7/10 | Stickers: 0
A wild Pikachu appeared! Pikachu joins Eevee, adding another memorable figure to the set. The rest of the bag builds the matching lower sides, more arena details, and the front of the ball.
Fitting the side panels needs care because smaller pieces can be knocked off. I found that a side had to come off again to restore those details. I also dropped a tile inside the ball, and getting it back out was a pain. Watch those loose pieces as the structure starts to close around them.
The white side panels and battle details complete more of the lower half.
Bag 10: The Opening Arm
Logged bag time: 14:52 | Difficulty: 5/10 | Repetition: 4/10 | Dexterity: 7/10 | Stickers: 0
Bag 10 focuses on the Technic arm that opens the Poké Ball. The assembly itself is enjoyable and makes the purpose of the earlier structure clearer.
The final connections take much more finger strength and dexterity than the rest of the bag. I rated dexterity 7/10 even though the overall bag difficulty was 5/10.
The arm for the opening mechanism takes shape.
Bag 11: Supporting the Upper Shell
Logged bag time: 23:29 | Difficulty: 5/10 | Repetition: 3/10 | Dexterity: 4/10 | Stickers: 0
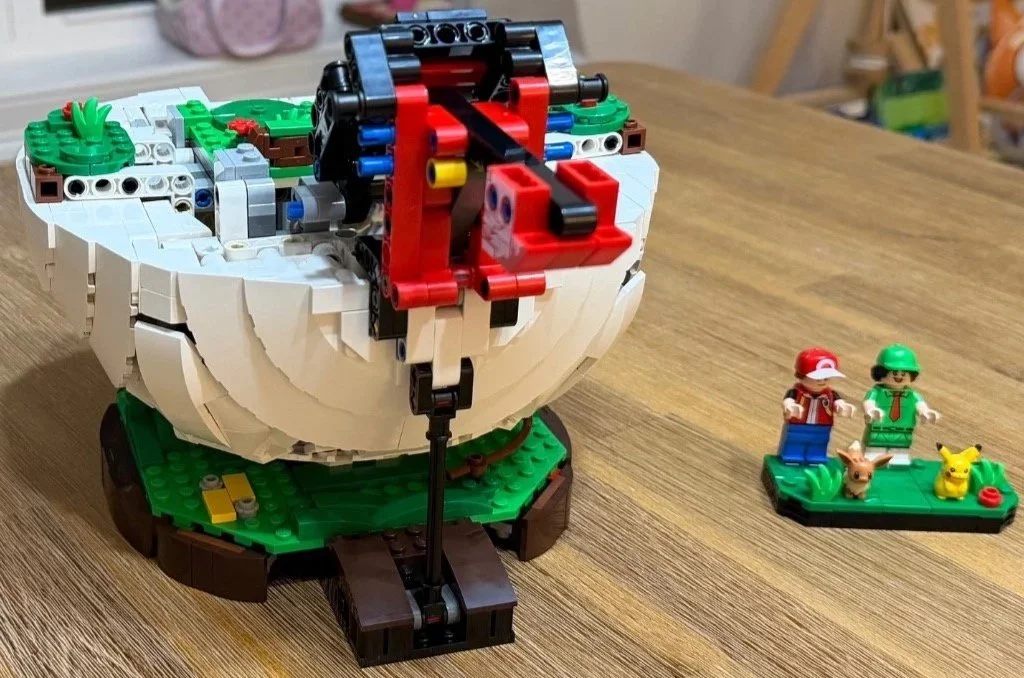
The full arm mechanism now takes shape to support the red upper shell. This Technic assembly was less challenging and less repetitive than several of the earlier ones.
It was also fun to put together. By this stage I could picture the finished display, and it was looking very promising.
The completed arm structure will support the red upper shell.
Bag 12: Professor Oak’s Laboratory Wall
Logged bag time: 10:29 | Difficulty: 3/10 | Repetition: 5/10 | Dexterity: 3/10 | Stickers: 4
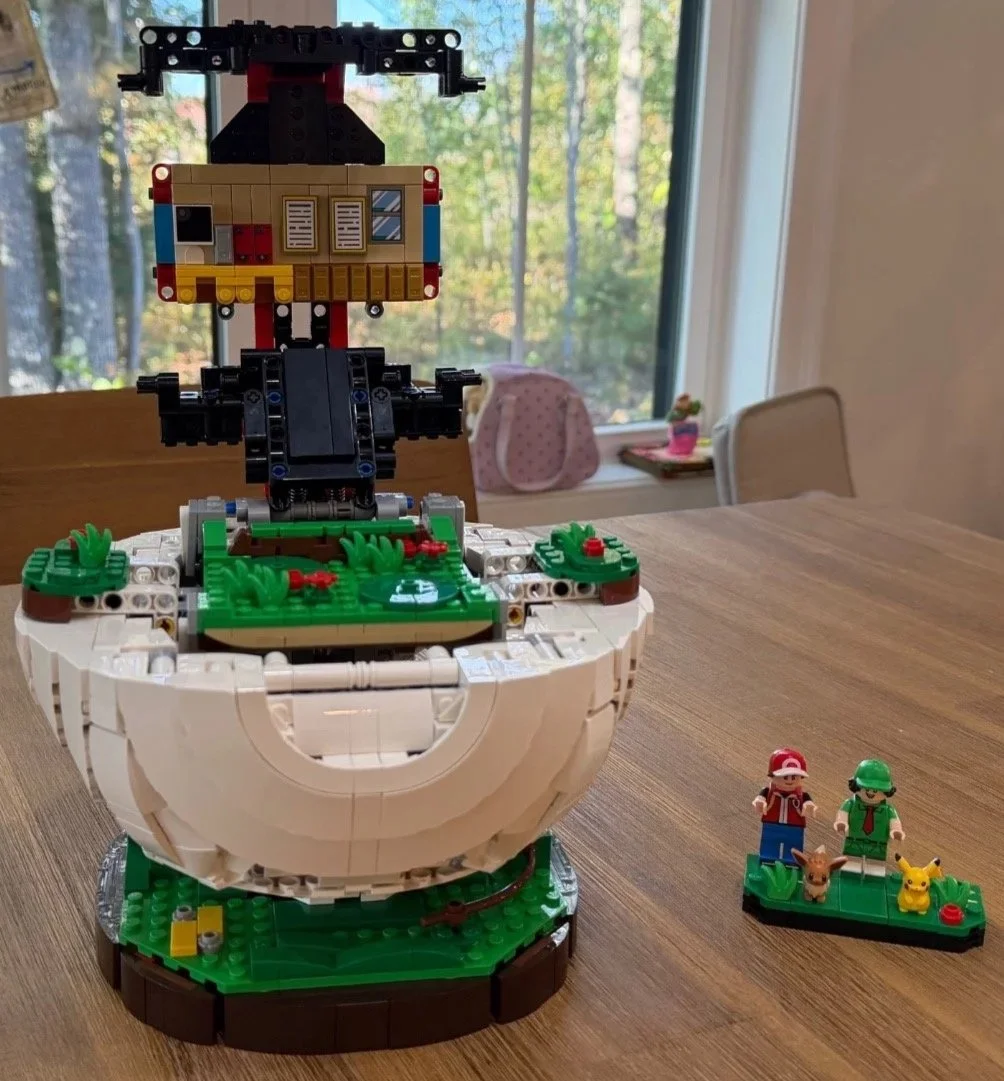
Matching Technic assemblies attach to the opening arm and form the back of Professor Oak’s laboratory. Four of the set’s five stickers add the laboratory wall details.
The two Pokédex tiles are printed, which was a welcome detail. There is some repetition in the structure and wall, but I really enjoyed this bag.
The bookshelf and computer details help the upper half feel like a room rather than just a mechanism in disguise. It is a small scene, but the printed Pokédex pieces make it immediately recognizable.
Four stickers add the laboratory wall details; the Pokédex tiles are printed
Bag 13: The Laboratory Side Walls
Logged bag time: 21:06 | Difficulty: 4/10 | Repetition: 5/10 | Dexterity: 5/10 | Stickers: 1
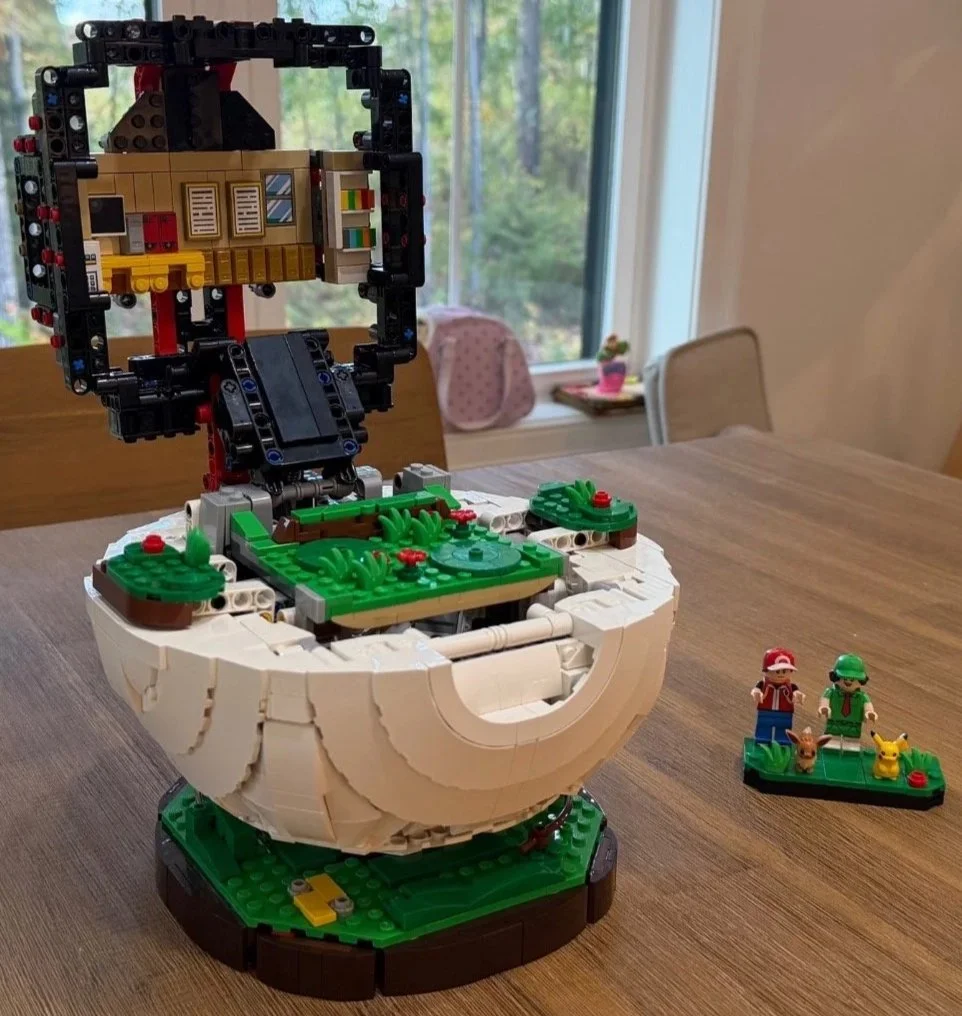
The laboratory’s left and right walls use the final sticker. Their Technic assemblies are surprisingly easy to attach to the main structure.
There are plenty of tight red pins, which increase the dexterity demand. Check each assembly’s orientation before pressing those pins fully into place.
The two wall frames attach separately, which is more manageable than trying to line up the whole laboratory at once. I found the fitting easier here than in the lower shell, even with the pin work still demanding attention.
The laboratory walls use the final sticker of the build.
Bag 14: The First Opening and Closing Test
Logged bag time: 16:40 | Difficulty: 5/10 | Repetition: 6/10 | Dexterity: 6/10 | Stickers: 0
Another Technic section uses plenty of gray pins before the upper display takes shape. The booklet uses coloured structural sections to help with orientation, which is useful when several sides of the frame look similar. Placing the upper shell sections had me standing up to reach comfortably.
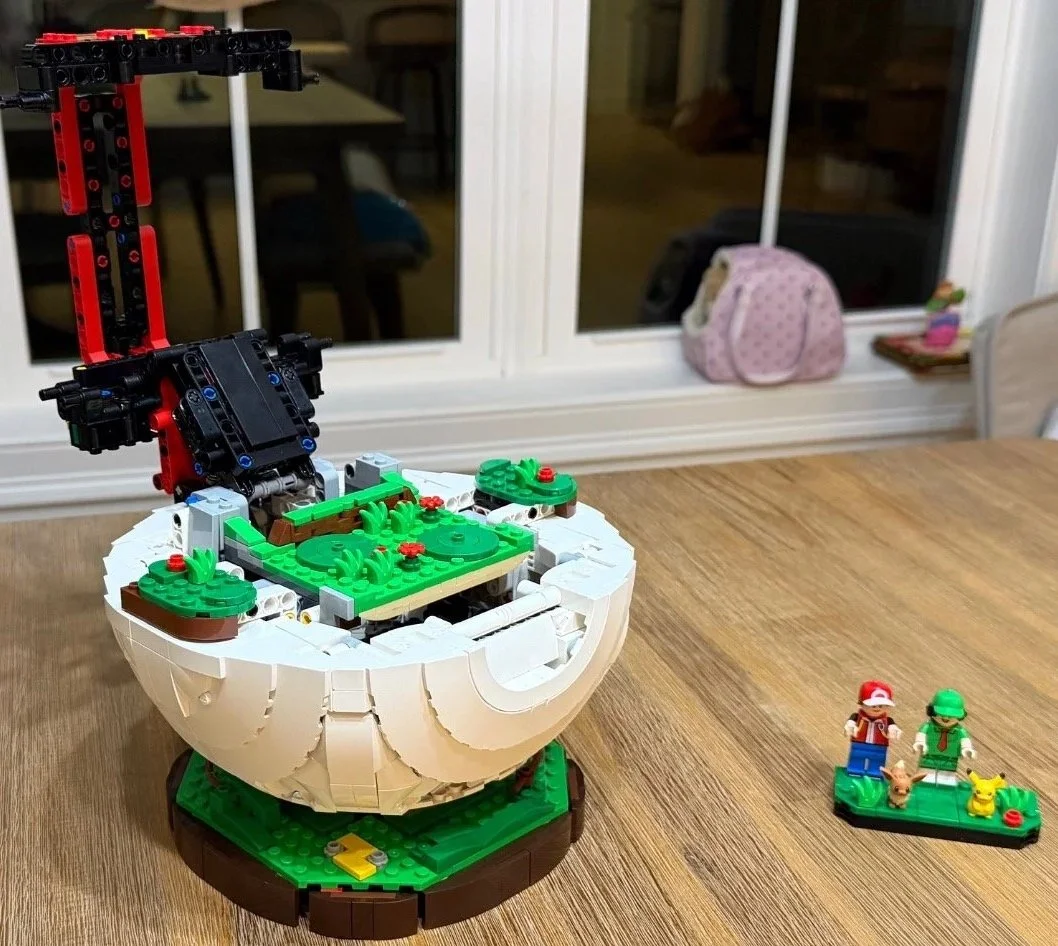
Then comes my favorite moment of the build: testing the opening and closing mechanism. At step 495, the instructions show the upper assembly swinging into the closed position. On my model, the way the display expands and collapses is impressively smooth. This is the bag that made the earlier structural work feel worthwhile.
The upper display reaches the stage where I first tested the opening feature.
Bag 15: Securing the Lever and Upper Panels
Logged bag time: 18:43 | Difficulty: 4/10 | Repetition: 4/10 | Dexterity: 8/10 | Stickers: 0
The first assembly reminded me of the little starships I built as a child. Here, its job is to help hold the lever mechanism in place.
The model already feels sturdy enough that attaching new assemblies does not threaten the whole structure. The red upper panels and black border still require force to connect properly, which is why I scored dexterity 8/10.
The rear assembly helps secure the lever mechanism.
Bag 16: Four Red Curved Sections
Logged bag time: 17:47 | Difficulty: 3/10 | Repetition: 6/10 | Dexterity: 4/10 | Stickers: 0
The red curves mirror the earlier white corner construction. Each section has enough steps to keep the repetition from taking over, even with four similar assemblies.
Before attachment, they looked like four small red spaceships. The construction is straightforward, and the curved shell keeps getting closer to the finished Poké Ball.
The red curves follow the earlier white-corner construction.
Bag 17: The Red Upper Shell
Logged bag time: 07:51 | Difficulty: 2/10 | Repetition: 8/10 | Dexterity: 3/10 | Stickers: 0
Bag 17 was my quickest bag, at 7 minutes, 51 seconds. It is easy to follow but full of repeated work, earning an 8/10 repetition score.
Before the red cap covers everything, the instructions show red, blue, green and yellow bricks around the central support. I liked that little burst of hidden colour. Whatever associations those colours bring to mind, the construction itself is a straightforward sequence of repeated sections that closes the top of the ball.
The red upper shell is nearing completion; my log references this same photo for Bags 17 and 18.
Bag 18: Completing the Red Sides
Logged bag time: 17:37 | Difficulty: 3/10 | Repetition: 5/10 | Dexterity: 4/10 | Stickers: 0
The red side sections follow a similar approach to the earlier white sides. The process is repetitive, but I still found it enjoyable.
These panels bring the exterior much closer to its familiar finished shape. The bag stays moderate in both difficulty and dexterity demand.
The interior is visible before the final foliage and display arrangement.
Bag 19: Professor Oak and the Finishing Details
Logged bag time: 16:27 | Difficulty: 3/10 | Repetition: 8/10 | Dexterity: 7/10 | Stickers: 0
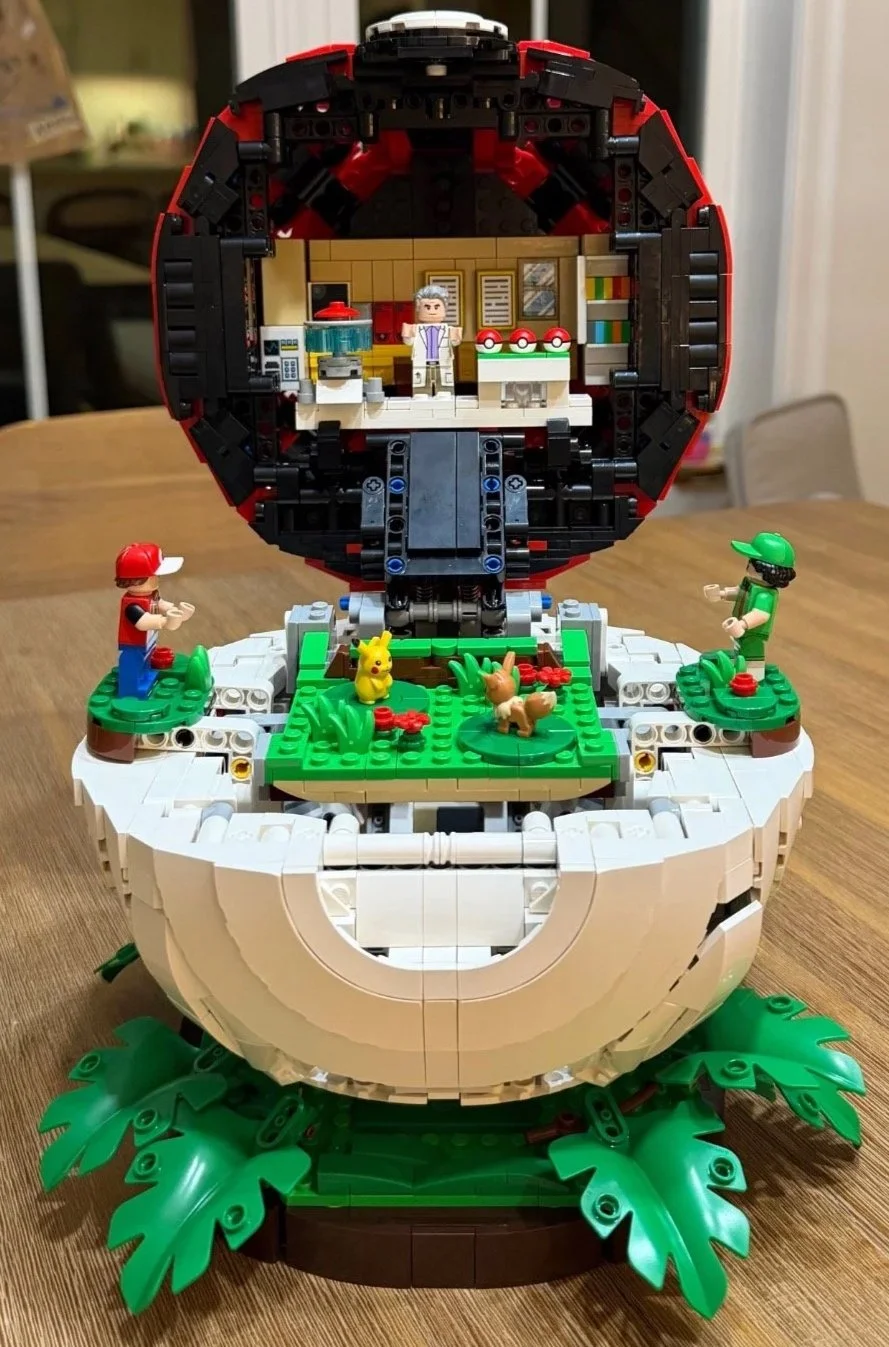
Professor Oak is the final minifigure. His laboratory counter includes equipment and three small molded Poké Balls, a lovely reminder of choosing a first partner Pokémon. Those new Poké Ball pieces are among my favorite details in the set.
Placing the leaves around the base was my least enjoyable section. It is repetitive work that takes steady, dexterous hands, although I was pleasantly surprised by how much the foliage improved the finished display. The main Poké Ball button is the last assembly, which feels like exactly the right way to finish.
The familiar closed ball is satisfying on its own. Opening it turns the finished model into something much more interesting: a little Trainer journey, with Oak's laboratory above the battle scene.
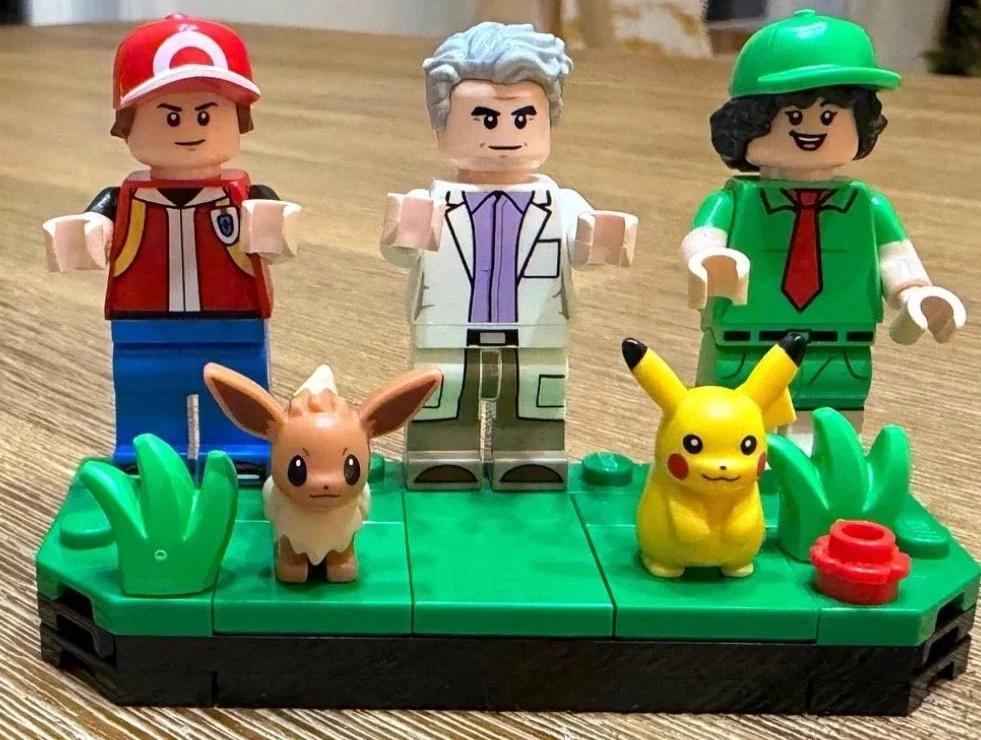
The full character lineup is ready for the finished display.
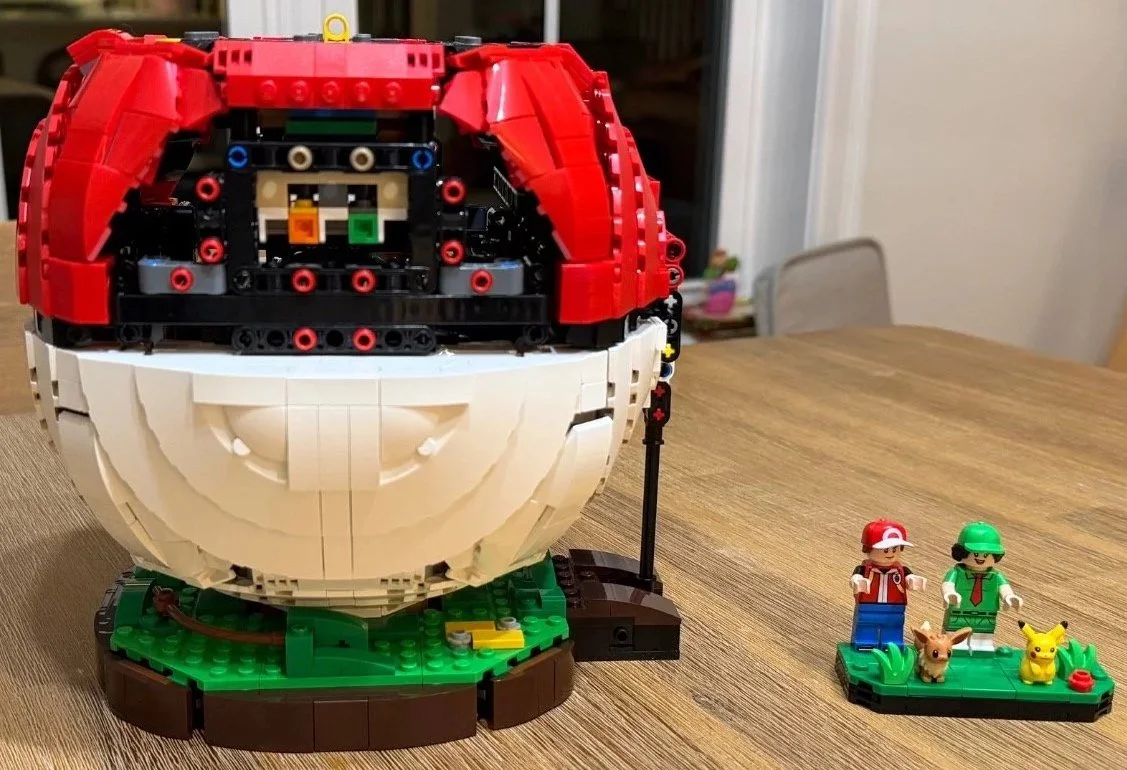
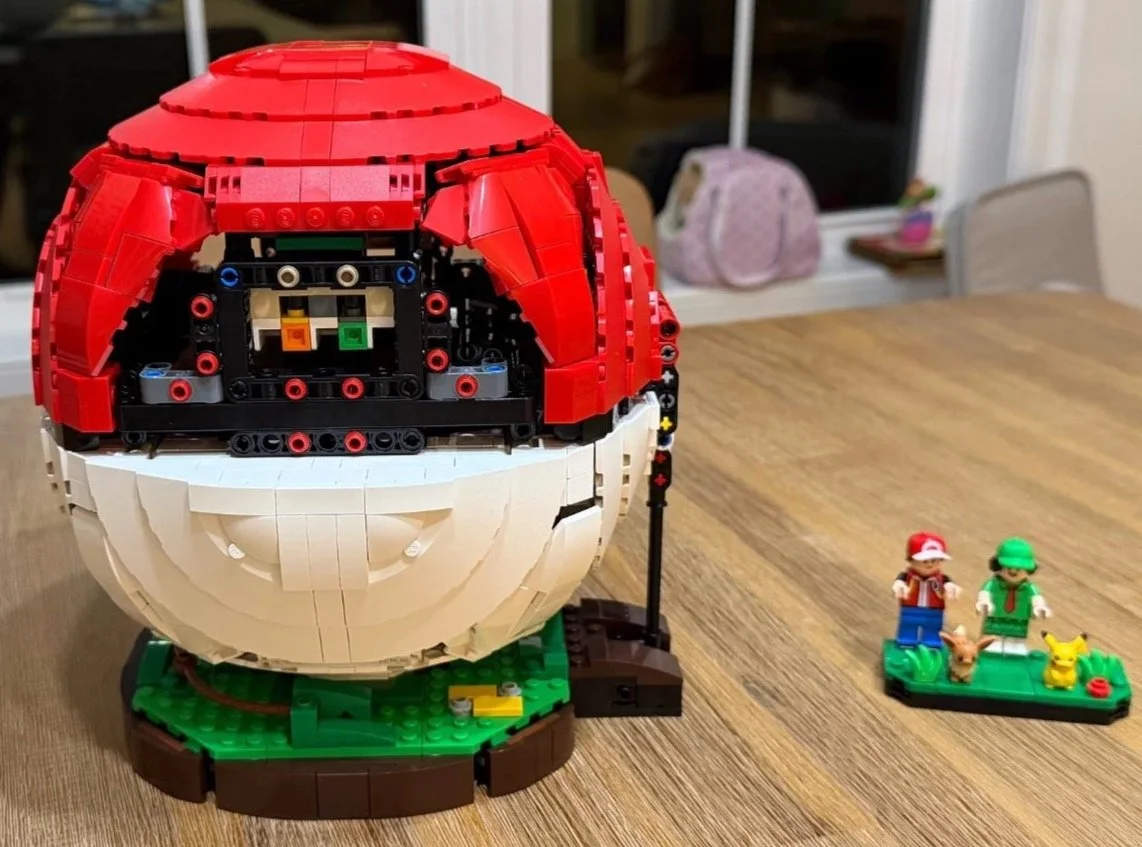
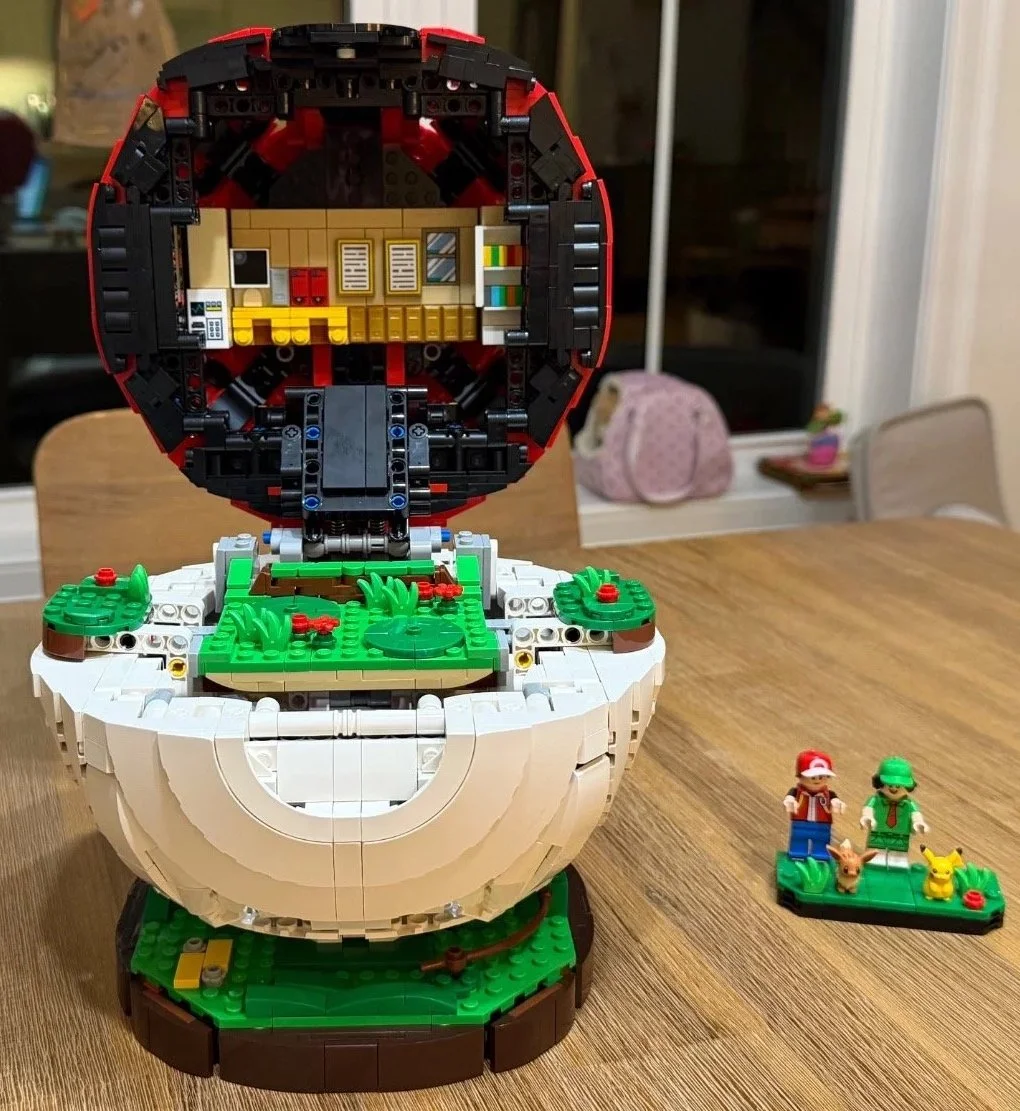
The completed Poké Ball opens into the laboratory and battle scene with the characters in place.
Build Progress
Follow the build from the numbered bags and first frame through the finished shell and open display. Some stages have an extra angle or close-up. My log uses the same near-final shell photograph for Bags 17 and 18, so there is no separately identified Bag 18 checkpoint.
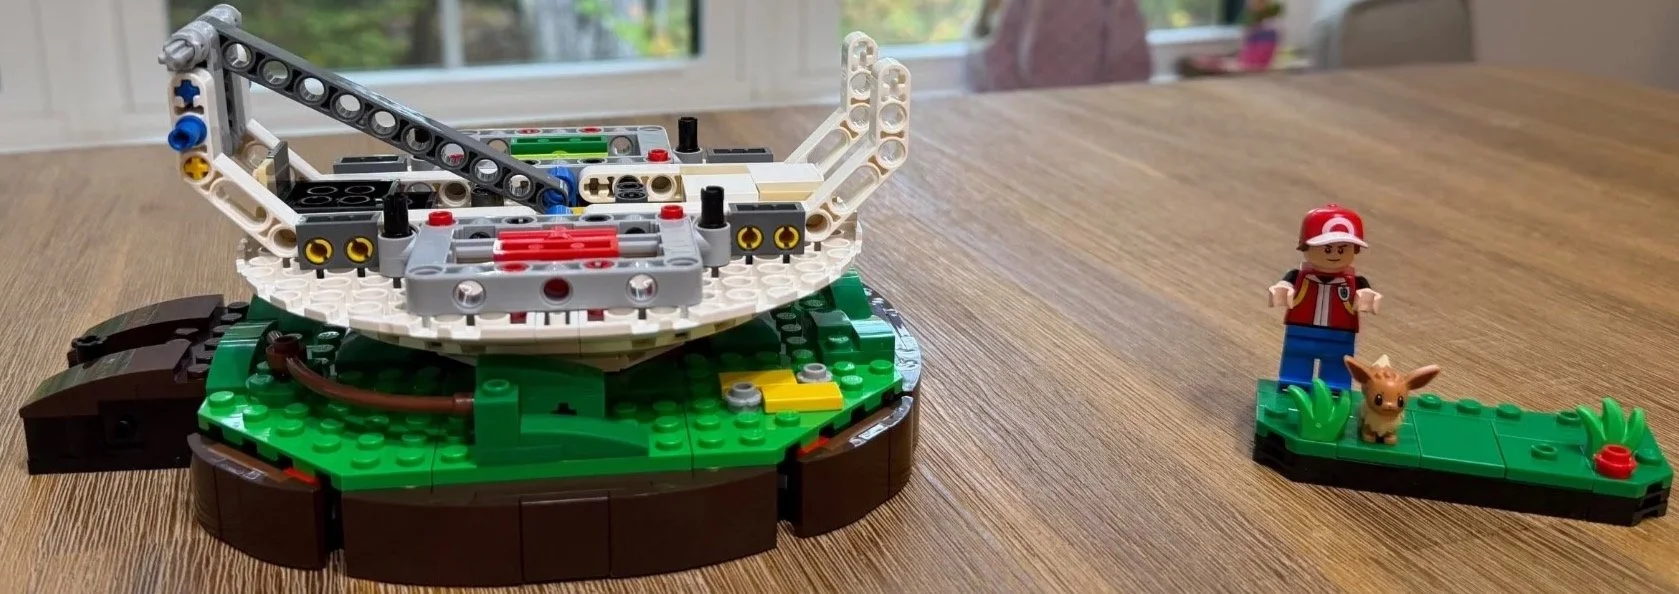
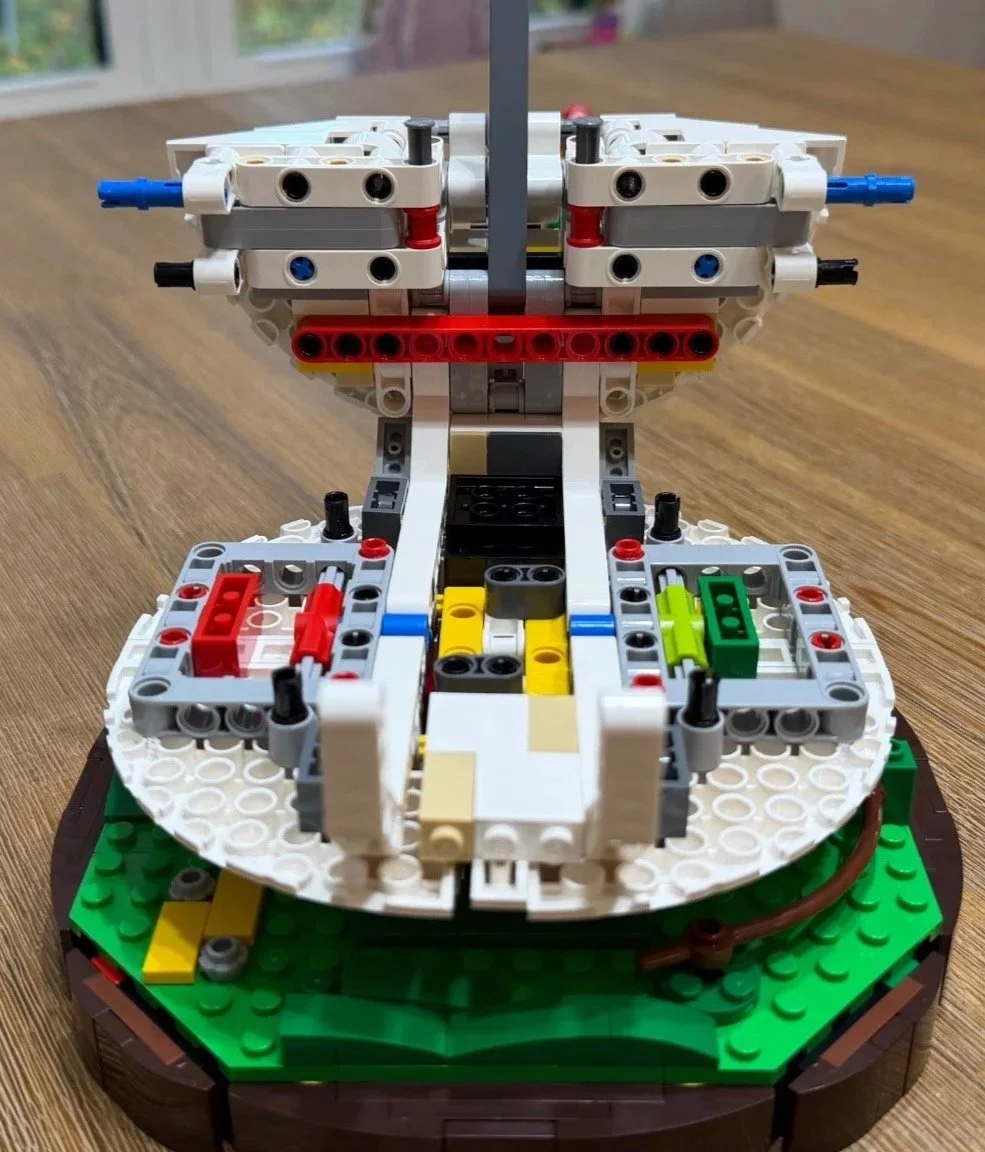
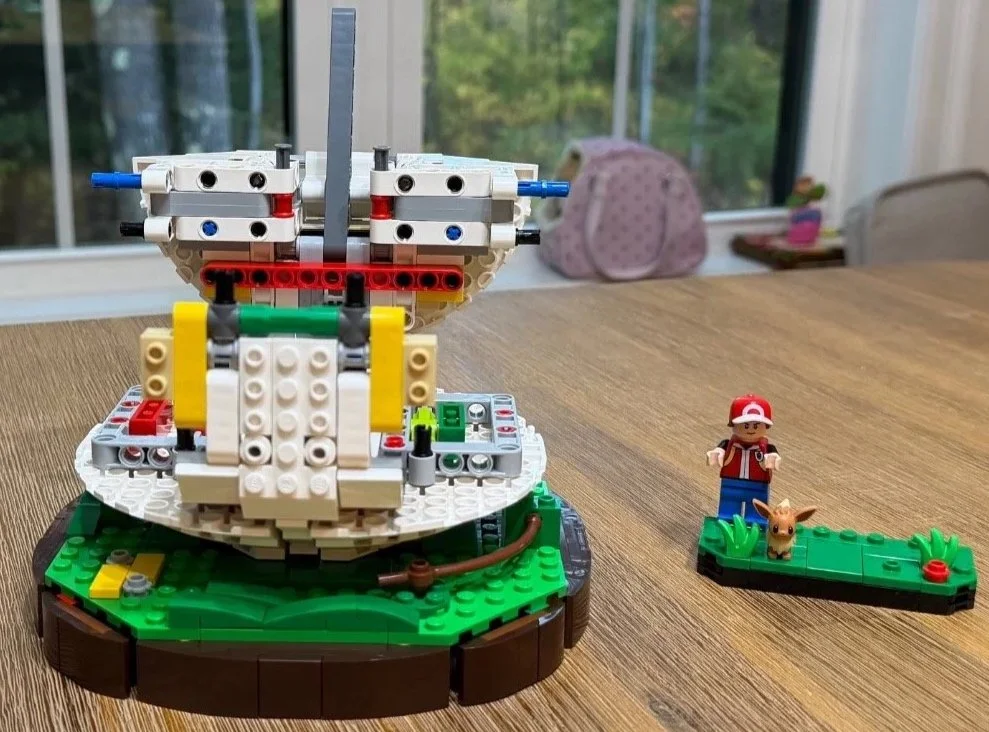
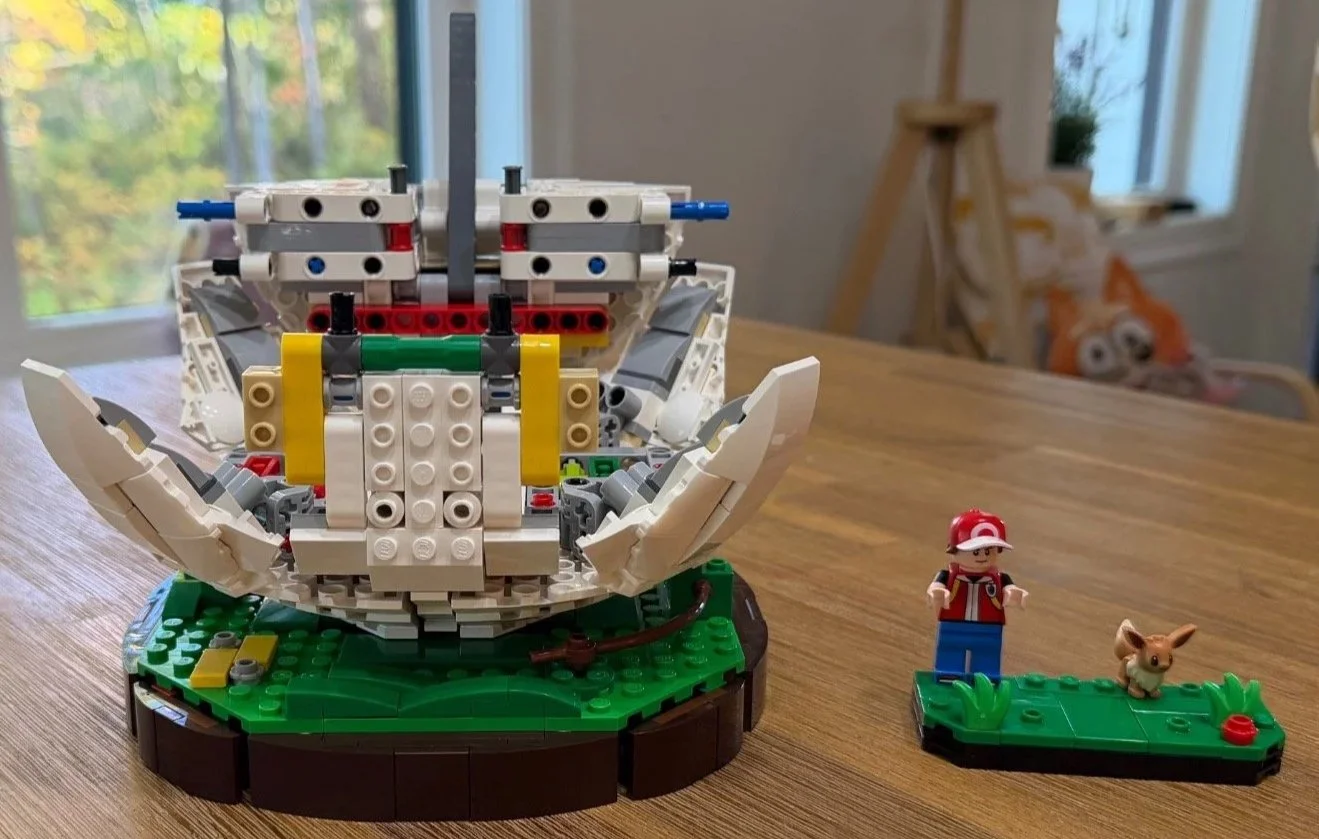
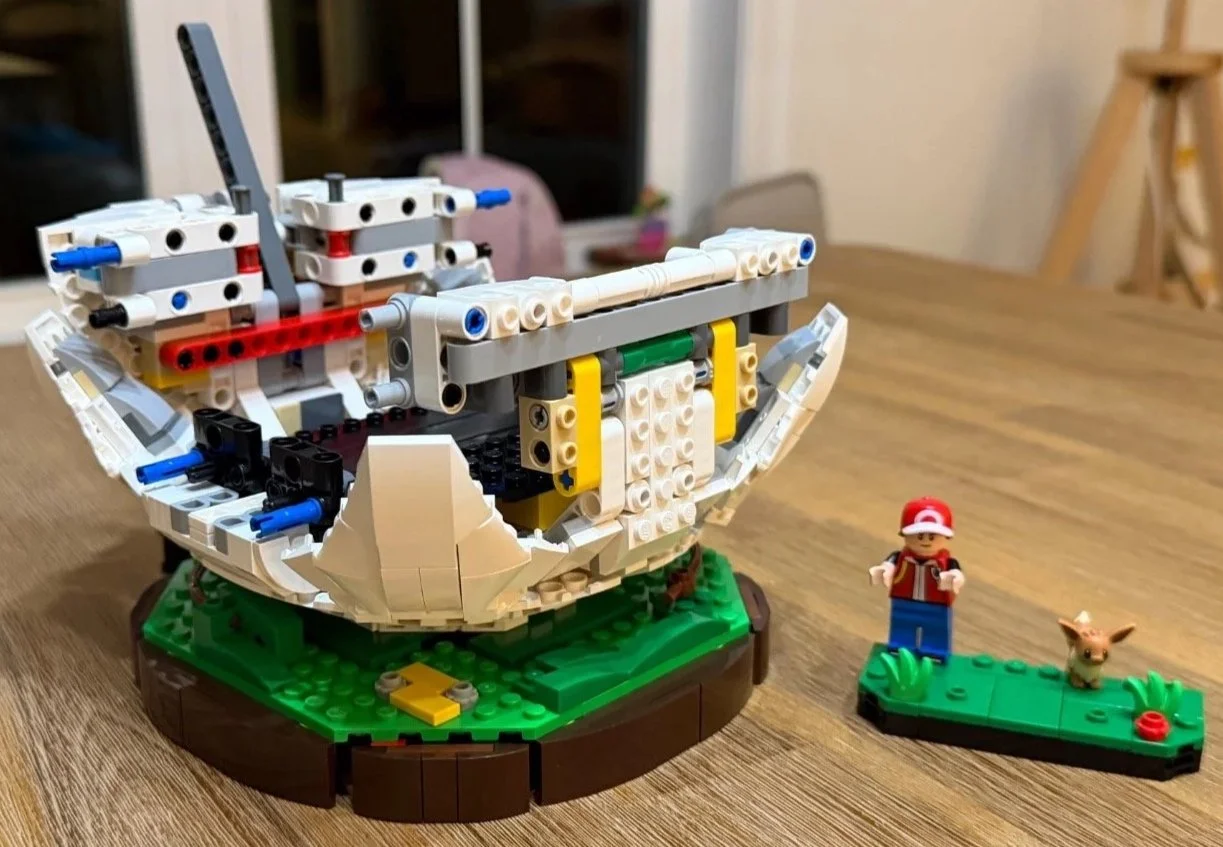
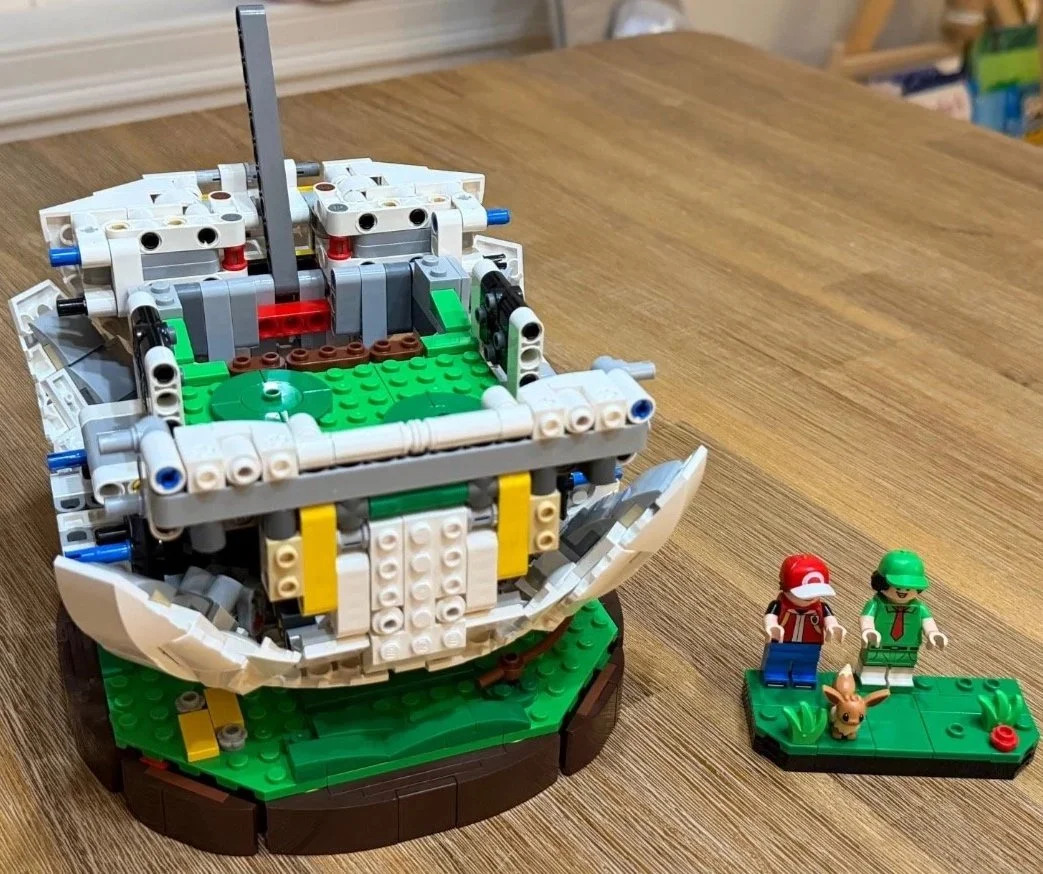
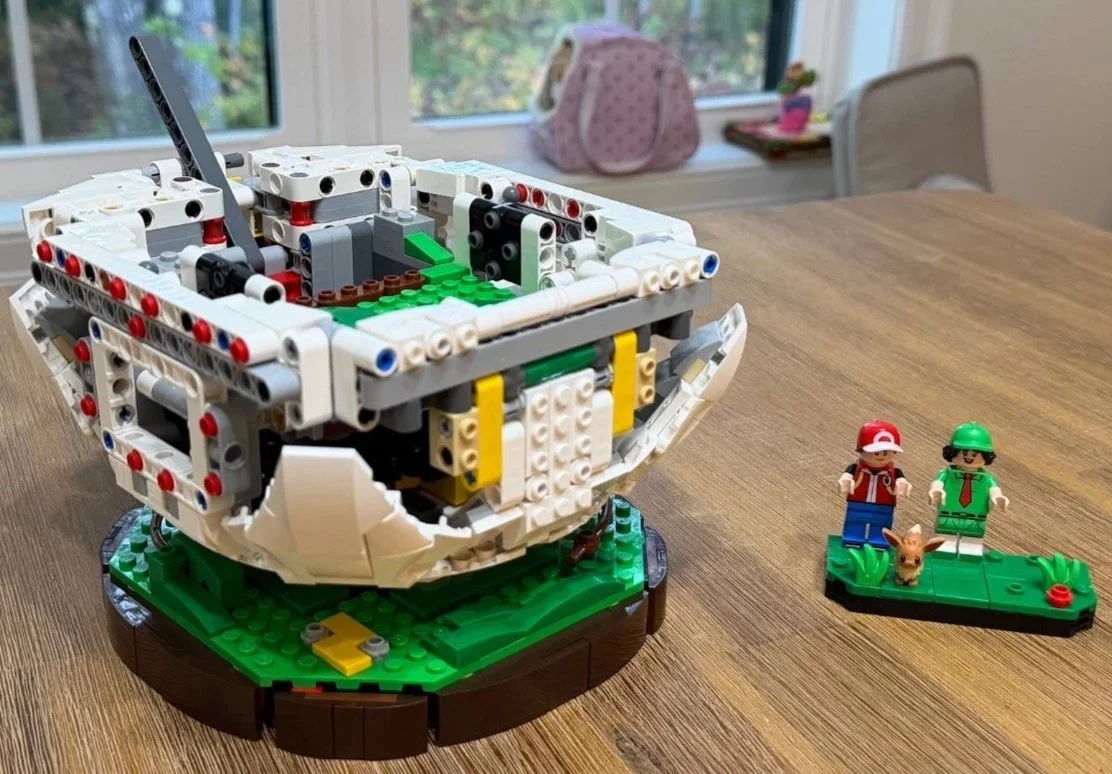
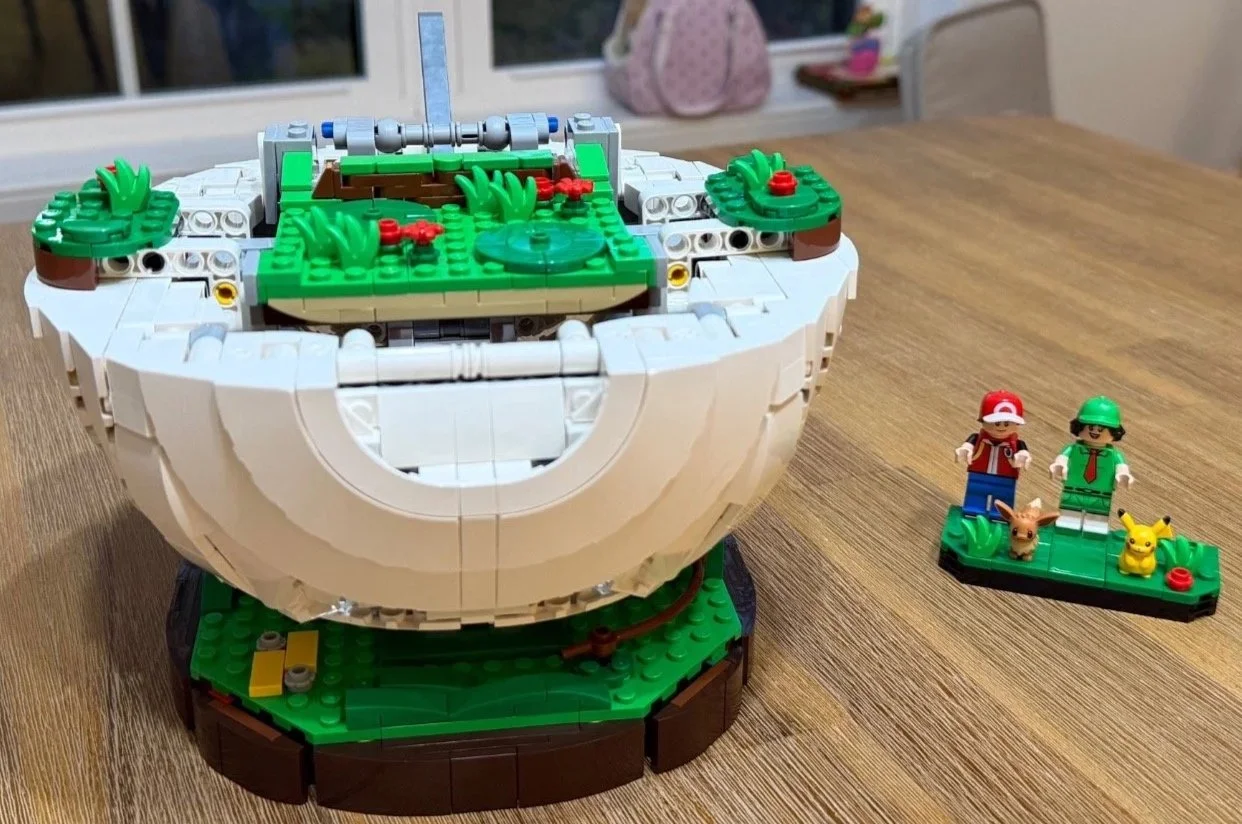
Photos 1–3: setup and base. Photos 4–12: lower frame, shell and battle arena. Photos 13–17: opening arm, laboratory and first test. Photos 18–21: upper shell and late open view; photo 20 is the shared Bags 17/18 reference. Photo 22: character lineup. Photos 23–26: finished closed, open front, rear and open side views.
See the Poké Ball Open and Close
Watch the Poké Ball open to reveal the laboratory and battle scene, then close again. This clip has no sound.
This short silent clip shows the feature I enjoyed most: the shell opens, the battle scene rises into view, and the model closes again. The finished-model photos let you look more closely at the laboratory and characters.
I could leave the figures in place while opening and closing the ball without a problem. It is an impressive bit of movement, and the biggest surprise of the finished build.
Details Worth Looking For
Oak's Laboratory and the First Partner Choice
The instruction booklet connects the laboratory to Pokémon FireRed and LeafGreen, down to the order of the books on the shelf, the computer screen and the windows. Those are worth a closer look when the ball is open. The two printed Pokédex tiles and three small molded Poké Balls on Oak's counter bring the room to life, with the Poké Balls providing that familiar reminder of choosing a first partner.
The Trainer Battle
The lower scene continues the journey beyond Oak's laboratory. Red faces a Picnicker Trainer, whose green outfit and hat echo the game artwork shown in the booklet. Eevee and Pikachu complete the scene.
The Pop-Up Book Inspiration
The booklet explains that pop-up books helped inspire the transformation. That is a lovely way to understand the finished model: opening the familiar shell unfolds two little scenes from a Trainer's journey. I found the movement impressively smooth when I first tested it in Bag 14, and it remains the feature I most enjoyed.
A Poké Ball That Has Just Landed
LEGO describes the grassy stand as making the Poké Ball look as though it has been thrown to the ground. That gives the leaves a purpose beyond decoration. Placing them was repetitive work for me, but I was pleasantly surprised by how much they improved the finished display.
Hidden Colours Inside the Frame
Notice the coloured sections before the shell covers them. LEGO explains that they help builders orient the inner frame correctly. I enjoyed those flashes of colour, but the instructions do not confirm that they represent particular starter Pokémon or game titles.
Display and Handling
The finished model is immediately recognizable when closed. Opening it adds a completely different view, with the laboratory above the battle scene. I originally thought the leaves might be unnecessary, but they improved the display once they were attached.
The model felt very secure and stable to me thanks to its Technic structure. I tested the opening feature with the characters in place. I did not record a transport, shipping, restoration or disassembly test.
A side view shows how the interior display and opening structure fit together.
What Should a Builder Pay Attention To?
The main challenge is lining up assemblies with several Technic connections, especially where the connectors differ in length or type. Before pressing a section home, check its orientation and where each connection will meet. The lower shell in Bag 4 is the clearest example.
Bag 9 needs a different kind of care: small details can come off while the panels are fitted, and a dropped tile can be awkward to retrieve from inside the shell. The repetitive leaf placement at the end also benefits from steady hands.
My Verdict
My overall set rating is 9.3/10. The smooth opening mechanism is the highlight, and the secure structure makes the earlier Technic work feel justified. Eevee, Pikachu, the Trainer minifigures and the small Poké Balls add the character I wanted from a Pokémon display set.
There are frustrations along the way. Several lower-shell connections are demanding, loose details need care, and the leaves were a repetitive chore. The reviewed bag averages are 4.1/10 difficulty, 5.0/10 repetition and 5.2/10 dexterity. They describe the practical work without replacing my overall verdict.
I would recommend this particularly to Pokémon fans who enjoy a display model with a working feature, and to builders who like Technic construction. It has LEGO's 18+ guidance. In my view, a younger fan would benefit from adult help with the more demanding connections.
For another take on the Trainer side of the theme, read my Up-Scaled Red Minifigure 40868 review. You can also compare it with my Rayquaza 72168 review, or browse all build reviews.
Need Help With Your LEGO Set?
Have a LEGO set waiting to be built, a model that needs rebuilding, or pieces that have become mixed together? Send The Bricksmith a few photos, the set number if you know it, and what you would like the finished result to be.
I handle assembly, rebuilding, sorting and re-bagging projects personally. A free photo assessment helps me explain the practical next step and whether the project is a good fit.