
I liked the mechanism inside this X-wing more than I liked the finished set. That probably tells you where this review is headed.
Luke’s Red Five X-Wing 75423 has a clever moving carrier for the SMART Brick, a few satisfying moments in the fuselage, and a finished ship that felt sturdy in my hands. But the supporting builds did little for me, the finished appearance was lackluster, and the SMART Play sounds left me underwhelmed.
I built the eight bags on October 26, 2026, using LEGO Builder. My recorded bag times add up to 1 hour, 11 minutes, 4 seconds. There are useful ideas here, especially in Bag 5, but my overall rating is 3.8/10.
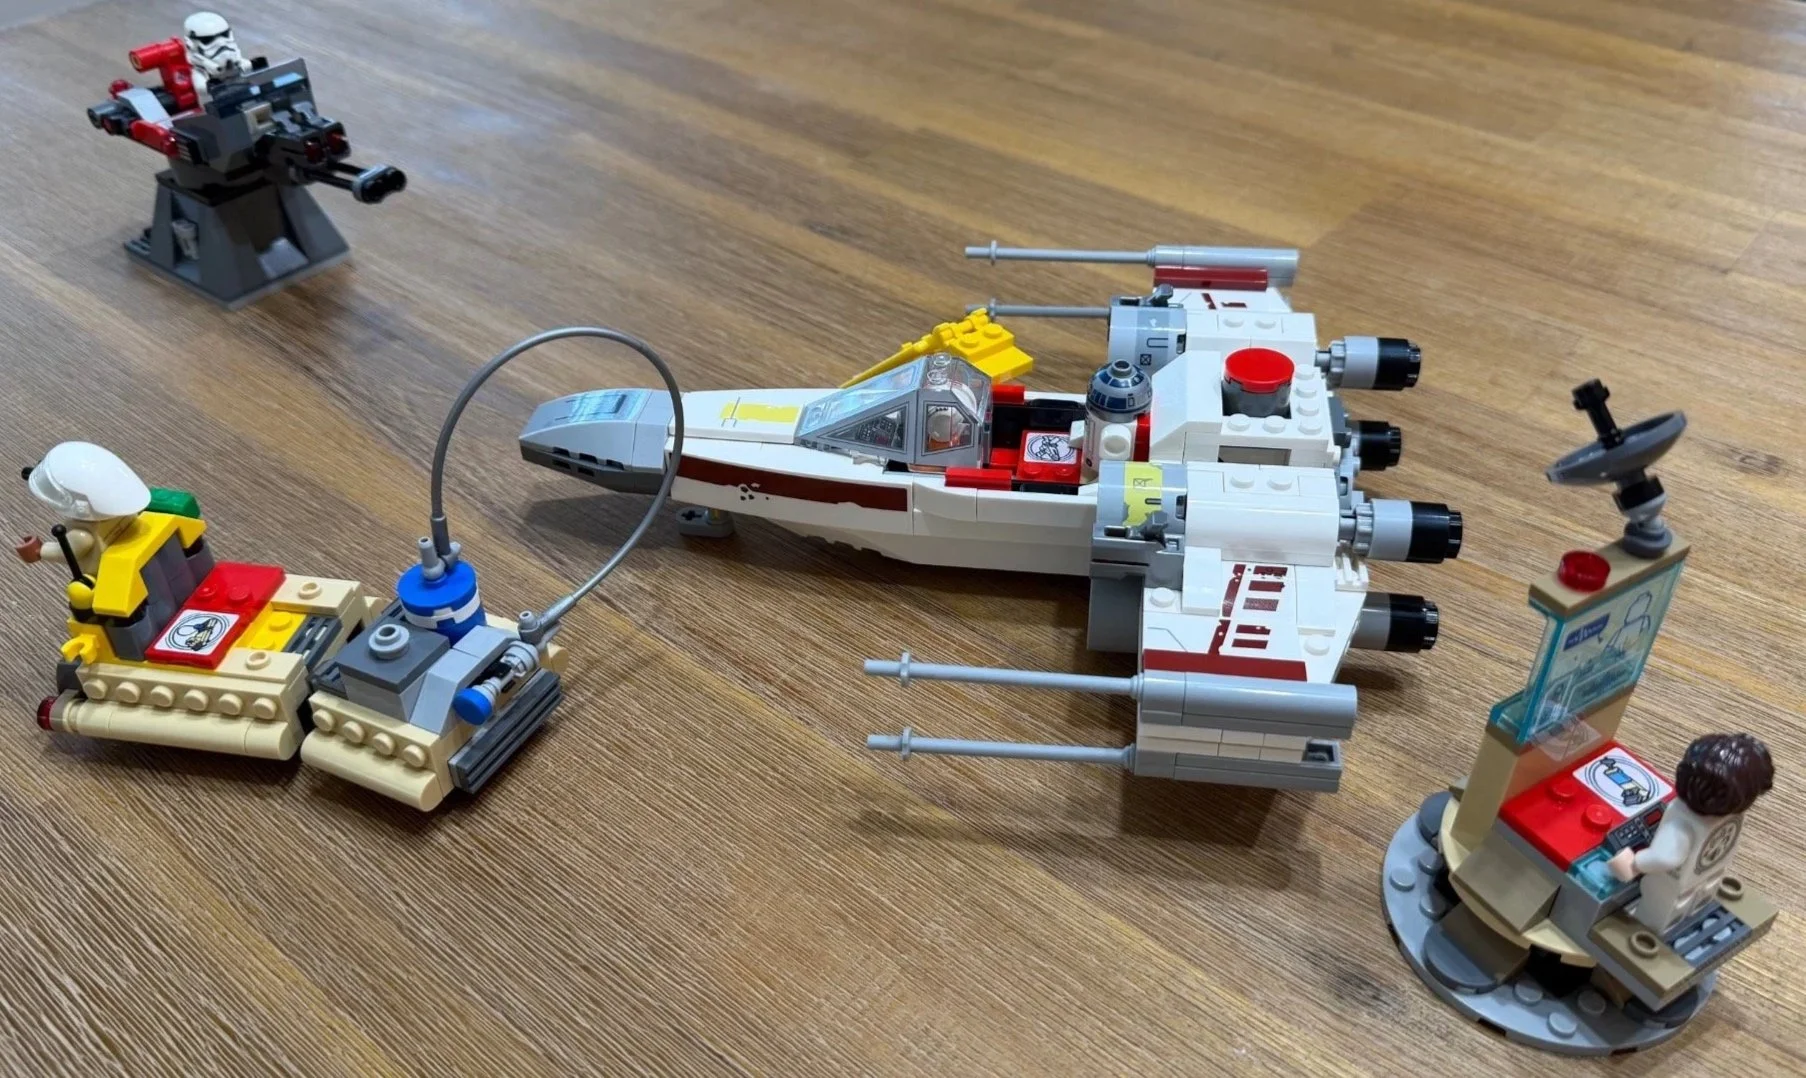
The completed set: Red Five, the fuel transporter, Imperial turret and command center.
At a Glance
Set: LEGO Star Wars SMART Play: Luke’s Red Five X-Wing, 75423
Pieces: 581
Numbered bags: 8
LEGO age recommendation: 6+
Recorded bag time: 1:11:04, with timing inclusions and exclusions unrecorded
Difficulty bag average: 2.5/10
Repetition bag average: 3.9/10
Dexterity / connection-demand bag average: 3.4/10
My overall set rating: 3.8/10
Stickers applied: 11, reconciled across all eight bag entries
Instructions used: LEGO Builder; 429 app steps recorded in my notes
SMART Play components: One SMART Brick and charger, two SMART Minifigures, and five SMART Tags
Affiliate disclosure: I may earn a commission if you purchase through the LEGO.com links in this review, at no additional cost to you.
View Luke’s Red Five X-Wing 75423 on LEGO.com
Build Time and Ratings
The 1:11:04 figure is the sum of my eight bag timers. My timing notes do not specify whether photos, notes, breaks, sorting, setup or corrections were included. Treat it as recorded bag time rather than a measured hands-only build time or wall-clock session. No separate overall-timer reading was supplied for comparison.
The ratings below are instruction-based editorial estimates informed by my build notes, added after the build because I did not assign individual bag scores. Each bag contributes equally to the three bag averages. Difficulty covers understanding, orientation and execution; repetition covers repeated placements and sub-builds; dexterity covers precision, access and connection demands. Those estimates are separate from my personal 3.8/10 overall set rating. I did not assign an instruction-complexity or separate overall difficulty/dexterity score.
LEGO Builder’s 429 recorded steps are an app count. The paper booklets restart their numbering and include setup and play panels, so I have kept their sequences separate rather than treating the app count as a paper-booklet total.
The Build, Bag by Bag
Bag 1: A Rebel crew member and a small transporter
Time: 7:36 · Difficulty: 1.5/10 · Repetition: 2.5/10 · Dexterity: 2.0/10 · Stickers: 0
LEGO Builder greeted me with a fun introductory video. I enjoyed it, and I can see the appeal for children. It then explained how to set up and charge the SMART Brick. Getting that started before the main build is a practical touch, although I did not measure how long charging took.
The physical build is a Rebel crew member and a small utility transporter. The first red SMART Tag goes onto its platform, establishing where the electronic brick will interact with the model. The little wheels and repeated side details keep the assembly simple, but this was one of my least enjoyable bags. It is a functional introduction rather than a particularly interesting build for me.
Bag 2: The fuel trailer joins the transporter
Time: 4:46 · Difficulty: 1.5/10 · Repetition: 2.5/10 · Dexterity: 3.0/10 · Stickers: 0
The trailer feels like a smaller companion to the transporter, with a blue fuel drum and a long hose. It is another quick, straightforward build, and it did not change my feelings about the opening stages.
The flexible silver hose with connector ends (6210590) deserves a little attention. Its end fittings are assembled before the hose is connected and looped into place. A younger builder may need help with that short section. That is an assembly tip from my notes, not a claim that the entire bag requires difficult connections.
After this bag, LEGO Builder demonstrates the repair, fueling and movement-related interactions. The hammer and fuel equipment give the small vehicle a purpose in the wider scene, even if the construction itself felt unremarkable to me.
Bag 3: Leia’s command center and the cockpit ladder
Time: 4:37 · Difficulty: 2.0/10 · Repetition: 2.0/10 · Dexterity: 2.5/10 · Stickers: 1
Leia’s little command center adds a circular base, upright display, dish and a separate yellow ladder for reaching the X-wing’s cockpit. It fits the Rebel-base setting on Yavin 4. The display takes the first sticker of the build.
This was another quick, simple stage. The SMART-related marking on the back of Leia’s figure stood out to me, and I thought it detracted from the appearance. That is a visual preference, but it matters when a character is part of the finished scene.
The app follows the build with a guide to Leia’s character reactions and the command-center interaction. For the sticker, I recommend using the included brick separator to help position it without having your fingers cover the edges.
Bag 4: Luke, R2-D2 and the start of Red Five
Time: 10:12 · Difficulty: 3.0/10 · Repetition: 3.0/10 · Dexterity: 4.5/10 · Stickers: 2
This is where the X-wing itself begins. Luke and R2-D2 come first, followed by the nose, cockpit area and the long central body. The large white fuselage base (6584640) is supplied outside the numbered bag and gives the smaller nose assembly a much larger structure to join.
R2-D2’s SMART Tag sits on his back. I found that awkward-looking, just as I did the SMART-related detail on Leia. The play system is noticeable in the appearance of both characters.
There were some tight, awkward assembly areas here. I could complete them with larger fingers, but access added a real handling challenge. Smaller fingers may fit into the spaces more easily, though that does not guarantee an easier build for every child. Take your time and support the model as you work.
Both stickers need their orientation checked before they touch the model, especially the one on the sloped nose piece. This is a good place to pause and compare the shape and direction shown in the instructions.
Bag 5: The clever bit inside the fuselage
Time: 12:09 · Difficulty: 4.0/10 · Repetition: 3.5/10 · Dexterity: 5.0/10 · Stickers: 2
Bag 5 was my favorite. The fuselage gains landing gear, rear details and more of its sides, but the interesting part is the separate carrier that holds the X-wing’s SMART Tag and supports the SMART Brick.
You build that carrier outside the ship, set it into the body, and add white pieces above it to keep it contained. It is meant to retain movement. It is not simply another plate to press firmly onto every stud beneath it. The instructions show the carrier being lowered into the body before the retaining pieces are added.
The red button at the back connects this moving arrangement to a physical action. I described it in my notes as the spring-loaded mechanism, and it was the cleverest part of the set for me. Later guidance connects the button action with the X-wing’s shooting sounds. Seeing the loose internal assembly become part of a purposeful mechanism was much more interesting than building the opening utility vehicles.
This was also the bag where temporary fragility became noticeable. While moving the model around to add side details, I repeatedly knocked some connections off. On my copy, that problem went away once those details were finished and the body became more stable. Until then, hold the stronger center rather than relying on an unfinished side panel as a grip.
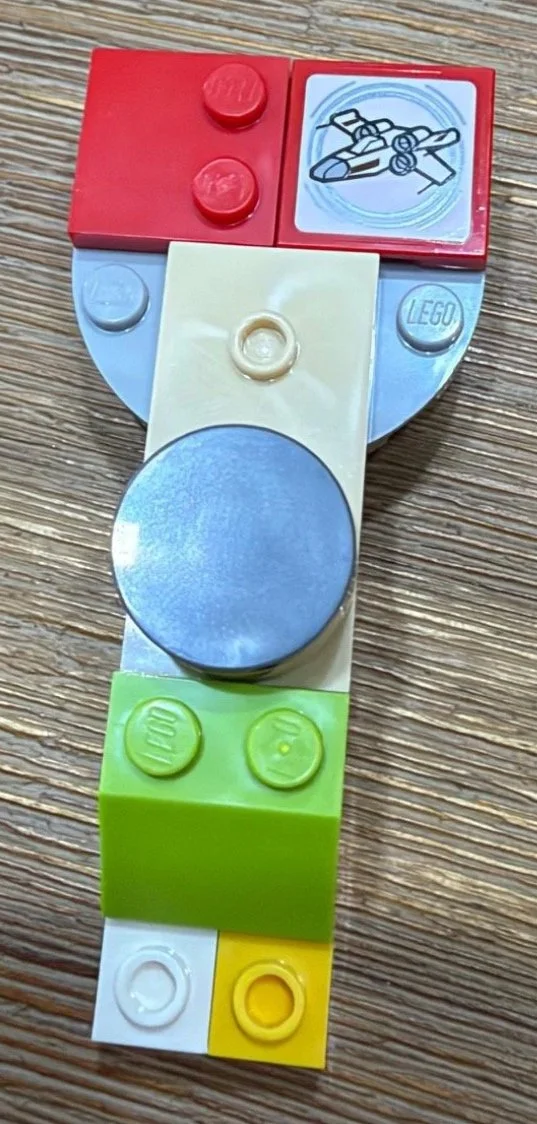
Bag 5 detail: the separate moving carrier before it is installed inside the X-wing.
Bag 6: The first two wings, on opposing sides
Time: 9:47 · Difficulty: 2.5/10 · Repetition: 6.0/10 · Dexterity: 3.5/10 · Stickers: 3
The first pair of wings goes onto opposing sides: top left and bottom right, using the orientation described in my build notes. On my copy, fitting the first wing left the model unbalanced enough to tip. Adding its opposite partner restored the balance, which made the sequence feel sensible.
The construction is straightforward, with familiar wing, engine and long cannon assemblies. If you have built an X-wing before, this section may not feel especially new. The repetition is real even though the placement and sticker direction still need attention.
My sticker tip is to attach the white 2 × 4 tile (4560178) to the wing first, then use the surrounding model as a reference for the decal’s direction. Check which sticker belongs on each wing before committing. The small connector and cannon work is concentrated in short sections rather than making the whole bag physically demanding.
Bag 7: The second pair completes the X-wing
Time: 10:48 · Difficulty: 2.5/10 · Repetition: 8.0/10 · Dexterity: 3.5/10 · Stickers: 3
This is close to a repeat of Bag 6. You build the remaining wings, engines and cannons, with changes to sticker choice and orientation. It is the most repetitive bag in the review because those assemblies are now familiar from the pair just completed.
The app then explains the X-wing’s SMART Play interactions, including flying, R2-D2, the cockpit and the rear button. That resolves the question I had while building the mechanism in Bag 5: the button is associated with the shooting-sound action. The guide also demonstrates refueling using the transporter’s hose beside the X-wing when the SMART Brick is installed in the ship.
Those are useful demonstrations of what the components are for. They should be kept separate from my own brief function test, which I describe below.
Bag 8: A turret after the main event
Time: 11:09 · Difficulty: 3.0/10 · Repetition: 3.5/10 · Dexterity: 3.5/10 · Stickers: 0
The last bag builds the Imperial turret and a stormtrooper. Outside the X-wing, this was the assembly I probably enjoyed most, even though I think the finished turret looks awkward. Its shaped base, rotating upper section and small mechanism provide more variety than the opening transporter builds.
The instructions show SMART Brick placement and a two-brick interaction between the turret and X-wing. The set supplies one SMART Brick, so having both models electronically active together calls for a second one. I did not record a two-brick test.
I would have preferred to build the turret before the X-wing. Finishing the main ship felt like the natural conclusion, and returning to a side assembly afterward made the build order feel less satisfying to me.
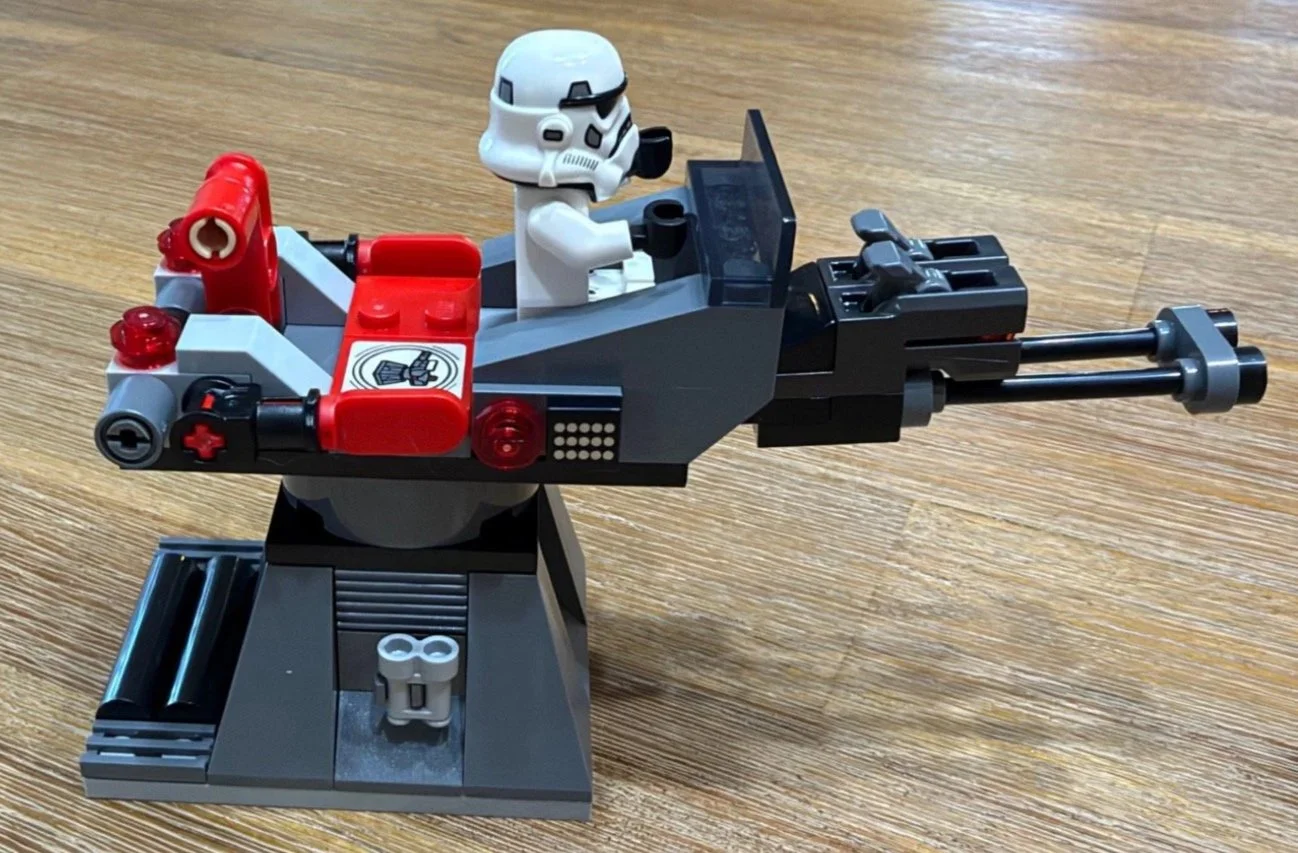
Bag 8: the finished Imperial turret and stormtrooper.
Build Progress
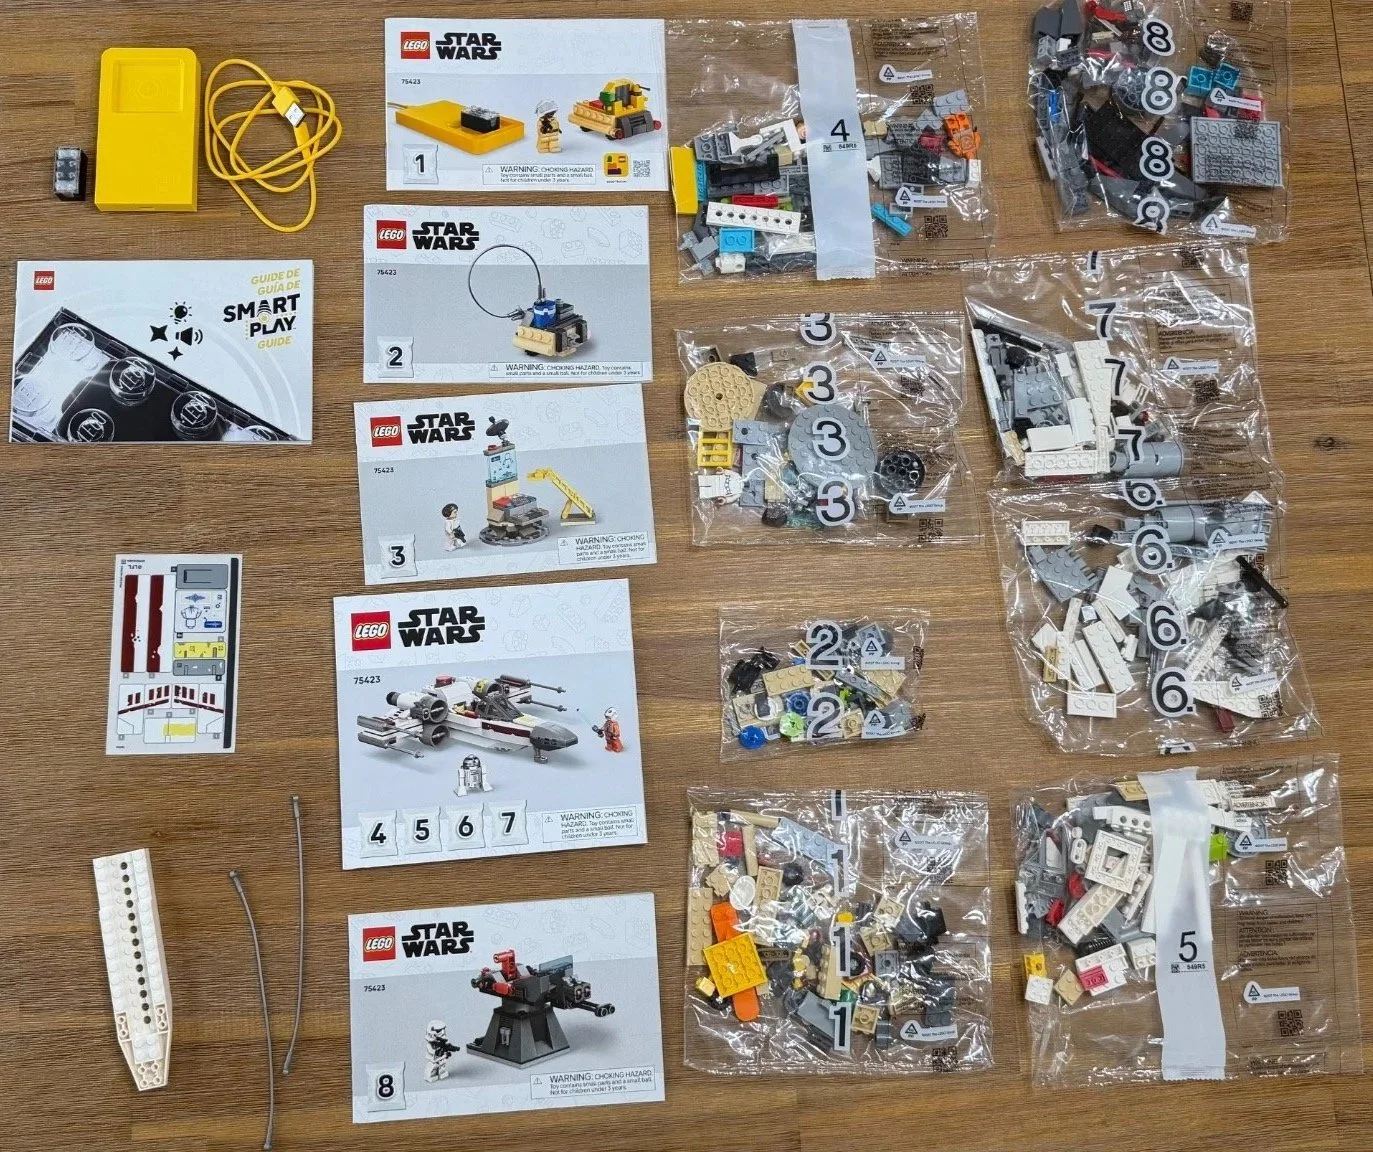
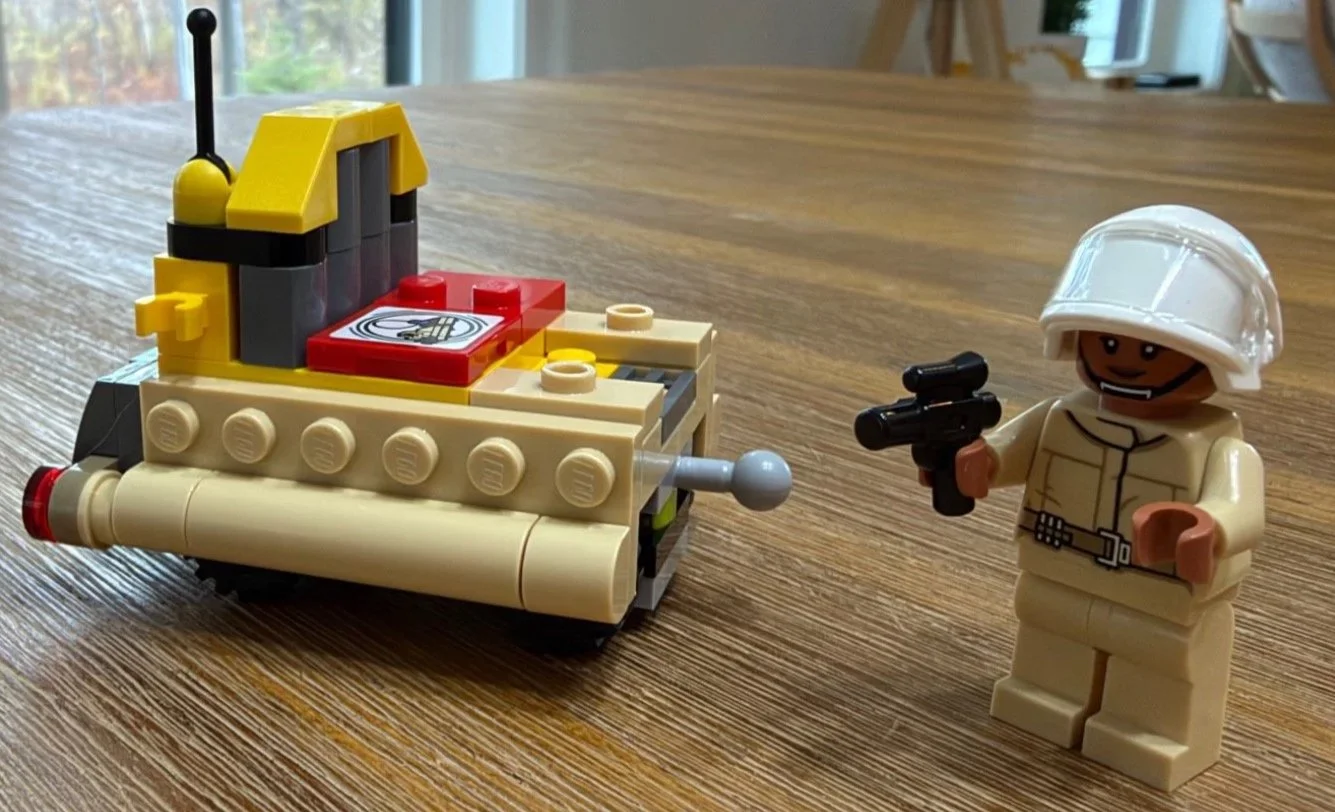
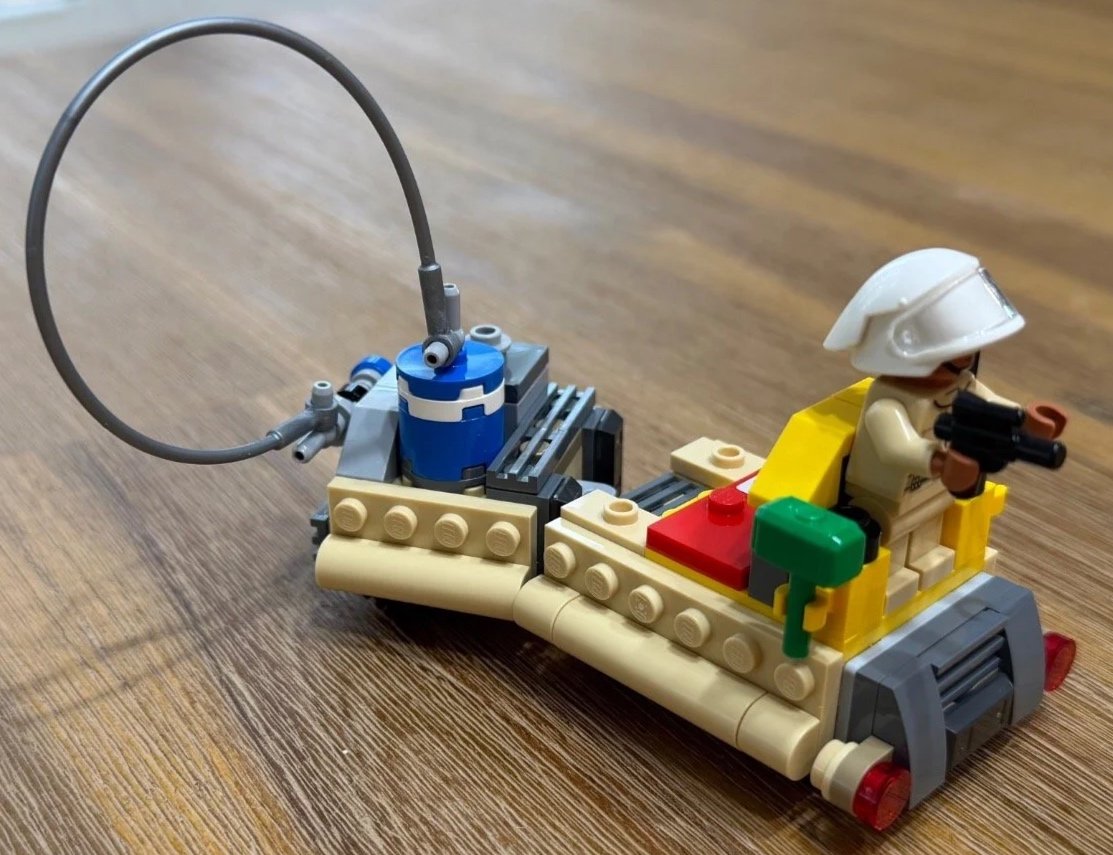
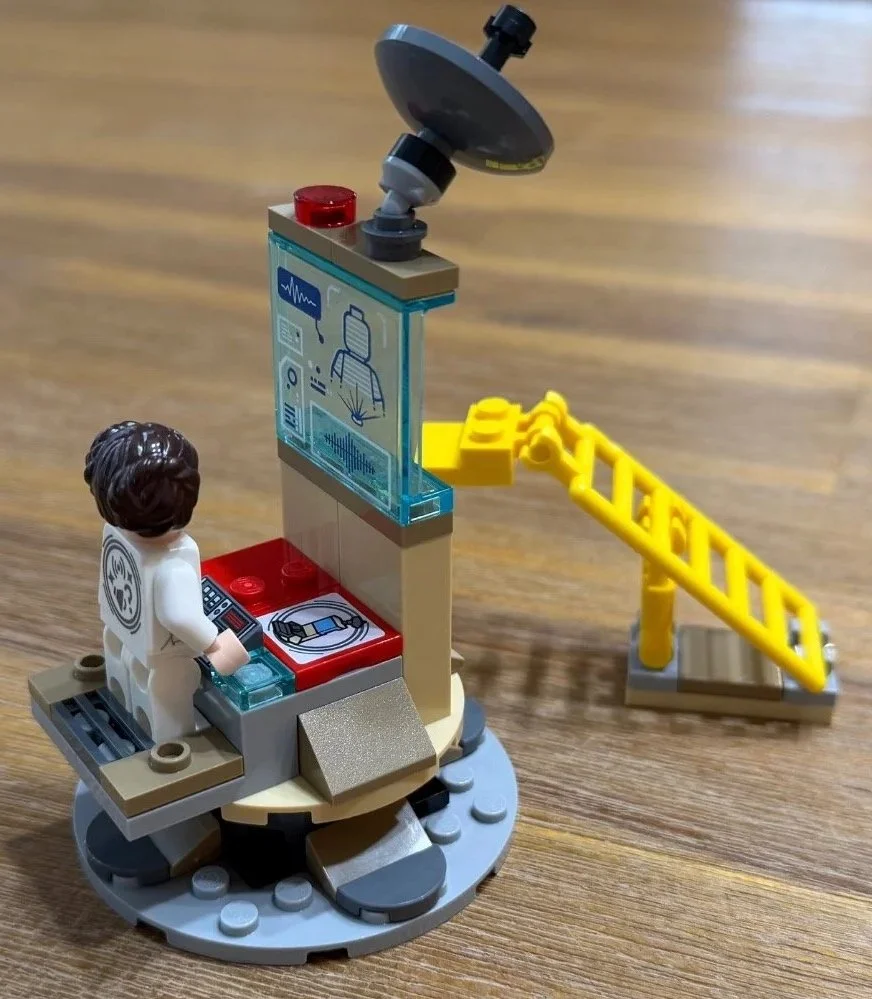
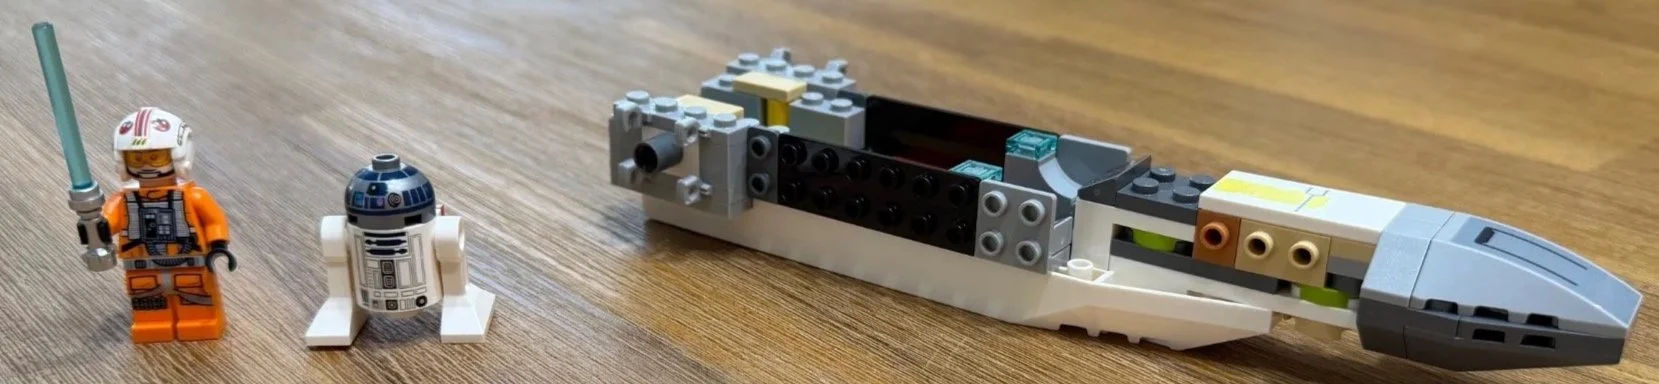
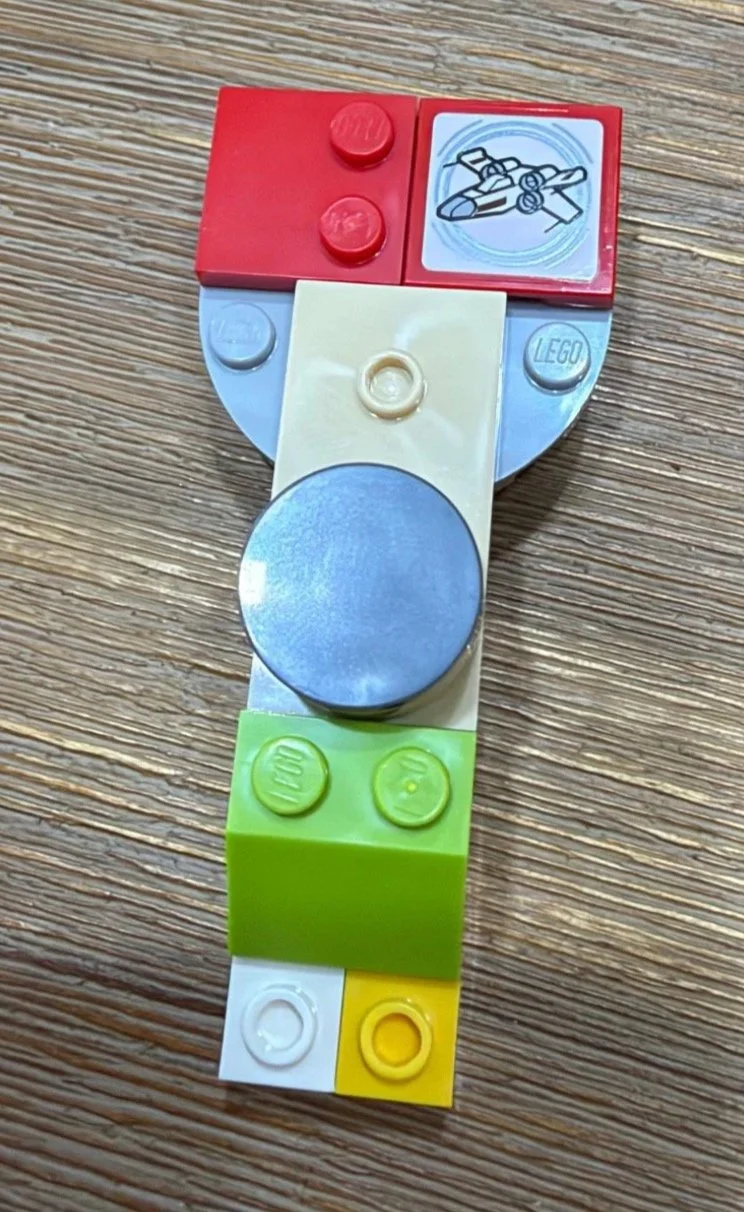
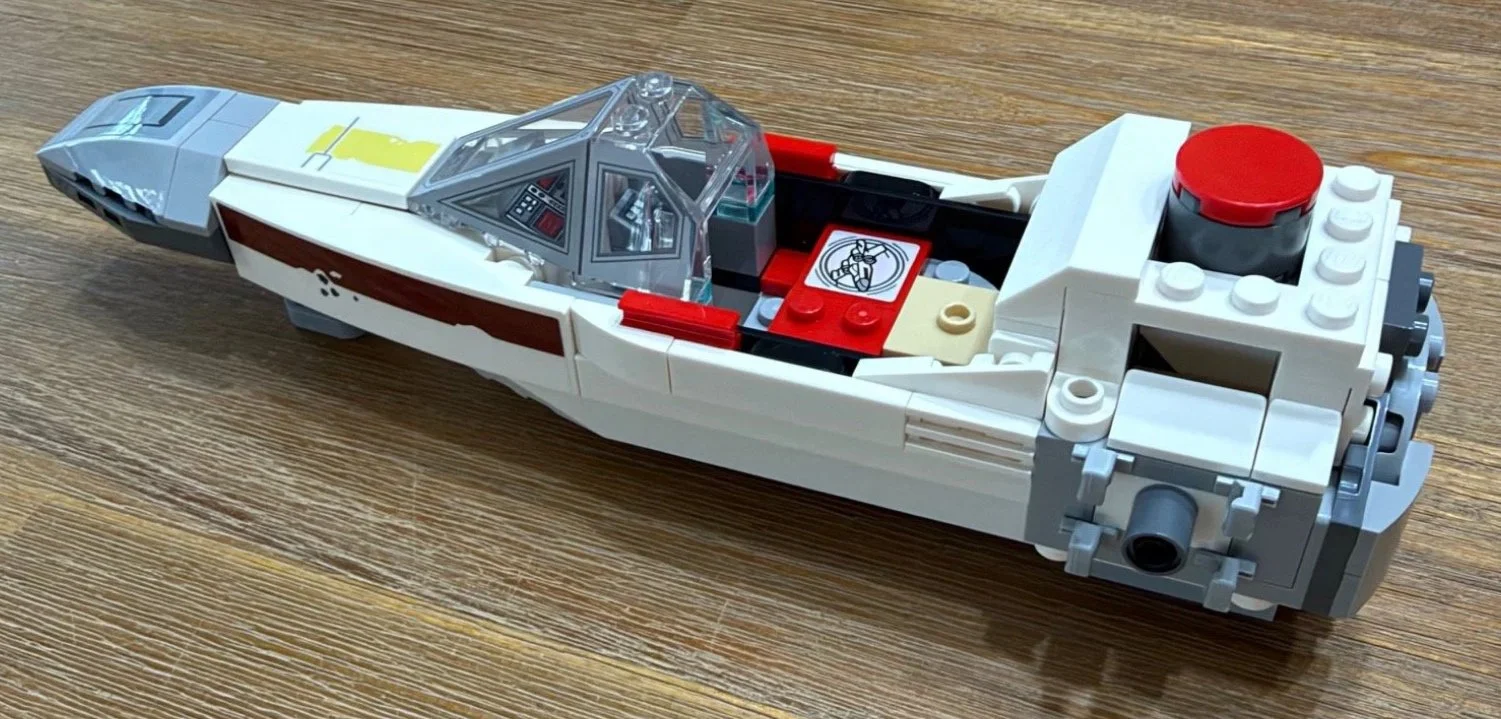
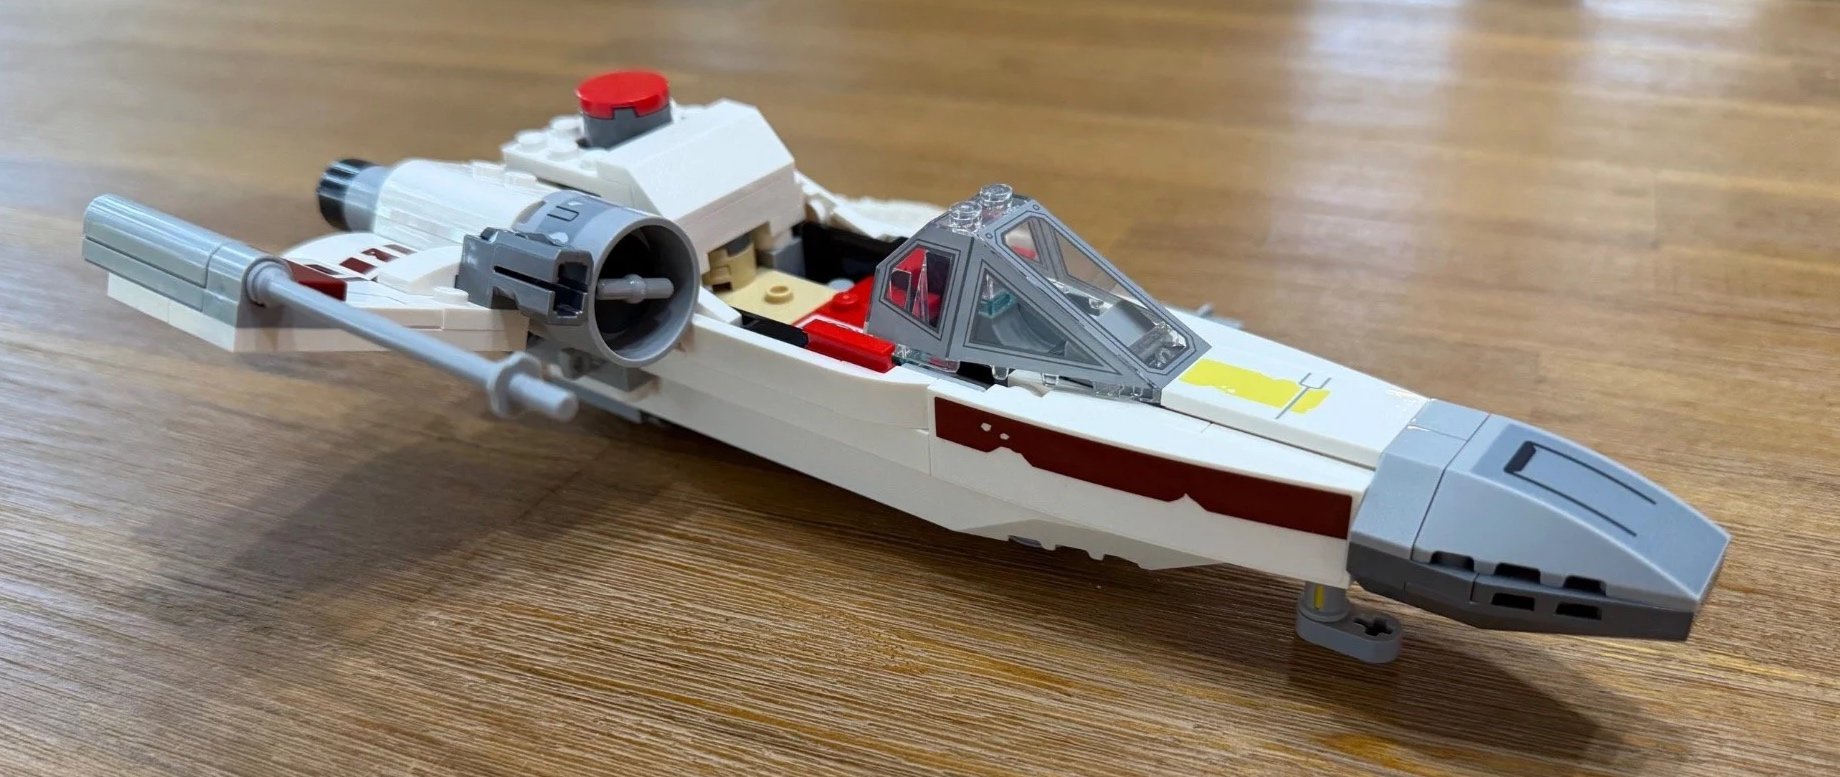
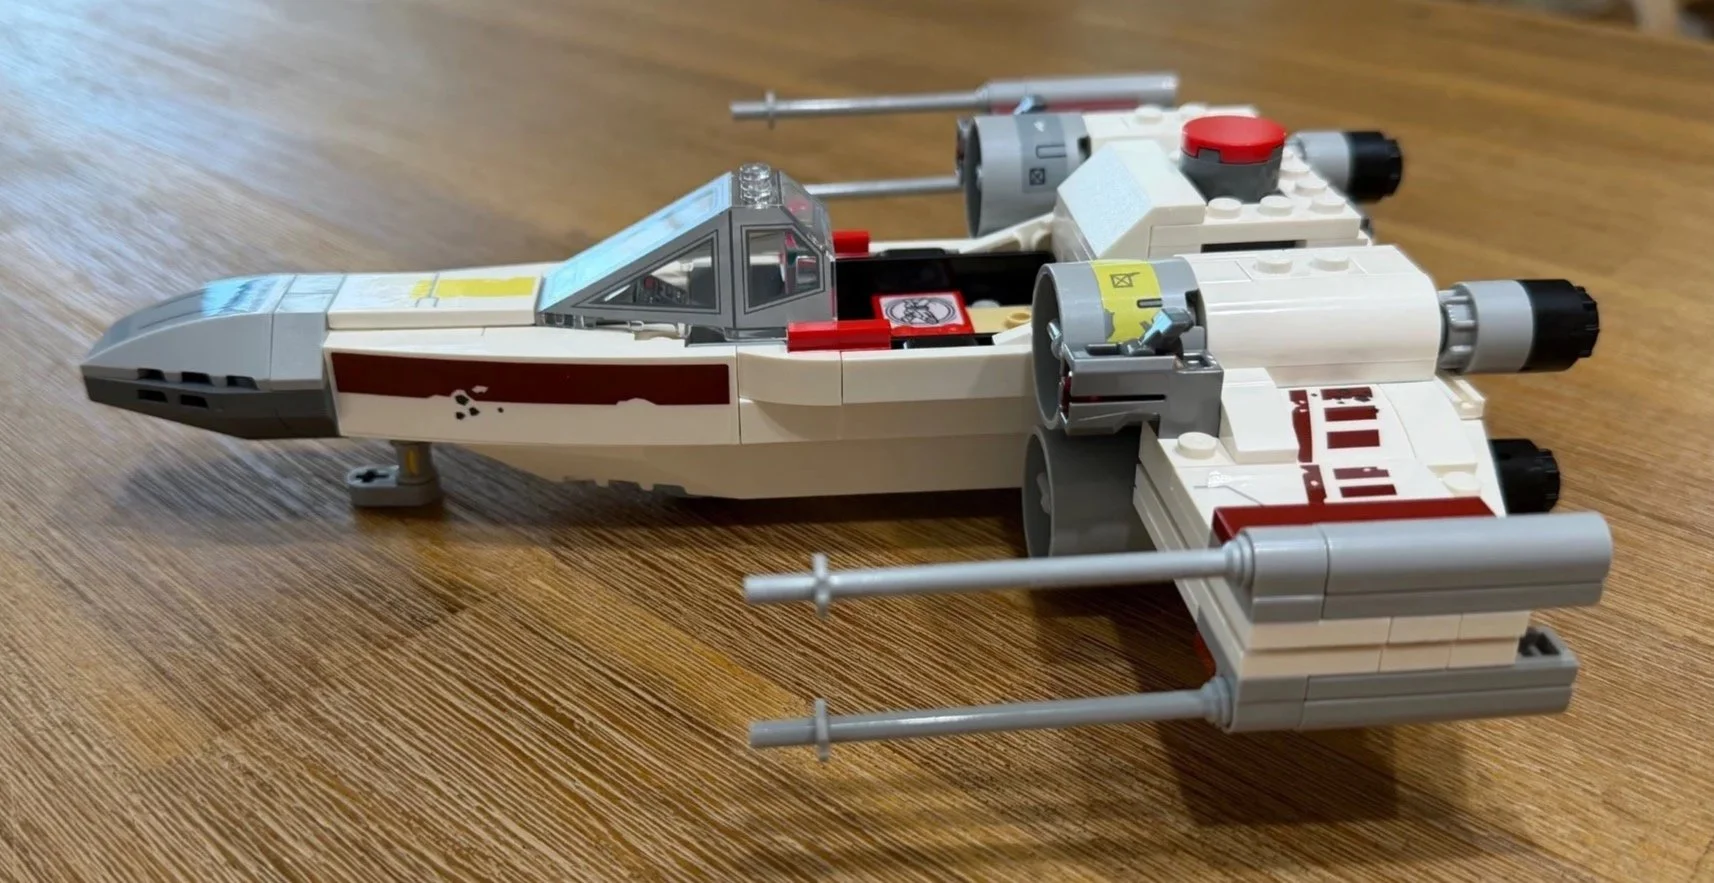
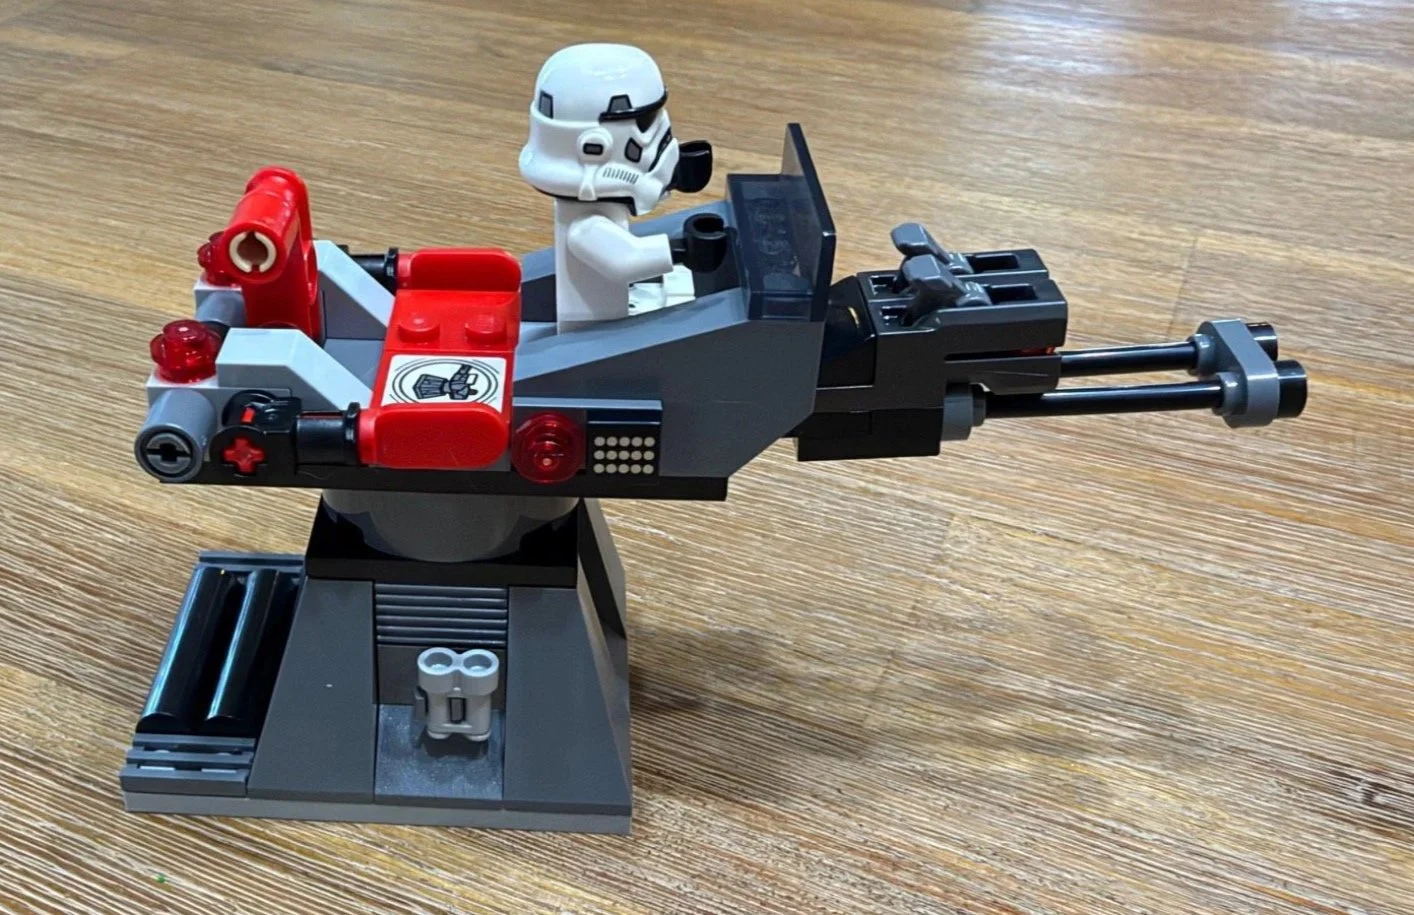
Follow the photos from the laid-out bags and booklets through the transporter, command center, fuselage, wings and turret to the finished scene. The portrait detail shows the moving carrier during Bag 5, beside the wider progress view from that stage.
Stage key: 1 setup; 2 transporter; 3 trailer; 4 command center; 5 early fuselage; 6 carrier detail; 7 completed central body; 8 first wing pair; 9 completed X-wing; 10 turret; 11 full scene.
Details Worth Looking For
The carrier is the highlight
The SMART Brick support is the most interesting construction idea here. Building a loose assembly and then keeping it captive inside the fuselage gives the rear button something to act on. It made me curious during the build, and the later shooting-sound explanation gave that curiosity a payoff. It is a small mechanism, but it was the part I would point out first.
The SMART details affect the look
The red Tags make the play locations easy to spot. I found the additions on R2-D2 and Leia less appealing visually, and the supporting builds did not make a particularly strong finished display for me. A feature can be useful to the play system and still detract from the look I prefer.
Sticker direction matters more than the total suggests
Eleven stickers is a manageable count, but there are several opportunities to place the wrong one or turn it the wrong way. The nose and mirrored wing sections deserve a check before application. A brick separator can help with positioning, and my wing-tile tip provides a useful orientation reference.
Stability and SMART Play
The finished model felt stable during my handling and seemed built with active play in mind. The temporary side-detail problem in Bag 5 did not persist once that section was complete. My SMART Brick platforms held their pieces steadily, and recognition was quick in my brief test. These are observations from my copy, not a drop test or a durability guarantee.
The electronic experience was less convincing for me. I tested SMART Play for a bit and found the sounds odd and underwhelming. I enjoyed the sounds in the Pokémon SMART Play sets I tried earlier this year more than these. That is my preference, and a child interested in Star Wars may respond differently, but it was a significant reason this set did not land for me.
I appreciated the app’s demonstrations, particularly when they explained what the rear button was for. The functions still did not make the overall finished experience feel especially rewarding to me.
My Verdict: 3.8/10
Bag 5 and the moving SMART Brick carrier were the highlights. I also enjoyed building the turret, despite finding its appearance awkward. The completed X-wing felt sturdy enough to handle, and the SMART components were recognized quickly when I tried them.
But Bags 1 and 2 were my least enjoyable stages, the wings brought familiar repetition, and the finished appearance felt lackluster. The sound features did not lift the set enough to compensate. I would not choose to build it again.
I can see this being a better fit for a Star Wars fan or a child who wants an interactive play scene. Builders who find small or confined connections difficult may need help around the nose and internal body, the hose fittings, and the longer wing details. For my own enjoyment and finished-model verdict, it remains 3.8/10.
More From My Workbench
For another Star Wars build, read my Darth Vader’s Lightsaber 40897 review. For a different mechanism-focused build, see my Donkey Kong Arcade 72051 review. You can browse the full collection in Build Guides.
Need a Hand With Your LEGO Set?
If you have a new set waiting to be built, a model that needs rebuilding, or pieces that need organizing, I can help you work out a practical next step. Explore my LEGO services, or send a few photos and tell me what you would like to achieve.