

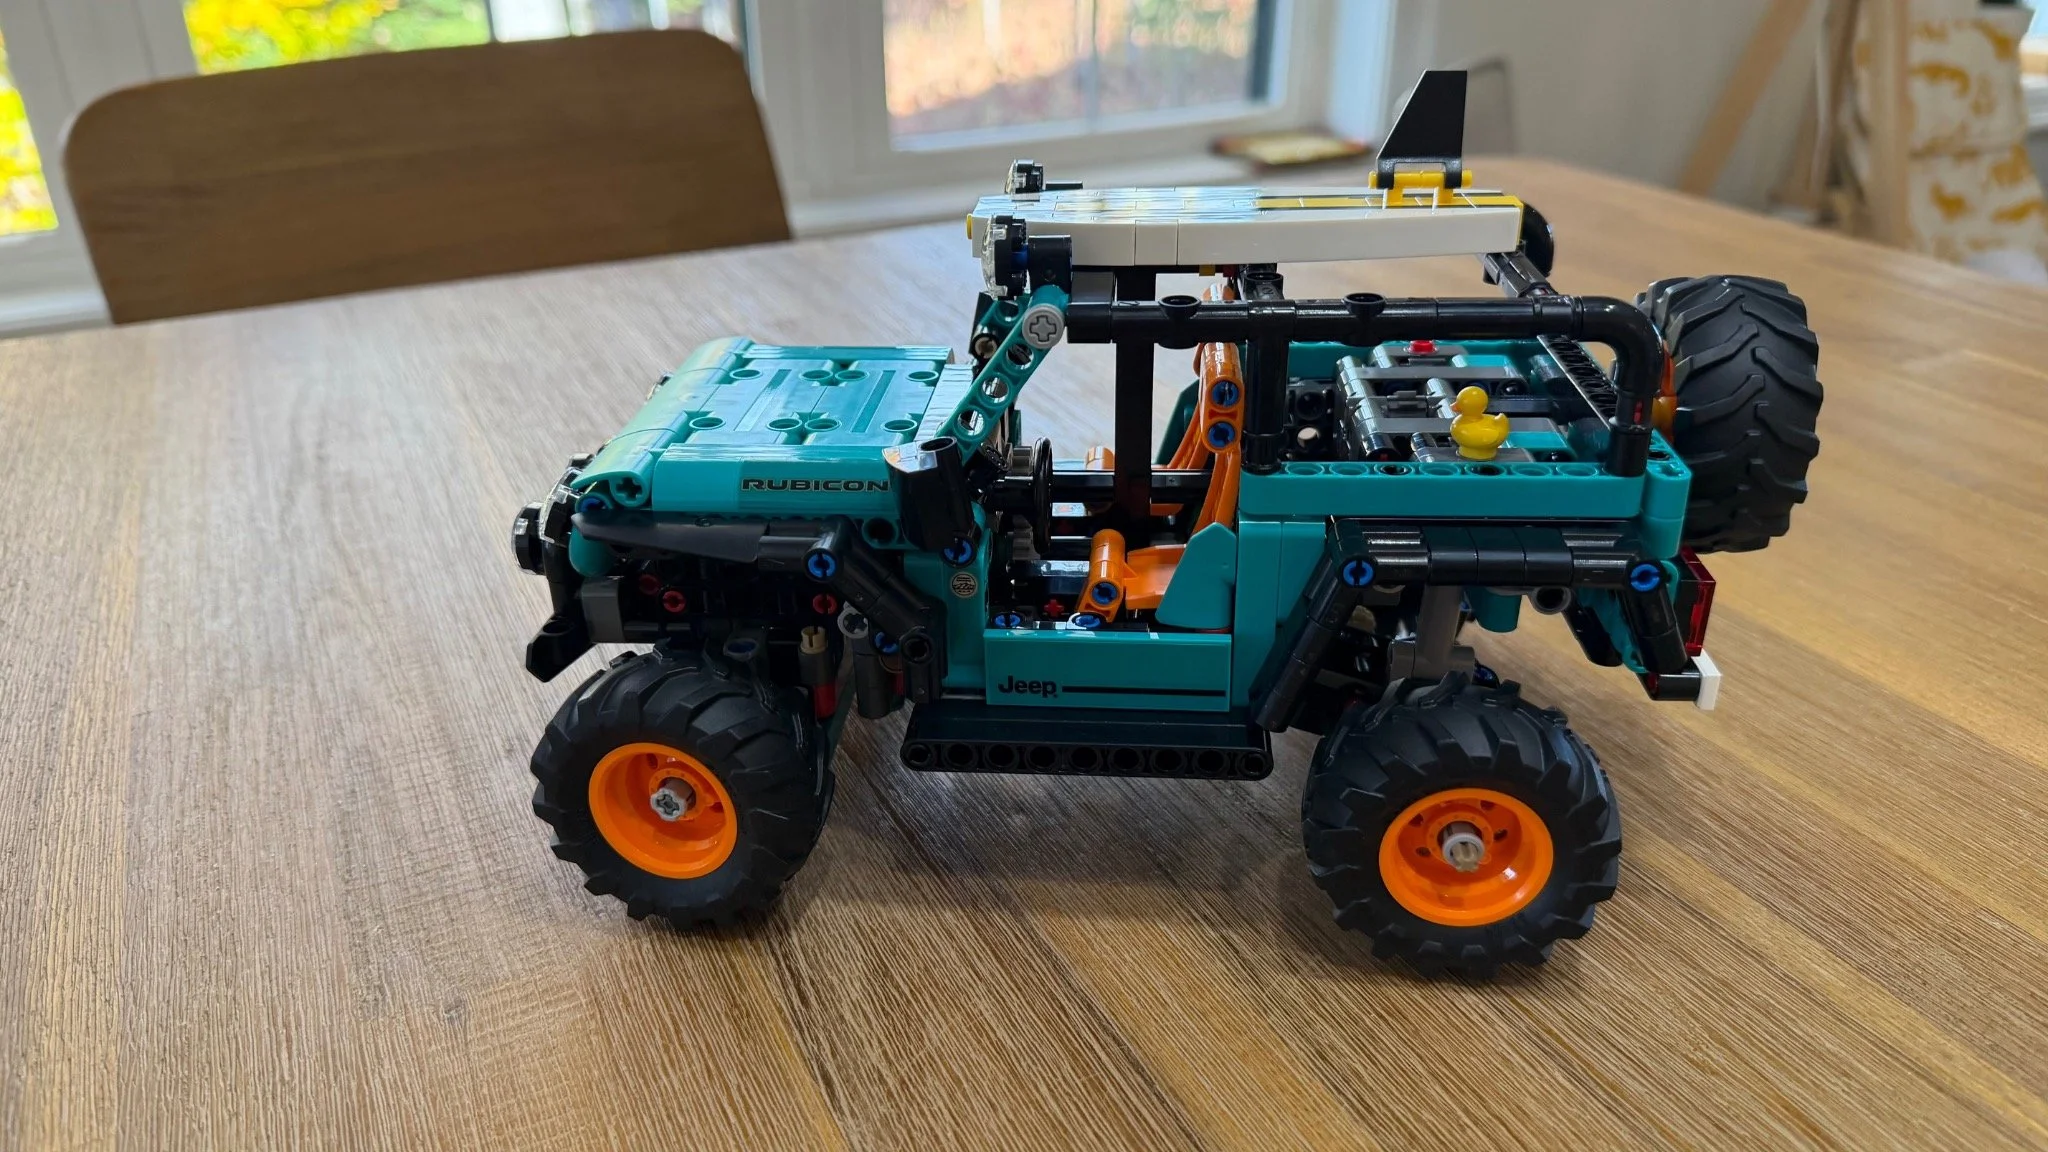
The finished Rubicon in profile, with teal bodywork, orange wheels and the surfboard above the cabin.
The suspension is the reason I will remember this Jeep. Getting it built is the reason I would not rush to do it again.
LEGO Technic's Jeep Wrangler Rubicon 42227 looks right to me when it is finished. The proportions work, the engine is a clever little assembly, and the suspension gives the model the flexibility I want from an off-road vehicle. The first two bags, though, were a frustrating stretch of Technic connections and orientation checks.
I built it on October 28, 2026. By the end, I appreciated the finished Rubicon more than the process of assembling it. Here is where it worked for me, and where it asked for patience.
At a Glance
Set: LEGO Technic Jeep Wrangler Rubicon SUV, 42227
Pieces: 723
LEGO age recommendation: 10+
Numbered bags: 5
Total recorded bag time: 2 hours, 6 minutes, 18 seconds
Bag-average difficulty: 4.4/10
Bag-average repetition: 5.2/10
Bag-average dexterity / connection demand: 5.4/10
My overall set rating: 5.7/10
Stickers: 12, reconciled across all five bags
Instructions used: LEGO Builder, with 470 steps recorded in my notes; the booklet has 189 main numbered steps
Official model size: over 15 cm high, 26 cm long and 14 cm wide
Affiliate disclosure: I may earn a commission if you purchase through the LEGO.com links in this review, at no additional cost to you.
View Jeep Wrangler Rubicon SUV 42227 on LEGO.com
Build Time and Ratings
Adding my five bag timers gives 2:06:18. My timing-method fields were not completed, so I cannot say exactly how photos, notes, breaks, setup or corrections were handled. Treat this as the sum of my recorded bag sessions. I did not record a separate overall reading to compare with it.
The bag ratings below are editorial estimates based on an instruction review alongside my build notes. I did not assign numerical scores to the individual bags during this build. Each bag has equal weight in the three published bag averages.
Difficulty covers understanding, orientation and execution. Repetition covers similar placements and repeated sub-builds, even when they are enjoyable. Dexterity includes precision, awkward access and keeping an assembly supported while making connections. These averages describe the bags; my 5.7/10 overall rating describes how I felt about the set as a whole.
The Build, Bag by Bag
Bag 1: The chassis asks for patience immediately
Time: 17:46 · Difficulty: 7.0/10 · Repetition: 4.0/10 · Dexterity: 8.0/10 · Stickers: 0
The Jeep begins around a black Technic 7 × 11 open frame (6265643), supplied outside the numbered bag. This stage builds the initial chassis and axle structures, and it quickly reminded me why Technic does not suit every builder.
One particularly difficult connection involved blue 3L Technic friction pins (6299413) sitting at different exposed heights. I was trying to bring four connection points together at once. The matching beam placement appears at booklet step 12 on page 12. The next awkward section involved threading an axle into the growing structure while lining it up with a gear, shown at booklet step 14 on page 13.
The differential is another place to slow down. At booklet step 26 on page 20, small gears sit inside the housing while yellow 3L cross axles (6130007) secure the assembly. Orientation matters, and I had to be careful that the loose pieces did not fall out while I slid the axle into place.
These were concentrated trouble spots rather than a claim that every connection was equally difficult. They still shaped my impression of the whole bag. The Builder app helped immensely with orientation and finding the correct connection points. I would make use of that rotation view before committing to these assemblies.
Bag 2: My favorite assembly inside another demanding bag
Time: 20:36 · Difficulty: 6.0/10 · Repetition: 6.0/10 · Dexterity: 6.0/10 · Stickers: 0
The engine was my favorite assembly in the set. It is a compact V6 representation with six yellow piston assemblies, and getting its moving parts arranged correctly makes the mechanism more satisfying to look at.
Pay attention to orientation here. The rotating elements need to sit correctly for the pistons to move as intended. The booklet builds those six repeated piston units at step 54, then surrounds the engine with more of the frame and mirrored structural sections.
There is a useful payoff as those portions connect to the chassis: assemblies that had felt less secure become tied into a more substantial model. That does not make the whole bag easy. Along with Bag 1, it was the least enjoyable stretch for me, even though it contained my favorite individual feature.
This is another stage where I found the Builder app helpful. Before joining a larger section, compare the facing direction and connection points from more than one angle.
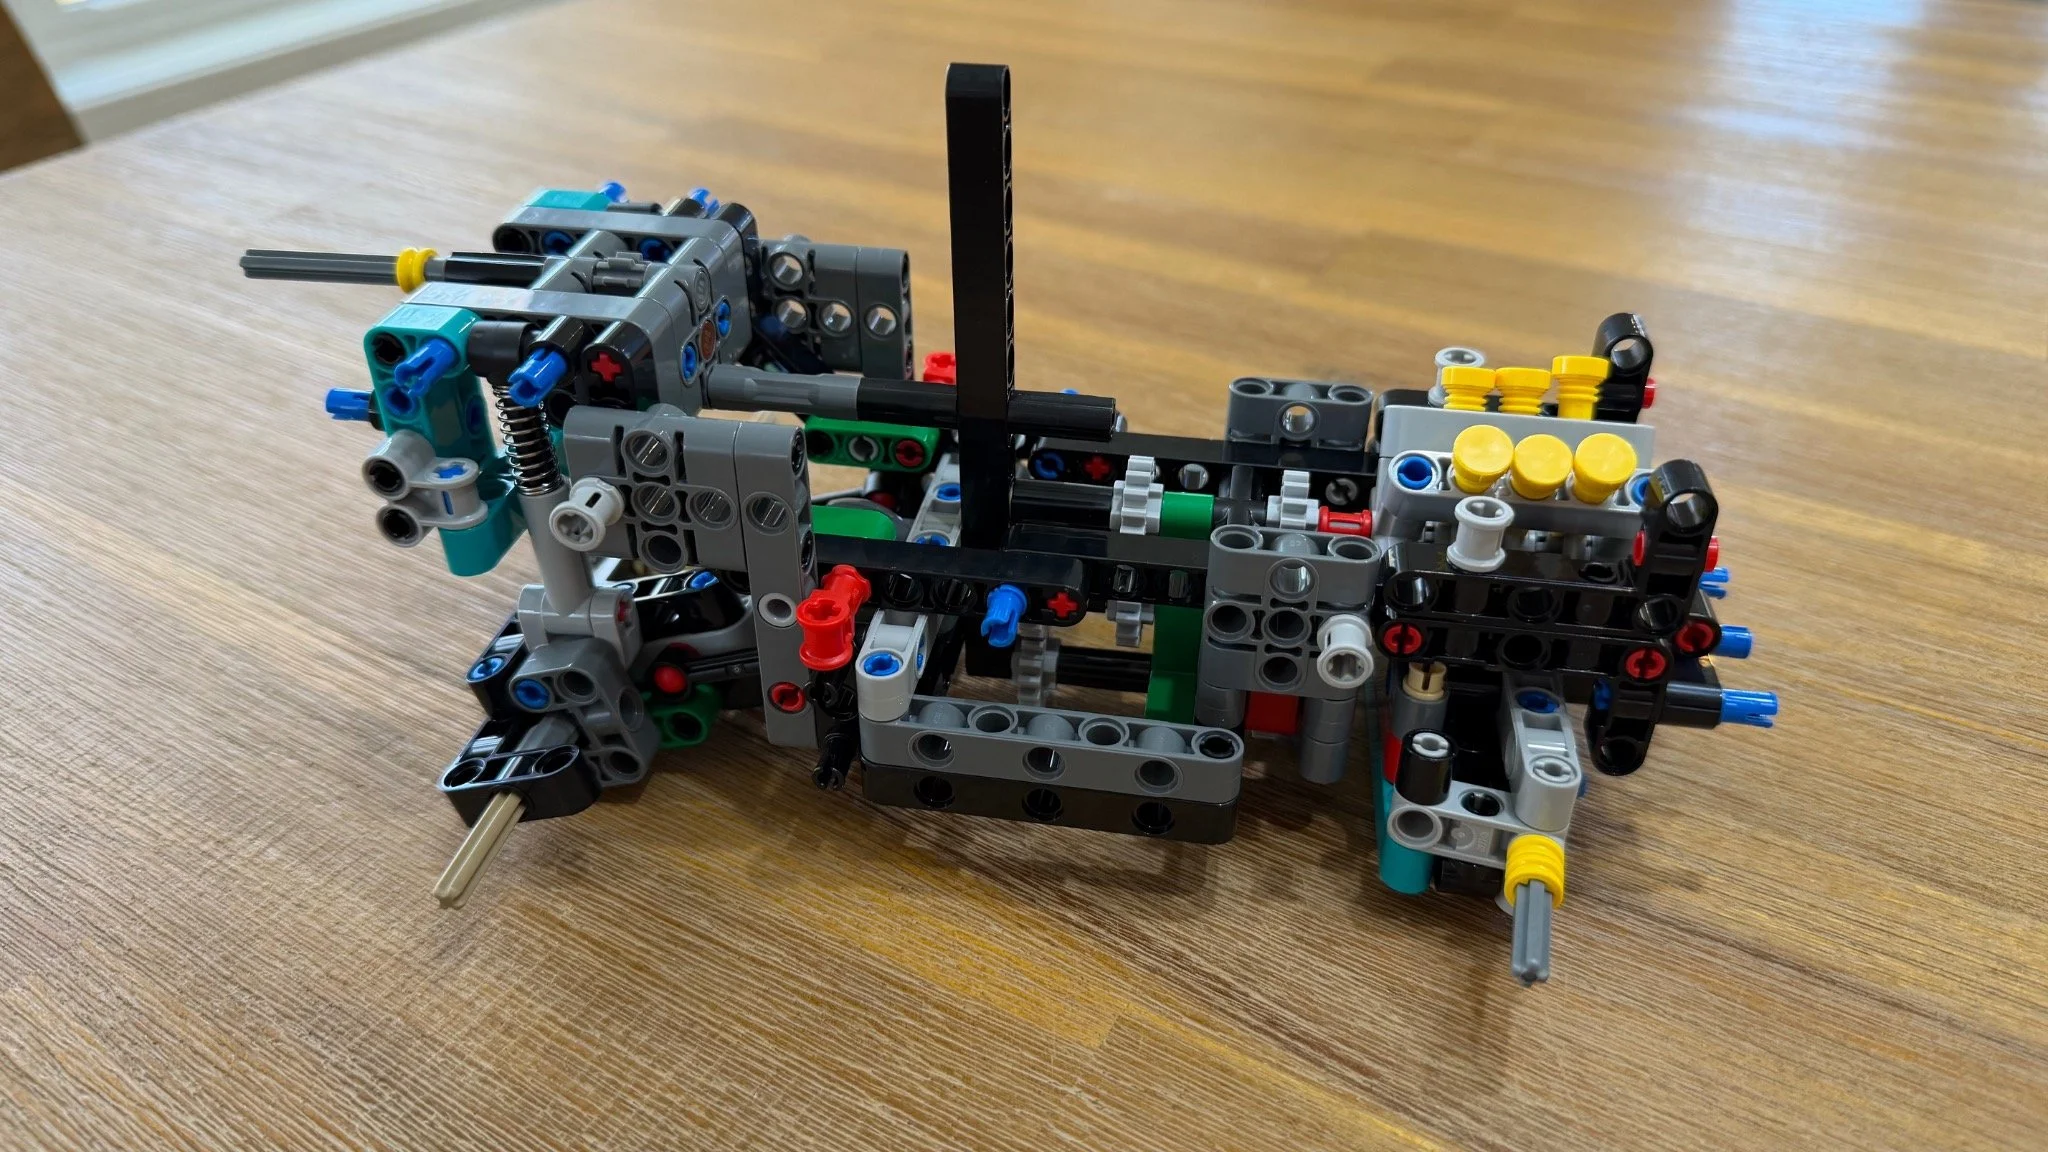
After Bag 2: the engine and frame are in place, with the yellow piston tops still easy to see.
Bag 3: Seats, grille and a welcome change of pace
Time: 25:57 · Difficulty: 3.0/10 · Repetition: 5.0/10 · Dexterity: 4.0/10 · Stickers: 4
This was a much easier time than the first two bags. The model had gained stability, and the work became more manageable as the orange seats, steering-wheel column, front grille, headlights and hood took shape.
The two seats introduce some similar work, and their patterned details help the interior stand out against the teal bodywork. My four stickers here were the seat details and Rubicon logos. The grille also has repeated placements, but this section felt less demanding to me than the early mechanical structure.
By the end of the bag, it was becoming recognizable as a Jeep rather than mainly a framework of axles and beams. The hood also gives the engine something to sit beneath, which makes that earlier work feel part of the finished vehicle.
Bag 4: Meticulous body details, with the worst behind me
Time: 27:02 · Difficulty: 4.0/10 · Repetition: 6.0/10 · Dexterity: 6.0/10 · Stickers: 6
Bag 4 was meticulous, but it did not reach the frustration of the first two bags. The hood support, body sections, extra front lights, bumper and wheel-arch assemblies give the Rubicon much more of its finished outline.
There are several small subassemblies and mirrored portions to work through. This is where fine motor control matters more than solving a complicated mechanism. The hood support rod is a particularly useful detail: it gives the raised hood a supported position over the engine.
I applied six stickers in this bag. Between the small connections and the growing bodywork, there was plenty to pay attention to, but the model was finally taking the shape I had been working toward.
Bag 5: My favorite bag finishes the Rubicon
Time: 34:57 · Difficulty: 2.0/10 · Repetition: 5.0/10 · Dexterity: 3.0/10 · Stickers: 2
This was the easiest bag for me and my favorite overall. It was also the longest recorded session. Those two things can coexist: this stage has plenty of finishing work without feeling as difficult as the early chassis.
The side mirrors, doors, rear section, roll cage, windshield structure, surfboard and wheels complete the model. There is still repeated work in the paired details and wheel assemblies, but it felt more approachable than holding the early mechanisms together.
The little yellow duck is a nice touch for Jeep fans. It refers to Jeep ducking, where owners leave a toy duck on another Jeep. It is an openly acknowledged community reference, and a small detail that adds personality to the finished set.
With the tires on and the surfboard above the cabin, the whole model finally came together. I liked the result. I was also happy to have the demanding early bags behind me.
Build Progress
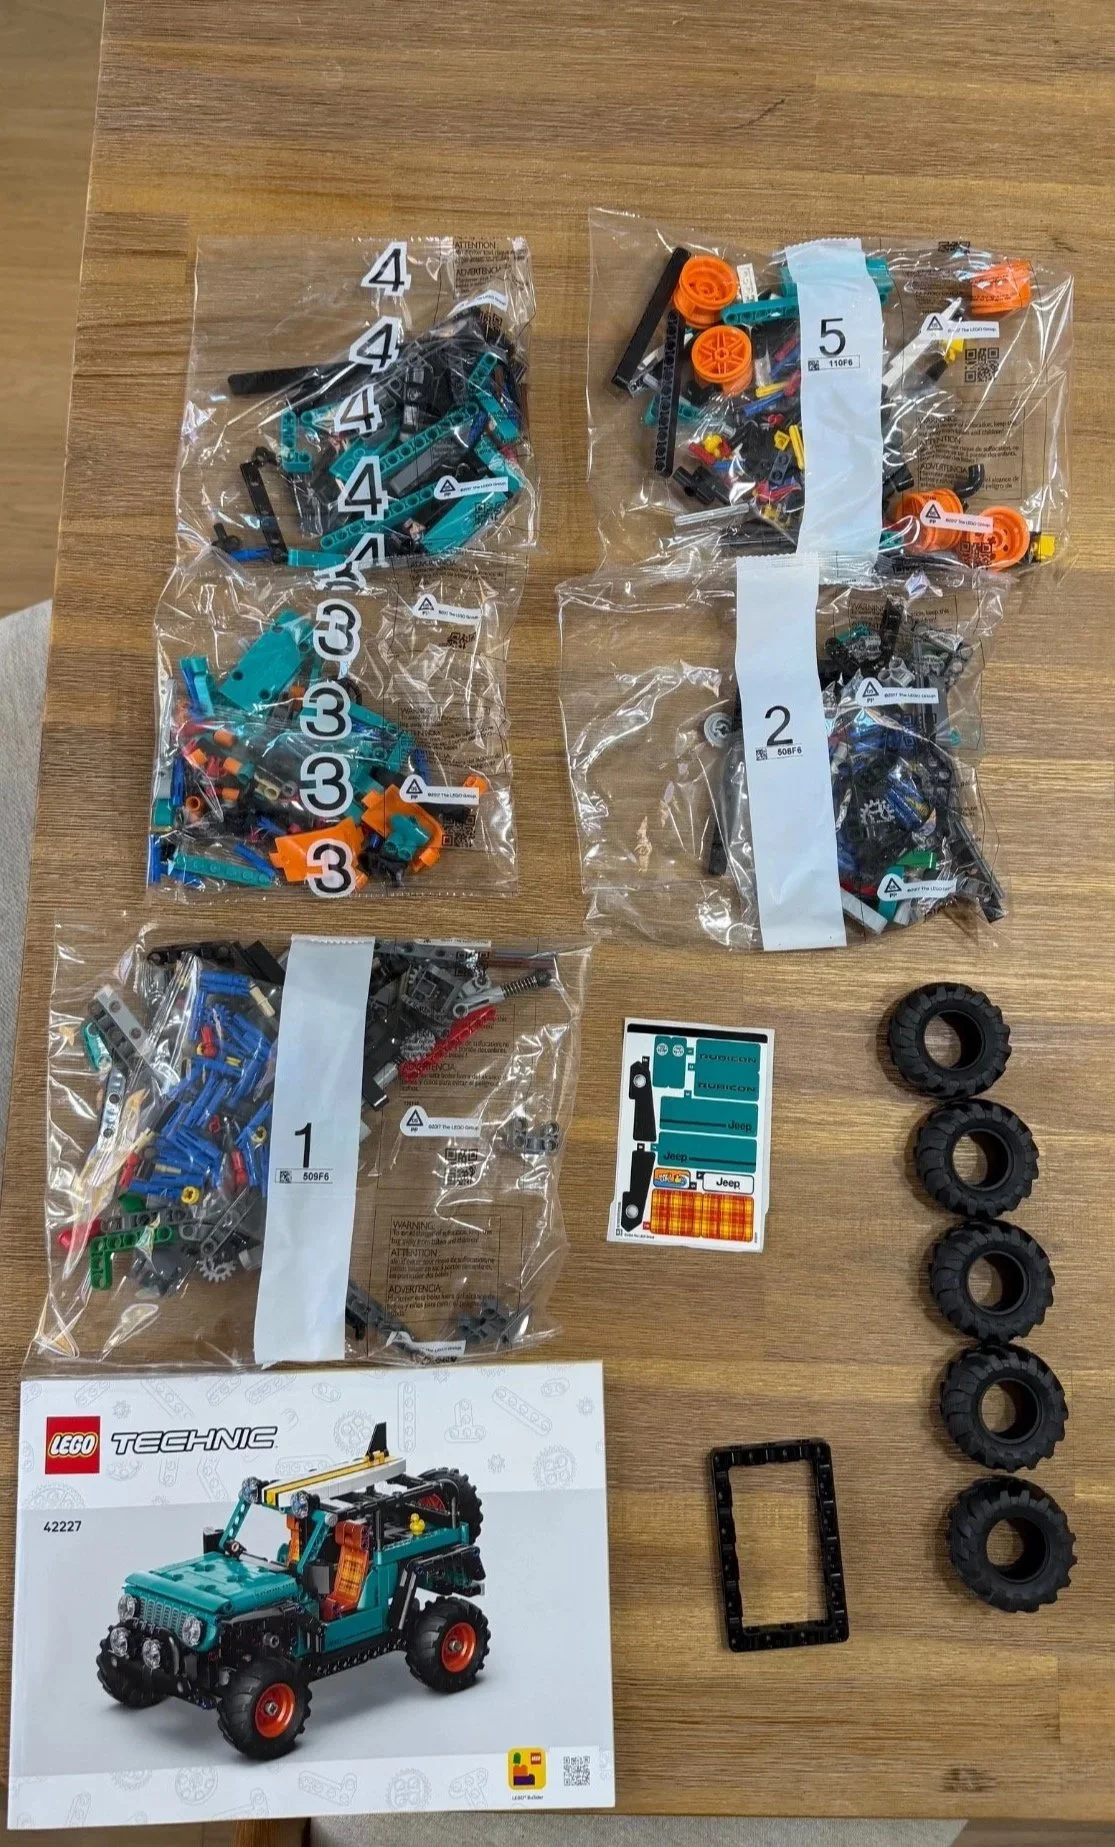
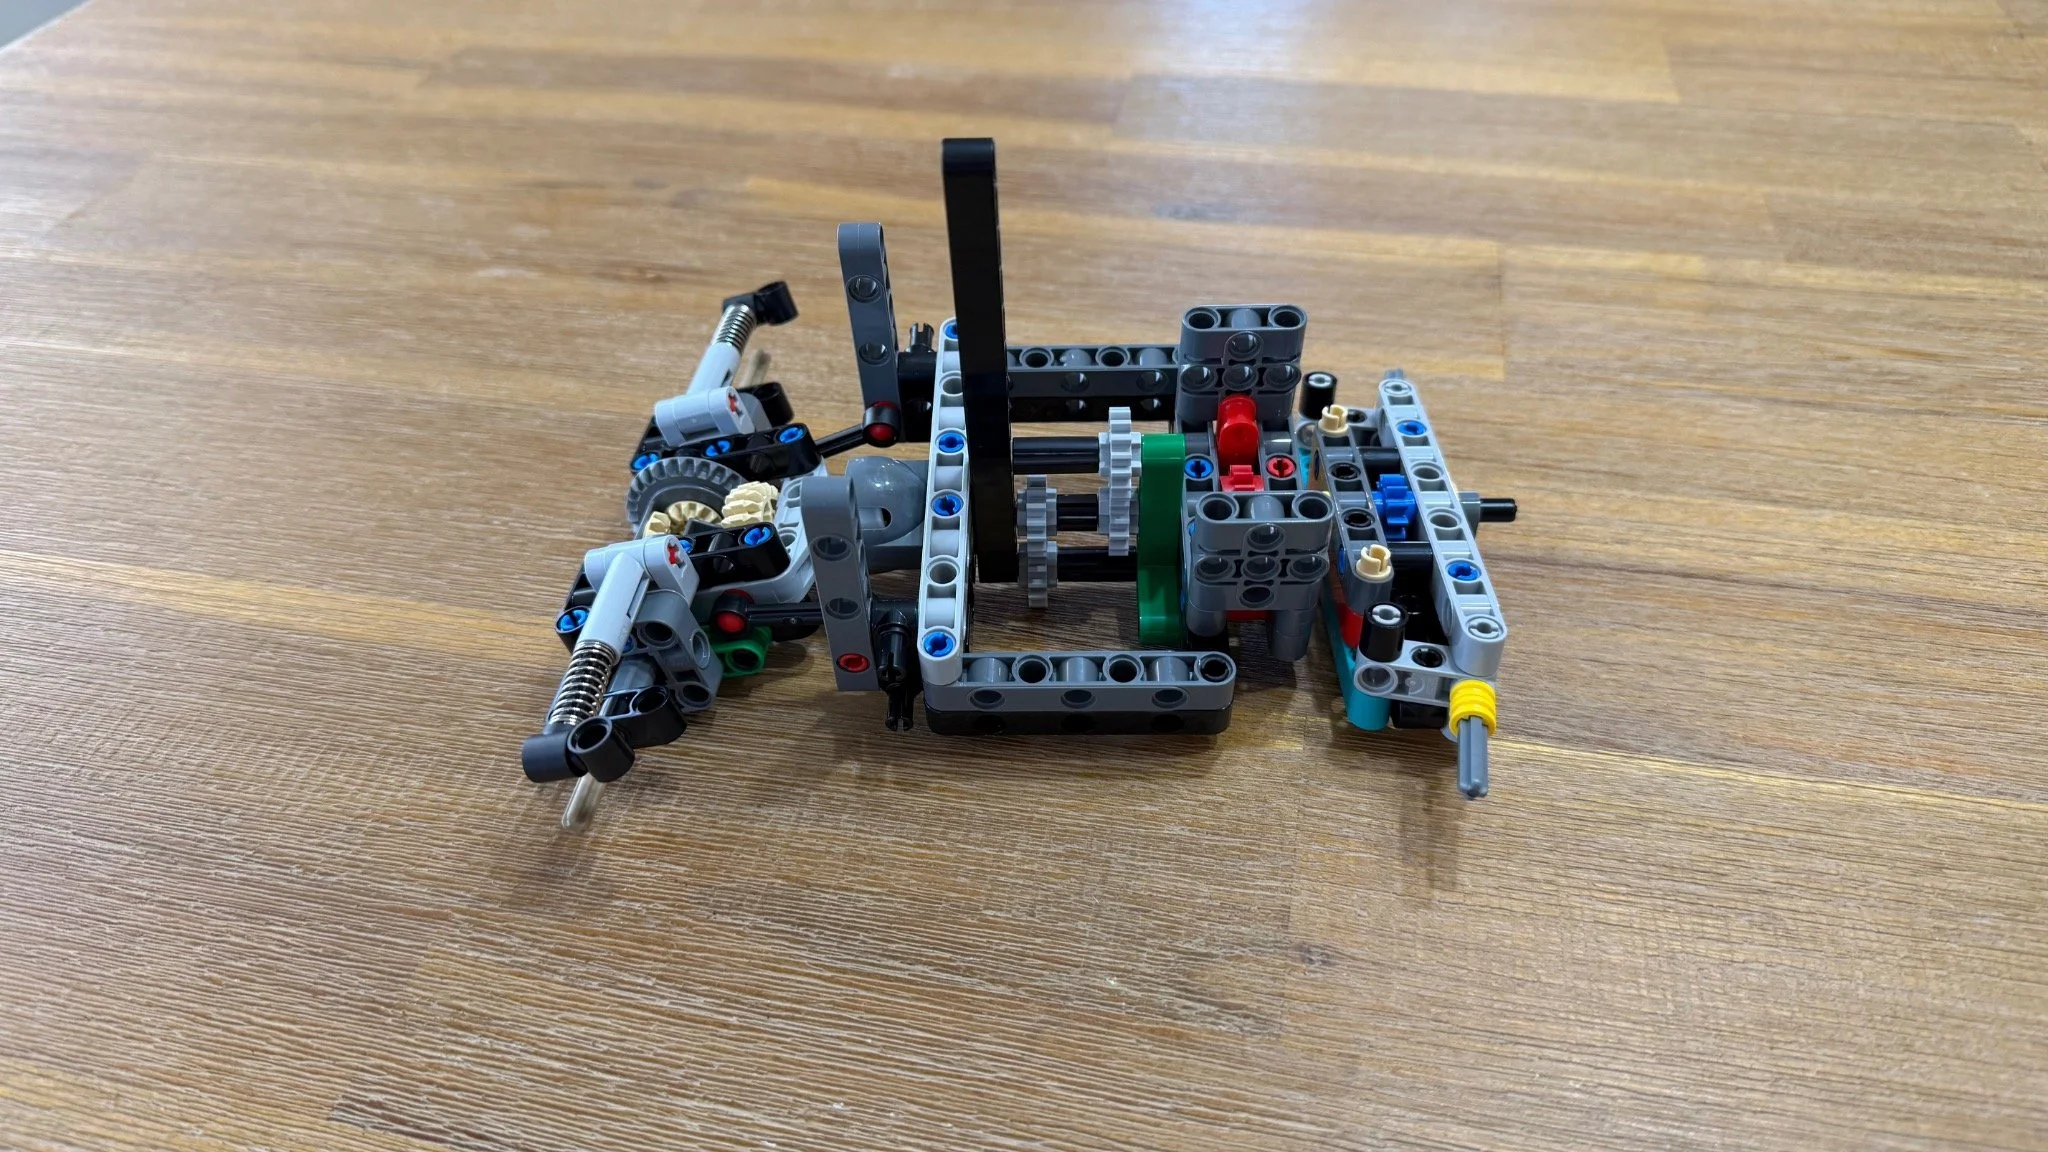
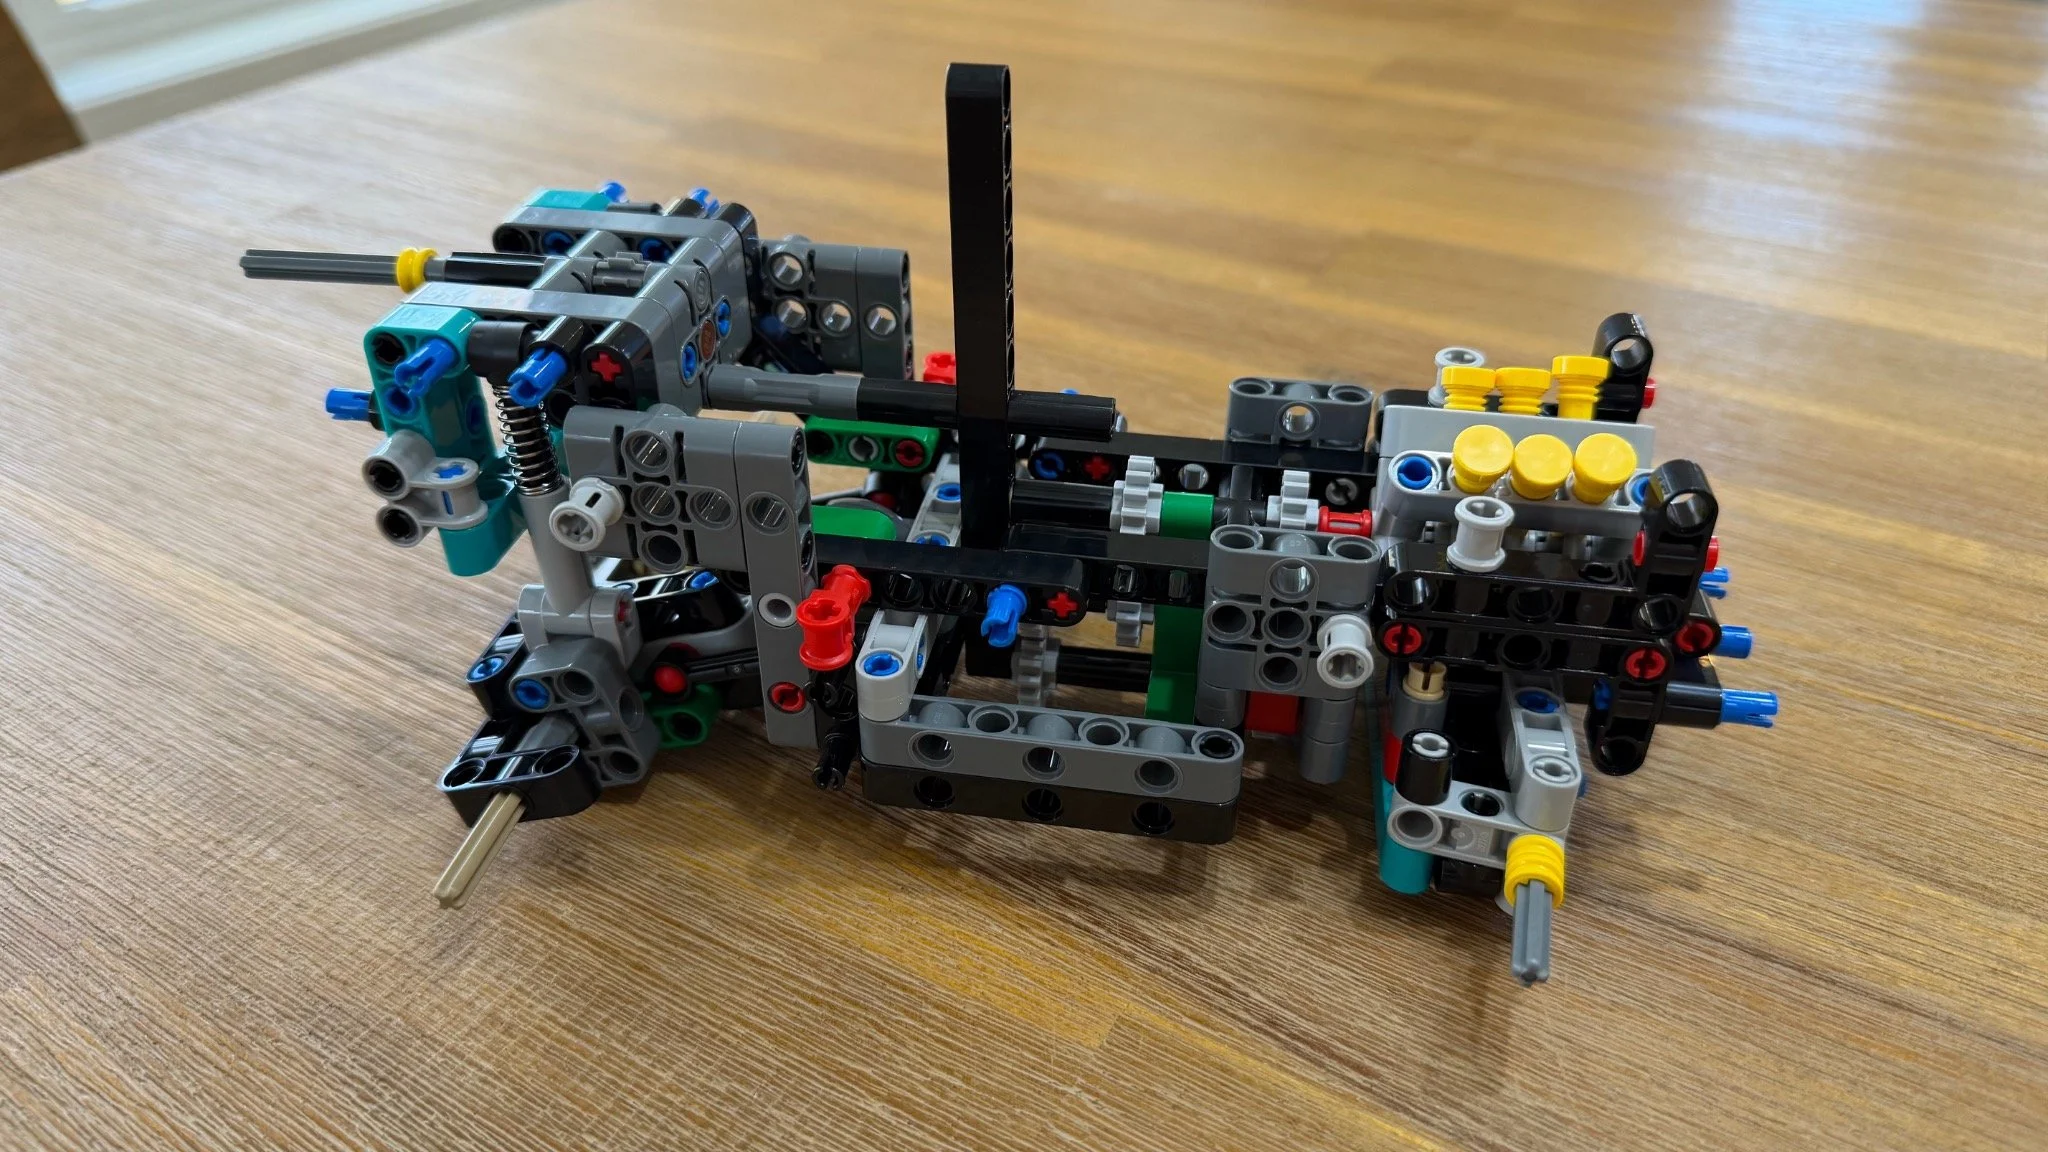
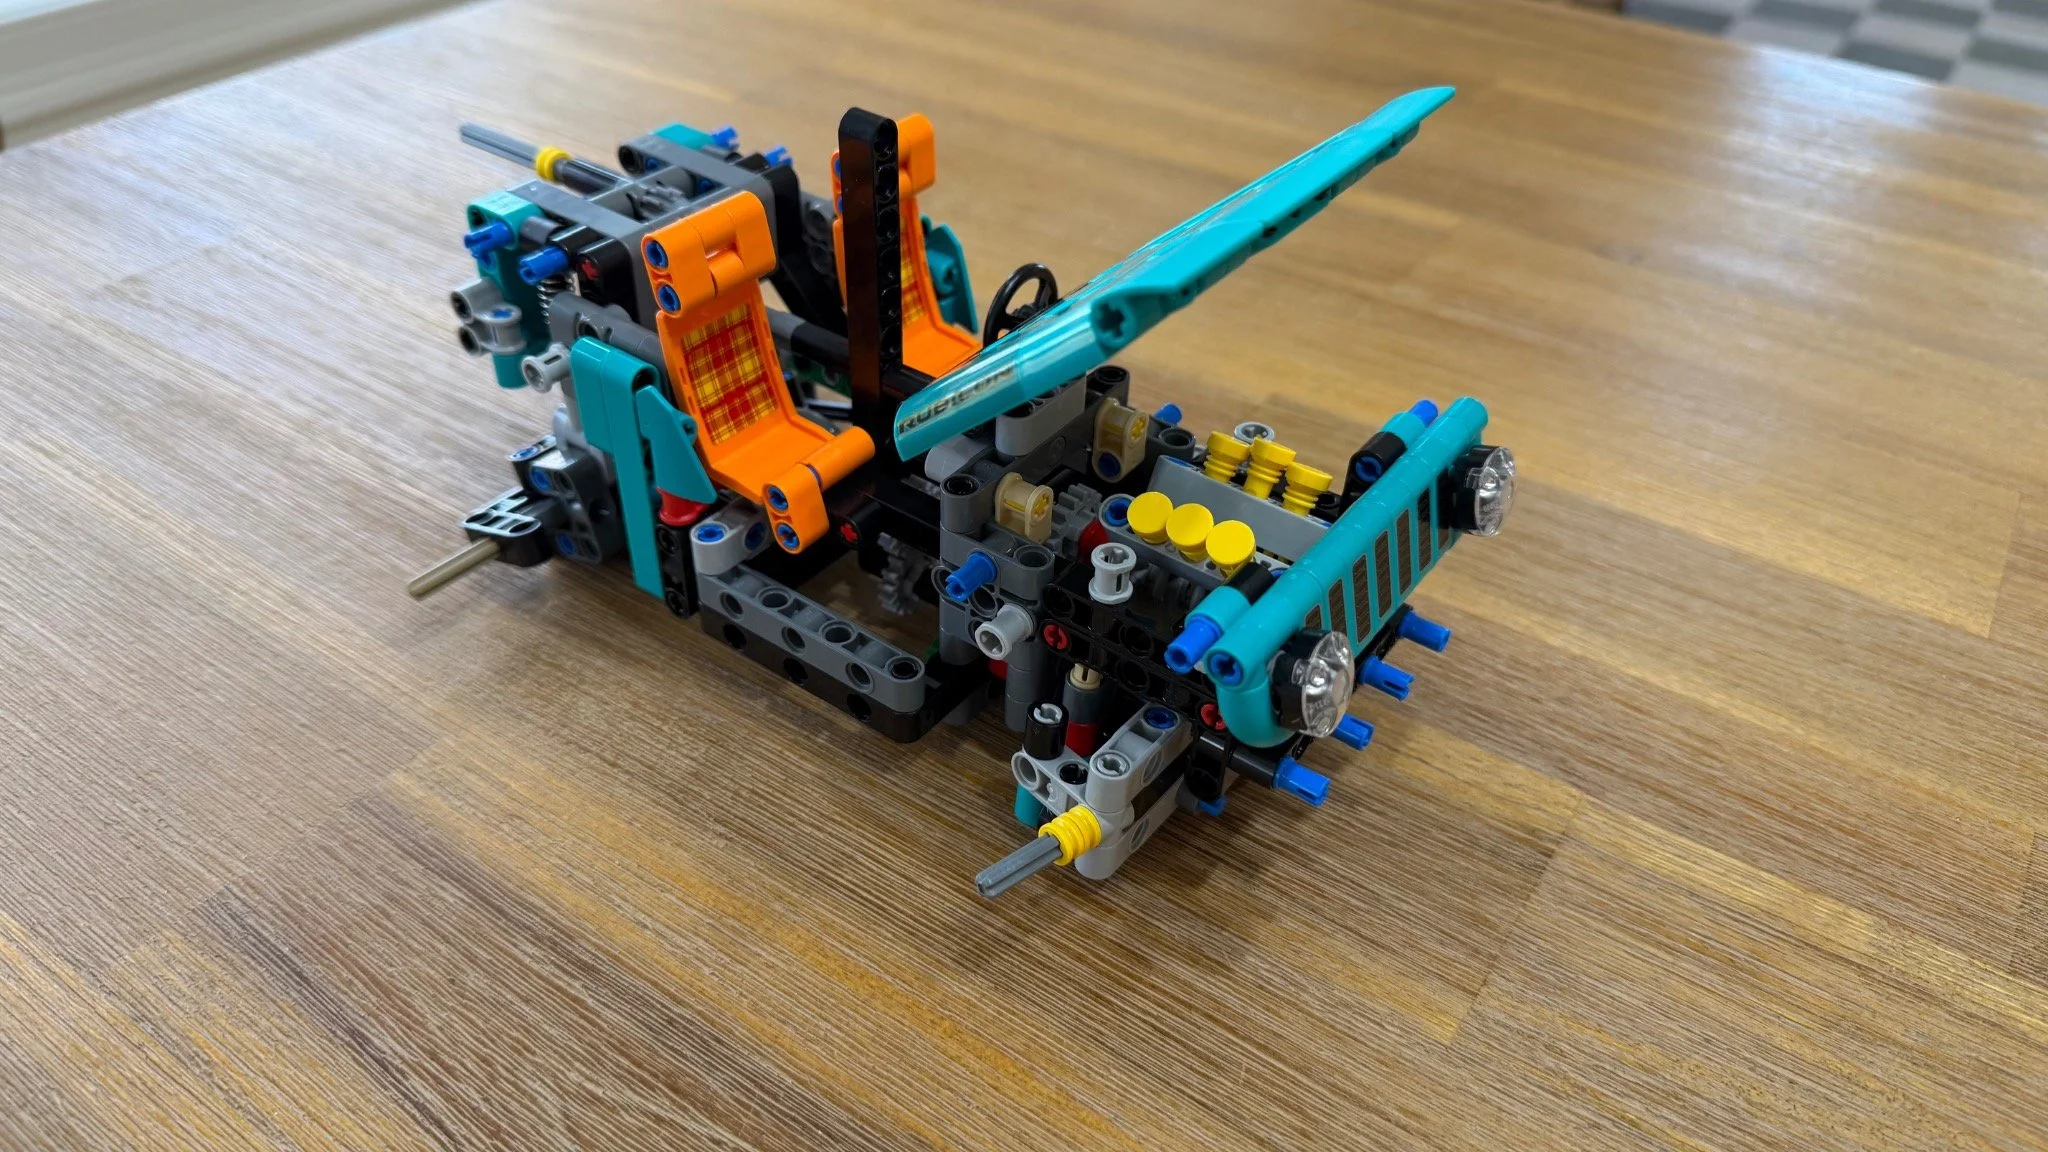
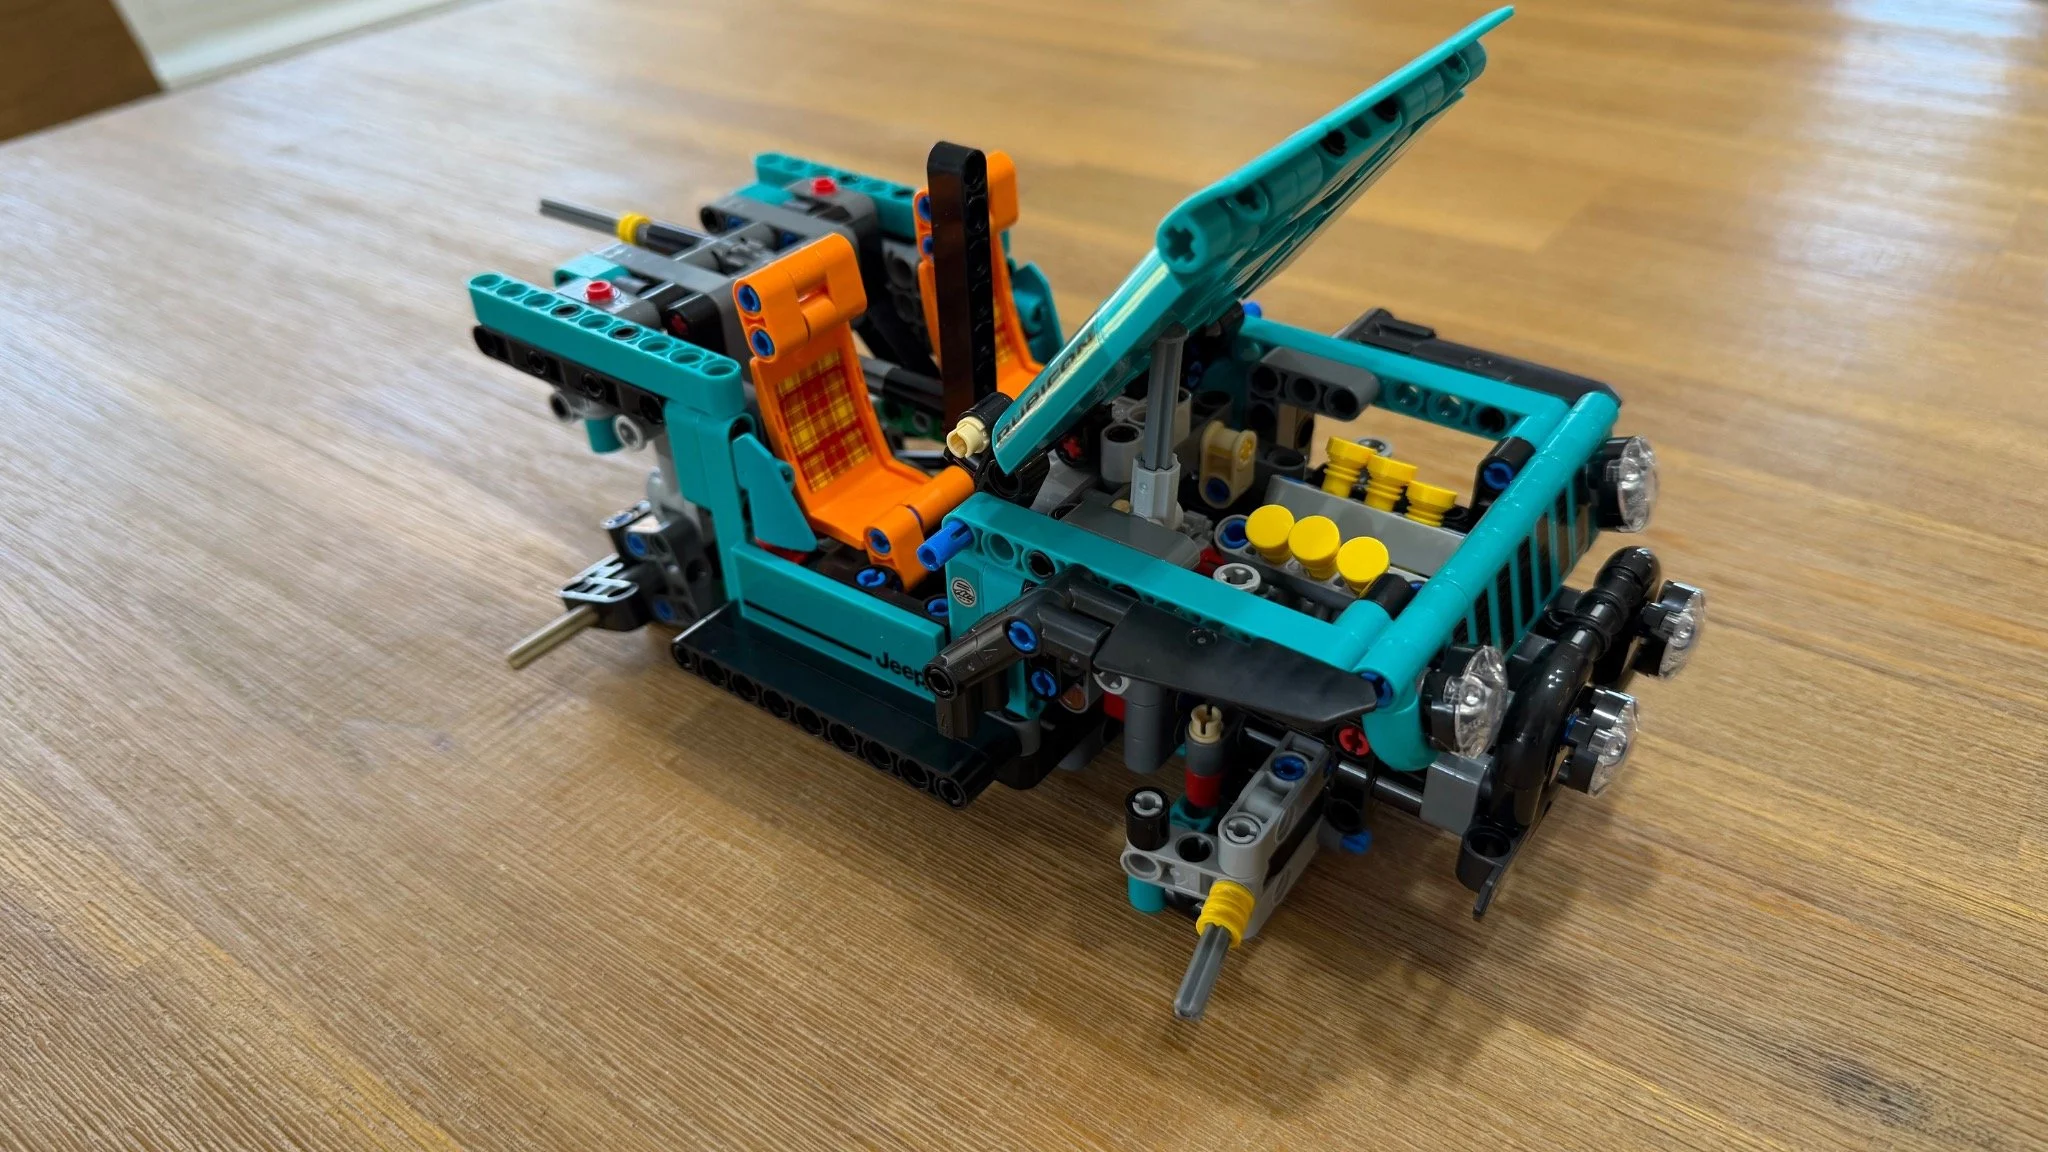
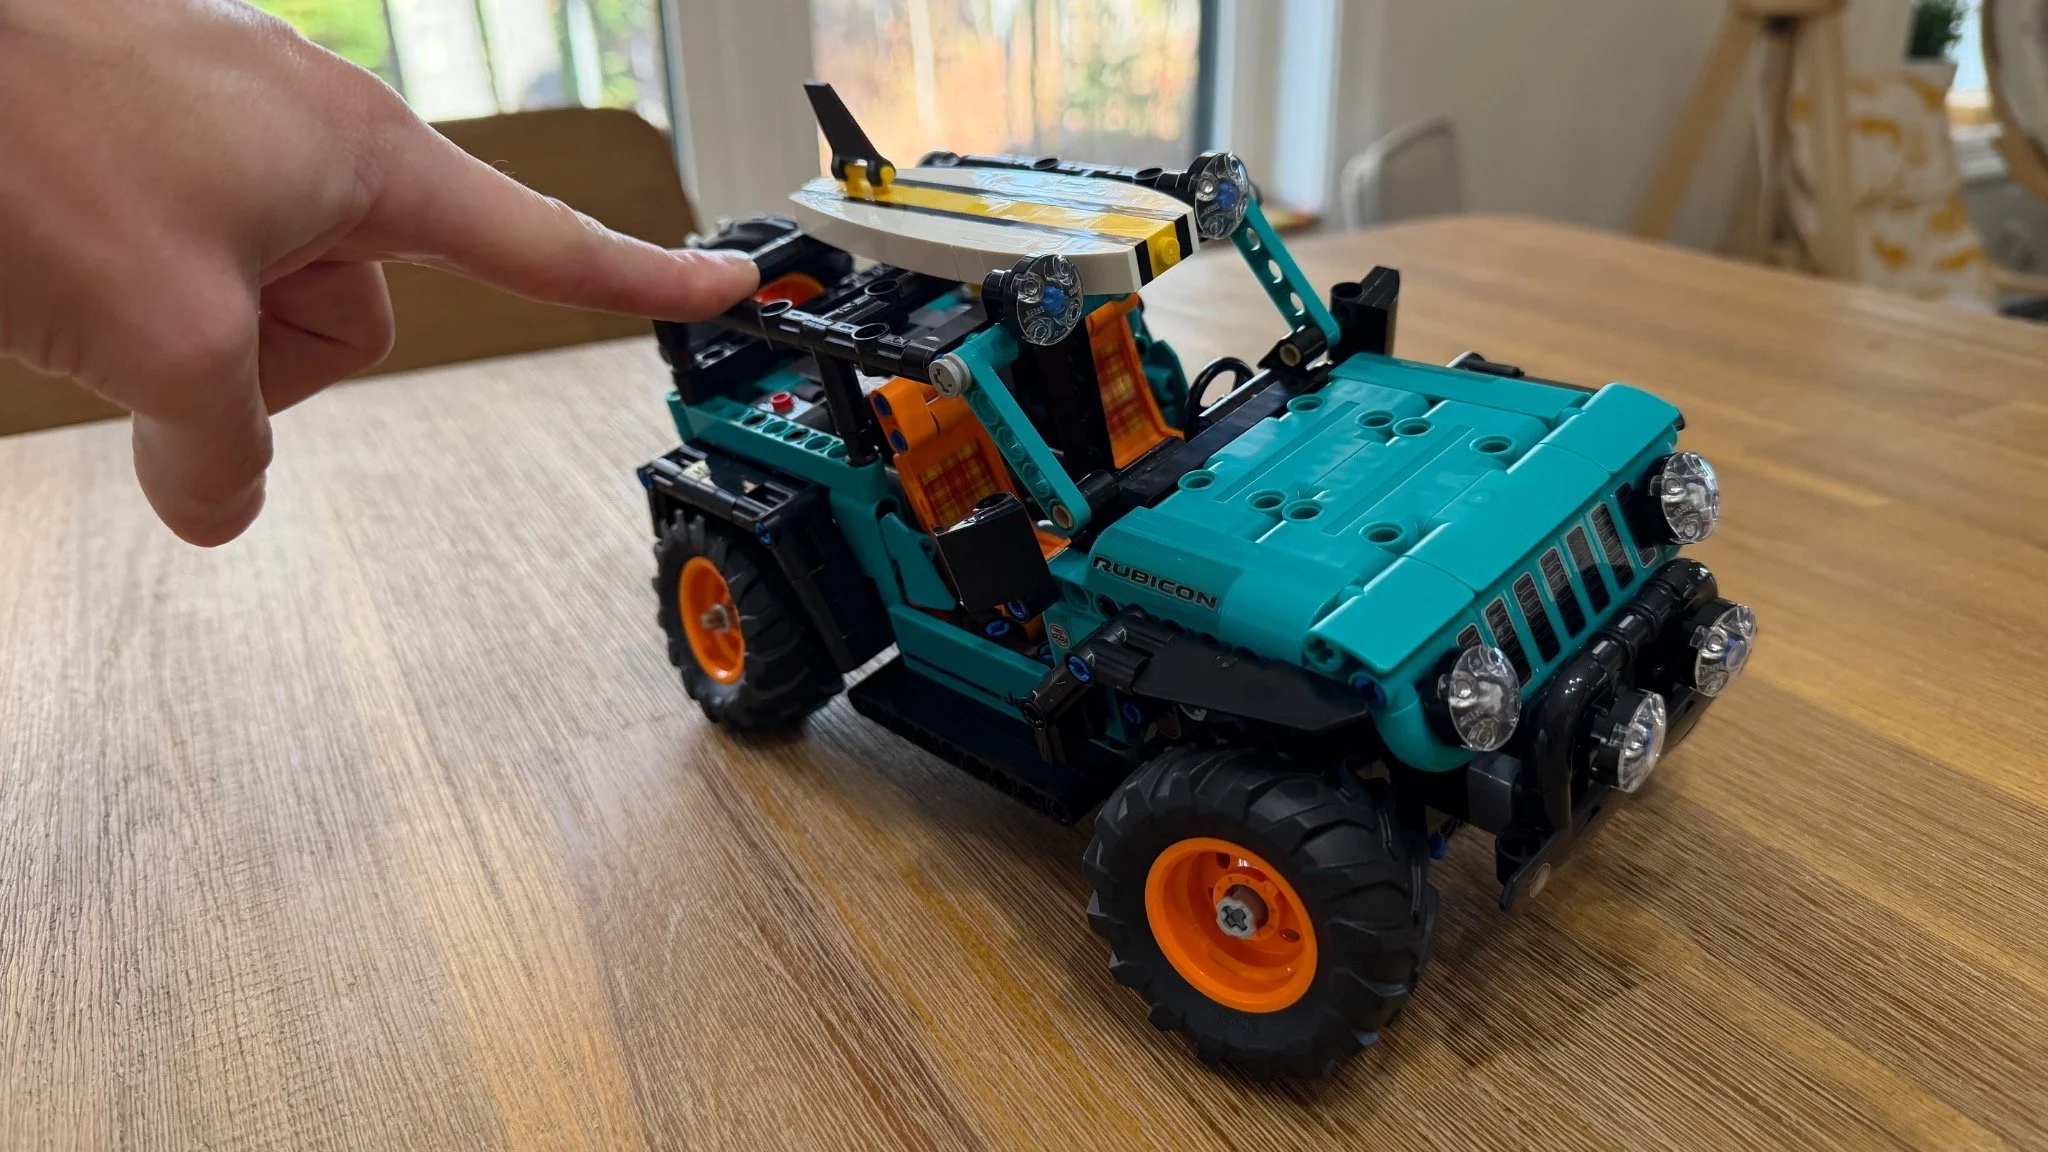
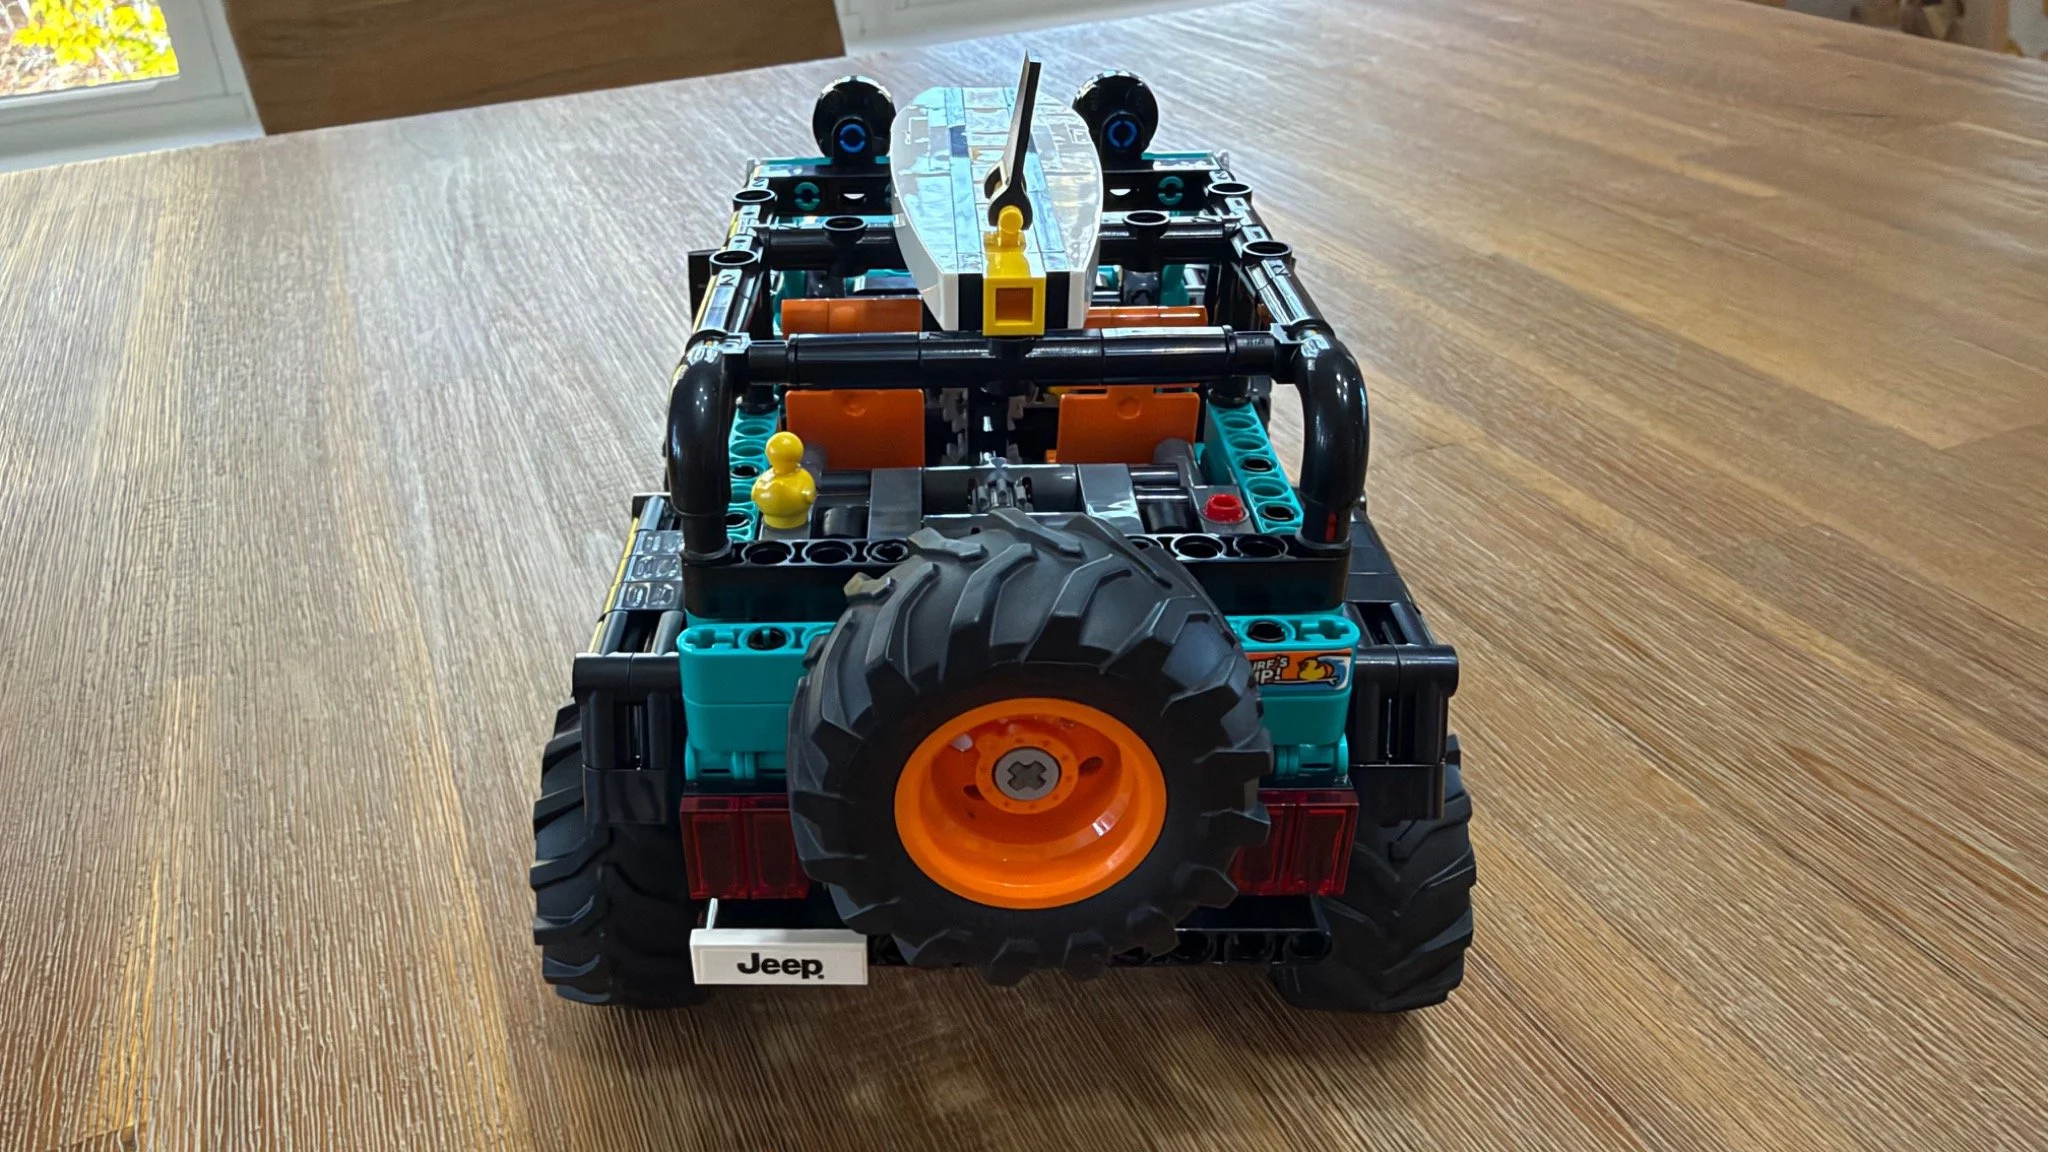
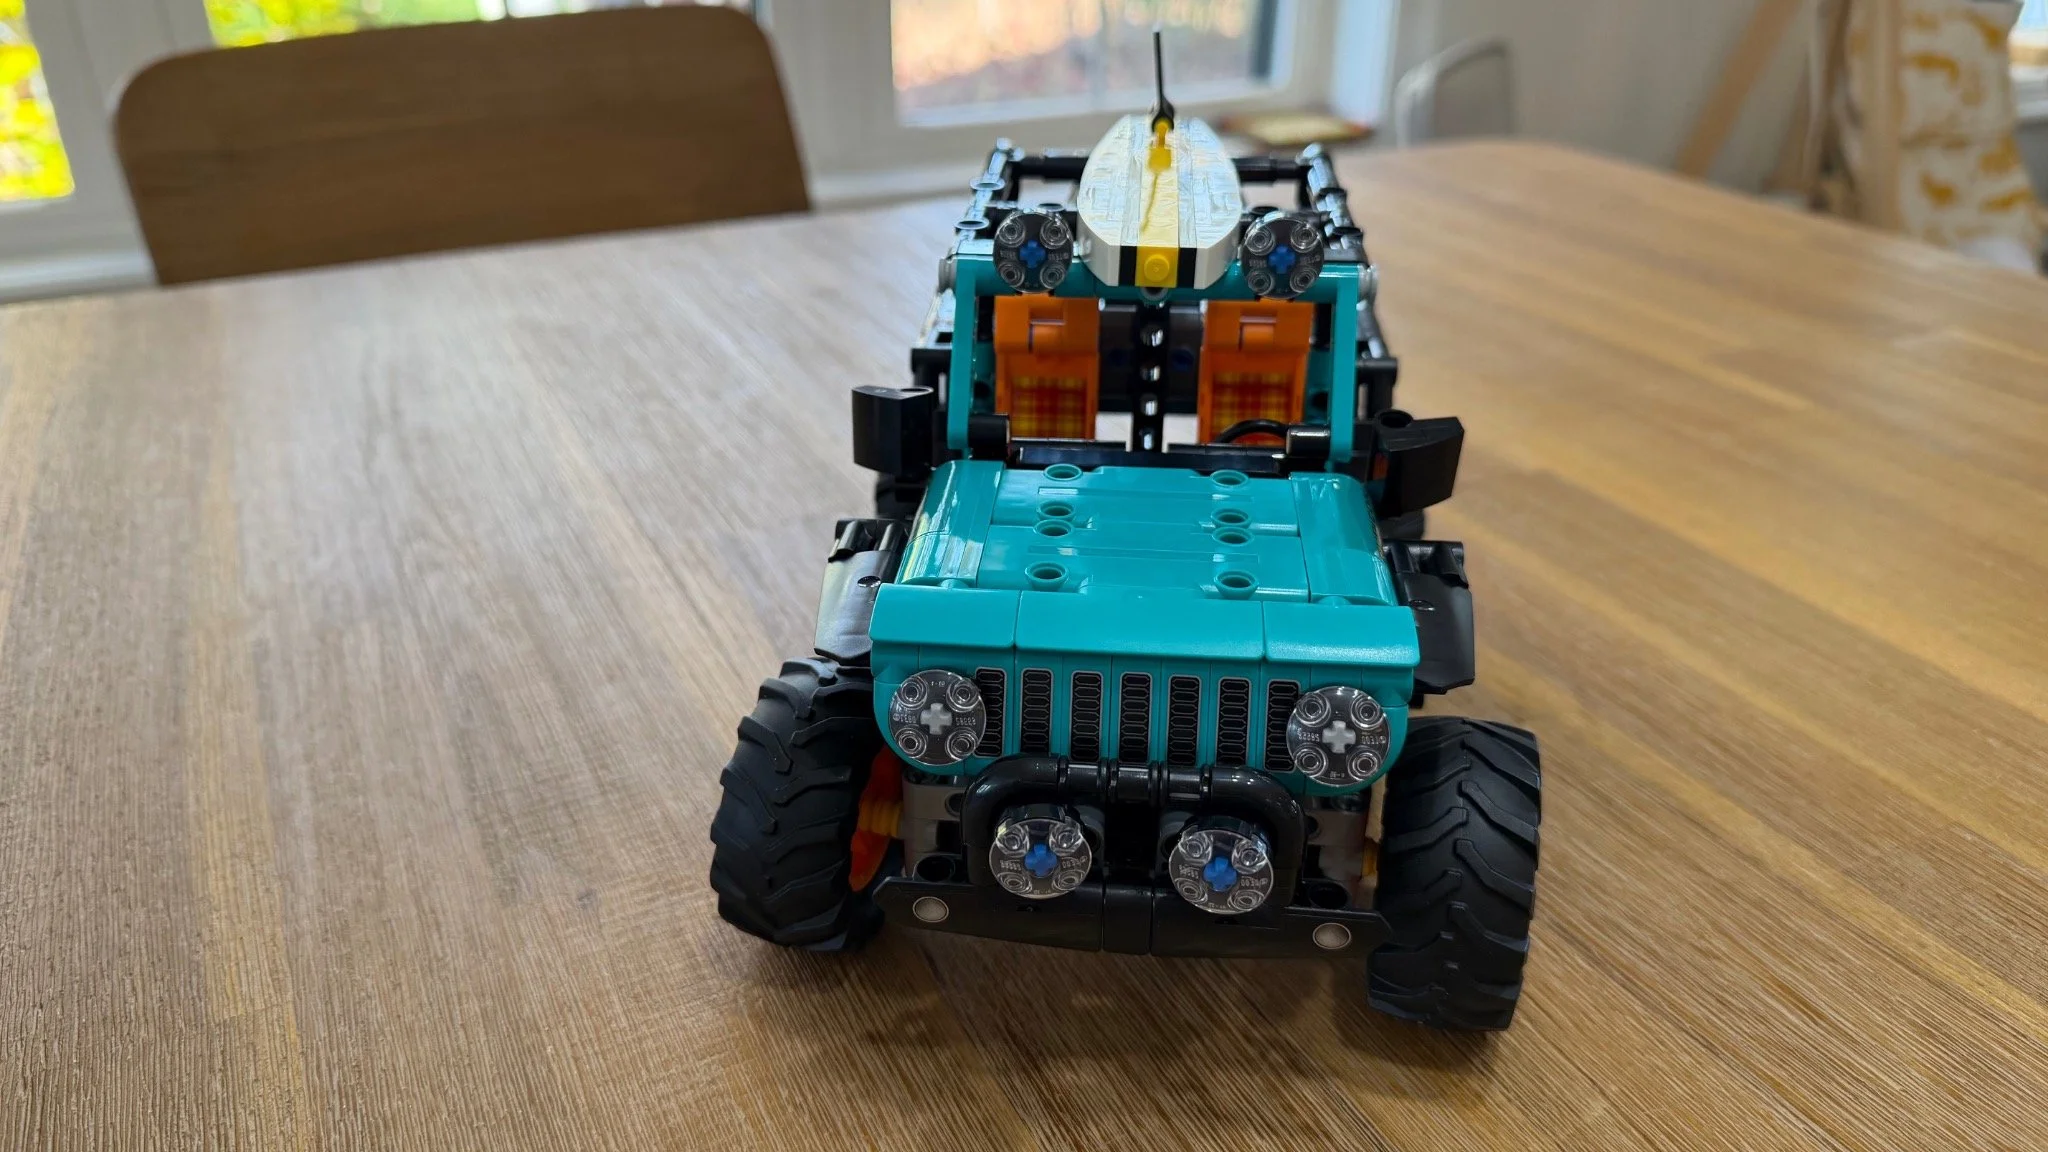
From the first chassis connections to the finished Rubicon. Use the arrows or thumbnails to move through the build. The final four views show the completed model.
Stage key: 1: Setup · 2: Bag 1 chassis · 3: Bag 2 engine · 4: Bag 3 seats and hood · 5: Bag 4 body details · 6–9: Finished Rubicon.
Details Worth Looking For
The engine earns its place under the hood
The engine was my favorite assembly because there is something to understand as well as something to look at. Once the model was finished, pushing it made the pistons move. The hood opens to reveal the mechanism, with a small support rod built into the model.
Suspension is the biggest surprise
I had not seen this much suspension flexibility in a LEGO set I had built before. Handling the finished Jeep made its off-road character immediately noticeable. The amount of movement was the biggest surprise of the set for me.
That is a personal comparison with my own builds. It is also what made the finished model more interesting than its appearance alone would suggest.
A duck, a board and a recognizable shape
The molded duck sits behind the seats, where it is visible through the open rear section. The surfboard rides above the cabin, while the rear spare tire and orange wheels help complete the Rubicon's look.
The finished proportions look right to me. I can appreciate that appearance and those details while still feeling that the assembly was less enjoyable than I wanted.
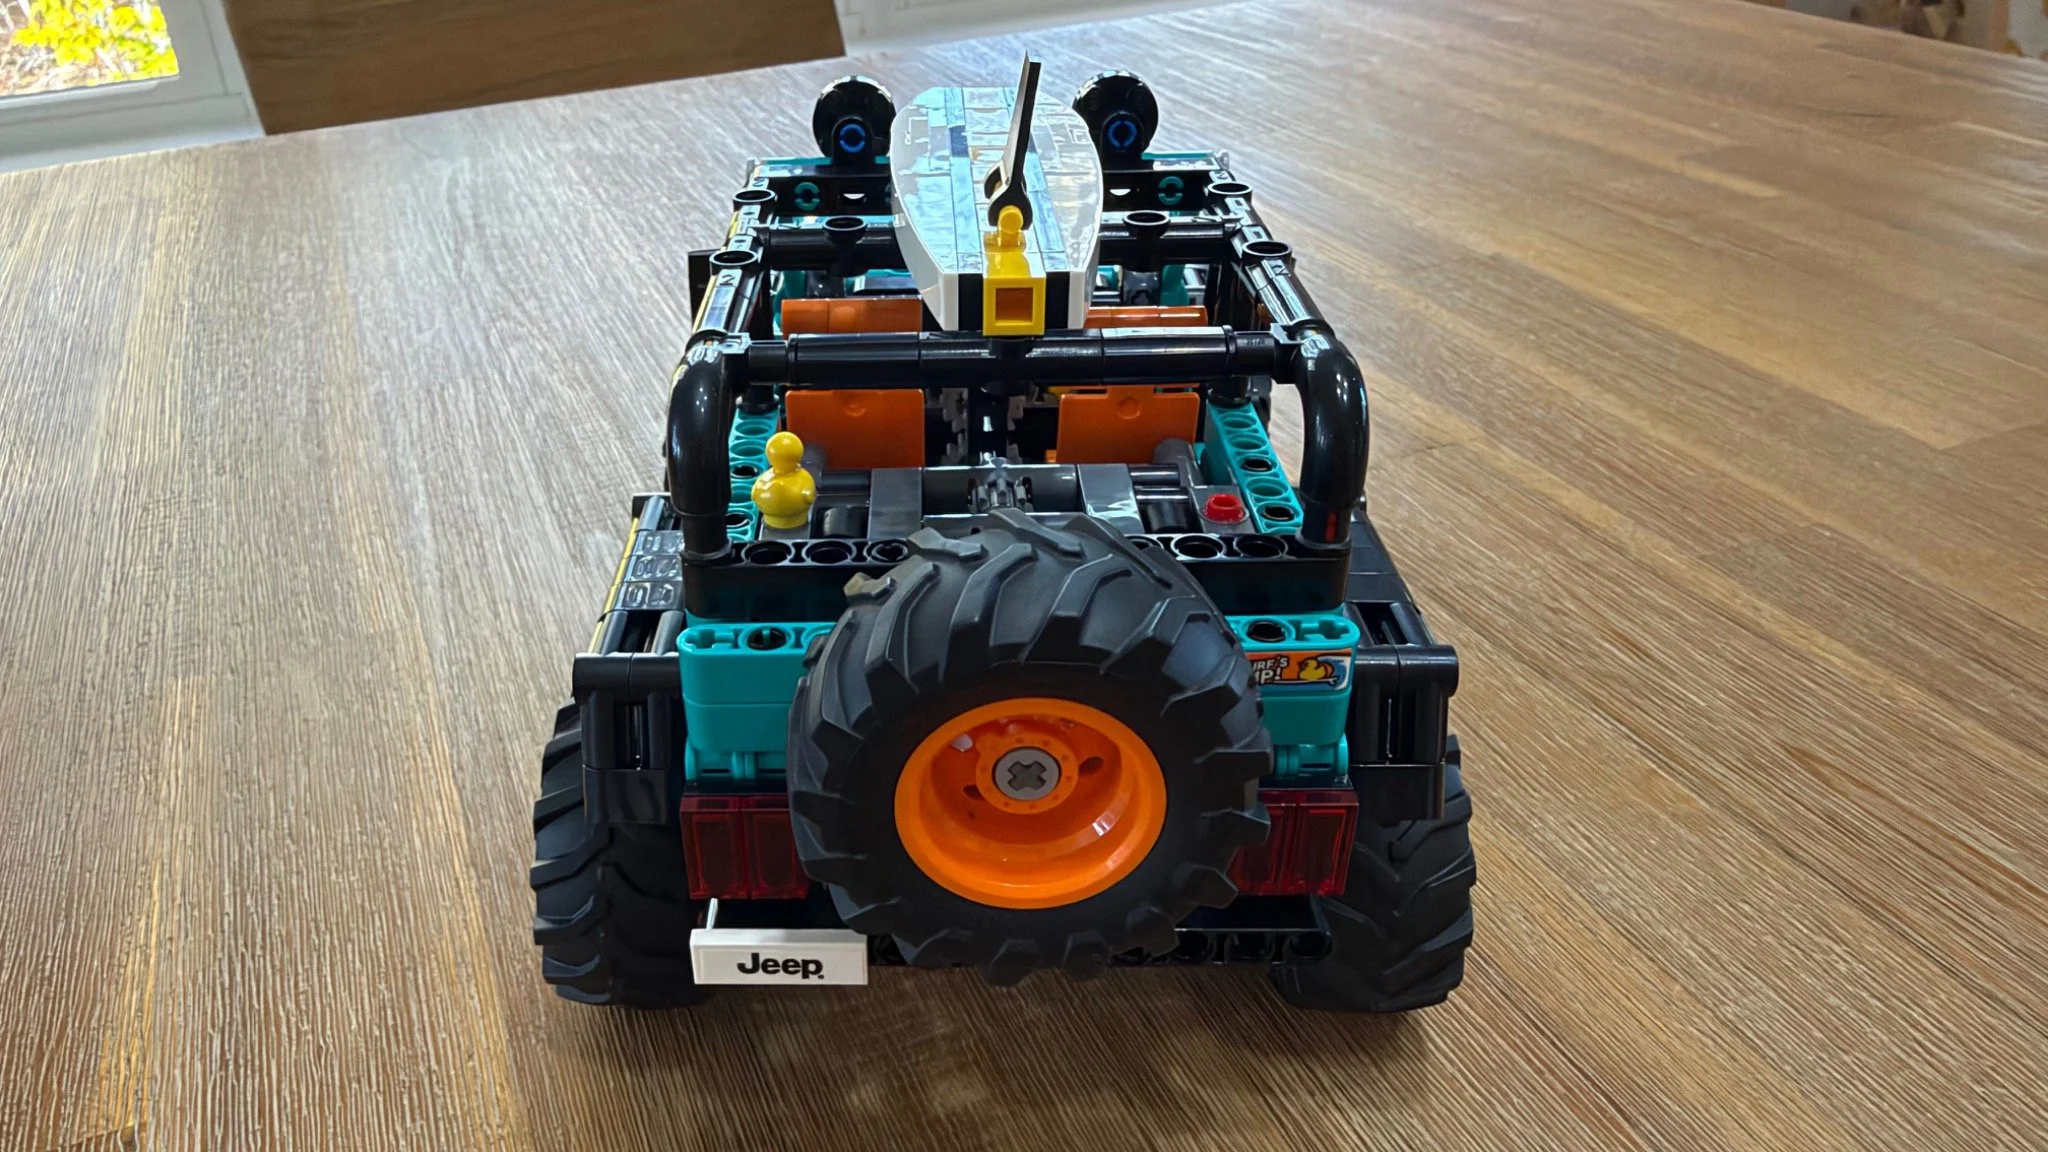
The rear view brings together the spare tire, yellow duck, orange seats and roof-mounted surfboard.
Stability and Working Features
My completed model felt very stable in the handling I tested. The suspension's intended movement did not stop it feeling like a solid finished build.
Left and right steering worked, the pistons moved when I pushed the model, and the suspension was the standout function. LEGO identifies the rear spare tire as the steering control. I would keep that distinction in mind when looking at the small steering wheel inside the cabin.
The photographs show the model's structure and finished positions. The handling view includes my hand resting on the roll cage; a still photo cannot demonstrate the suspension's range or the movement of the pistons. Those impressions come from my build and handling notes.
My Verdict
My overall rating is 5.7/10.
This is a nice-looking Rubicon with a very cool engine and suspension that impressed me. The early assembly was frustrating enough that those strengths did not turn it into a favorite build. I would not choose to build it again.
Jeep fans and Technic vehicle enthusiasts are the audience I would recommend it to. If you enjoy working out mechanical connections, there is something worthwhile here. Newer builders, children who are still getting used to Technic, and anyone who struggles with awkward multi-point connections may want help with the opening two bags.
Bag 5 was my favorite stretch. The engine was my favorite assembly. The suspension was the biggest surprise. My mixed verdict comes from enjoying those parts while finding the route to the finished model less rewarding.
Related Reading
For another Technic vehicle I have built, read my LEGO Ferrari FXX K 42212 review. For a smaller vehicle in another theme, there is my LEGO Lightning McQueen 77255 review.
You can find more firsthand reviews in The Bricksmith's Build Guides.
Need Help With Your Own Set?
If a Technic build has stalled at an awkward connection, or a model needs rebuilding, I can review photos and recommend a practical next step. Explore my LEGO assembly and rebuilding services, with local pickup and return around Greater Portland, Maine, and approved mail-in projects across the United States.