
LEGO Technic Ferrari FXX K 42212 Build Review
LEGO Technic Ferrari FXX K 42212 is an impressive finished model. The red bodywork looks great on display, the engine pistons move as the car rolls, and the opening doors, hood, and engine cover give it plenty to explore.
Building it was more demanding than I expected. The sticker work became a slog, and several connections were challenging even as an experienced LEGO builder. My overall set rating is 6/10: I like the finished Ferrari, but the engine installation and rear bodywork made me work for it.
My set rating: 6/10
Build time from my bag log: 2 hours 56 minutes 51 seconds, or just under three hours
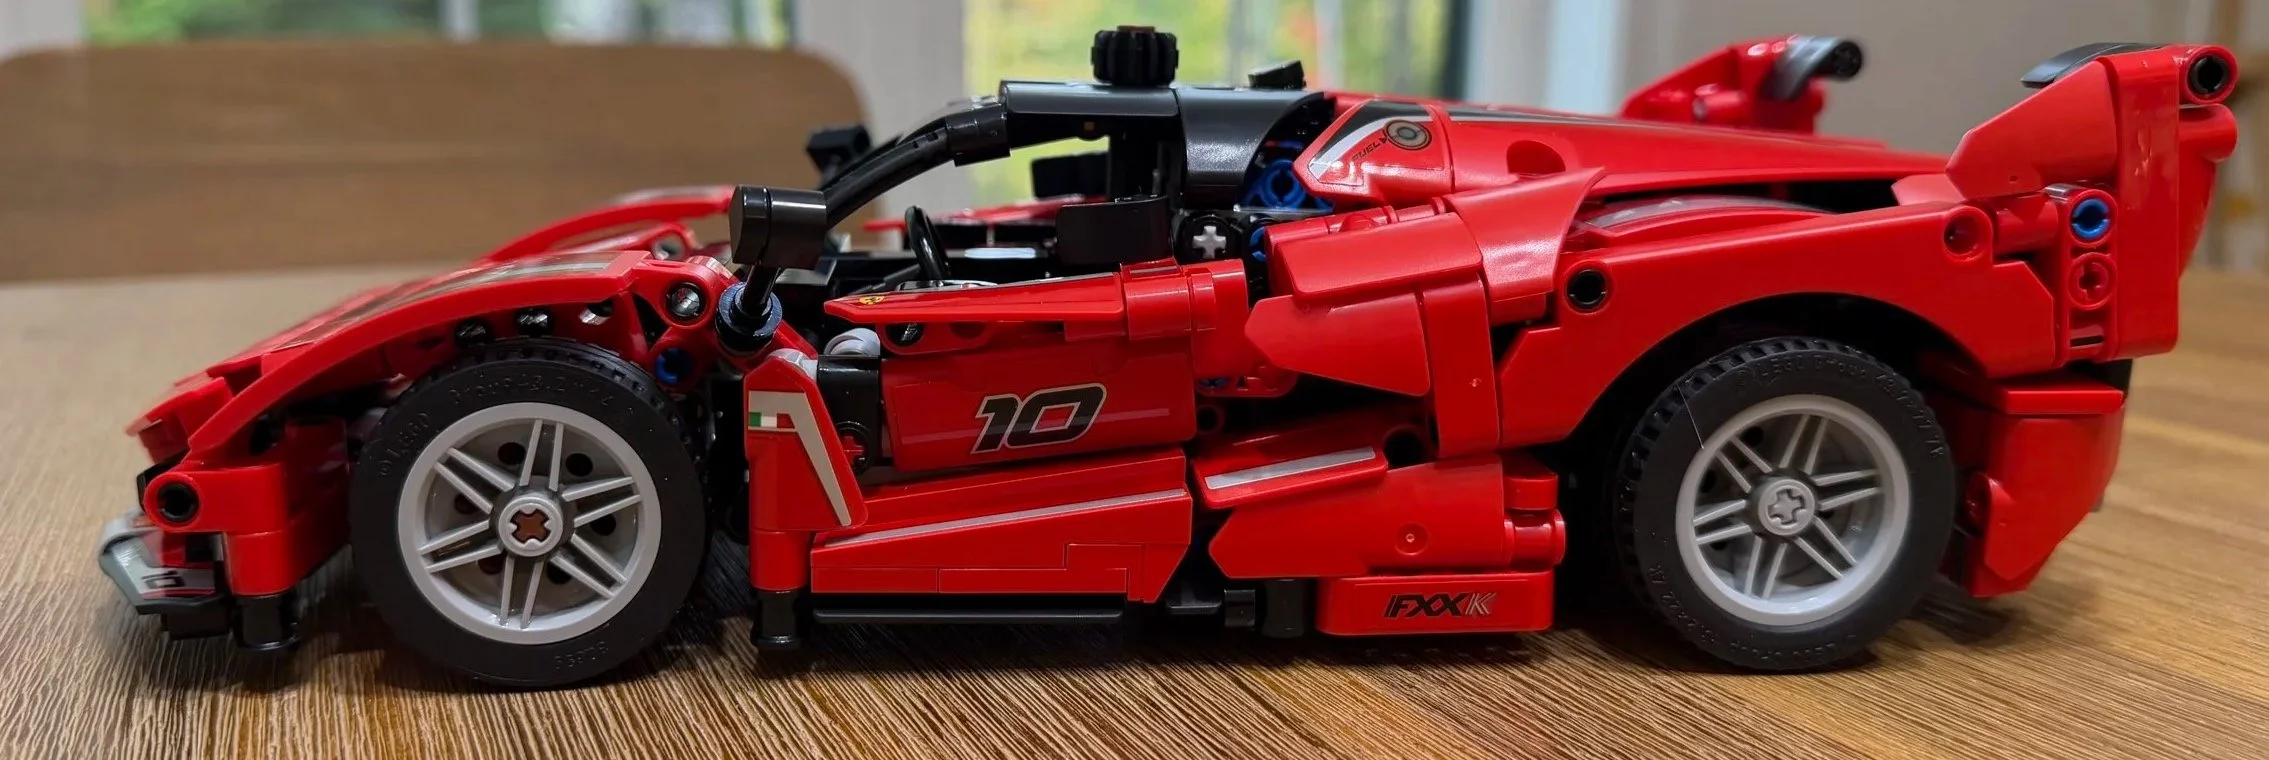
The completed Ferrari FXX K, with the doors and engine cover closed and the finished side profile on display.
At a Glance
Set: 42212 • LEGO Technic • Ferrari FXX K
Pieces and bags: 270 pieces • 5 numbered bags
Instructions and stickers: 698 steps • 30 stickers
My recorded build time: 2 hours 56 minutes 51 seconds
My overall set rating: 6/10
Hardest section: Bag 5 • rear engine cover • difficulty 8/10
Main challenge: Tight Technic connections, alignment, and sticker placement
Finished stability: Very stable in my handling of the completed model
LEGO age recommendation: 10+
LEGO listed dimensions: Over 3 in. / 8 cm high, 11 in. / 29 cm long, and 4.5 in. / 12 cm wide
LEGO US price: $64.99, checked September 30, 2026; prices may change
Official set information: LEGO Ferrari FXX K 42212
What Is the Ferrari FXX K Like to Build?
This is a build where the connection work matters as much as understanding the instructions. Pressing Technic pins into place repeatedly takes finger strength, and some of the larger assemblies need careful alignment before they will connect properly.
The construction becomes more rewarding as the bodywork takes shape. I particularly enjoyed the curved front bumper and opening hood. The engine is another highlight, although building and installing it is one of the more demanding parts of the process.
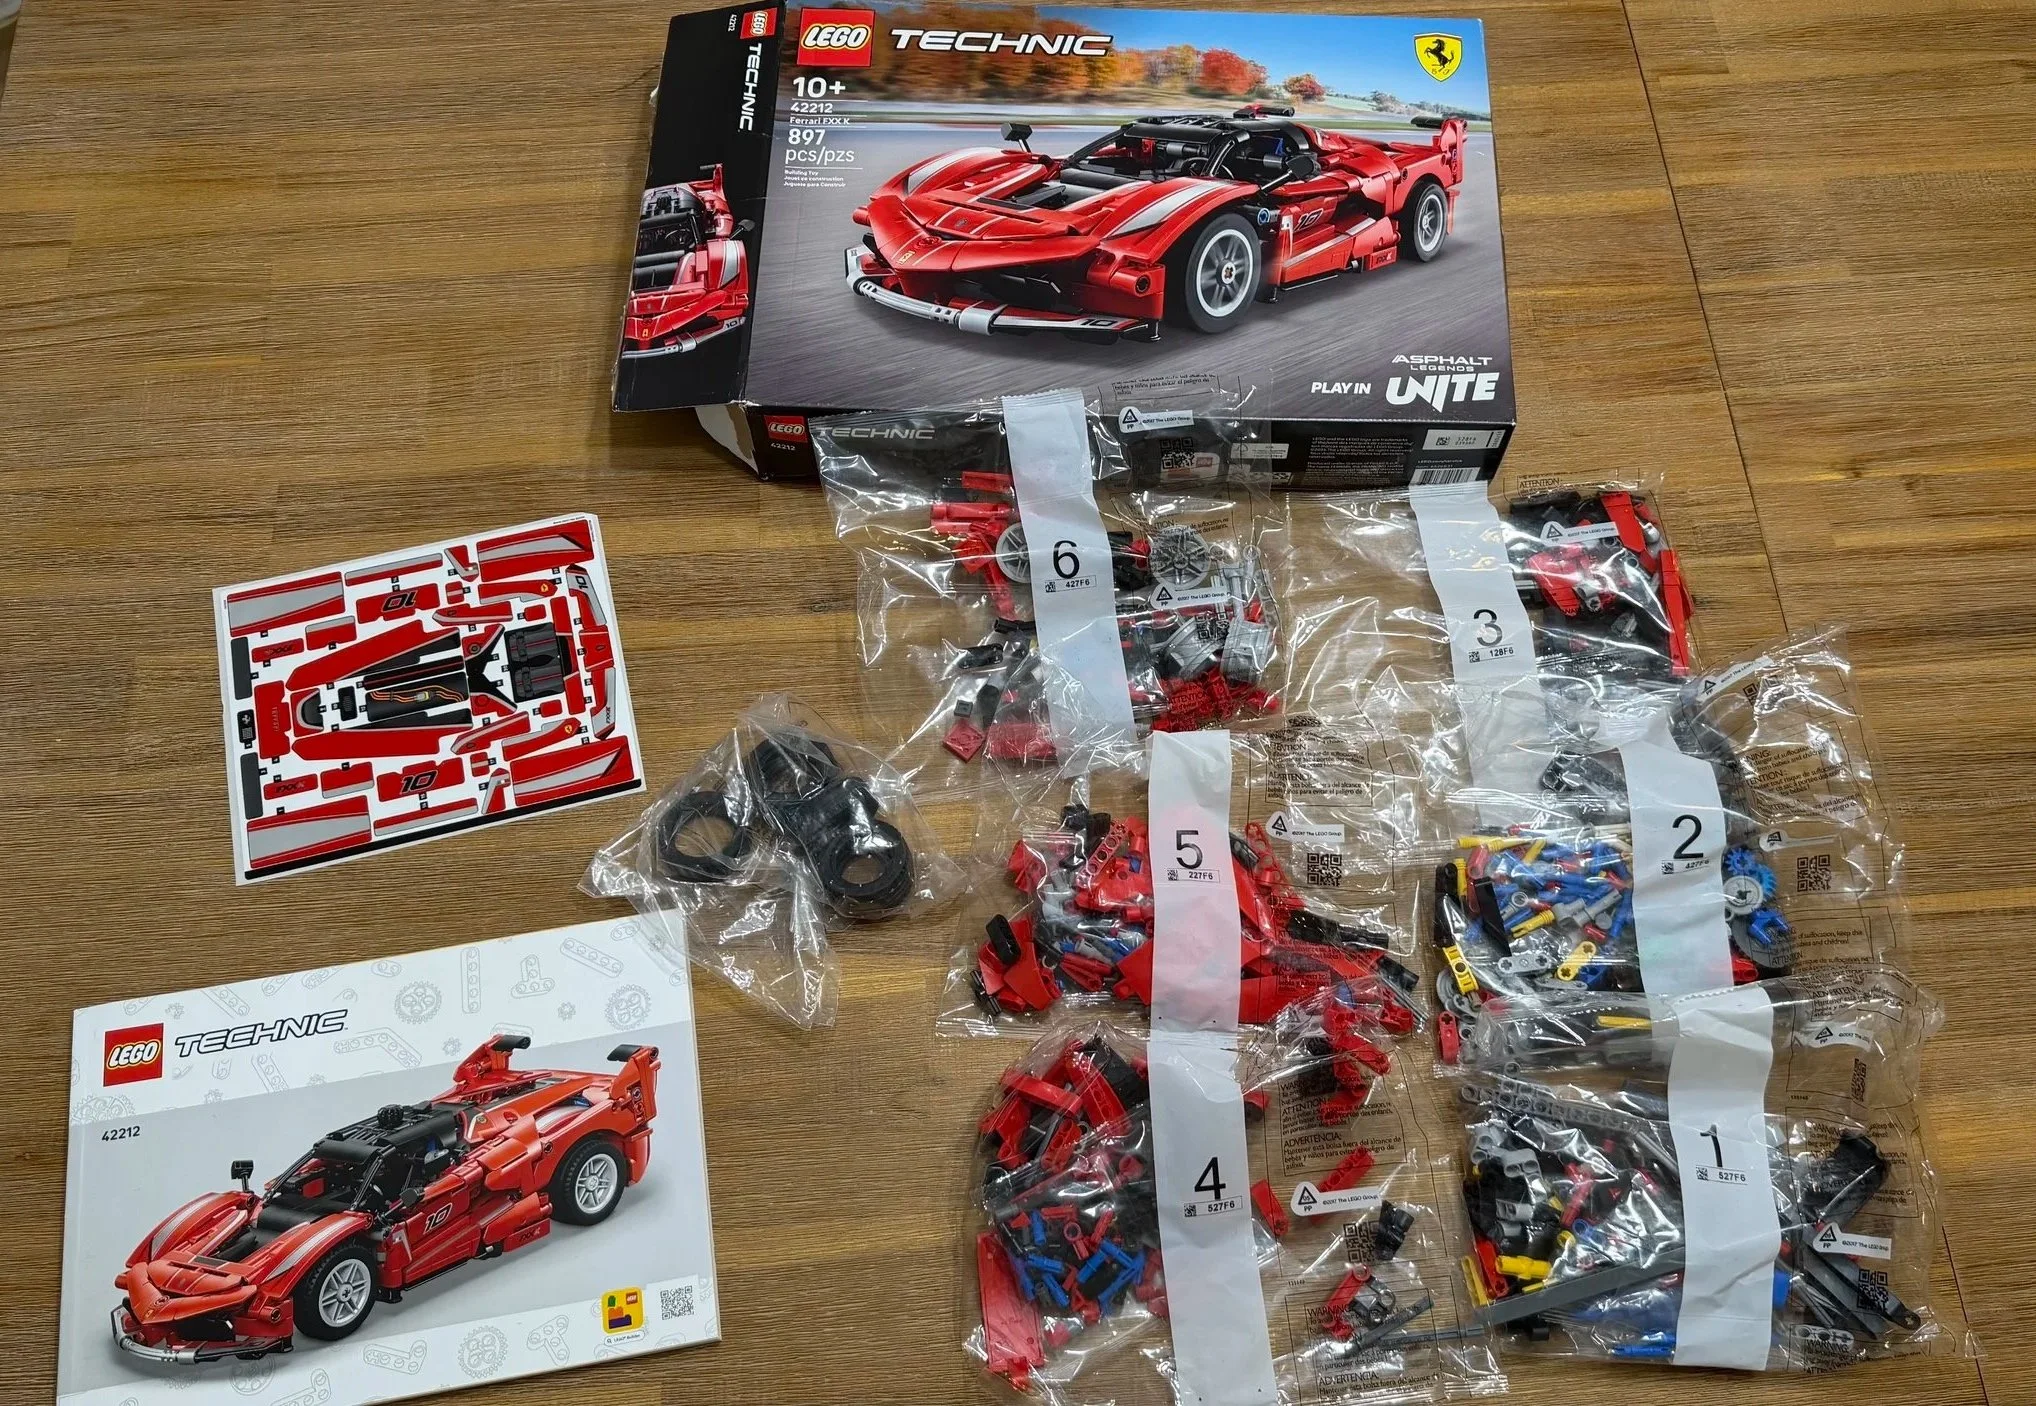
The box, instructions, six numbered bags, tires, and sticker sheet before the Ferrari build begins.
Bag-by-Bag Build Notes
Bag 1: Chassis, Seats, and Steering
Time and ratings: 30:00 • Difficulty 3/10 • Repetition 3/10 • Dexterity 8/10
The first bag builds the initial frame, seats, and front-wheel steering mechanism. There are three stickers to place, including the two seat decorations. The structure is straightforward to follow, but the amount of pin insertion makes it physically demanding from the start.
That is why I scored the construction at 3/10 while giving the finger and dexterity demand an 8/10. Understanding where a part goes and comfortably pressing it into place are two different parts of this build.
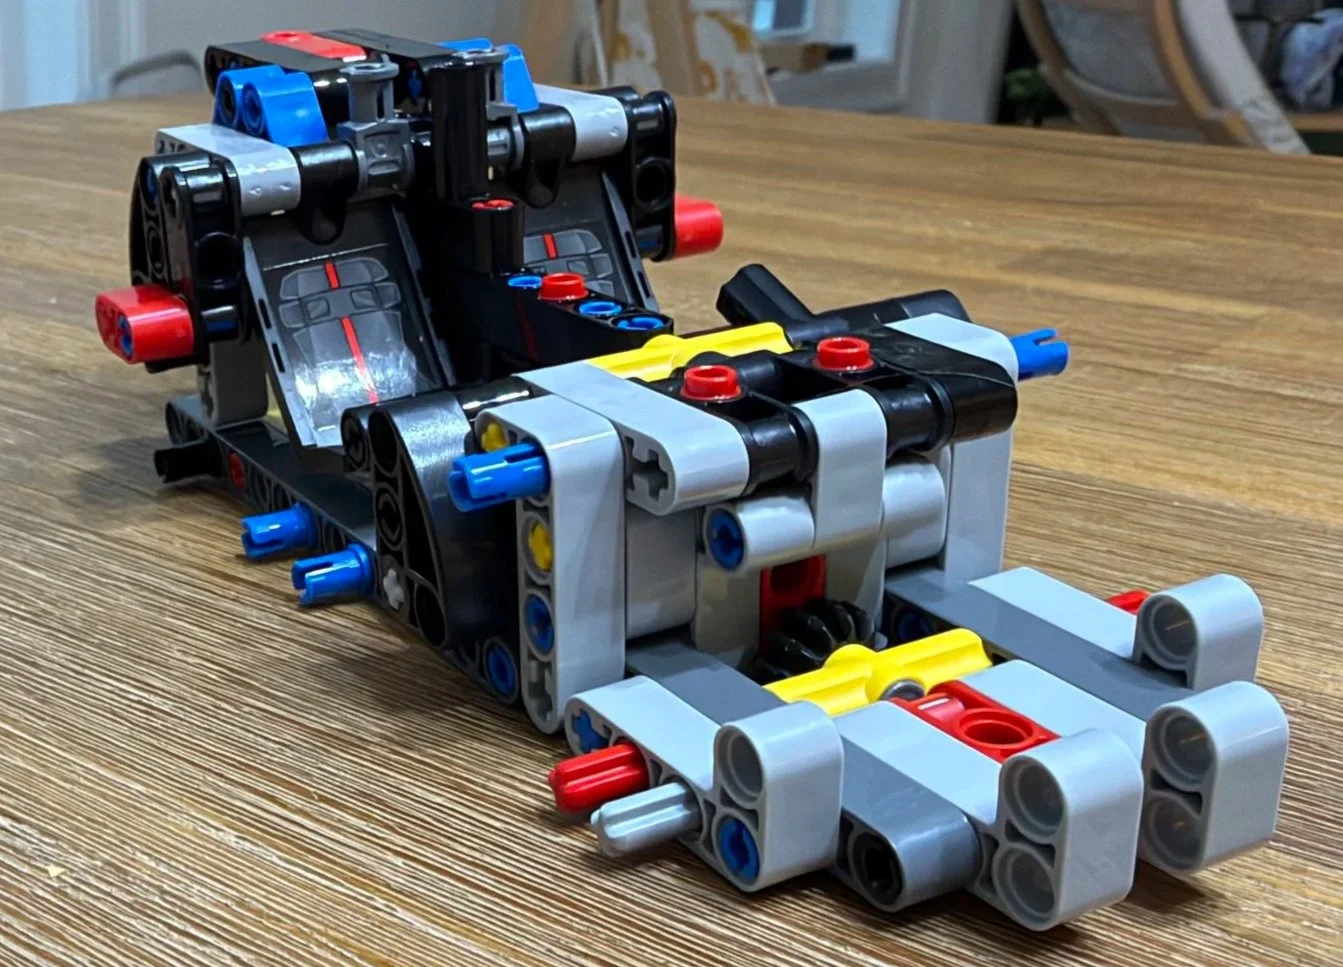
The first stage establishes the chassis, decorated seats, and steering structure before the engine and body panels are added.
Bag 2: The V12 Engine and Rear Frame
Time and ratings: 27:38 • Difficulty 6/10 • Repetition 7/10 • Dexterity 9/10
The engine is the highlight of Bag 2, but assembling the twelve pistons introduces plenty of repetition. The crankshaft offset pieces need to face the correct directions, so this is a section where orientation deserves close attention.
I found the LEGO Builder app especially useful here. Rotating the model in 3D made it easier to check placements and connections. Attaching the engine and the two surrounding sides was still extremely difficult and required a lot of finger strength.
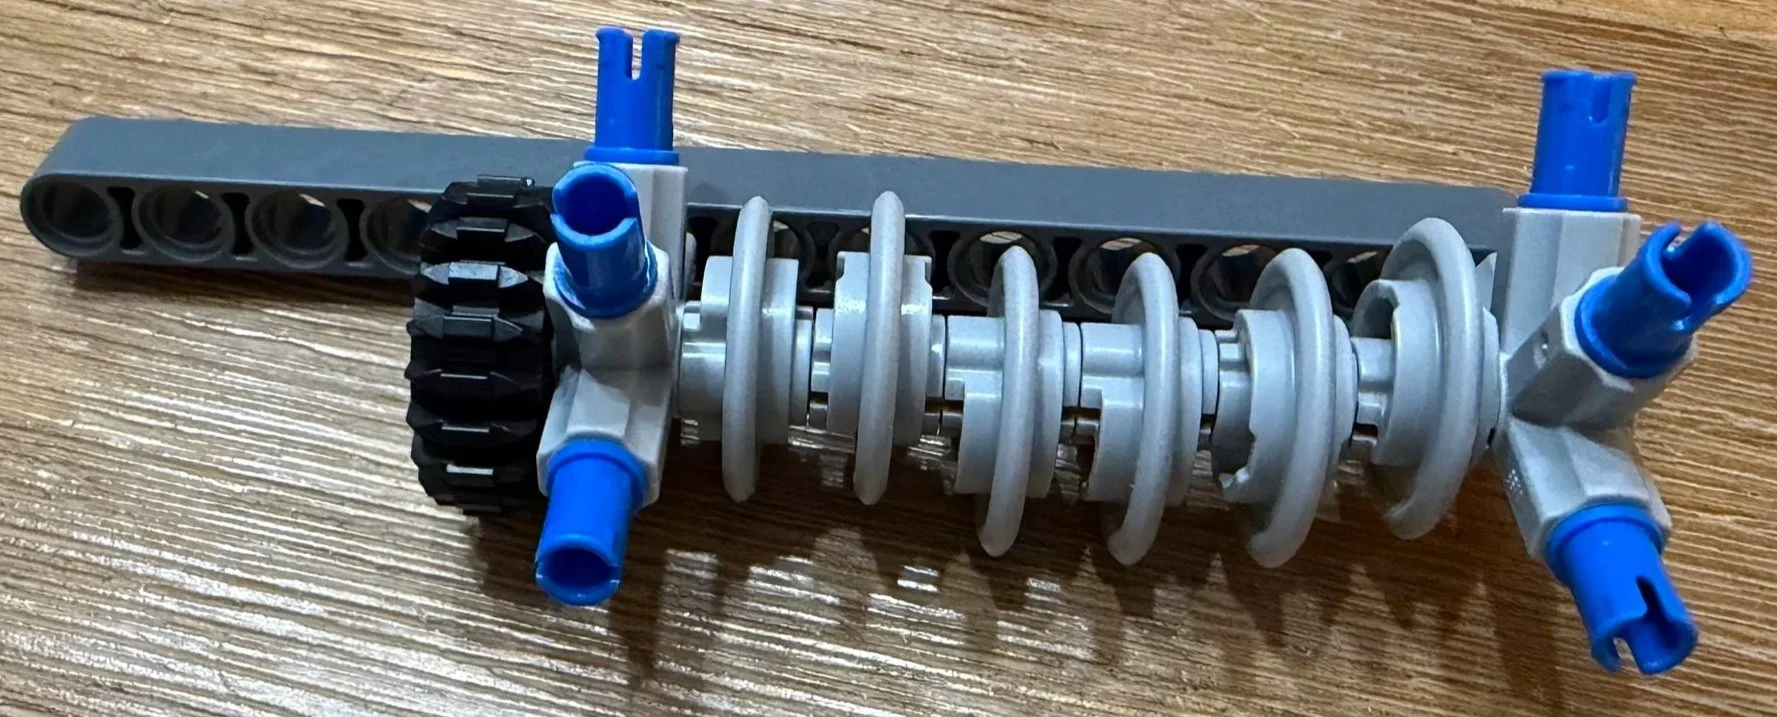
A close look at the crankshaft assembly shows why the orientation of its offset pieces matters.
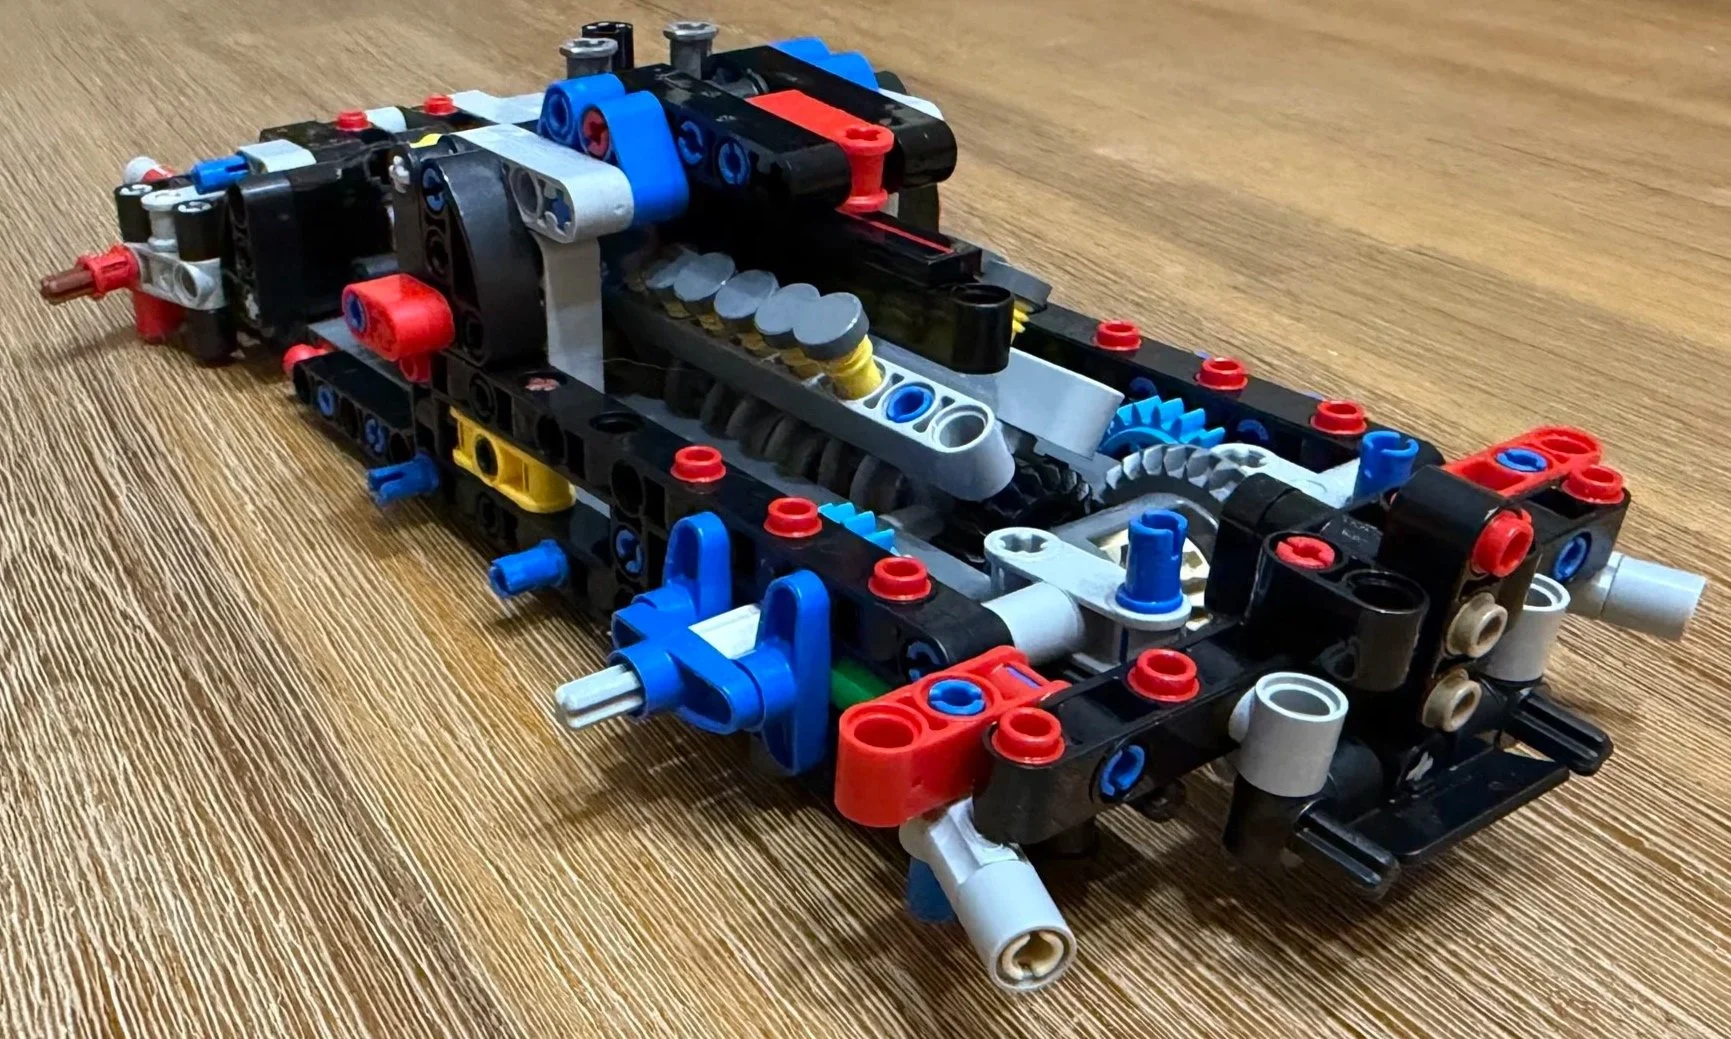
The engine and rear frame are in place, with the pistons and gears still exposed before the bodywork covers them.
Bag 3: Curved Bodywork and the Opening Hood
Time and ratings: 22:07 • Difficulty 4/10 • Repetition 4/10 • Dexterity 6/10
Bag 3 adds the hood, front bumper, steering wheel, and roof. Eight stickers go on here, along with some familiar LEGO bricks that give my thumbs a welcome break from the heavier Technic connections.
The front bumper uses a gray flexible axle to create its distinctive curve. Two black flexible axles form the outer edges of the windshield opening, while the gear on the roof lets you steer the front wheels.
The hood was my favorite part of this bag. Its attachment is a clever way to let it open easily and sit neatly against the model when closed. This was a welcome stretch of creative bodywork after the effort of installing the engine.
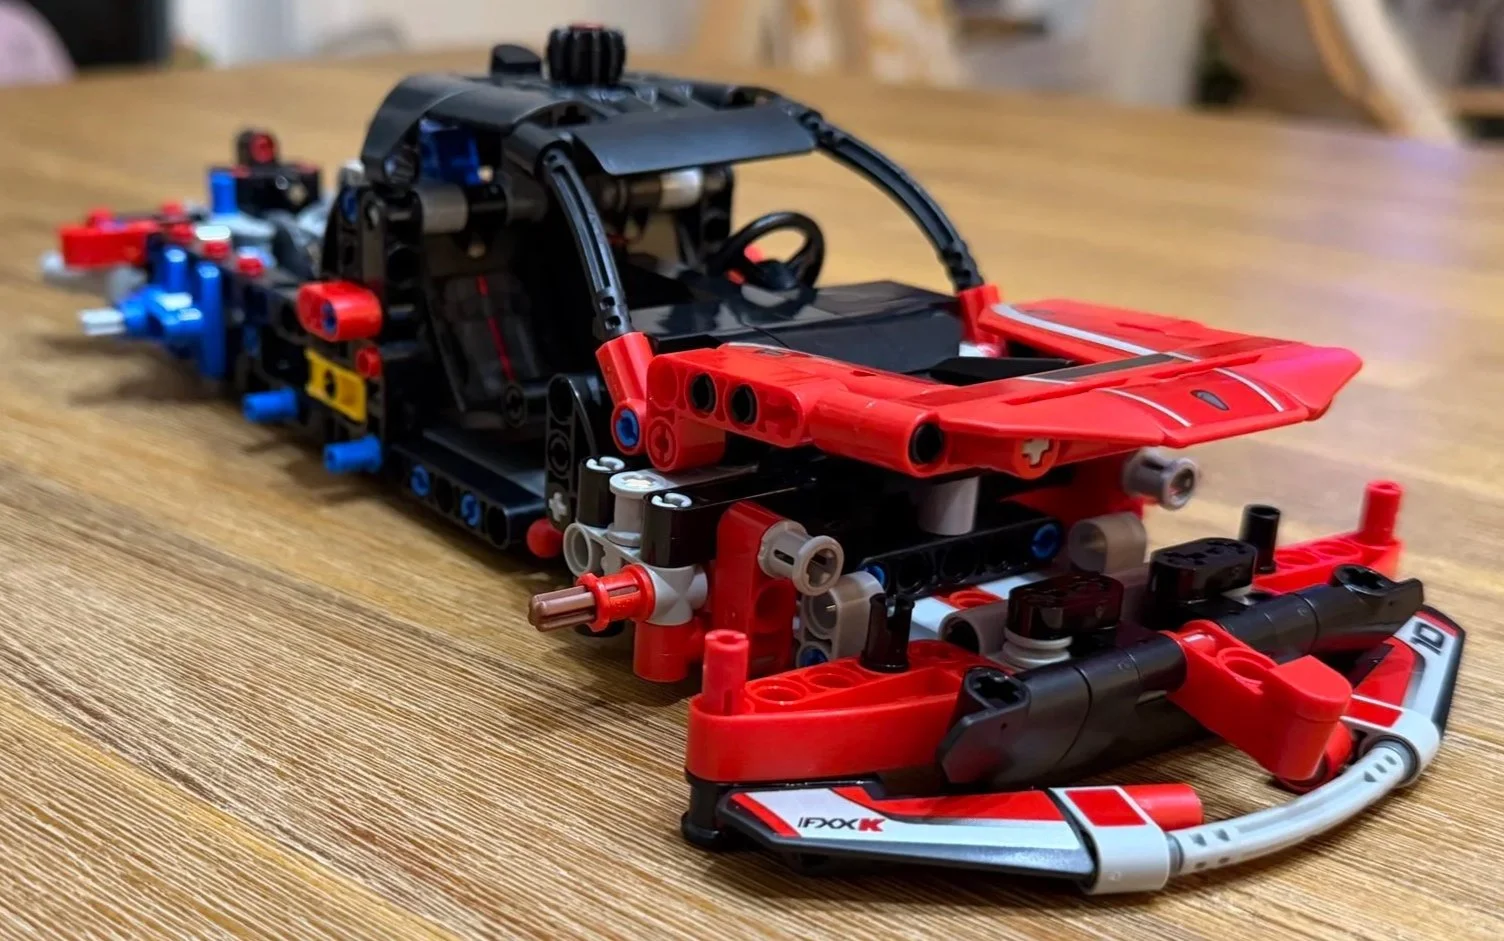
The curved front bumper, windshield frame, roof steering control, and opening hood give the chassis its first recognizable Ferrari features.
Bag 4: Wheel Arches, Side Panels, and Rear Bumper
Time and ratings: 30:43 • Difficulty 4/10 • Repetition 2/10 • Dexterity 5/10
This bag creates the curved front wheel arches and the mirrored assemblies along the sides of the frame. It also finishes the rear bumper, including the Ferrari sticker in its center. There are nine stickers to apply in this stage.
The car starts looking much more complete here. Although there is some mirrored construction, the overall sequence felt varied enough for a repetition score of just 2/10. The engine remains visible, which makes this a useful point to appreciate how the bodywork is being built around the mechanical structure.
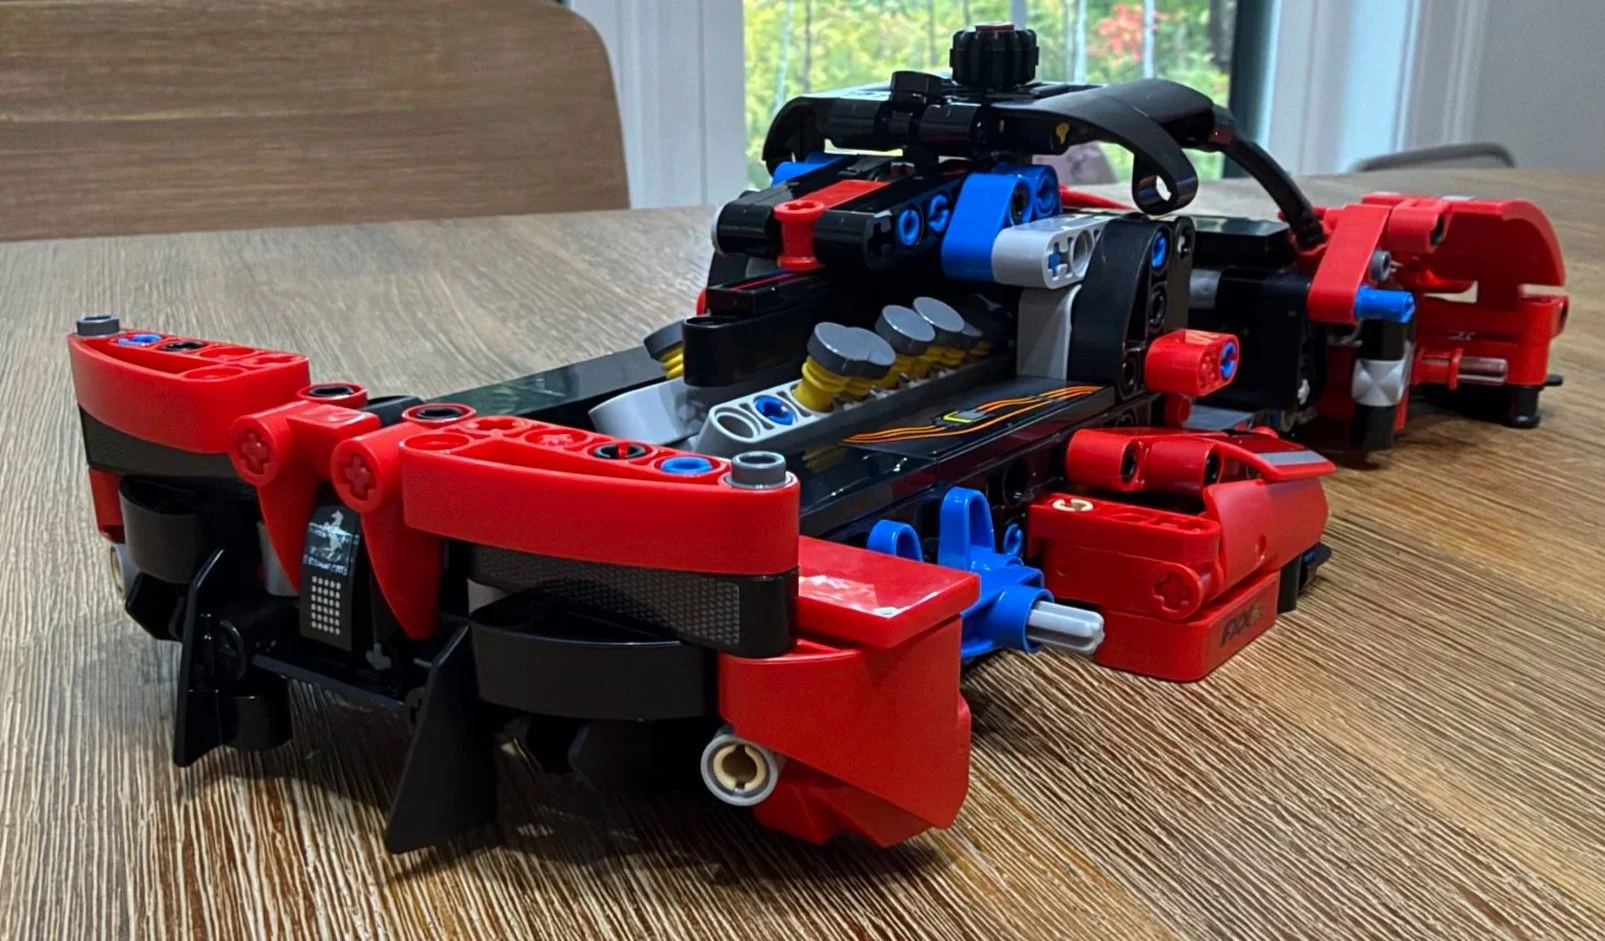
The side panels and rear bumper are taking shape, while the engine remains exposed ahead of the large rear cover assembly.
Bag 5: The Challenging Rear Engine Cover
Time and ratings: 36:20 • Difficulty 8/10 • Repetition 6/10 • Dexterity 9/10
Bag 5 was the hardest section by a significant margin. It builds the large rear engine cover, and the separate assemblies feel weak until they are attached to the car. The pins you need to connect are not fully visible, which makes lining everything up frustrating.
Trying to support the loose structure while finding the right connection points takes patience and finger strength. I would slow down here, check the alignment from more than one angle, and avoid pressing harder until the pins and holes are lined up.
The payoff is a rear cover that looks great and opens and closes well. The support holding it open is a nice detail, and lifting the finished assembly to reveal the engine makes the effort feel worthwhile. It is an impressive result from the section that tested me most.
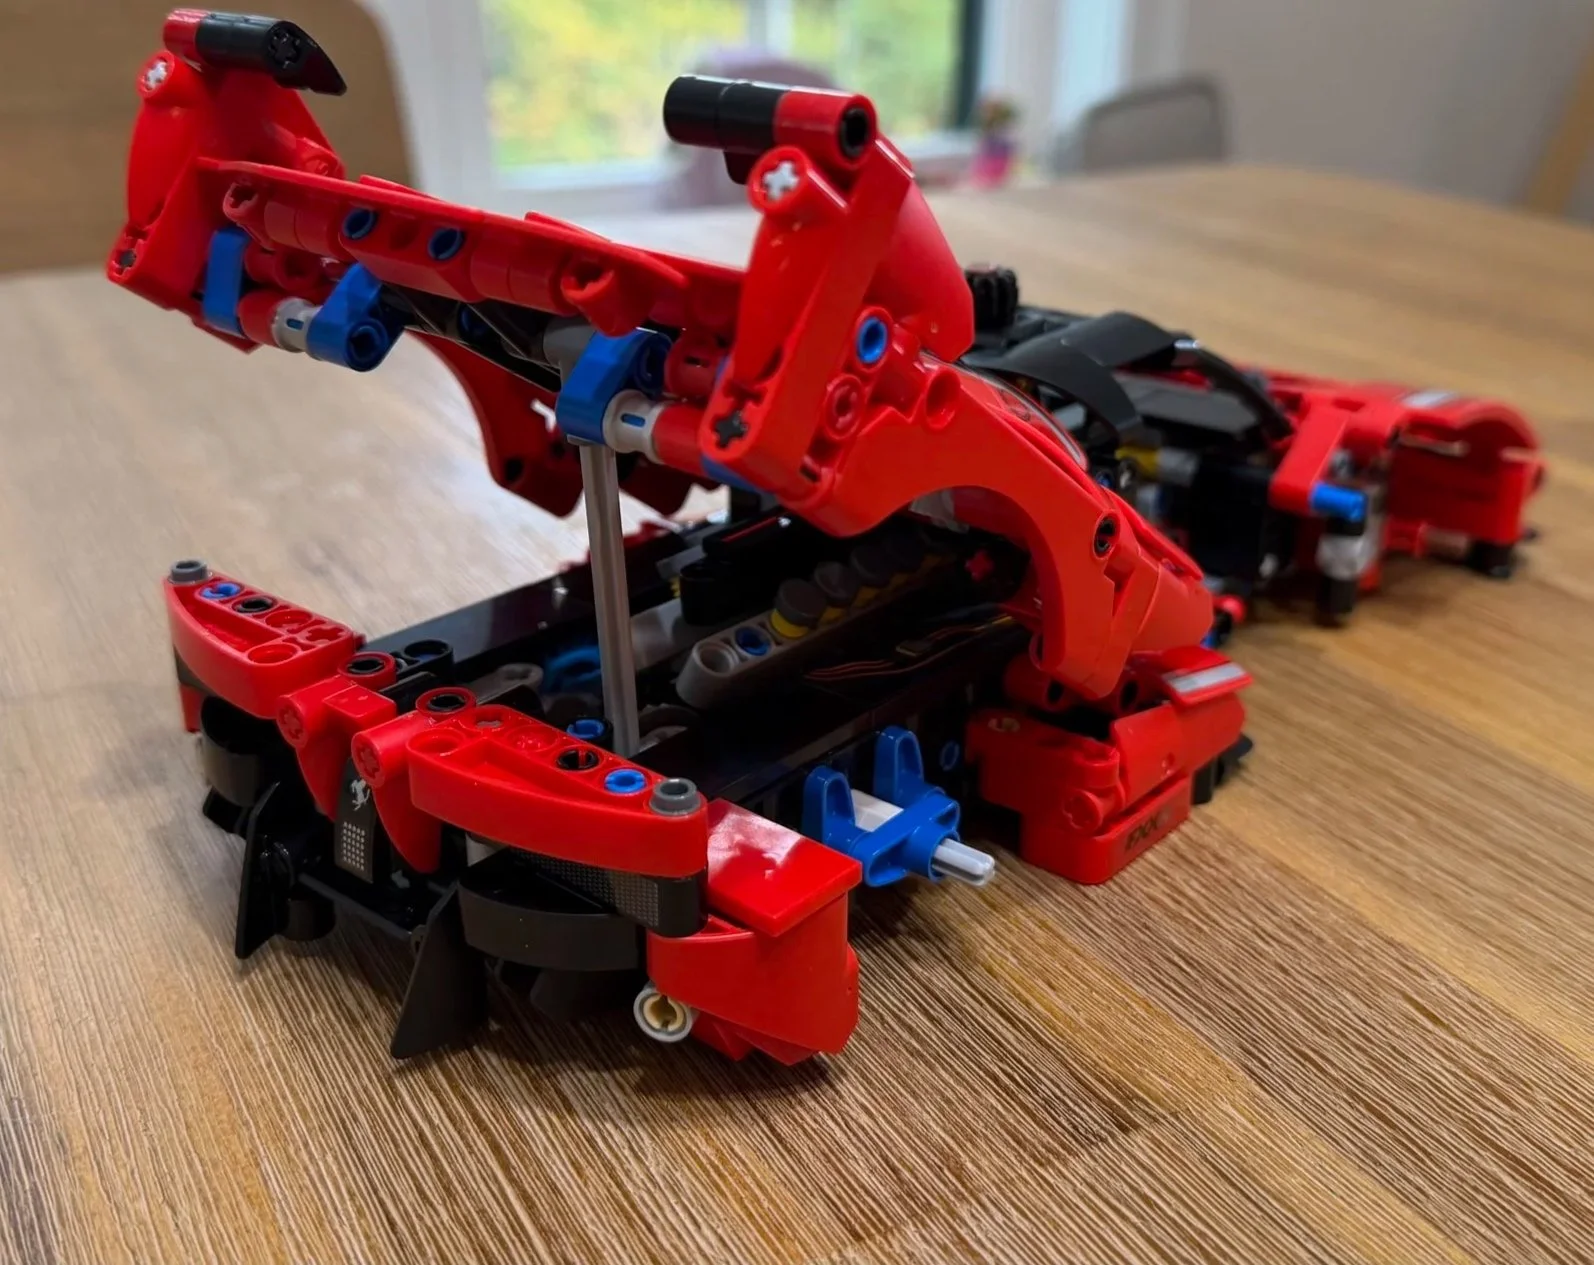
The large rear engine cover opens to reveal the engine, with its support visible underneath; the doors and wheels have not yet been added.
Bag 6: Butterfly Doors, Mirrors, and Wheels
Time and ratings: 30:03 • Difficulty 5/10 • Repetition 6/10 • Dexterity 6/10
The final bag builds the two butterfly doors. Several of their Technic connections are difficult to press together, but attaching the completed doors to the car was surprisingly easy.
There is repetition because you build a left and a right version of the same design, although the mirrored work is spread through the sequence. Ten stickers are applied in this bag. The mirrors follow, then the rear taillight detail with another curved axle, and finally the wheels.
Opening the doors gives the finished model the supercar effect I was hoping for. With the hood and engine cover open too, there is plenty to look at beyond the car’s exterior shape.
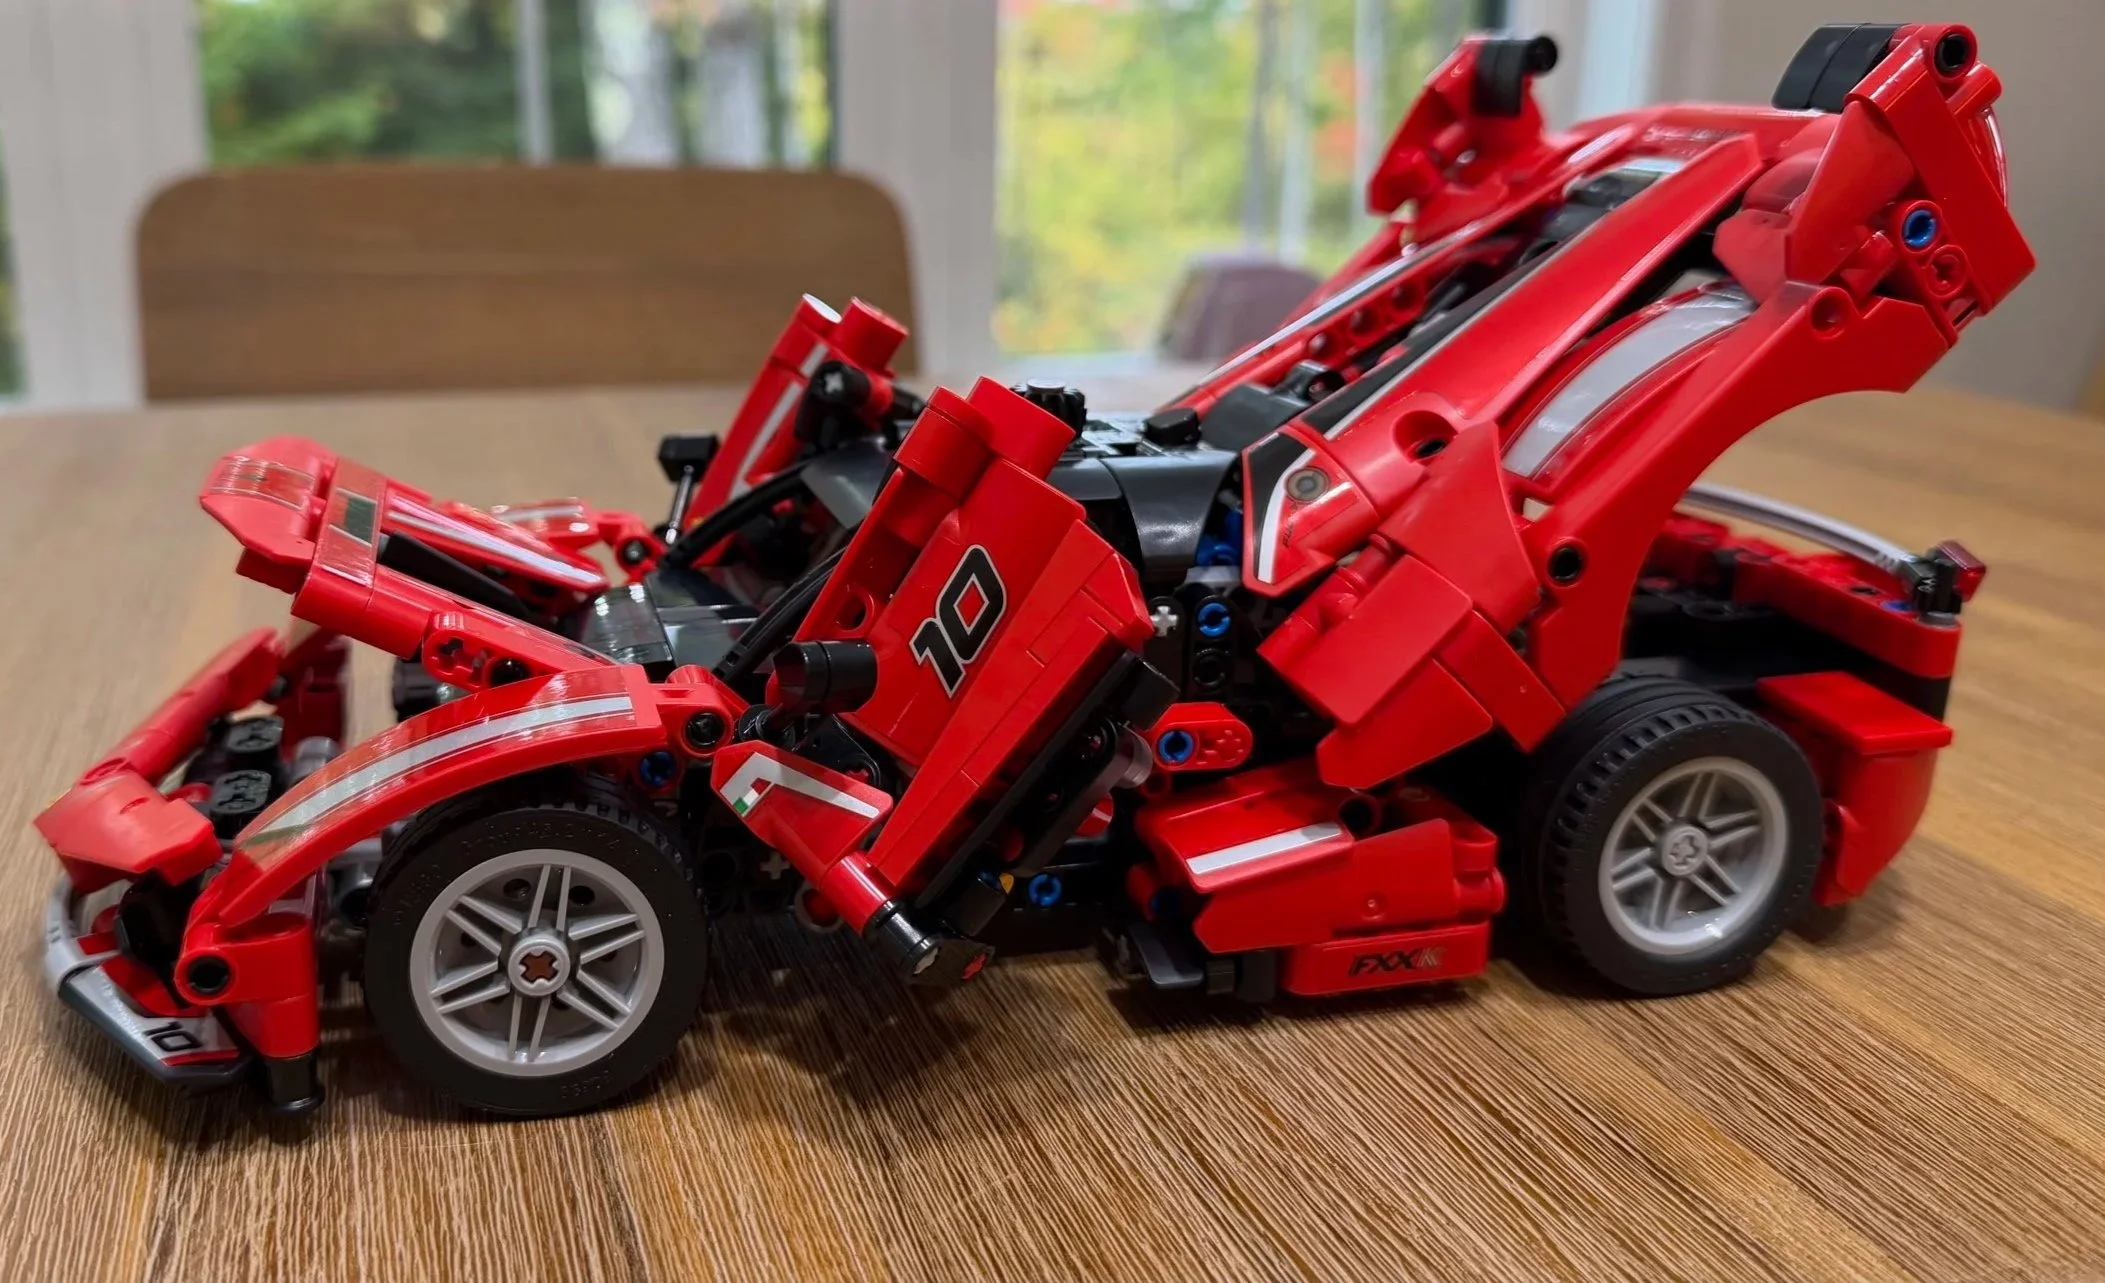
The finished Ferrari with its butterfly doors, front hood, and rear engine cover open.
What Could Someone Struggle With?
The main obstacles are finger strength, connection alignment, and keeping track of orientation. A builder can understand the instructions and still find the physical assembly difficult.
Repeated pressure on the fingers. Bag 1 was demanding from the outset, and Bags 2 and 5 both reached 9/10 for dexterity. I would plan breaks between these stages, especially if repeated pin connections make your hands tired.
Engine orientation. The crankshaft pieces in Bag 2 need specific placement. Rotate the digital model in the LEGO Builder app and check the arrangement before building around it. An early orientation error can become harder to reach later.
Hidden connection points. Bag 5 combines an unfinished assembly with pins that are difficult to see. Support the section close to the connection and check alignment before applying pressure.
Sticker patience. Decorations appear throughout the bodywork, rather than in one short finishing session. Keeping mirrored panels and their stickers in the correct orientation takes attention, and the volume of stickers reduced my enjoyment.
Mirrored door construction. The two doors follow a similar pattern, but their orientation changes from one side to the other. Check the instructions for each door instead of relying only on memory from the first one.
Display Quality, Functions, and Stability
The completed Ferrari feels very stable, and the moving features work well. Rolling the car moves the engine pistons, the roof control steers the front wheels, and the butterfly doors, front hood, and rear engine cover open easily.
The red panels and racing decorations create an impressive display piece. The stickers were a chore during construction, but they contribute a lot to the finished appearance. I particularly like being able to open the engine cover and see the mechanism that took so much effort to assemble.
For a child who enjoys model cars, there is plenty to explore once the build is finished. I would still handle the mirrors, wing tips, and open panels carefully. The sturdy feel of the main structure does not tell us how those smaller details will respond to rough play.
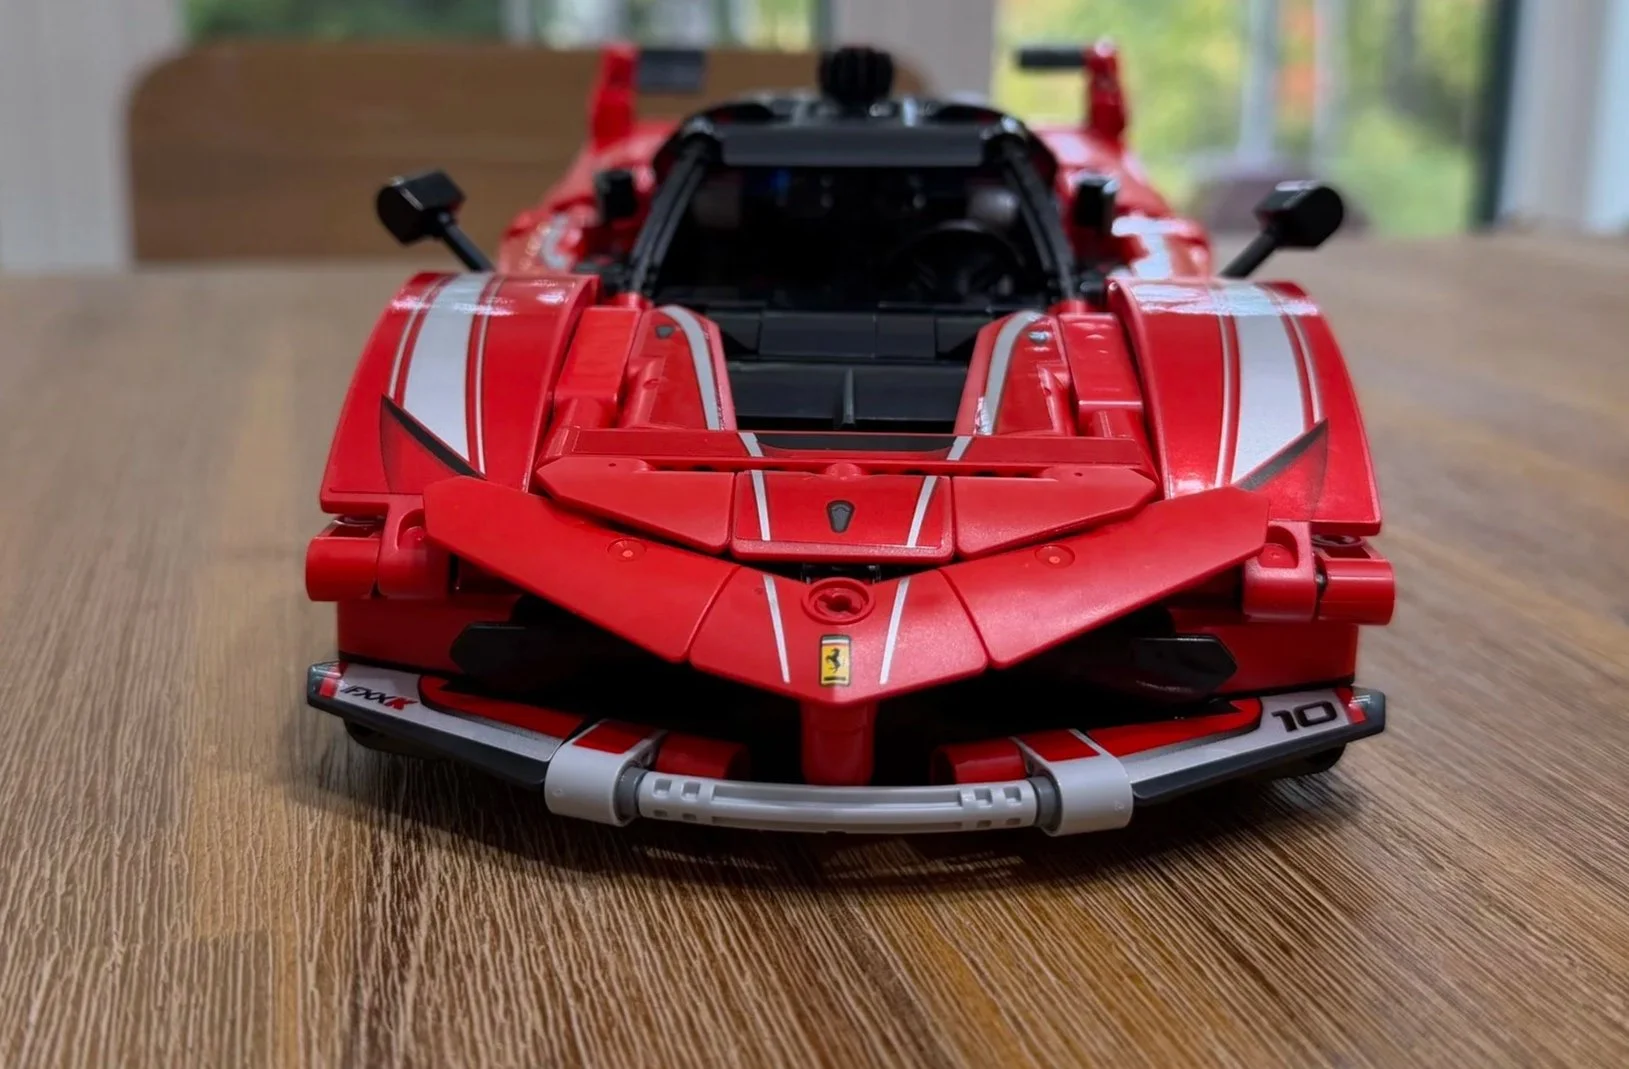
The completed front end combines the Ferrari badge, red and silver bodywork, and the curved lower bumper.
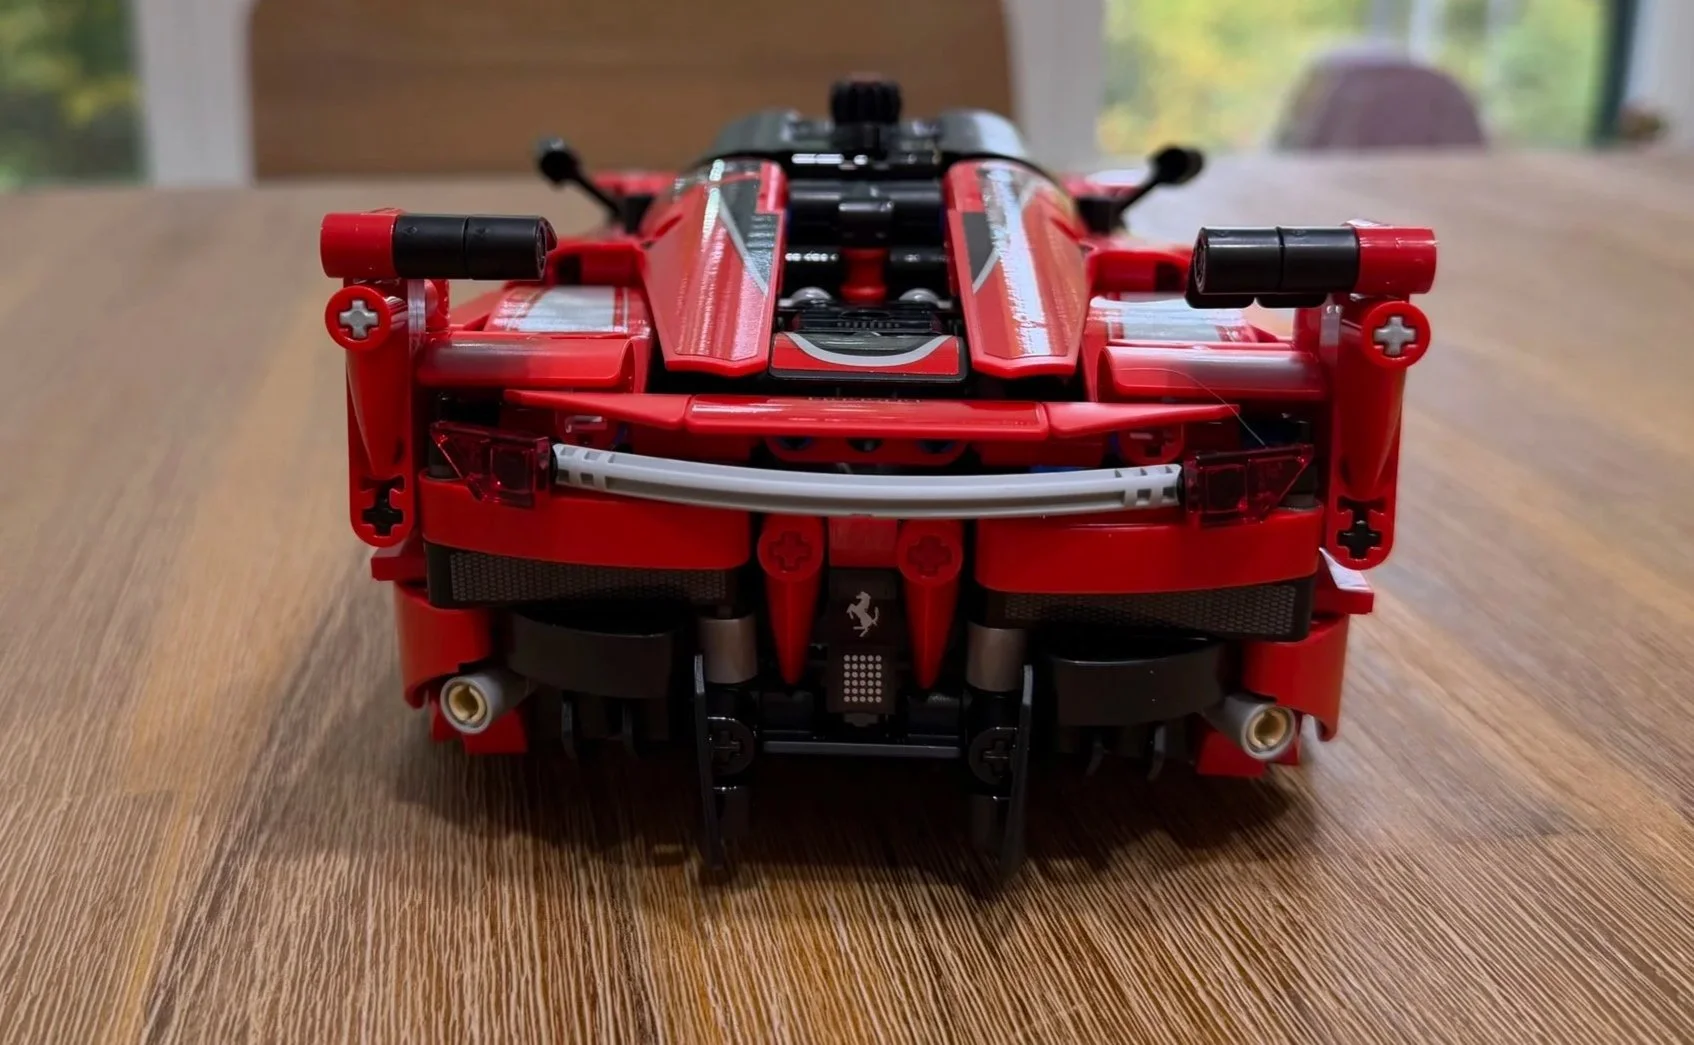
The rear view shows the wing tips, taillights, exhaust outlets, and black diffuser below the closed engine cover.
Moving, Rebuilding, and Disassembly
For a customer handoff, I would support the Ferrari underneath the main chassis and keep the doors, hood, and engine cover closed. The mirrors, curved bumper details, and rear wing tips would need protection from pressure and snagging during transport.
If the car arrived partly damaged, I would first check whether the problem was limited to exterior panels or involved the engine and internal frame. The difficult engine and rear-cover connections make the condition more useful than the piece count alone when estimating repair work.
For disassembly, I would work back through the instructions, keep left and right body panels grouped separately, and protect the stickered surfaces from scraping. I would also avoid pulling on flexible axles or thin exterior details to separate larger sections. The shipping plan and repair scope would depend on the condition of the actual model.
Who Would I Recommend LEGO 77255 To?
I would recommend the Ferrari FXX K to Ferrari fans and car enthusiasts who enjoy mechanical features and want a sturdy finished model. LEGO recommends it for ages 10 and up. Based on my build, I would expect some children to need help with the engine installation, rear cover, and tighter door connections.
Final Verdict
My overall set rating is 6/10. The finished Ferrari is impressive, stable, and enjoyable to handle, but the building experience is held back by the sticker work and several demanding connections. The opening bodywork and moving engine are the main reasons I am pleased with the result.
Overall set rating: 6/10
Hardest and longest bag: Bag 5 • difficulty 8/10 • 36:20
Lowest construction difficulty: Bag 1 • difficulty 3/10, despite high finger demand
Highest dexterity demand: Bags 2 and 5 • 9/10 each
Standout techniques and features: The curved front bumper, opening hood, moving pistons, and butterfly doors
Main drawbacks: Sticker volume, tight connections, and the hidden attachment points in Bag 5
Want the Finished Set Without the Build?
The Bricksmith helps with LEGO set assembly, rebuilding, disassembly, sorting, and re-bagging. If you would like help with this Ferrari or another set, send the set number and a few photos. I can assess the work and provide a written scope, price, estimated timing, and handoff plan before you decide.
Local pickup and return are available around Greater Portland, Maine. Mail-in projects are considered individually and require approval before shipping.