
LEGO Speed Champions Lightning McQueen 77255 Build Review
LEGO Speed Champions Lightning McQueen 77255 makes a wonderful little display piece for Cars fans. The finished model is very stable and full of character, with the familiar eyes, grin, racing graphics, and number 95 bringing McQueen to life.
My overall set rating is 7/10. I enjoyed the construction, especially the spoiler, rear window, and surprising underside details in the final bag. The main frustration is the sticker work: there are 22 to apply, and several are tiny stickers going onto tiny pieces. Bag 2 was the least enjoyable stretch for that reason.
My set rating: 7/10 • My recorded build time: 42 minutes 33 seconds
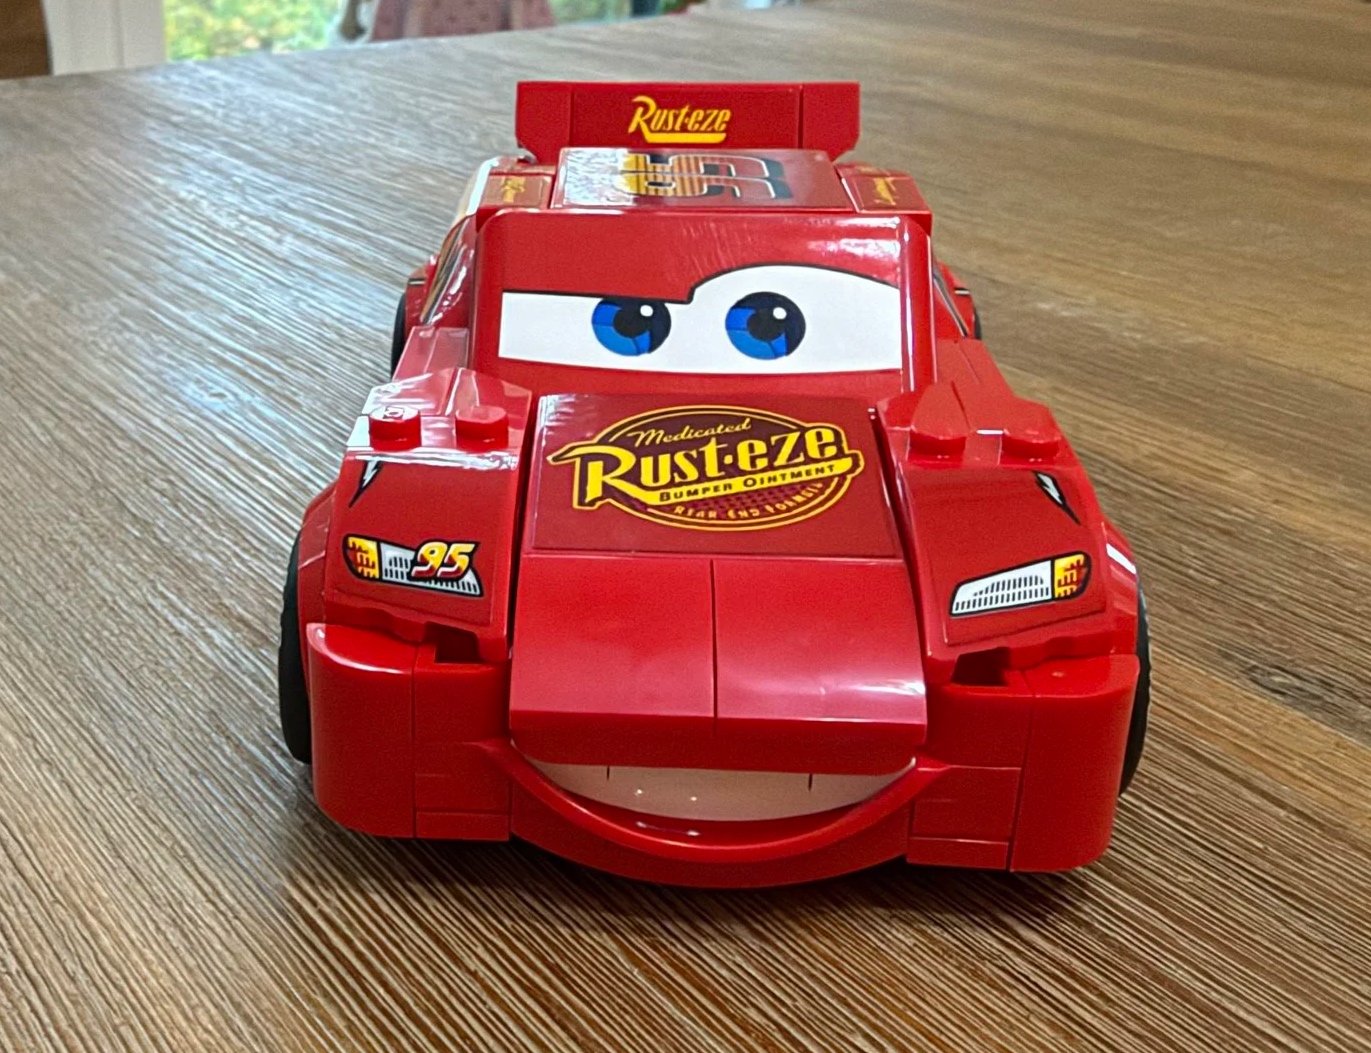
The completed Lightning McQueen, with his windshield eyes, Rust-eze hood logo, and familiar grin.
At a Glance
Set: 77255 • LEGO Speed Champions • Lightning McQueen
Movie connection: Disney and Pixar’s Cars
Pieces and bags: 270 pieces • 5 numbered bags
Instructions and stickers: 209 steps • 22 stickers
My recorded build time: 42 minutes 33 seconds
My overall set rating: 7/10
Main challenge: Small sticker placement, especially in Bag 2
Finished stability: Very stable once the build is complete
LEGO age recommendation: 9+
LEGO listed dimensions: Over 1.5 in. / 4 cm high, 5.5 in. / 14 cm long, and 3 in. / 7 cm wide
LEGO US price: US $27.99, checked September 28, 2026; prices may change
Official set information: LEGO Lightning McQueen 77255
What Is Lightning McQueen Like to Build?
McQueen starts with a frame built from smaller pieces, rather than the separate large chassis piece supplied with some of the Speed Champions cars I have built recently. That makes the opening structure worth paying attention to, particularly before the later pieces reinforce it.
The construction itself is enjoyable. Sticker placement is what raises the dexterity demands: holding a small part steady while aligning an equally small decal takes patience. A couple of assemblies also feel delicate before the surrounding bodywork is added, but the completed model feels very solid.
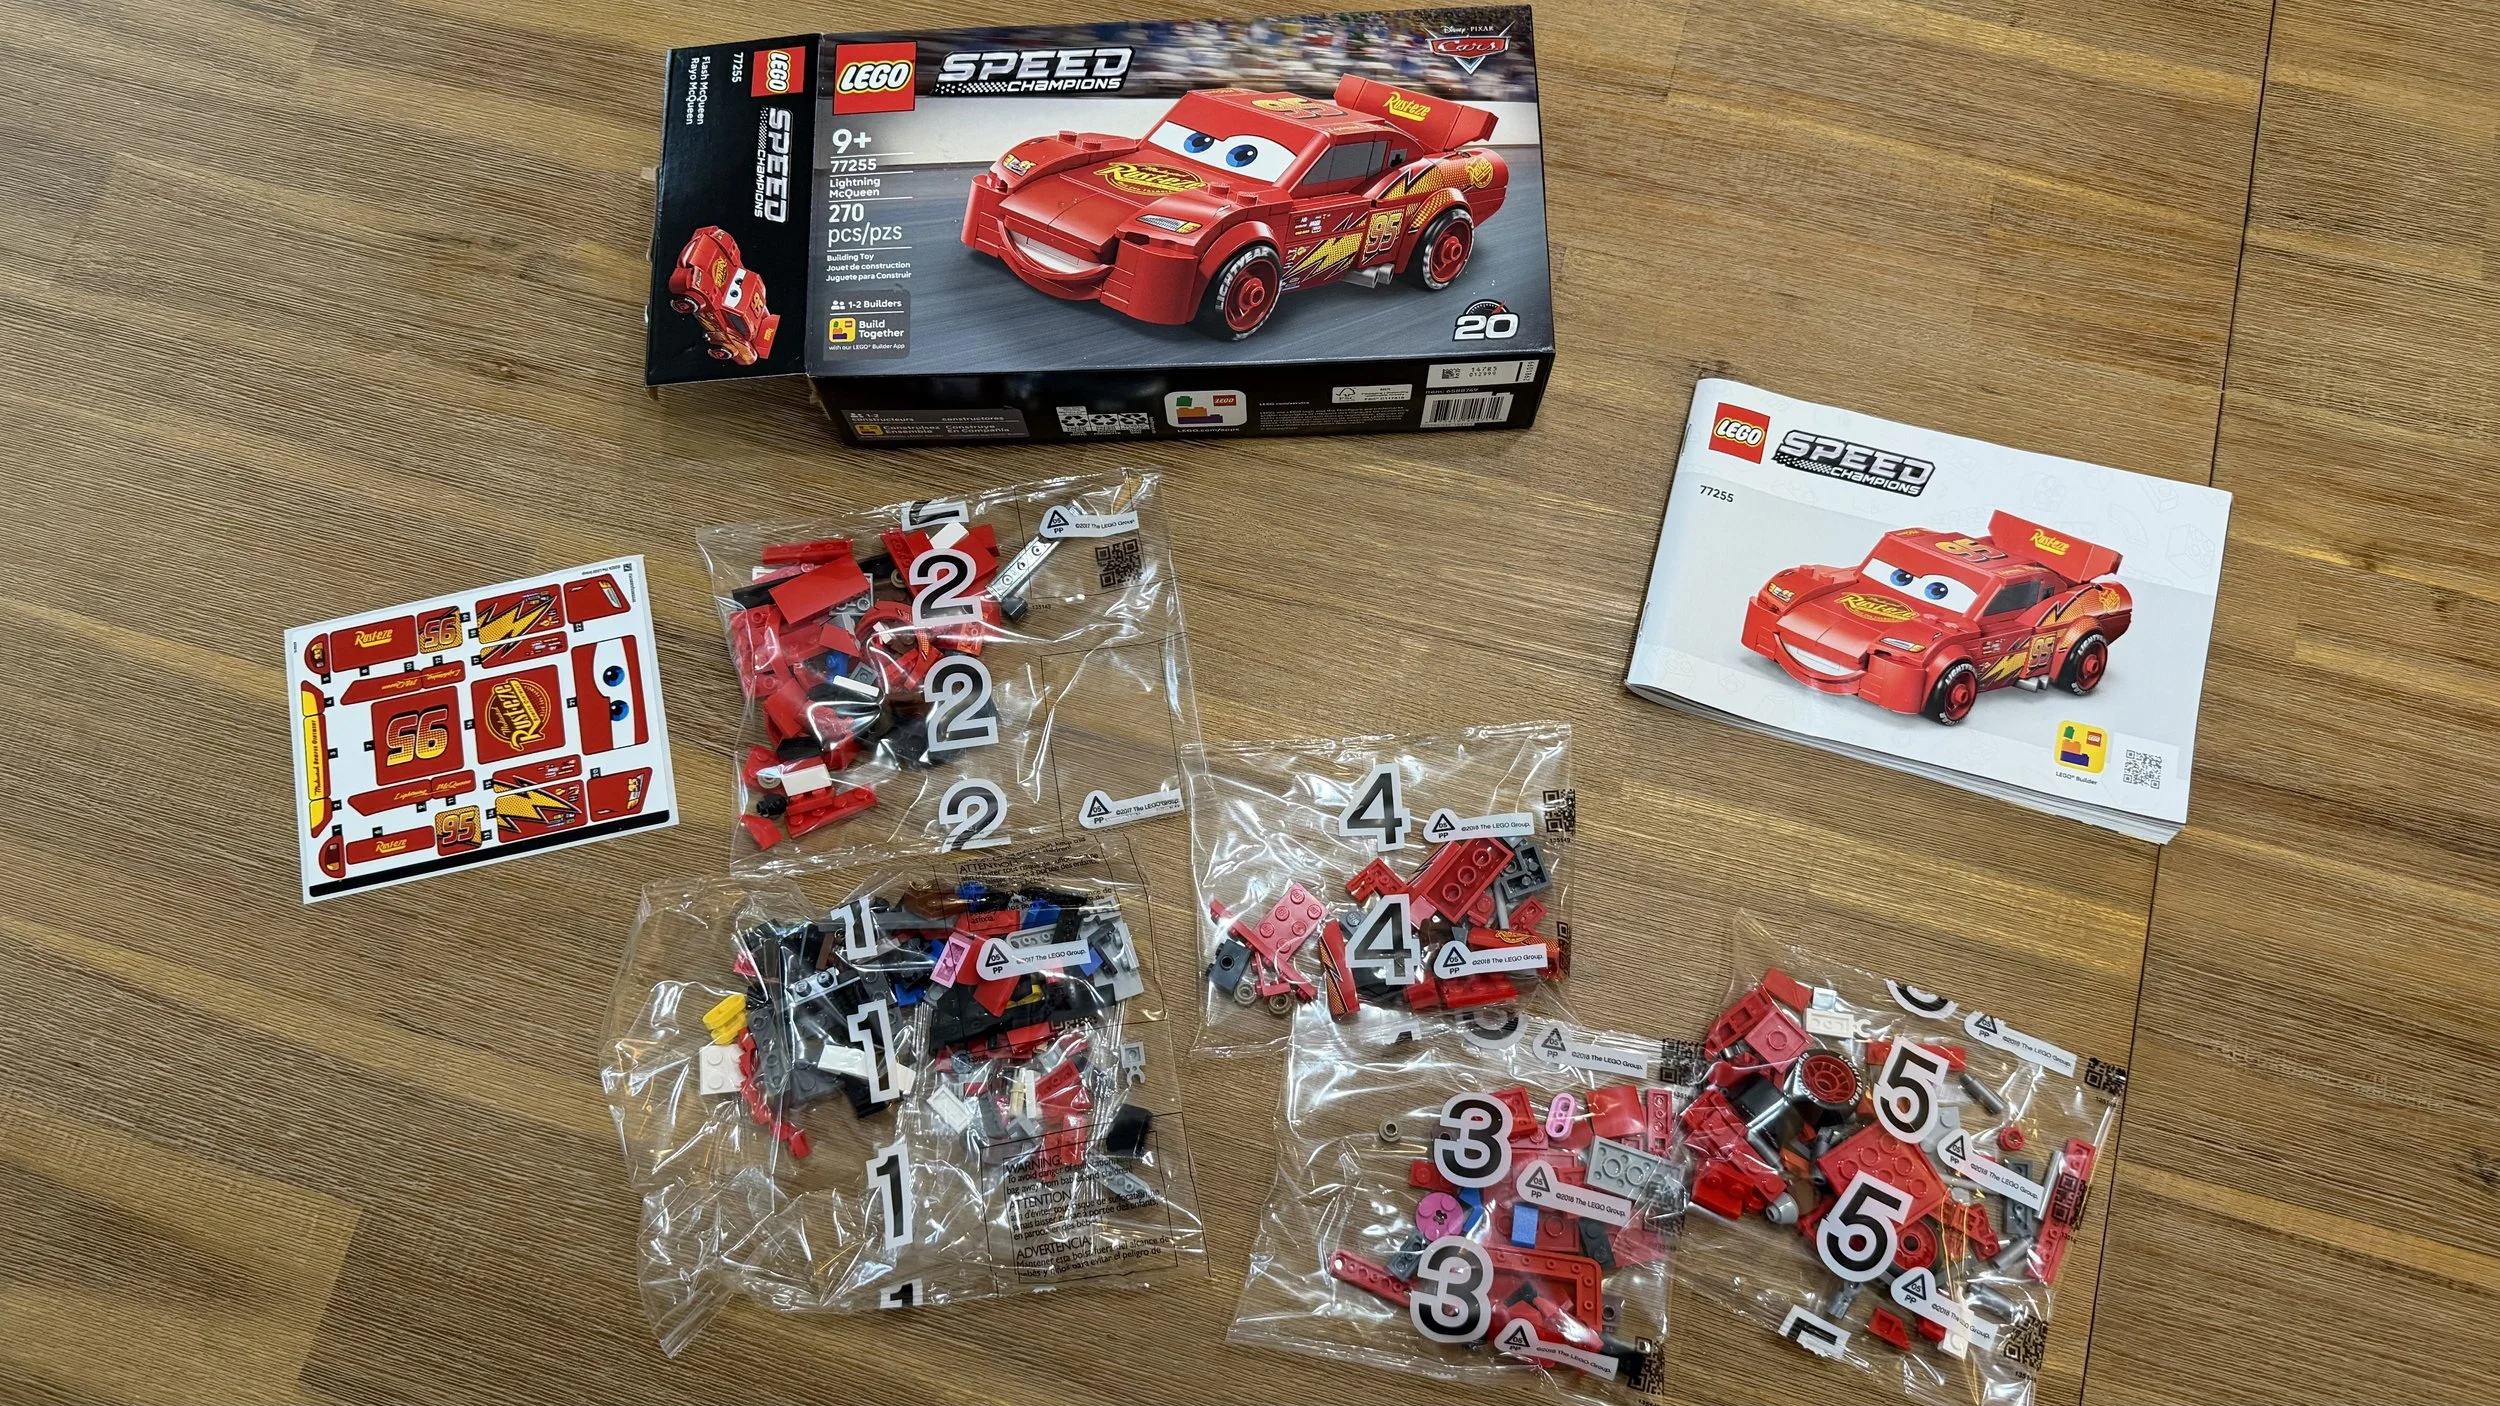
The box, instructions, five numbered bags, and sticker sheet laid out before the build.
Bag-by-Bag Build Notes
Bag 1: Building and Reinforcing the Frame
Ratings: Difficulty: 3/10 • Repetition: 1/10 • Dexterity: 3/10
Bag 1 focuses on the base frame. There is no separate large chassis piece to start from, so you build up the structure as you go. I got the orientation of one section wrong and had to take it apart and rebuild it correctly. Double-checking the direction of the assembly would have saved me some time.
The early connections can also feel weak before everything is reinforced. Support the structure close to the connection when adding pieces, and be careful about pressure on the unfinished frame. By the end of the bag, the added parts give it more stability.
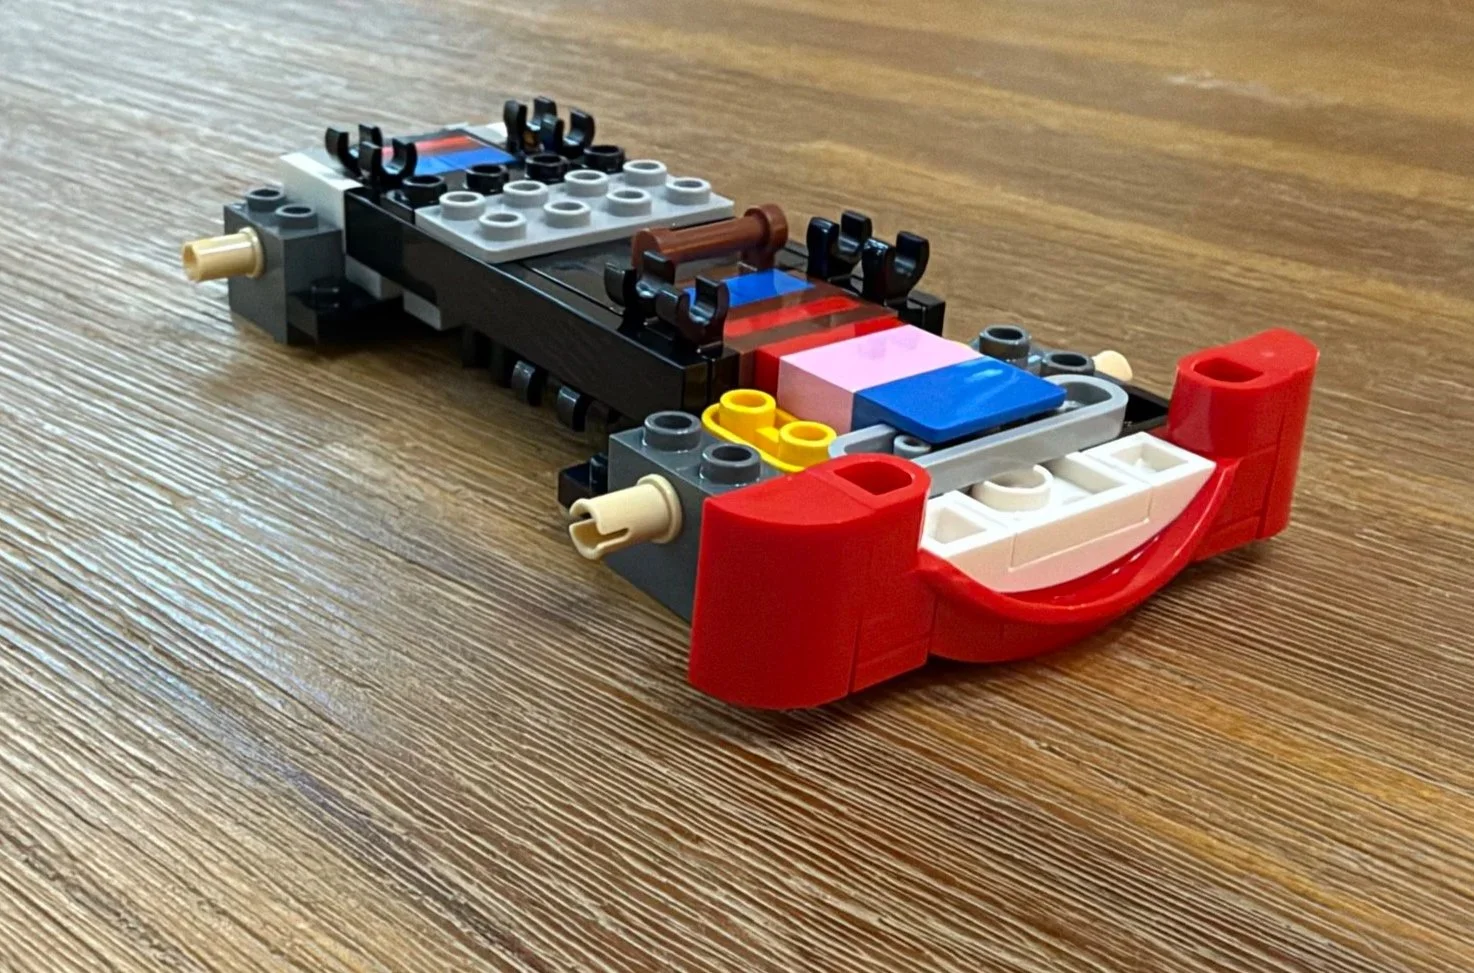
The early frame and smiling front bumper before the wheel arches and outer bodywork are added.
Bag 2: Bodywork and Ten Stickers
Ratings: Difficulty: 3/10 • Repetition: 2/10 • Dexterity: 7/10
This bag adds the rear bumper, all four wheel arches, lower door panels, and lower trim. The LEGO assembly is fun, but ten of the set’s 22 stickers are applied here. That made this my least enjoyable section.
I use a brick separator to help position the stickers. Even with that help, the small decals need careful alignment on small parts. The decoration does a lot for the finished appearance, but it is the main reason my dexterity score jumps to 7/10 while the construction difficulty stays at 3/10.
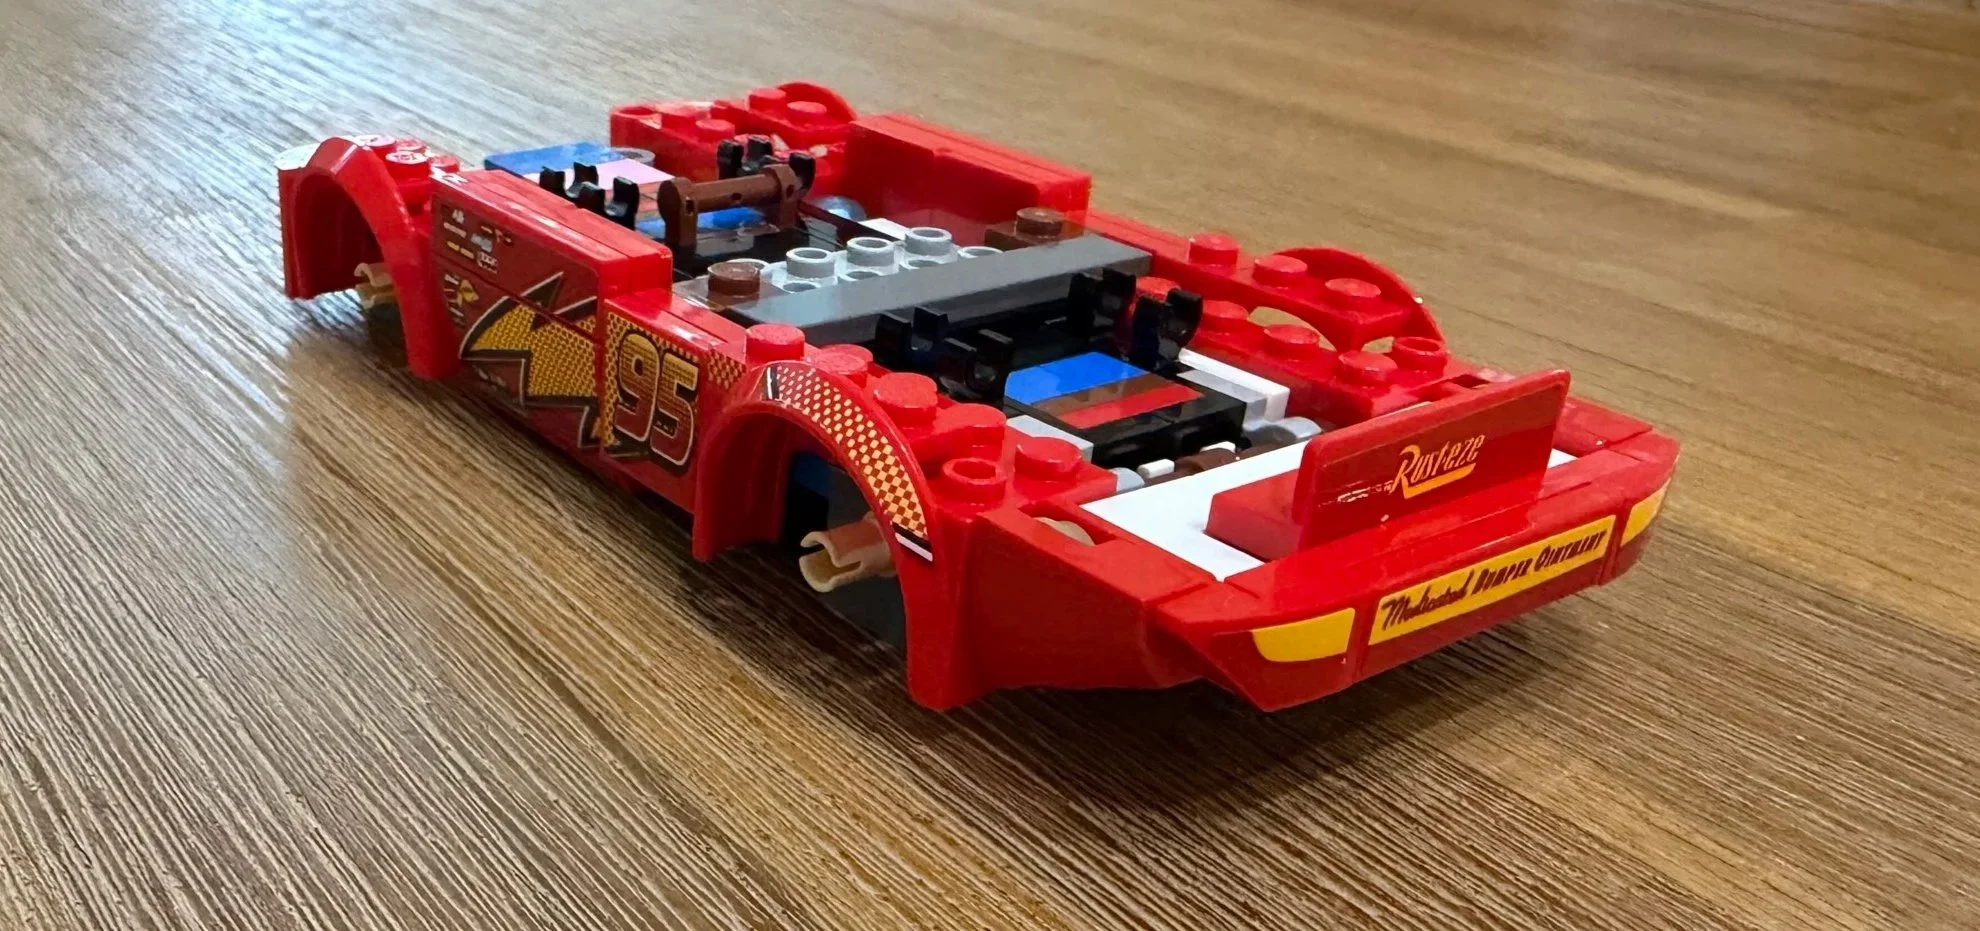
The decorated lower bodywork and rear bumper show how much of McQueen’s racing livery arrives in Bag 2.
Bag 3: Hood, Headlights, and Windshield Eyes
Ratings: Difficulty: 3/10 • Repetition: 2/10 • Dexterity: 6/10
Bag 3 is where the character really starts to appear. The hood and windshield come together with four stickers for the Rust-eze hood graphic, the two pretend headlights, and those unmistakable eyes. Ka-chow!
The windshield feels flimsy when it is first attached. Take care not to knock it while continuing the build; the surrounding assembly provides support later. Seeing McQueen’s face emerge is satisfying, even though the sticker work still calls for steady hands.
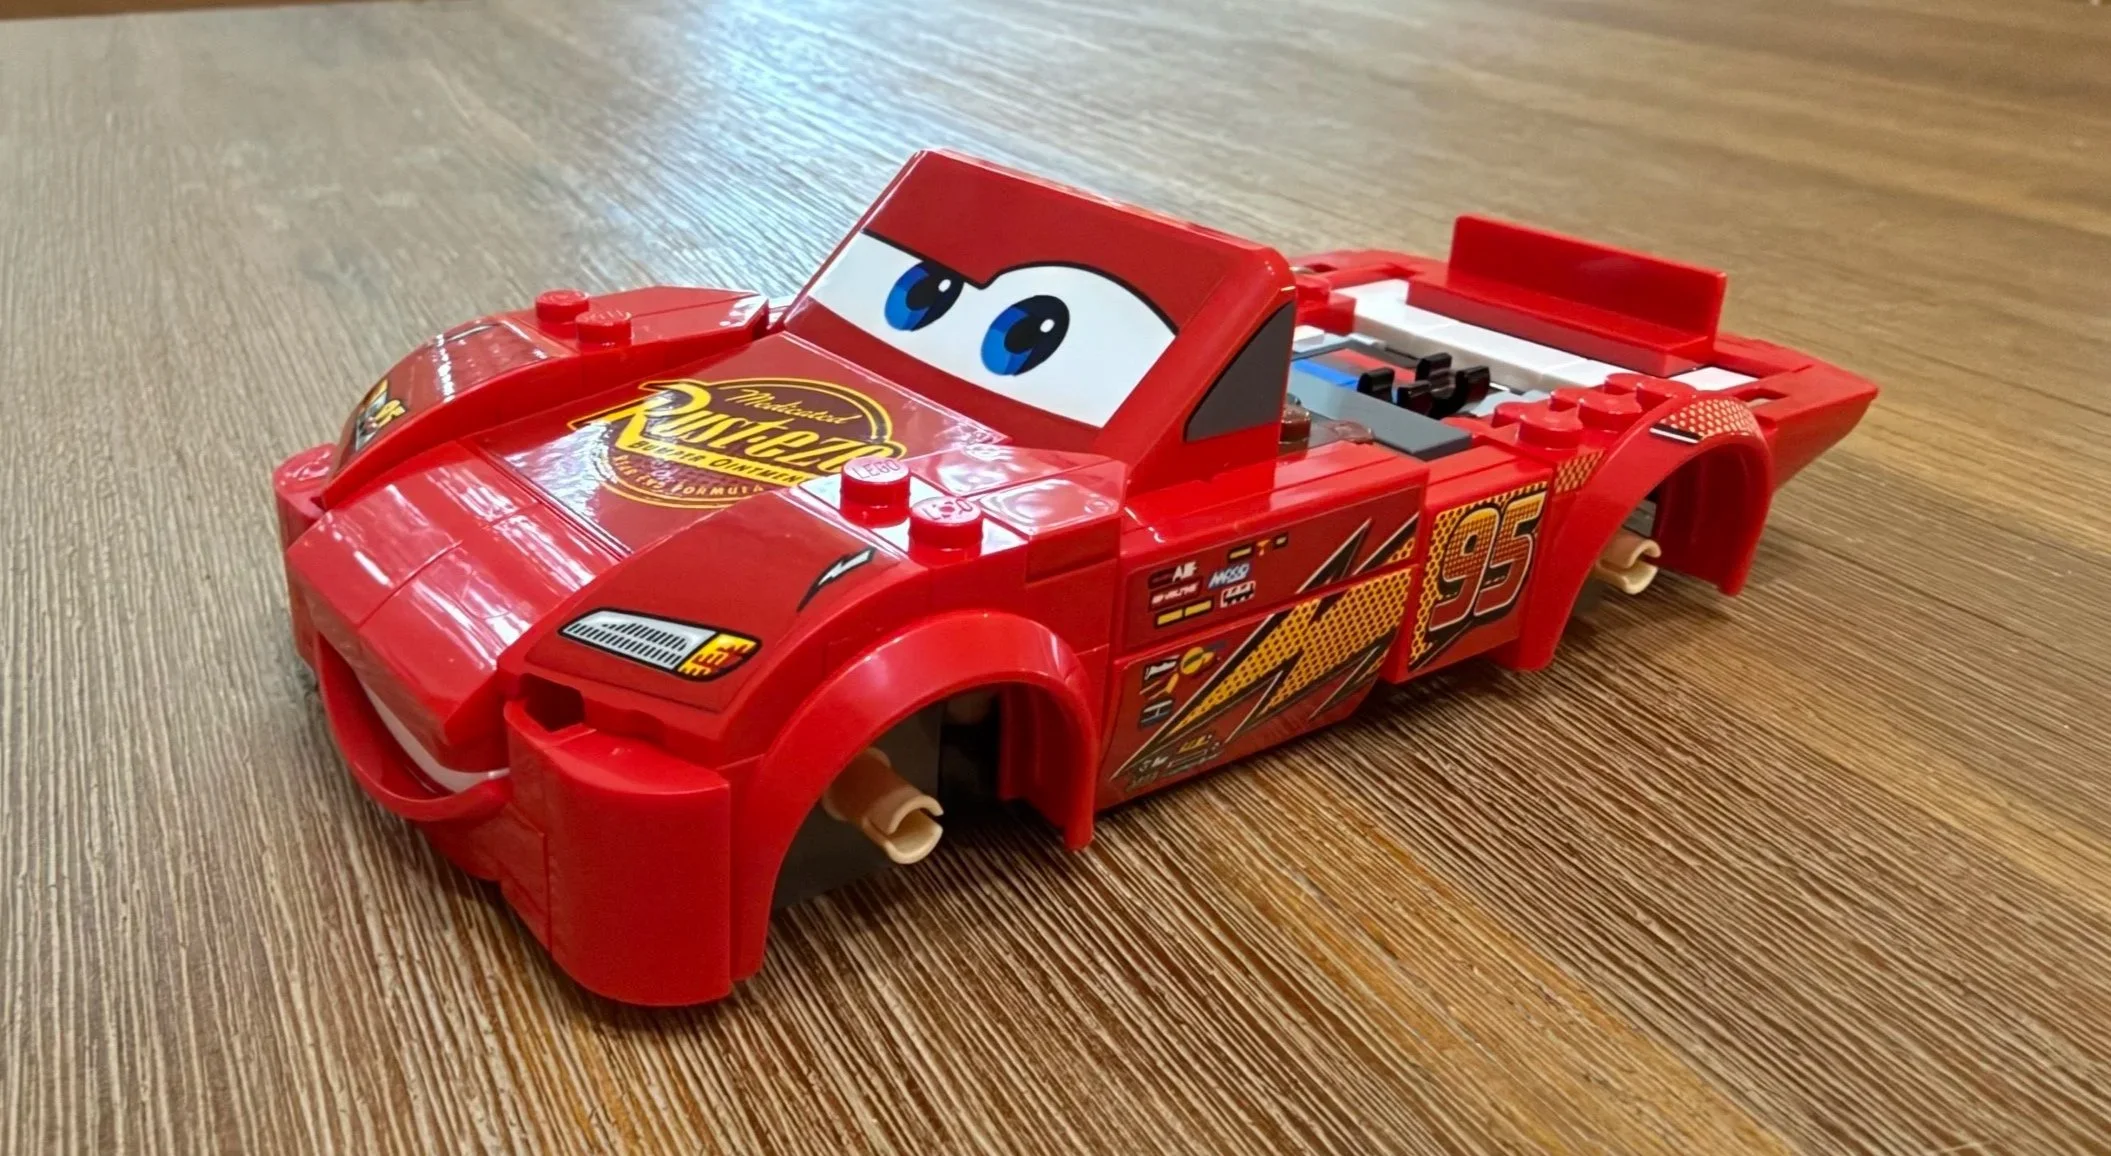
The hood graphic, headlight decals, and windshield eyes make the unfinished model instantly recognizable.
Bag 4: Interior Structure and Rear Bodywork
Ratings: Difficulty: 4/10 • Repetition: 5/10 • Dexterity: 4/10
Bag 4 was the quickest section of my build, with relatively few pieces and some welcome printed elements. Much of the work builds up the model’s internal structure, along with two stickers for the taillights.
Attaching the rear frame section to the existing model is a little awkward. Check how it lines up and support the surrounding bodywork as you connect it. The finished rear detail is worth the care, and this bag offers some relief from the heavier sticker sessions.
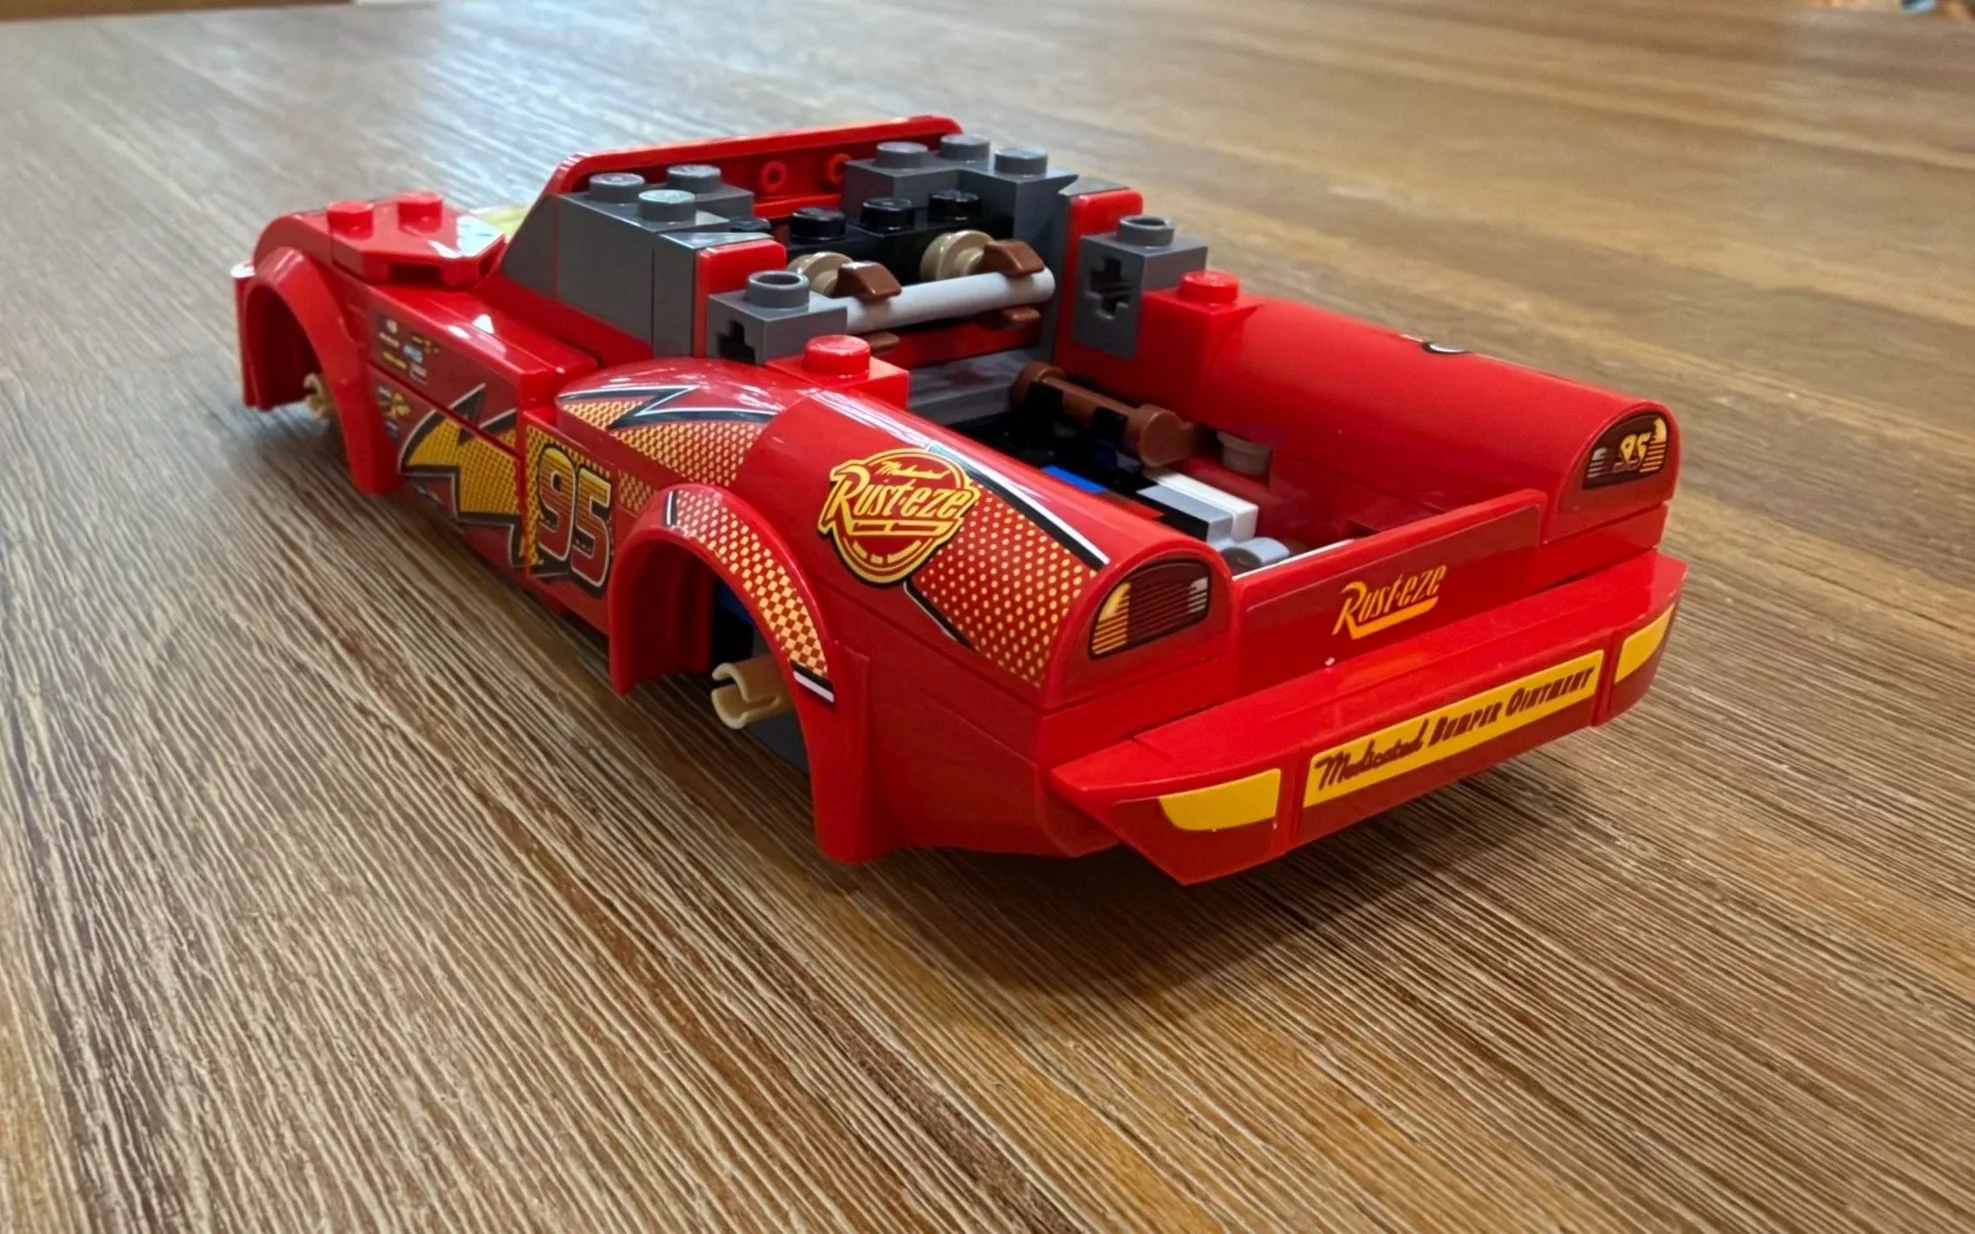
The rear bodywork and taillights are in place, while the internal structure remains visible before the roof and rear window are finished.
Bag 5: Spoiler, Rear Window, and Undercarriage
Ratings: Difficulty: 5/10 • Repetition: 4/10 • Dexterity: 5/10
The final bag was the most interesting and rewarding part of the build for me. There are still six stickers to apply, but the spoiler and rear window use one of the more unusual assemblies I have worked on. It is a satisfying way to complete McQueen’s shape.
The exhaust outlets and undercarriage were a welcome surprise. There is more to appreciate underneath this model than I expected, and those details give the final stage something extra. Bag 5 has my highest construction difficulty score at 5/10, but I enjoyed it much more than the sticker-heavy second bag.
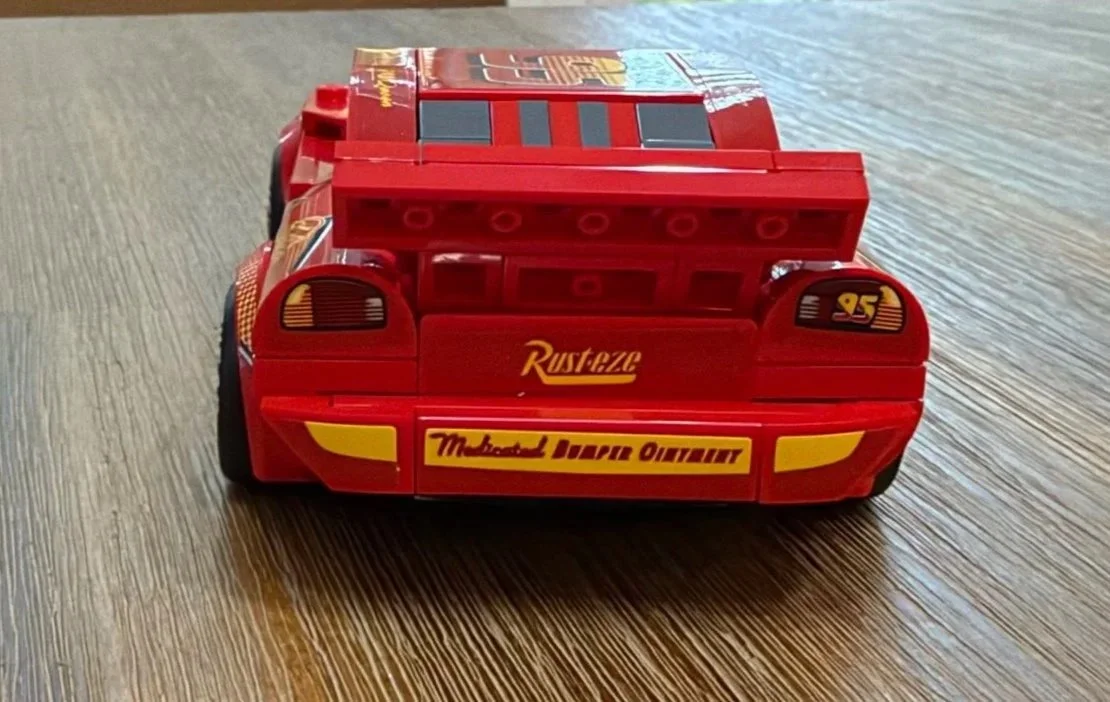
The finished rear window, spoiler, taillights, and Rust-eze branding complete the back of the car.
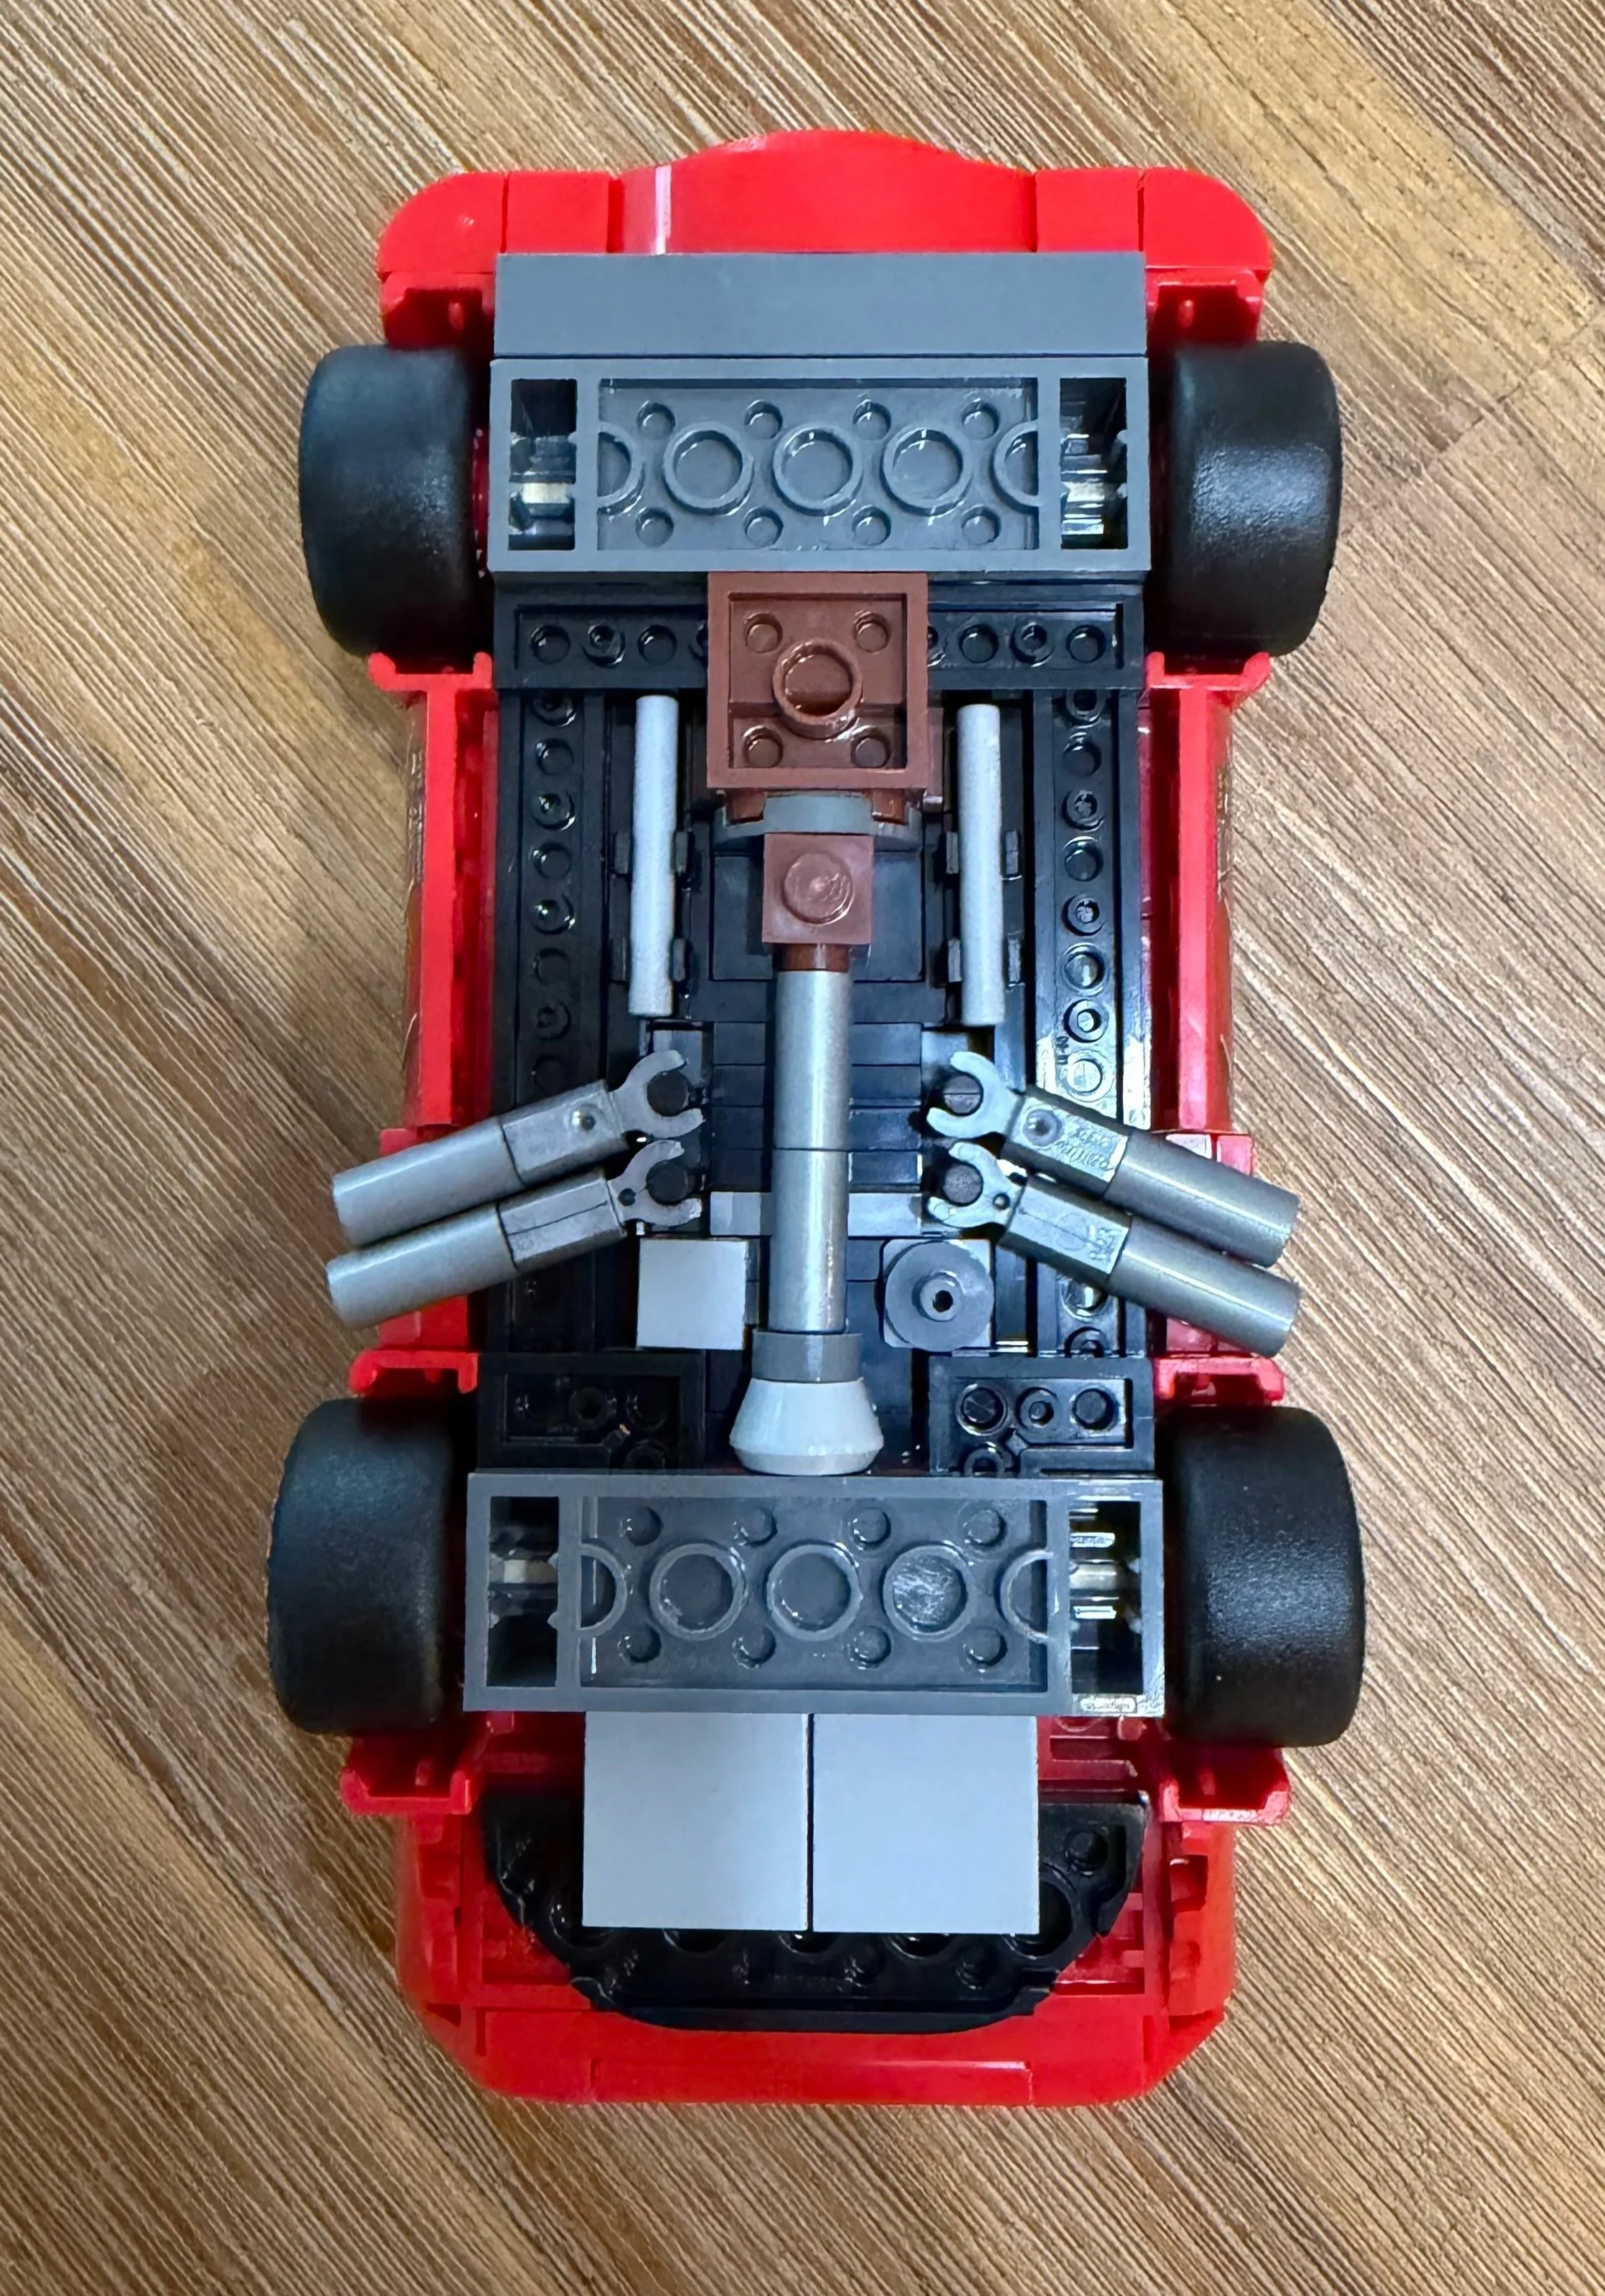
The detailed underside and paired exhaust outlets were one of the most enjoyable surprises in the final bag.
What Could Someone Struggle With?
The biggest challenge is precise sticker placement, followed by handling assemblies that are temporarily delicate. The small piece count does not tell the whole story of how much finger control this build needs.
Tiny stickers on tiny parts. Bag 2 is the main concentration of this work. I use a brick separator to help position the stickers, and I would recommend taking the placements one at a time. Builders who find fine hand movements tiring may appreciate help with this section.
Frame orientation in Bag 1. Check the direction of each section before building over it. I made a placement mistake here and had to take part of the structure apart to correct it.
The windshield before it is reinforced. The initial attachment in Bag 3 feels flimsy. Keep accidental bumps and pressure off the windshield while completing the surrounding assembly.
The rear connection in Bag 4. This assembly is awkward to attach. Align it carefully, support the nearby structure, and check the instructions again if the connection does not seem to line up.
Display Quality and Stability
The completed model is very stable, which is a satisfying change from the delicate frame and windshield stages early in the build. The red bodywork, number 95, lightning bolt graphics, and Lightyear tires make it a detailed little homage to Cars.
The stickers contribute a lot to that appearance, even though applying them was the part I enjoyed least. McQueen looks wonderful when finished, and the underside details reward a closer look. For a Cars fan, there is plenty of character packed into this small display piece.
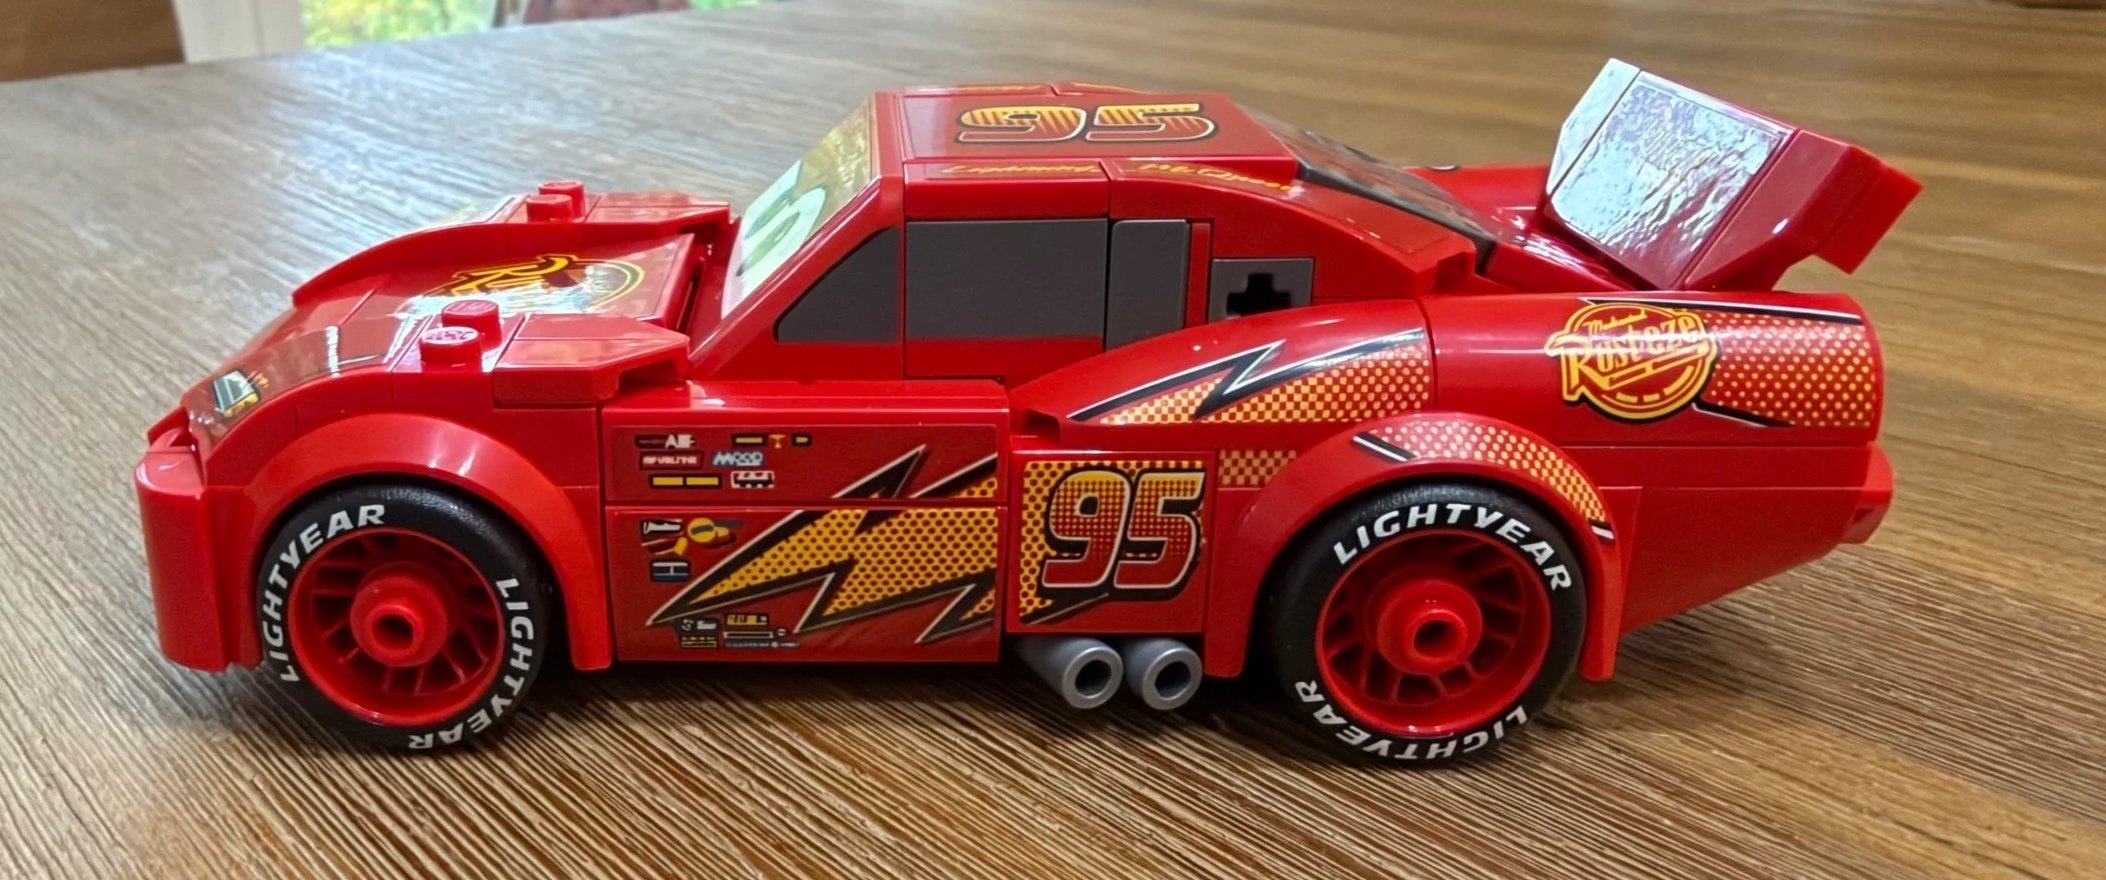
The finished side profile brings together the number 95, lightning bolt graphics, Lightyear tires, and silver exhaust outlets.
Moving, Rebuilding, and Disassembly
For a customer handoff, I would cradle the completed car around the solid lower body and wheel areas, keeping pressure off the spoiler and the exhaust details underneath. It feels very stable when finished, but those projecting details would still need protection in transit.
For a partial rebuild, I would check frame orientation first, then the windshield support and rear assembly. Removing surrounding pieces may expose the same delicate stages encountered during construction. During disassembly, I would keep decorated parts organized by side and protect their stickers from scraping. Repair time and a shipping plan would depend on the model’s actual condition.
Who Would I Recommend LEGO 77255 To?
I would recommend this to Cars fans and Speed Champions collectors who want a compact, recognizable character model. If you enjoy careful decoration work, the stickers may bother you less than they bothered me. Builders who find small decals frustrating may want help with that part of the process.
Final Verdict
My overall set rating is 7/10. Lightning McQueen is an enjoyable build with a very stable and detailed finished result. The 22 stickers hold the experience back for me, especially in Bag 2, but the unusual final assembly and hidden underside details finish the build on a high note.
Overall set rating: 7/10
Highest construction difficulty: Bag 5 at 5/10
Most demanding sticker work: Bag 2 at 7/10 for dexterity; also my least enjoyable section
Lowest difficulty scores: Bags 1, 2, and 3 each scored 3/10
Most rewarding section: Bag 5, especially the spoiler, rear window, and underside details
Want the Finished Set Without the Build?
The Bricksmith helps with LEGO set assembly, rebuilding, disassembly, sorting, and re-bagging. If you would like help with Lightning McQueen or another set, send the set number and a few photos. You will receive a written scope, price, estimated timing, and handoff plan before deciding whether to proceed.
Local pickup and return are available around Greater Portland, Maine. Mail-in projects are considered individually and require approval before shipping.