
LEGO® Ideas Tintin® Moon Rocket 21367 Build Review
A striking display model with a surprisingly demanding internal Technic structure, satisfying exterior construction, and excellent stability once complete.
I built LEGO® Ideas Tintin® Moon Rocket 21367 from start to finish to see how difficult the internal structure really is, where the build becomes most challenging, and whether all of that Technic work pays off in the finished model.
My build time: 3 hours, 43 minutes · Difficulty: 7/10
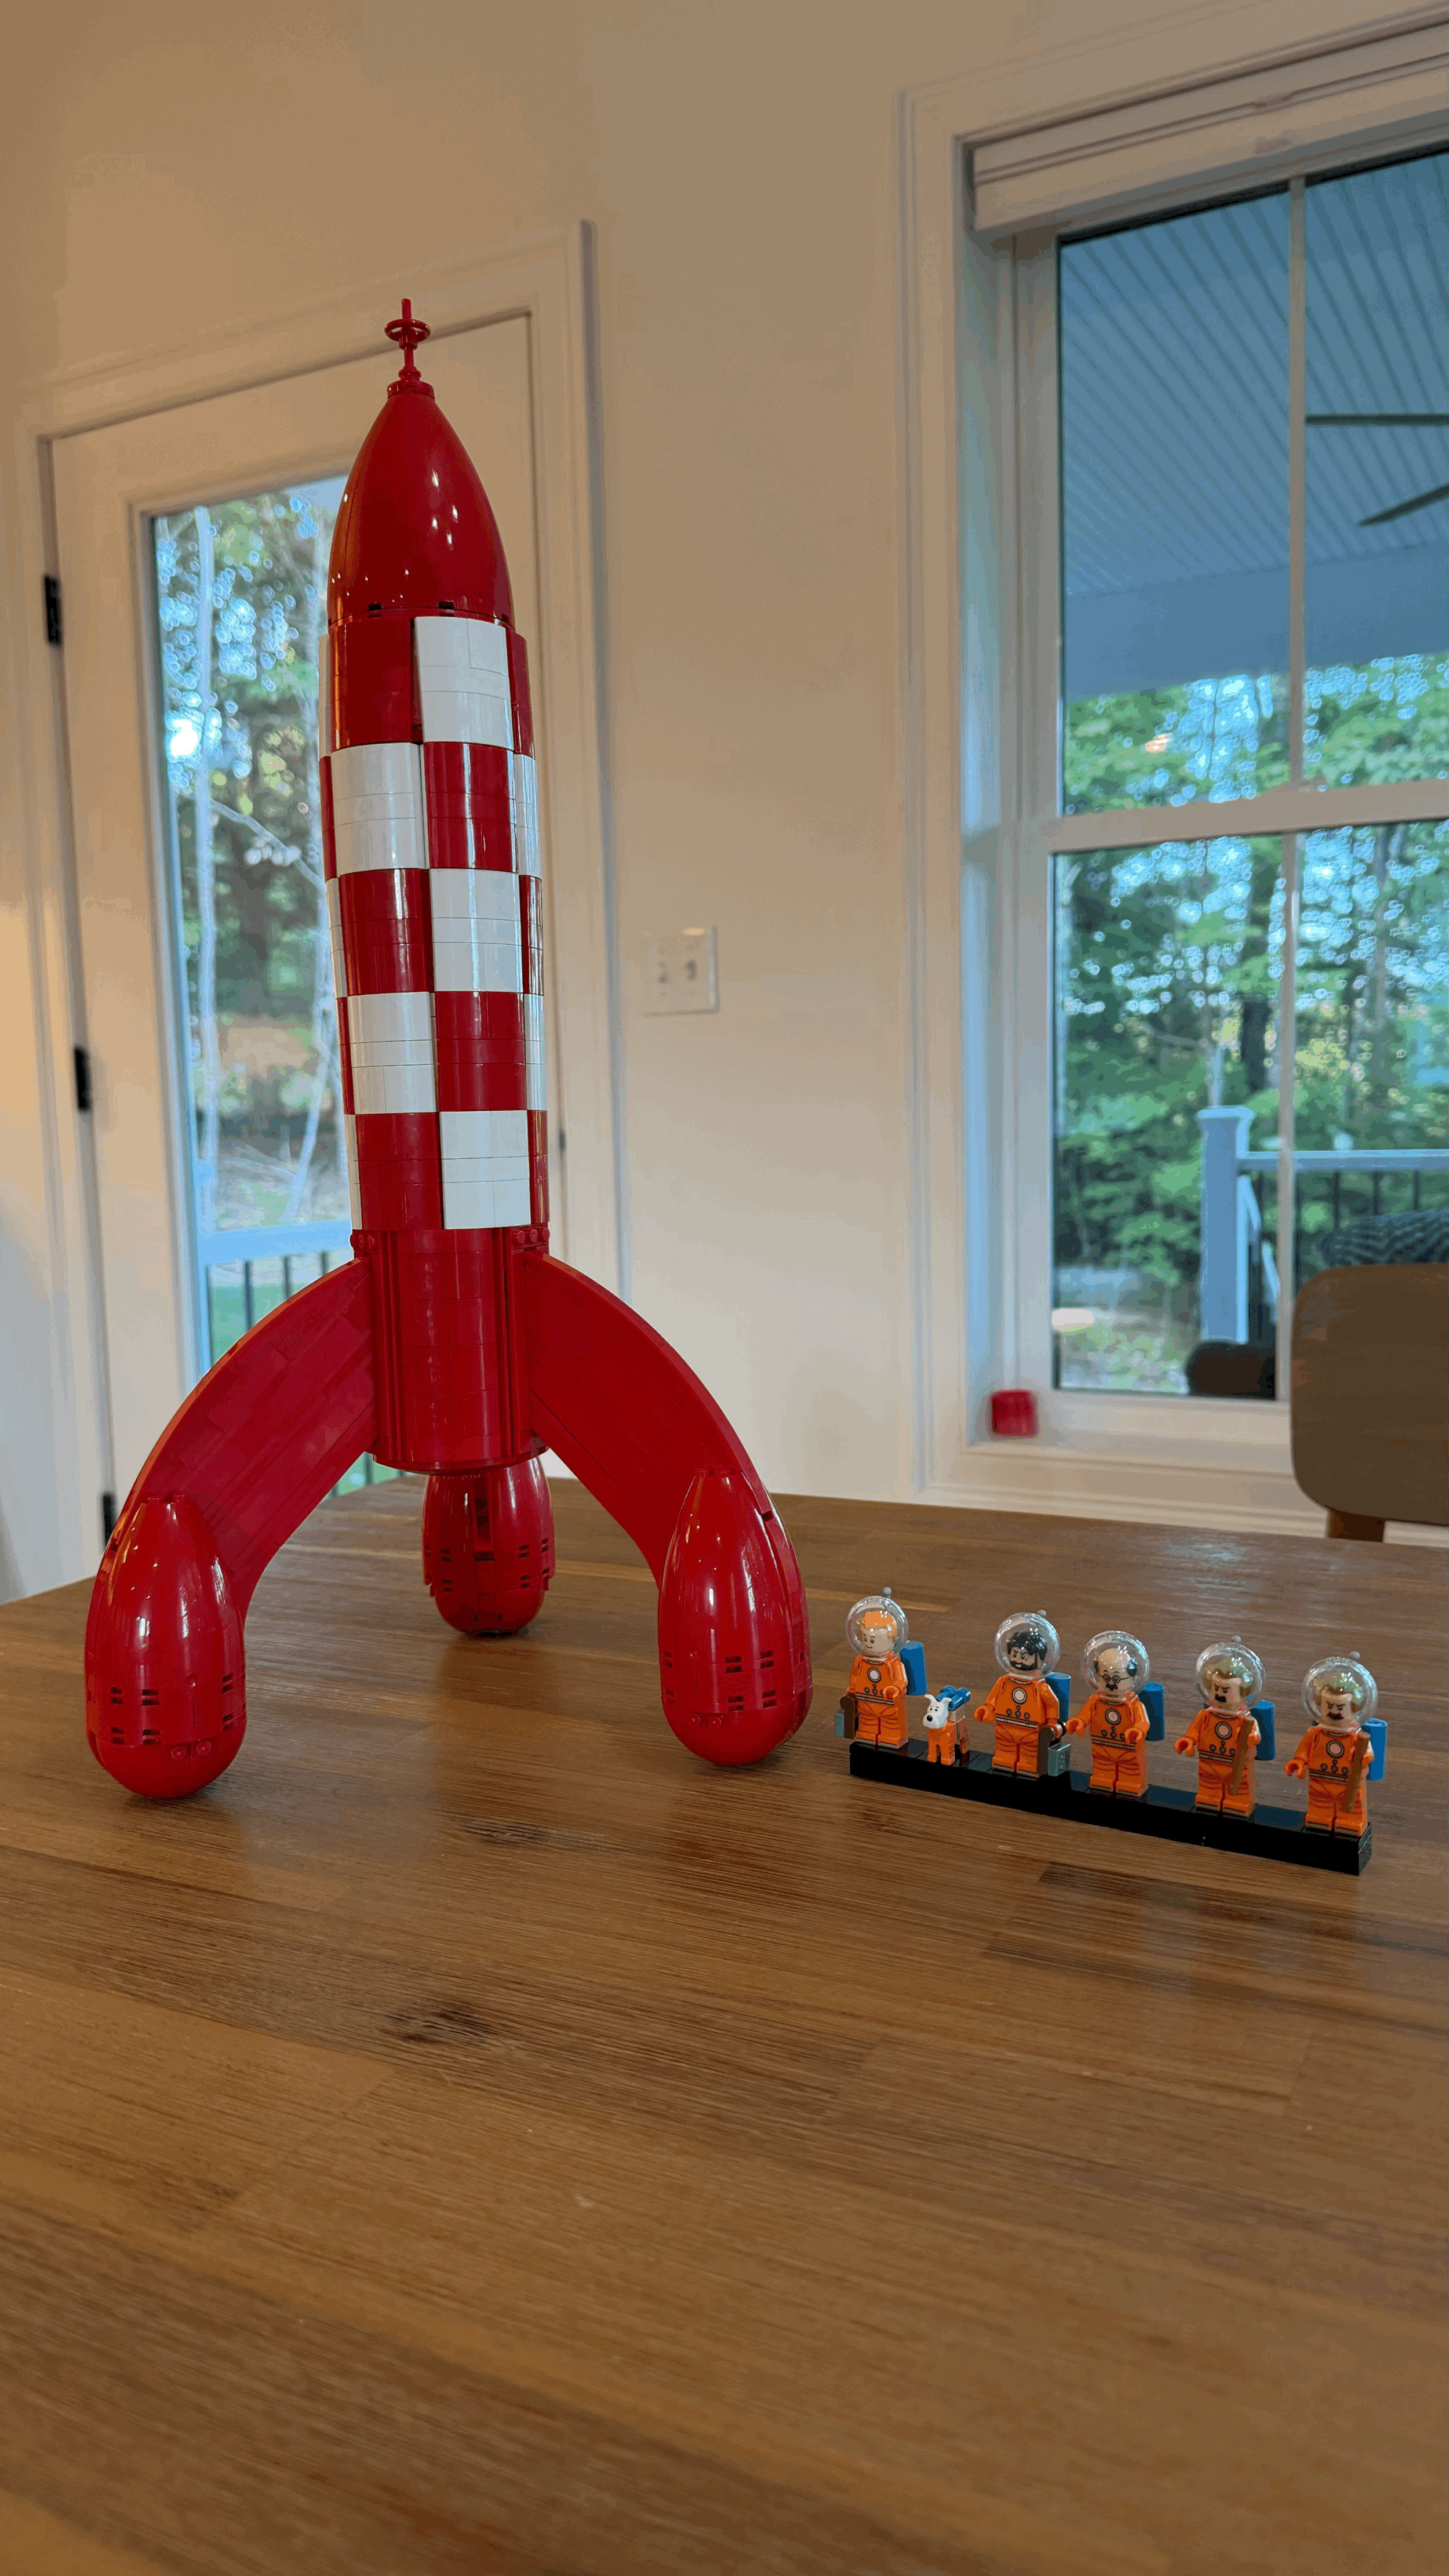
The completed Tintin® Moon Rocket is a substantial display model, accompanied by its separate character display.
Tintin® Moon Rocket 21367 at a Glance
Pieces: 1,283
Bags: 11
Instruction steps: 730
My build time: 3 hours, 43 minutes
My difficulty rating: 7/10
Stickers: 6
Finished stability: Excellent
Recommended age: 18+
Finished height: About 20 in. / 49 cm
LEGO® Ideas Tintin® Moon Rocket 21367 recreates the red-and-white rocket from Destination Moon and Explorers on the Moon. The model includes a removable cone panel revealing a detailed control room, five minifigures, and a Snowy® figure.
Official set information: LEGO® Ideas Tintin® Moon Rocket 21367
The Short Version
Tintin® Moon Rocket is one of those builds where the finished model hides just how technical the construction underneath really is.
The red-and-white exterior looks relatively simple, but the internal framework relies heavily on Technic elements, precise orientation, firm connections, and several assemblies that require considerable finger dexterity.
That is why I rate this build 7/10 for difficulty.
Fortunately, the challenge feels purposeful rather than frustrating for its own sake. Once the structural work is finished, the rocket becomes remarkably stable for a display model nearly 20 inches tall.
The experience also improves as the build progresses. The early Technic-heavy bags are the hardest, while later sections introduce the exterior shell, landing gear, cone, cockpit, and character details.
The result is a build that can be demanding on your fingers but extremely satisfying once everything starts coming together.
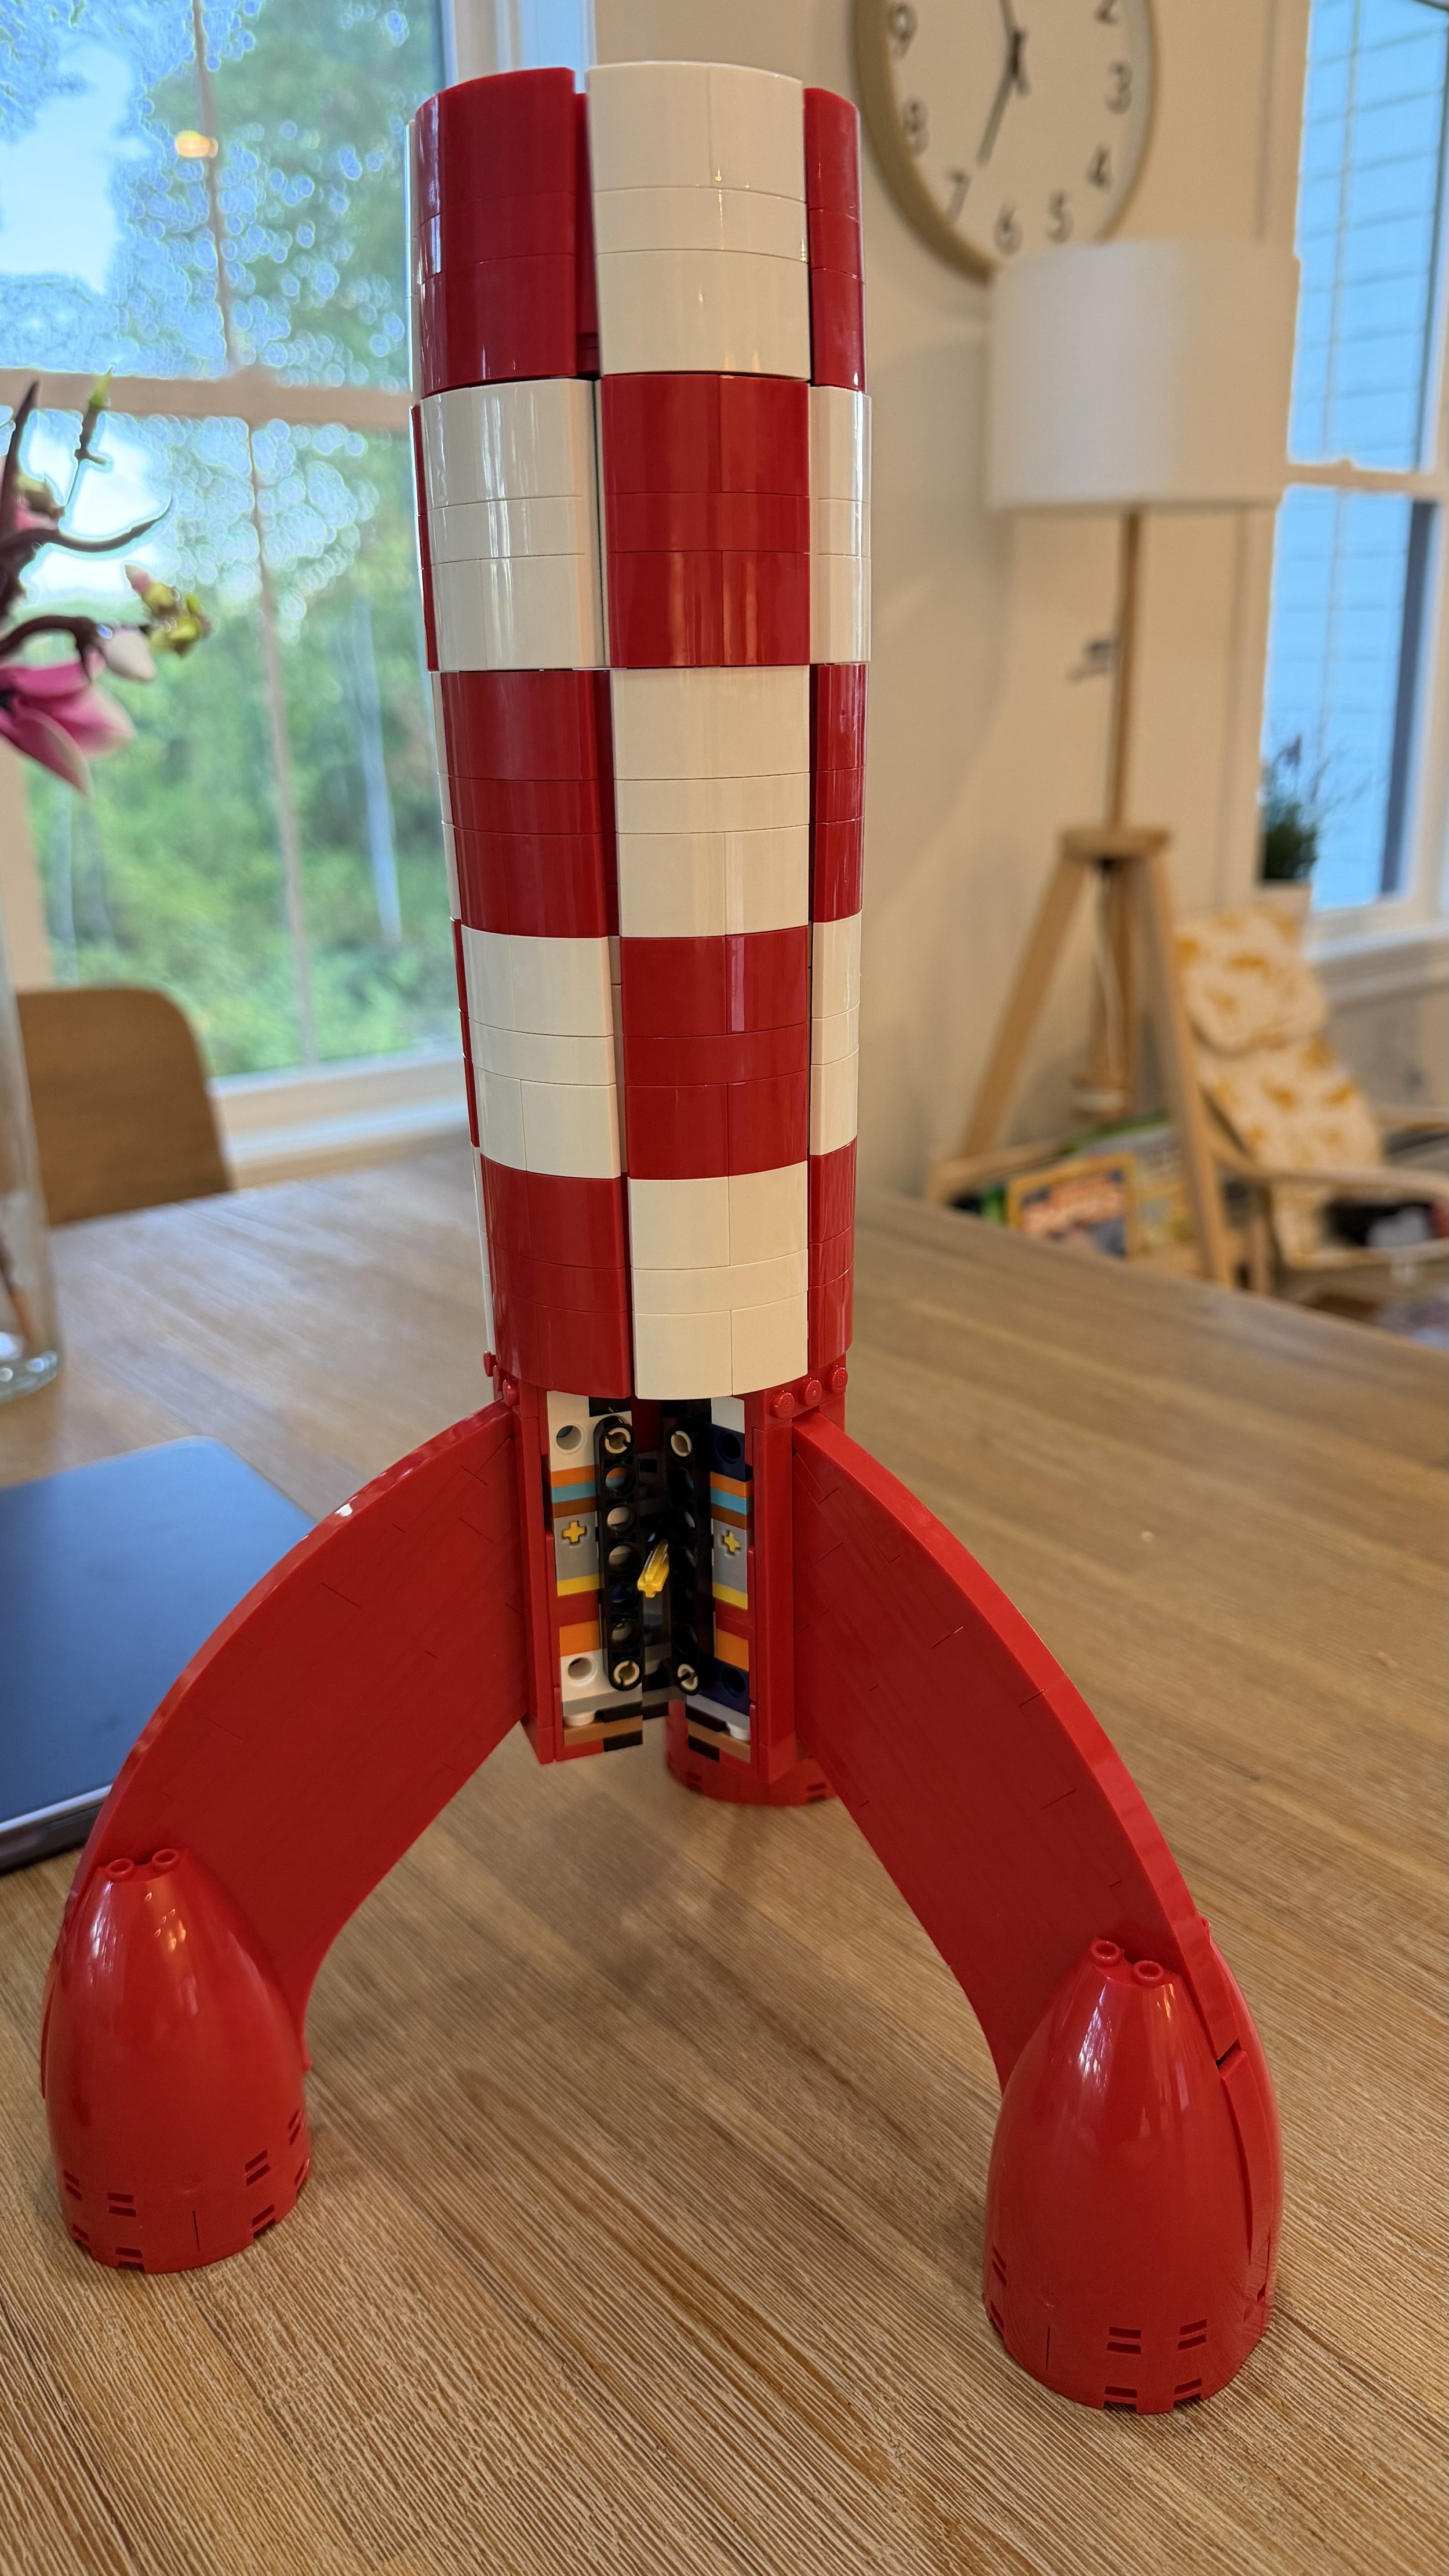
Once the landing gear and exterior shell are installed, the rocket finally starts looking like the finished model.
What Is Tintin® Moon Rocket Like to Build?
The build has a noticeable split between internal engineering and external presentation.
Bags 1 through 3 establish much of the rocket's internal structure, and these are easily the most technically demanding portions of the project.
Small Technic connections, tight attachment points, long axles, and orientation-sensitive assemblies appear very early. Unlike a build where difficult techniques are gradually introduced, Tintin® Moon Rocket asks you to pay close attention almost immediately.
Bags 4 through 8 provide more relief. The construction shifts toward conventional bricks, curved slopes, shell panels, and recognizable exterior sections.
Bags 9 and 10 are probably the most enjoyable part of the entire build. Constructing the three landing gear assemblies offers plenty of step variety, and attaching them to the rocket is surprisingly straightforward.
Bag 11 finishes with the cone, control room, and several character-defining details.
Overall, the build feels more like constructing a solid internal frame and then wrapping an iconic display model around it than simply stacking bricks upward.
Where the Build Gets Difficult
The 7/10 difficulty rating comes almost entirely from the internal Technic structure.
The instructions themselves are generally clear. The challenge is physically assembling some of the connections correctly.
Several sections require small Technic pins or larger structural assemblies to be lined up precisely before being pushed together. Some connections take significantly more finger pressure than you might expect from the finished model.
Bag 3 is particularly demanding because multiple assemblies must be placed onto a long Technic element in a very specific orientation. It's the kind of sequence where one incorrect rotation can create a problem several steps later.
The advantage is obvious once the rocket grows taller.
All that Technic work produces an exceptionally stable finished model.
For something this tall, the rocket feels reassuringly rigid rather than fragile or flexible. In my opinion, the difficulty is worth the stability trade-off.
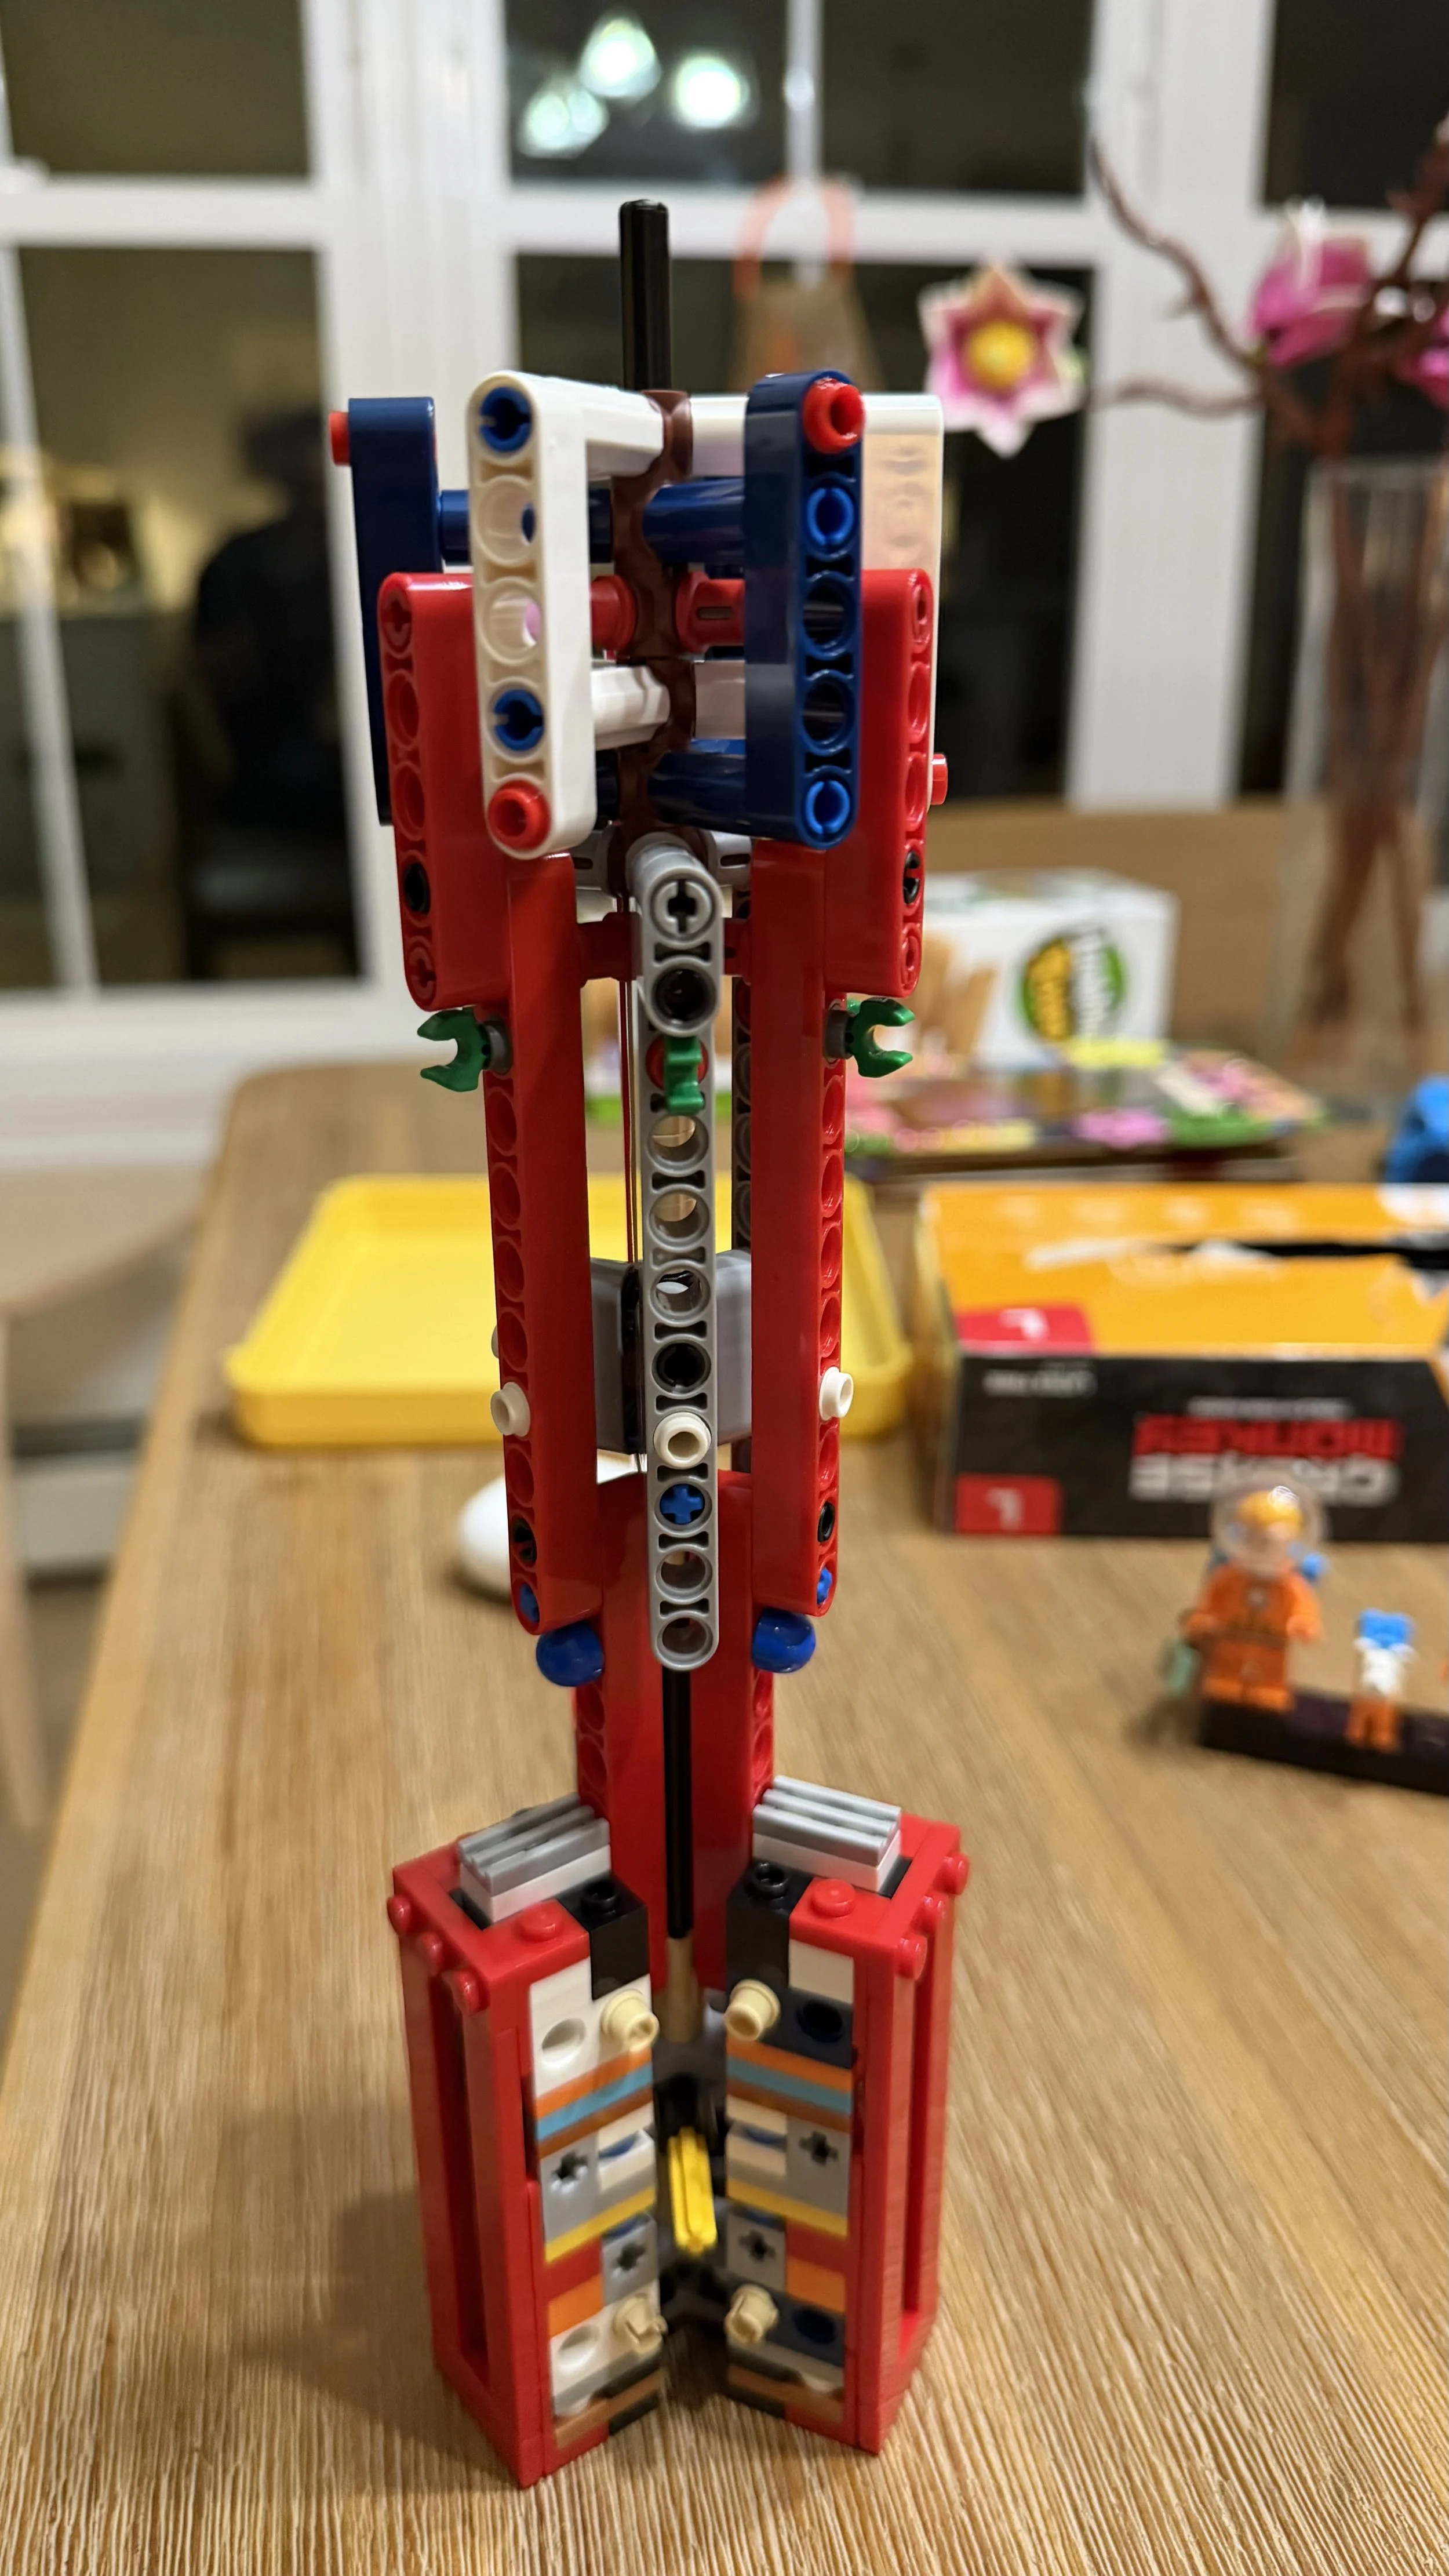
The internal structure is much more Technic-heavy than the finished rocket suggests.
Bag-by-Bag Build Notes
Bag 1: Minifigures and the First Rocket Structure
Bag 1 takes roughly 25 minutes and begins with the separate character display and first minifigure.
The helmet construction uses some clever pieces, and Snowy® is an especially fun addition.
The rocket construction quickly introduces small Technic connections and some fragile stacked assemblies. It's challenging surprisingly early, but still enjoyable.
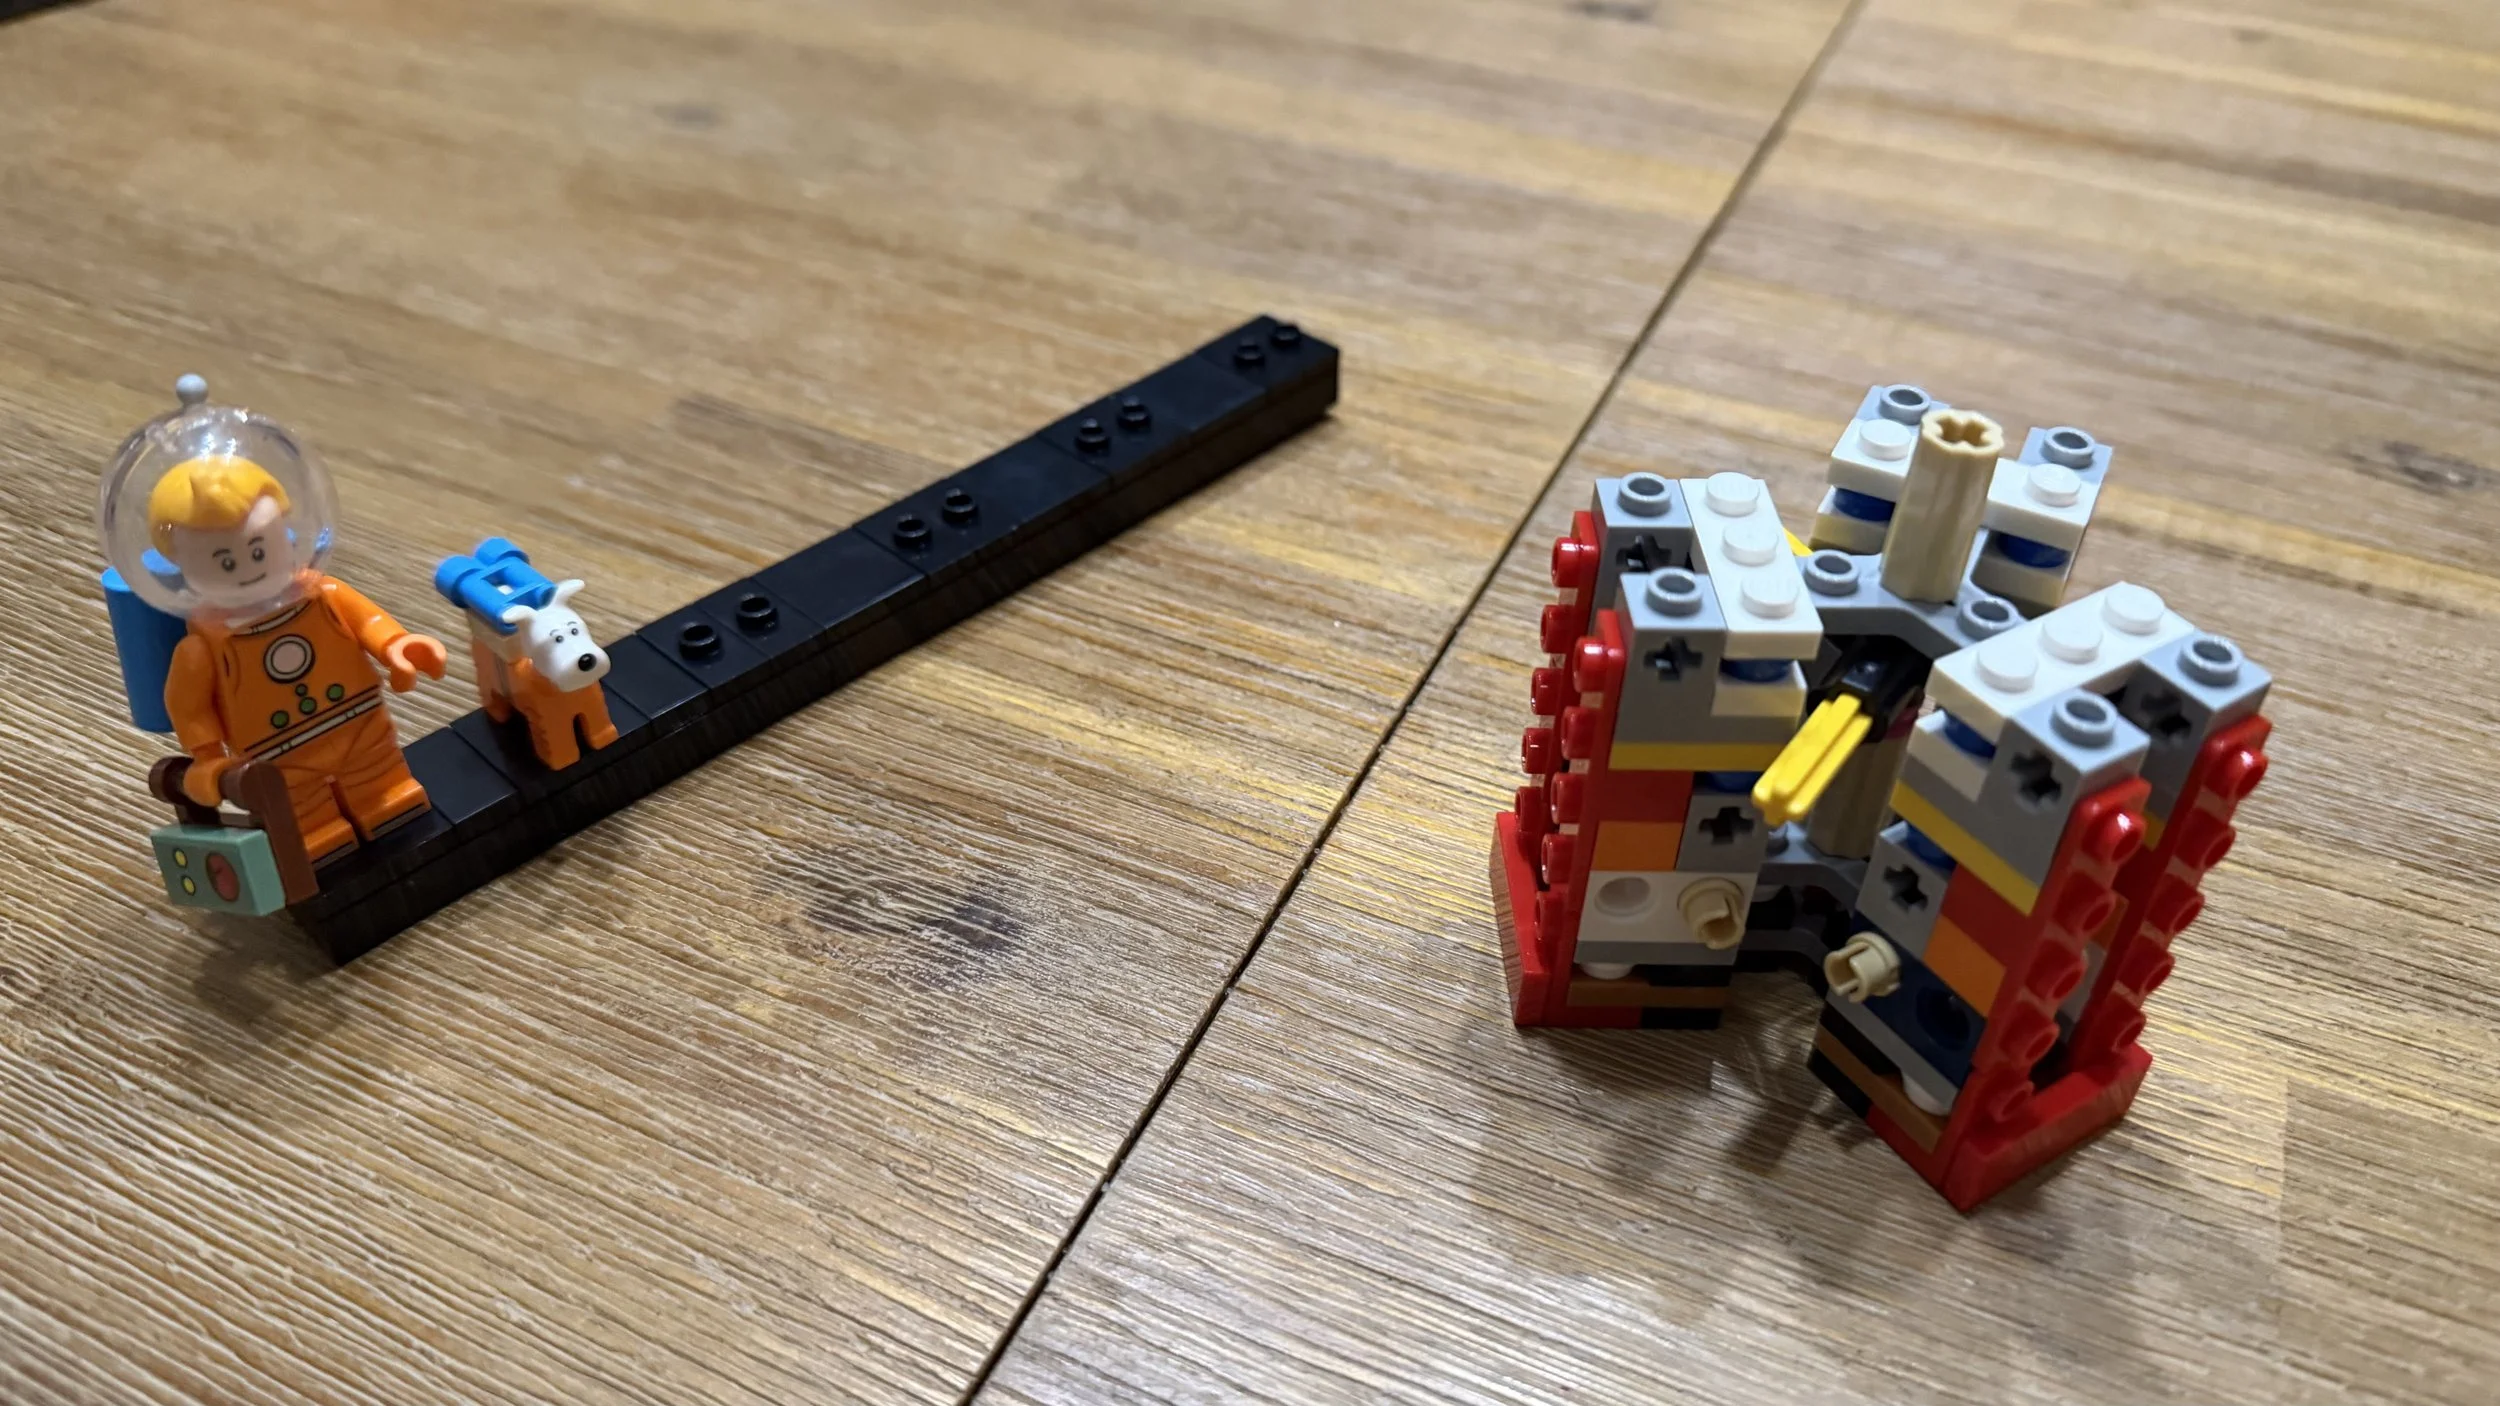
Bag 1 combines the character display with the first section of the rocket's internal structure.
Bag 2: Stability Comes at a Cost
Bag 2 is relatively small but contains several substantial structural pieces.
You build three large repeated assemblies. They are similar, but the individual steps vary enough that the repetition doesn't become particularly boring.
The difficult part comes when those components need to be attached to the Technic pins inside the rocket.
Some of these connections require considerable finger pressure and precise alignment. Attaching the completed assemblies to the existing rocket frame also requires care because the surrounding structure is still relatively exposed.
Snapping the eight flat pieces into position was another surprisingly difficult portion of this bag.
Bag 3: The Hardest Structural Work
Bag 3 is dominated by Technic construction, although it begins with another minifigure.
The tiny stickers on the figures can be difficult to align cleanly. I found that using the included brick separator as an alignment aid helped considerably.
The rocket itself requires substantial finger dexterity here.
Several assemblies must slide onto a long Technic element in a strict orientation, so this is a section where slowing down and double-checking the instructions pays off.
This was one of the most technically demanding portions of the entire set.
The upside is that by the end of the bag, the rocket's internal structure already feels extremely stable.
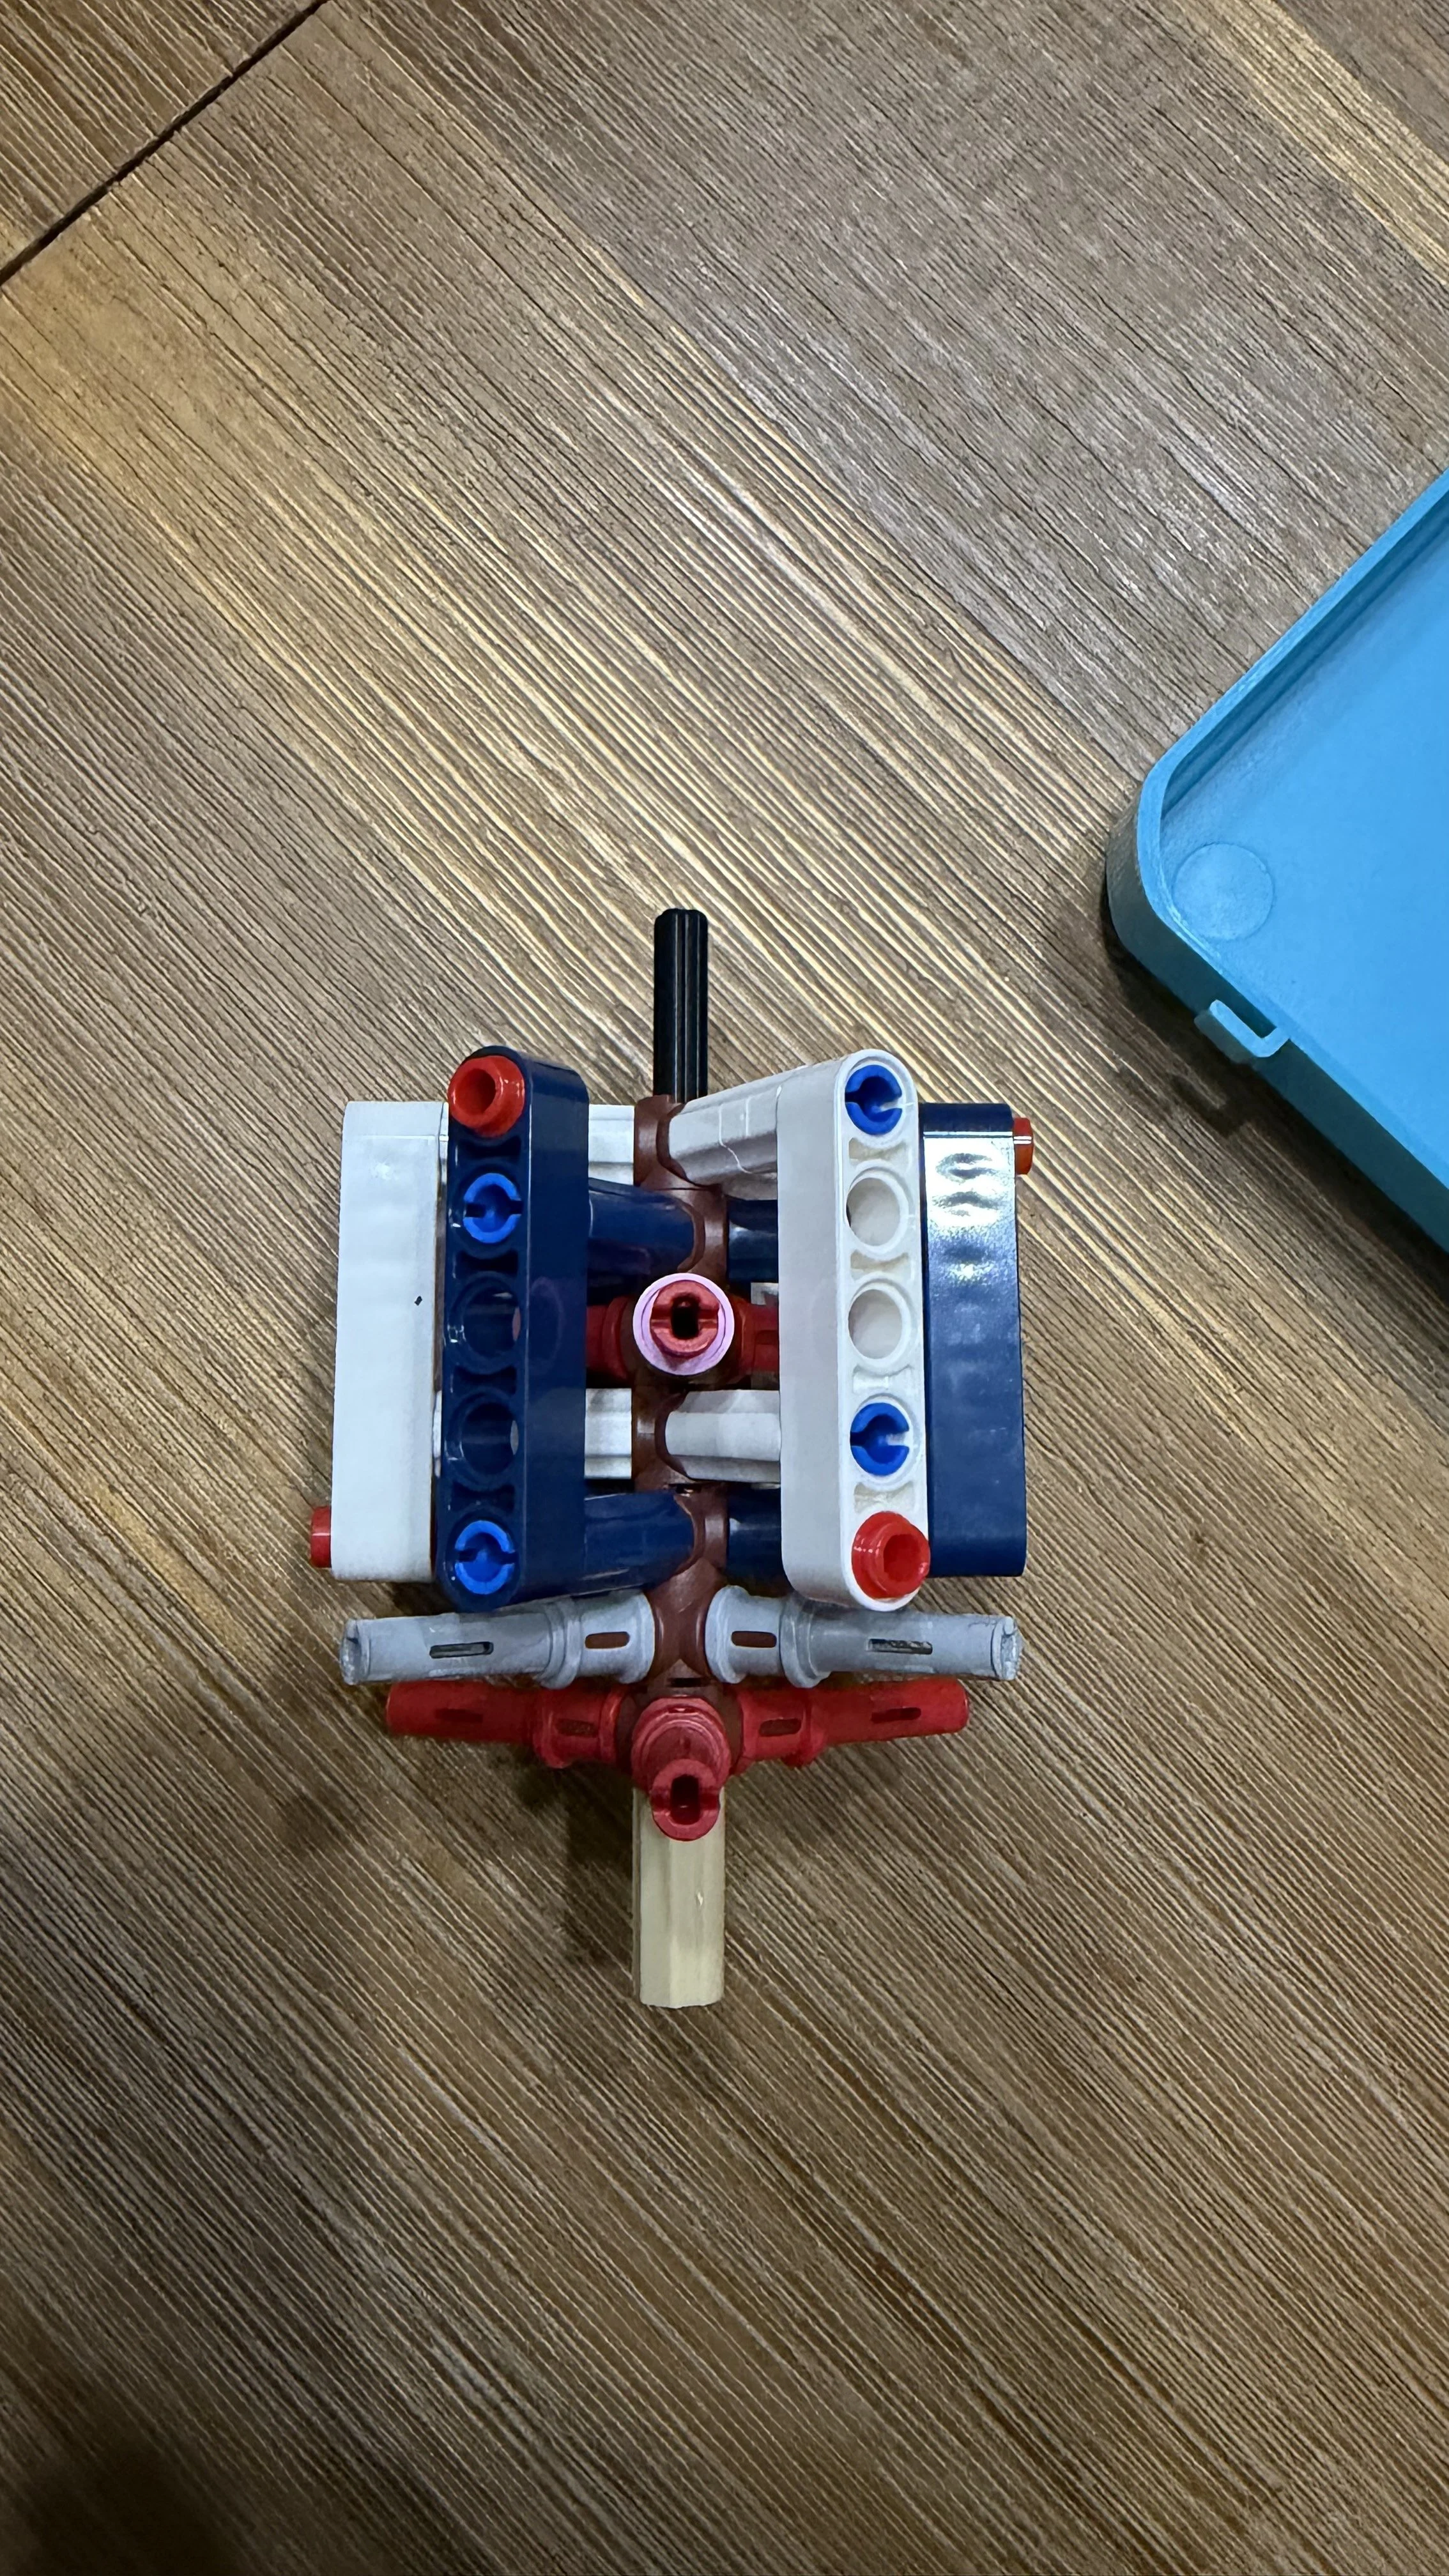
Bag 3 requires careful attention to the orientation of several Technic assemblies.
Bag 4: A Welcome Break
Bag 4 is small but filled mostly with conventional bricks.
After Bags 2 and 3, this feels like a welcome break for your fingers.
The assembly moves quickly. There is some repetition because of the rocket's symmetrical shape and red-and-white color pattern, but the construction itself is straightforward.
Bag 5: The Rocket Starts Taking Shape
Bag 5 contains the largest volume of pieces so far and also includes another minifigure.
Much of the bag is spent creating six large, nearly identical exterior assemblies.
Surprisingly, attaching these shell sections to the internal rocket structure is much easier than building the frame underneath them.
Snapping each section into place is extremely satisfying because the rocket's recognizable exterior begins appearing very quickly.
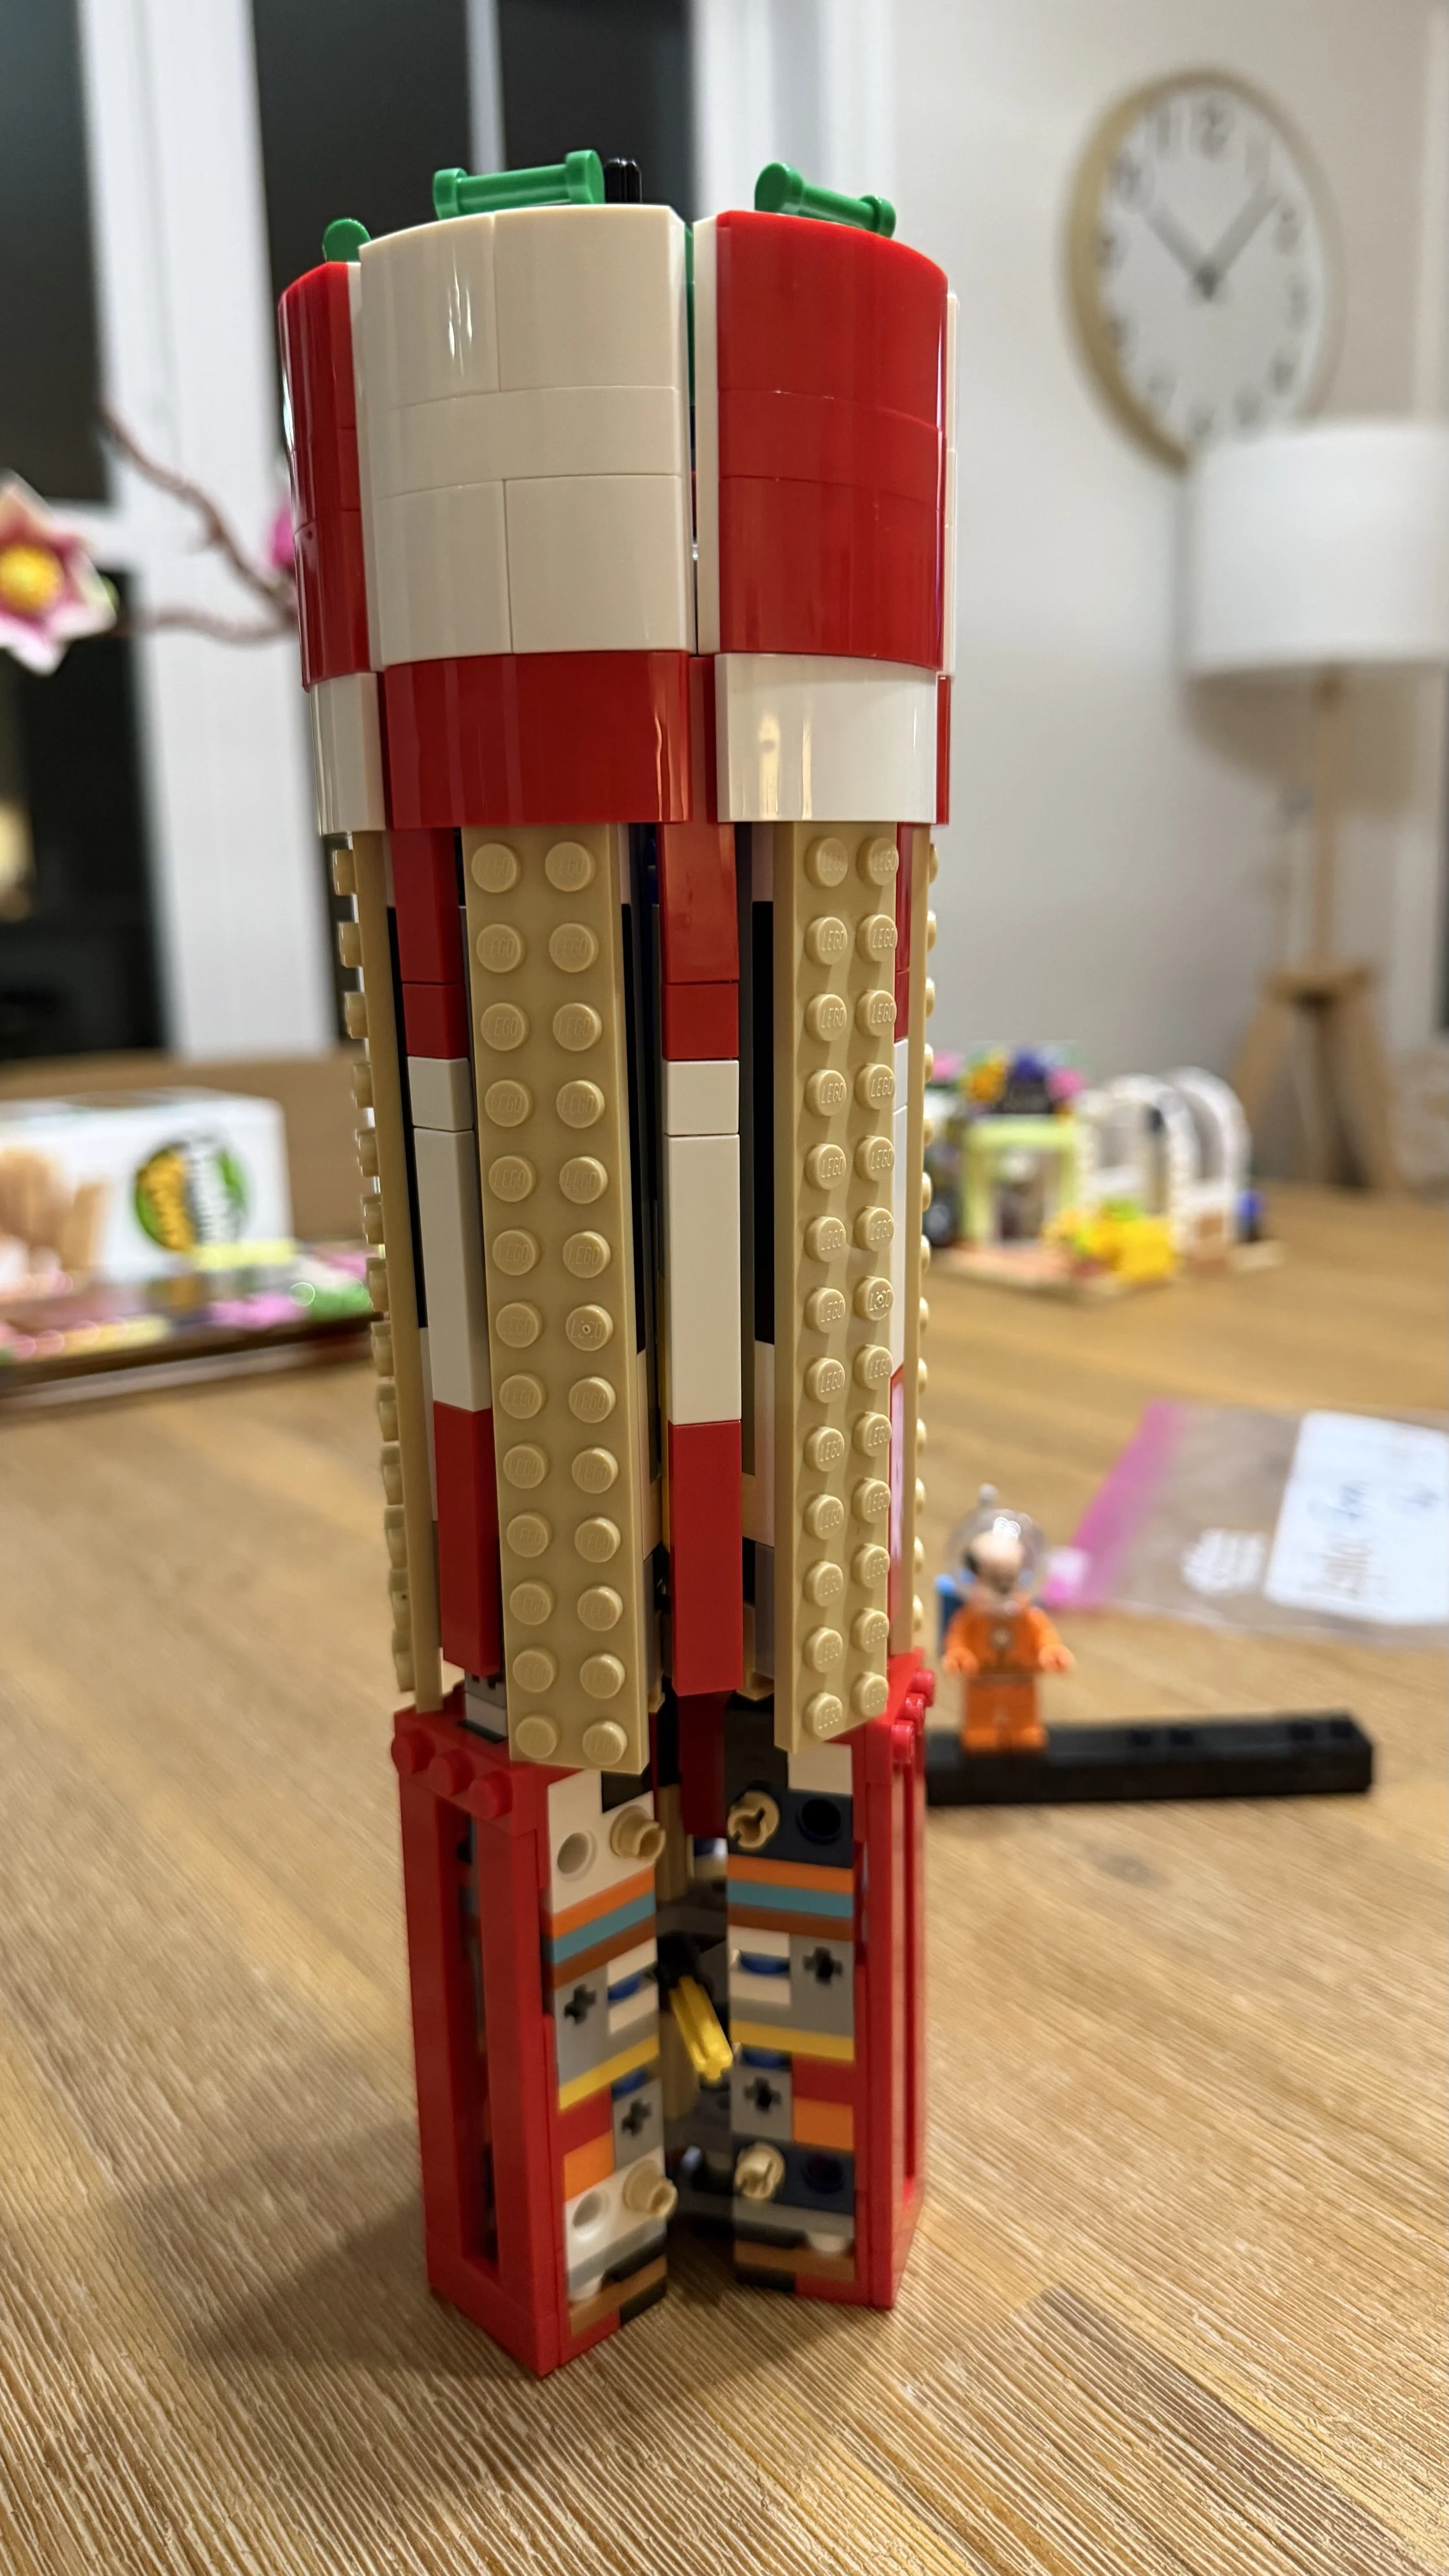
Bag 5 begins covering the complex internal frame with the rocket's recognizable exterior shell.
Bag 6: The Bag of Slopes
Bag 6 is another relatively small section focused almost entirely on building the rocket's exterior.
You could reasonably rename this one the bag of slope pieces.
The curved red-and-white shell becomes increasingly complete, and the difficulty is considerably lower than the early structural bags.
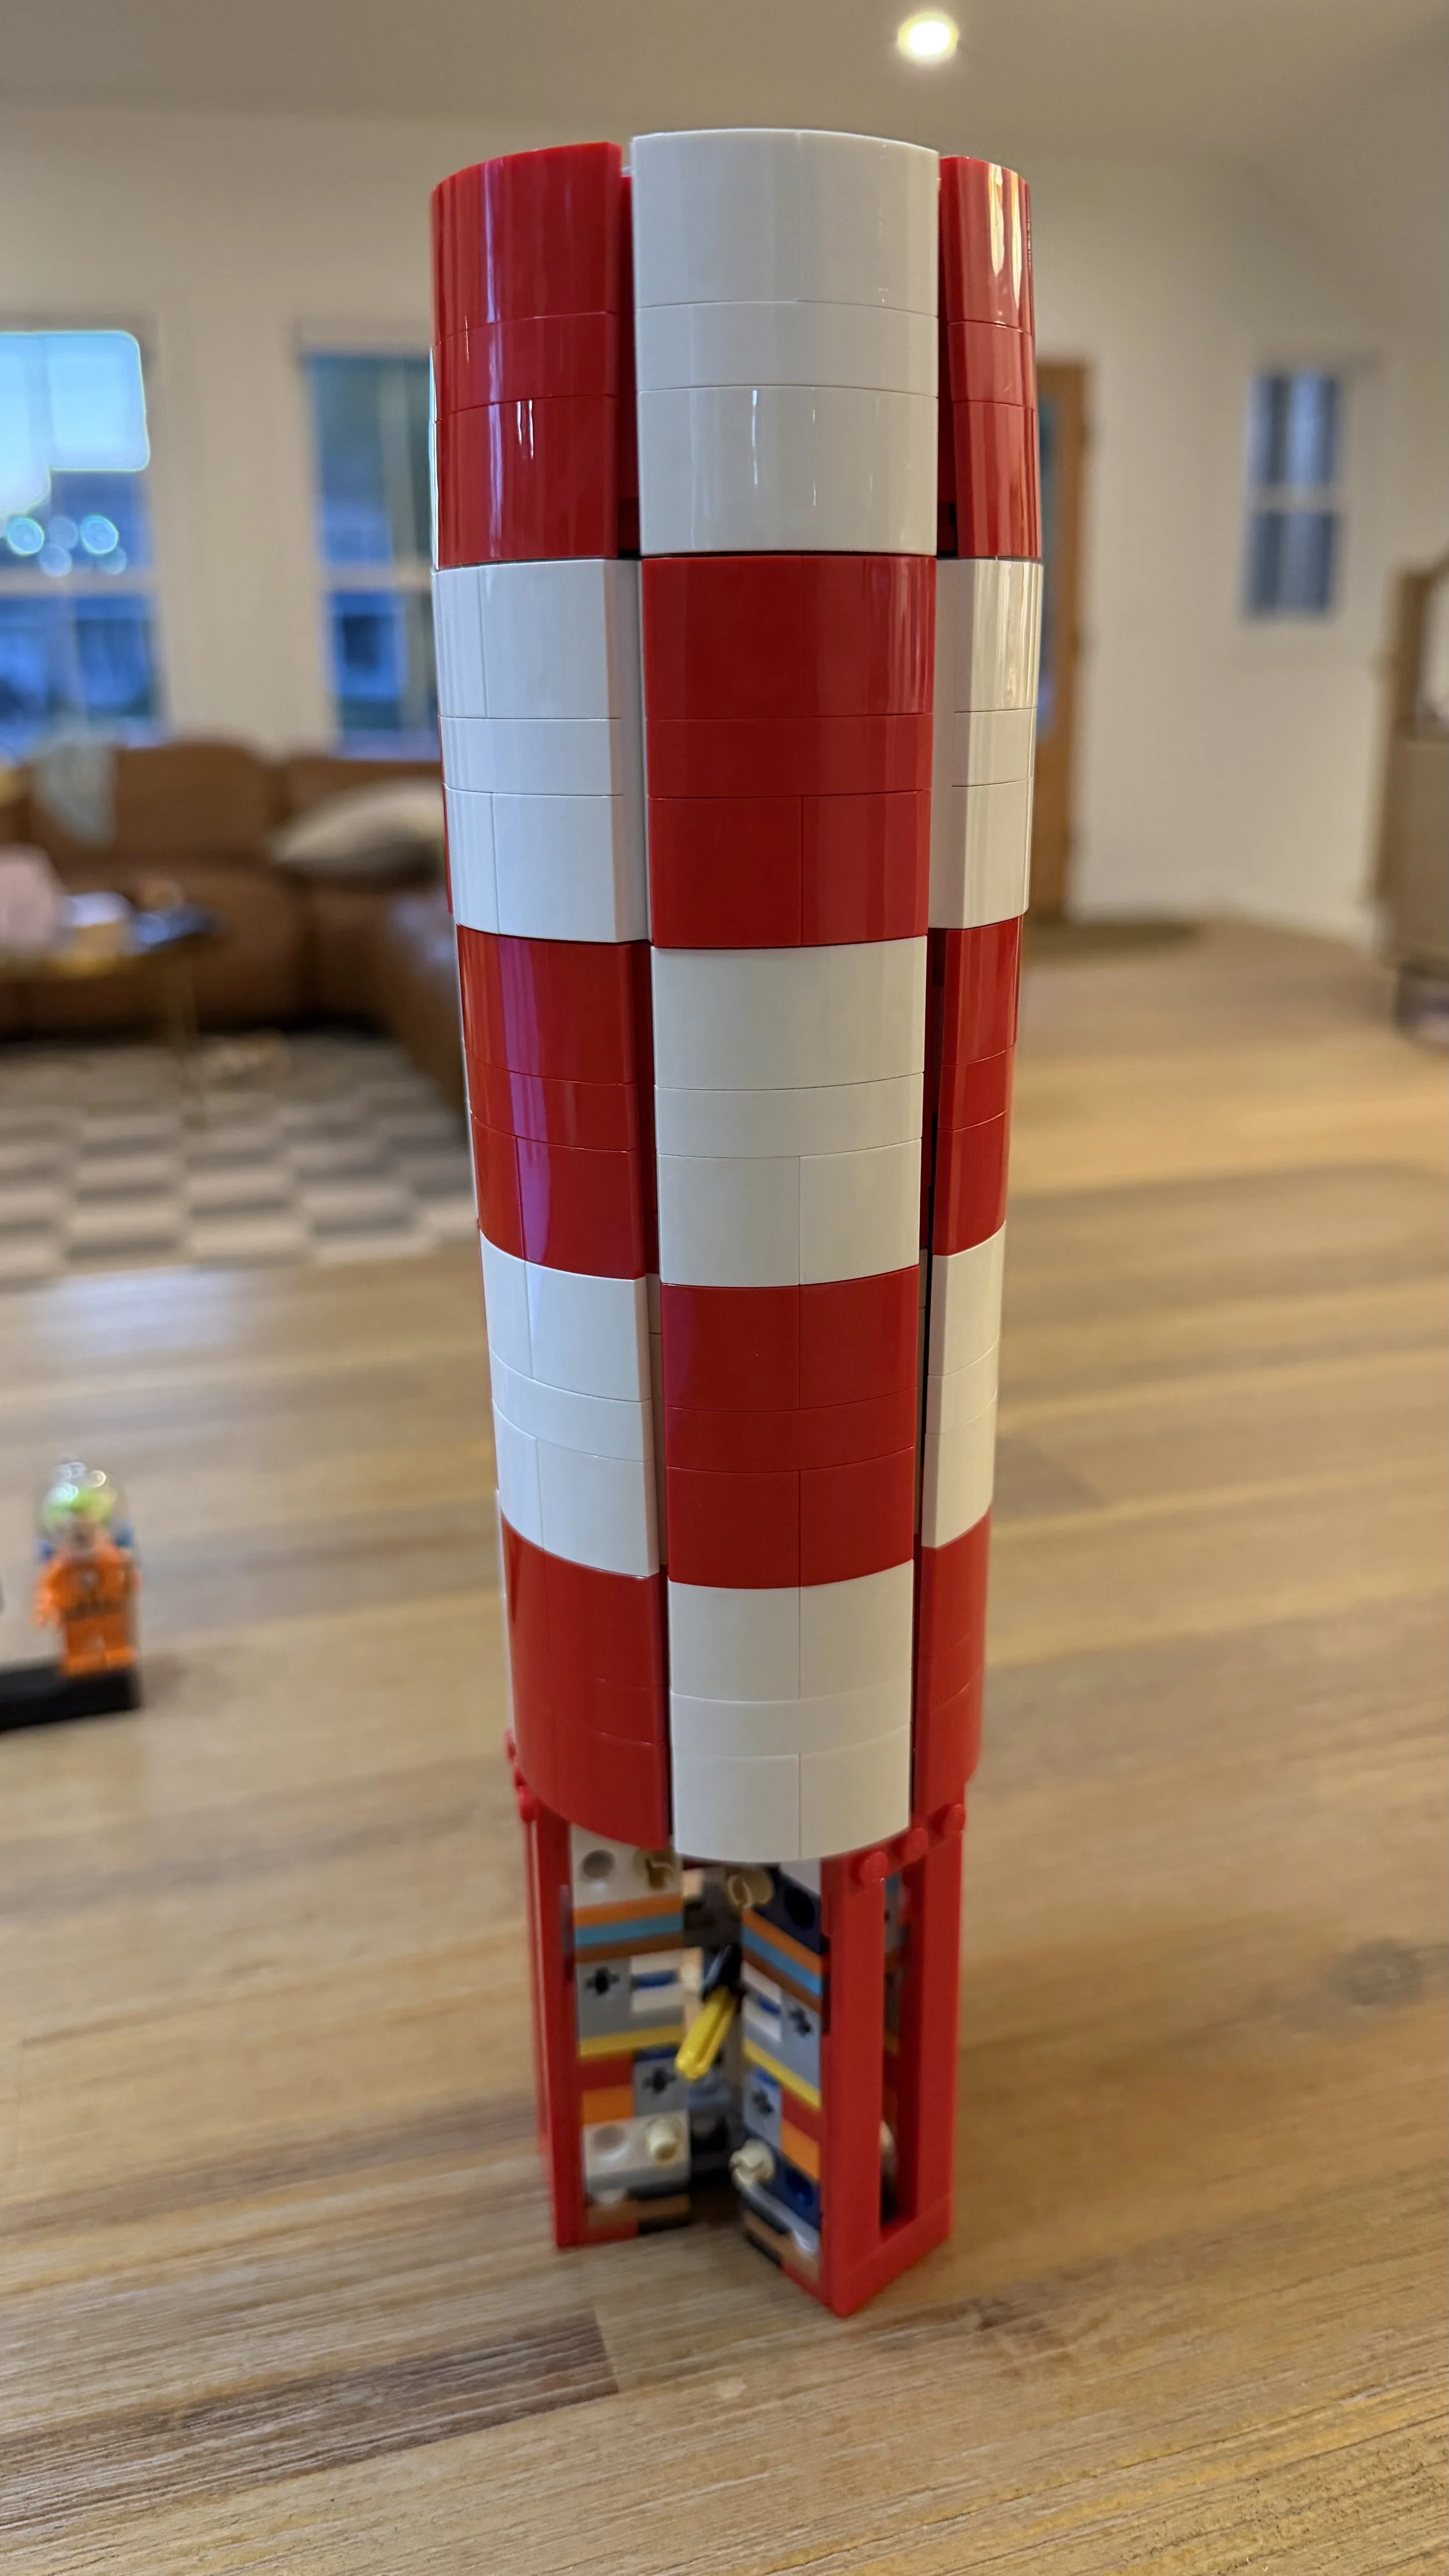
By Bag 6, most of the complicated internal construction has disappeared behind the red-and-white shell.
Bag 7: Building the Cone
Bag 7 begins forming the top of the rocket.
One of the more interesting techniques is a daisy-chain style sequence of connections that allows the pieces to create the cone shape.
The concept is clever, but connecting the completed assembly can be difficult because three hooks must line up with three bars on the existing rocket structure simultaneously.
It is another example of a connection that isn't difficult to understand, but can be physically challenging to execute.
Bag 8: Fast Exterior Finishing
Bag 8 is one of the quickest bags in the set, taking less than 10 minutes.
You assemble the final two minifigures and add several finishing touches to the exterior shell and cone.
After the more demanding earlier sections, this bag moves extremely quickly.
Bags 9 & 10: The Most Enjoyable Part
Bags 9 and 10 are unusual because both are opened together for the next phase of construction.
That creates a large number of pieces on the work surface at once, so sorting trays are especially useful here. I use puzzle-piece trays, and they made this section considerably easier to manage.
These bags construct the rocket's three landing gear assemblies.
This was probably my favorite portion of the entire build.
The construction varies enough to stay interesting, the assemblies are satisfying to put together, and connecting them to the rocket is surprisingly easy.
It's a nice reward after some of the much tighter structural connections earlier in the build.
Bag 11: Cockpit and Final Details
The final bag contains many larger pieces and begins with several somewhat fragile assemblies.
When attaching new pieces, it's possible to knock previously completed components slightly out of position. I found it useful to periodically check the surrounding assembly and press everything back together before moving on.
The control room is one of the best details in the entire set.
Its curved pieces require another sticker application, which can be tricky to align, but the completed cockpit looks excellent.
The finished cockpit also rotates surprisingly smoothly, which gives the model an unexpectedly fun interactive feature.
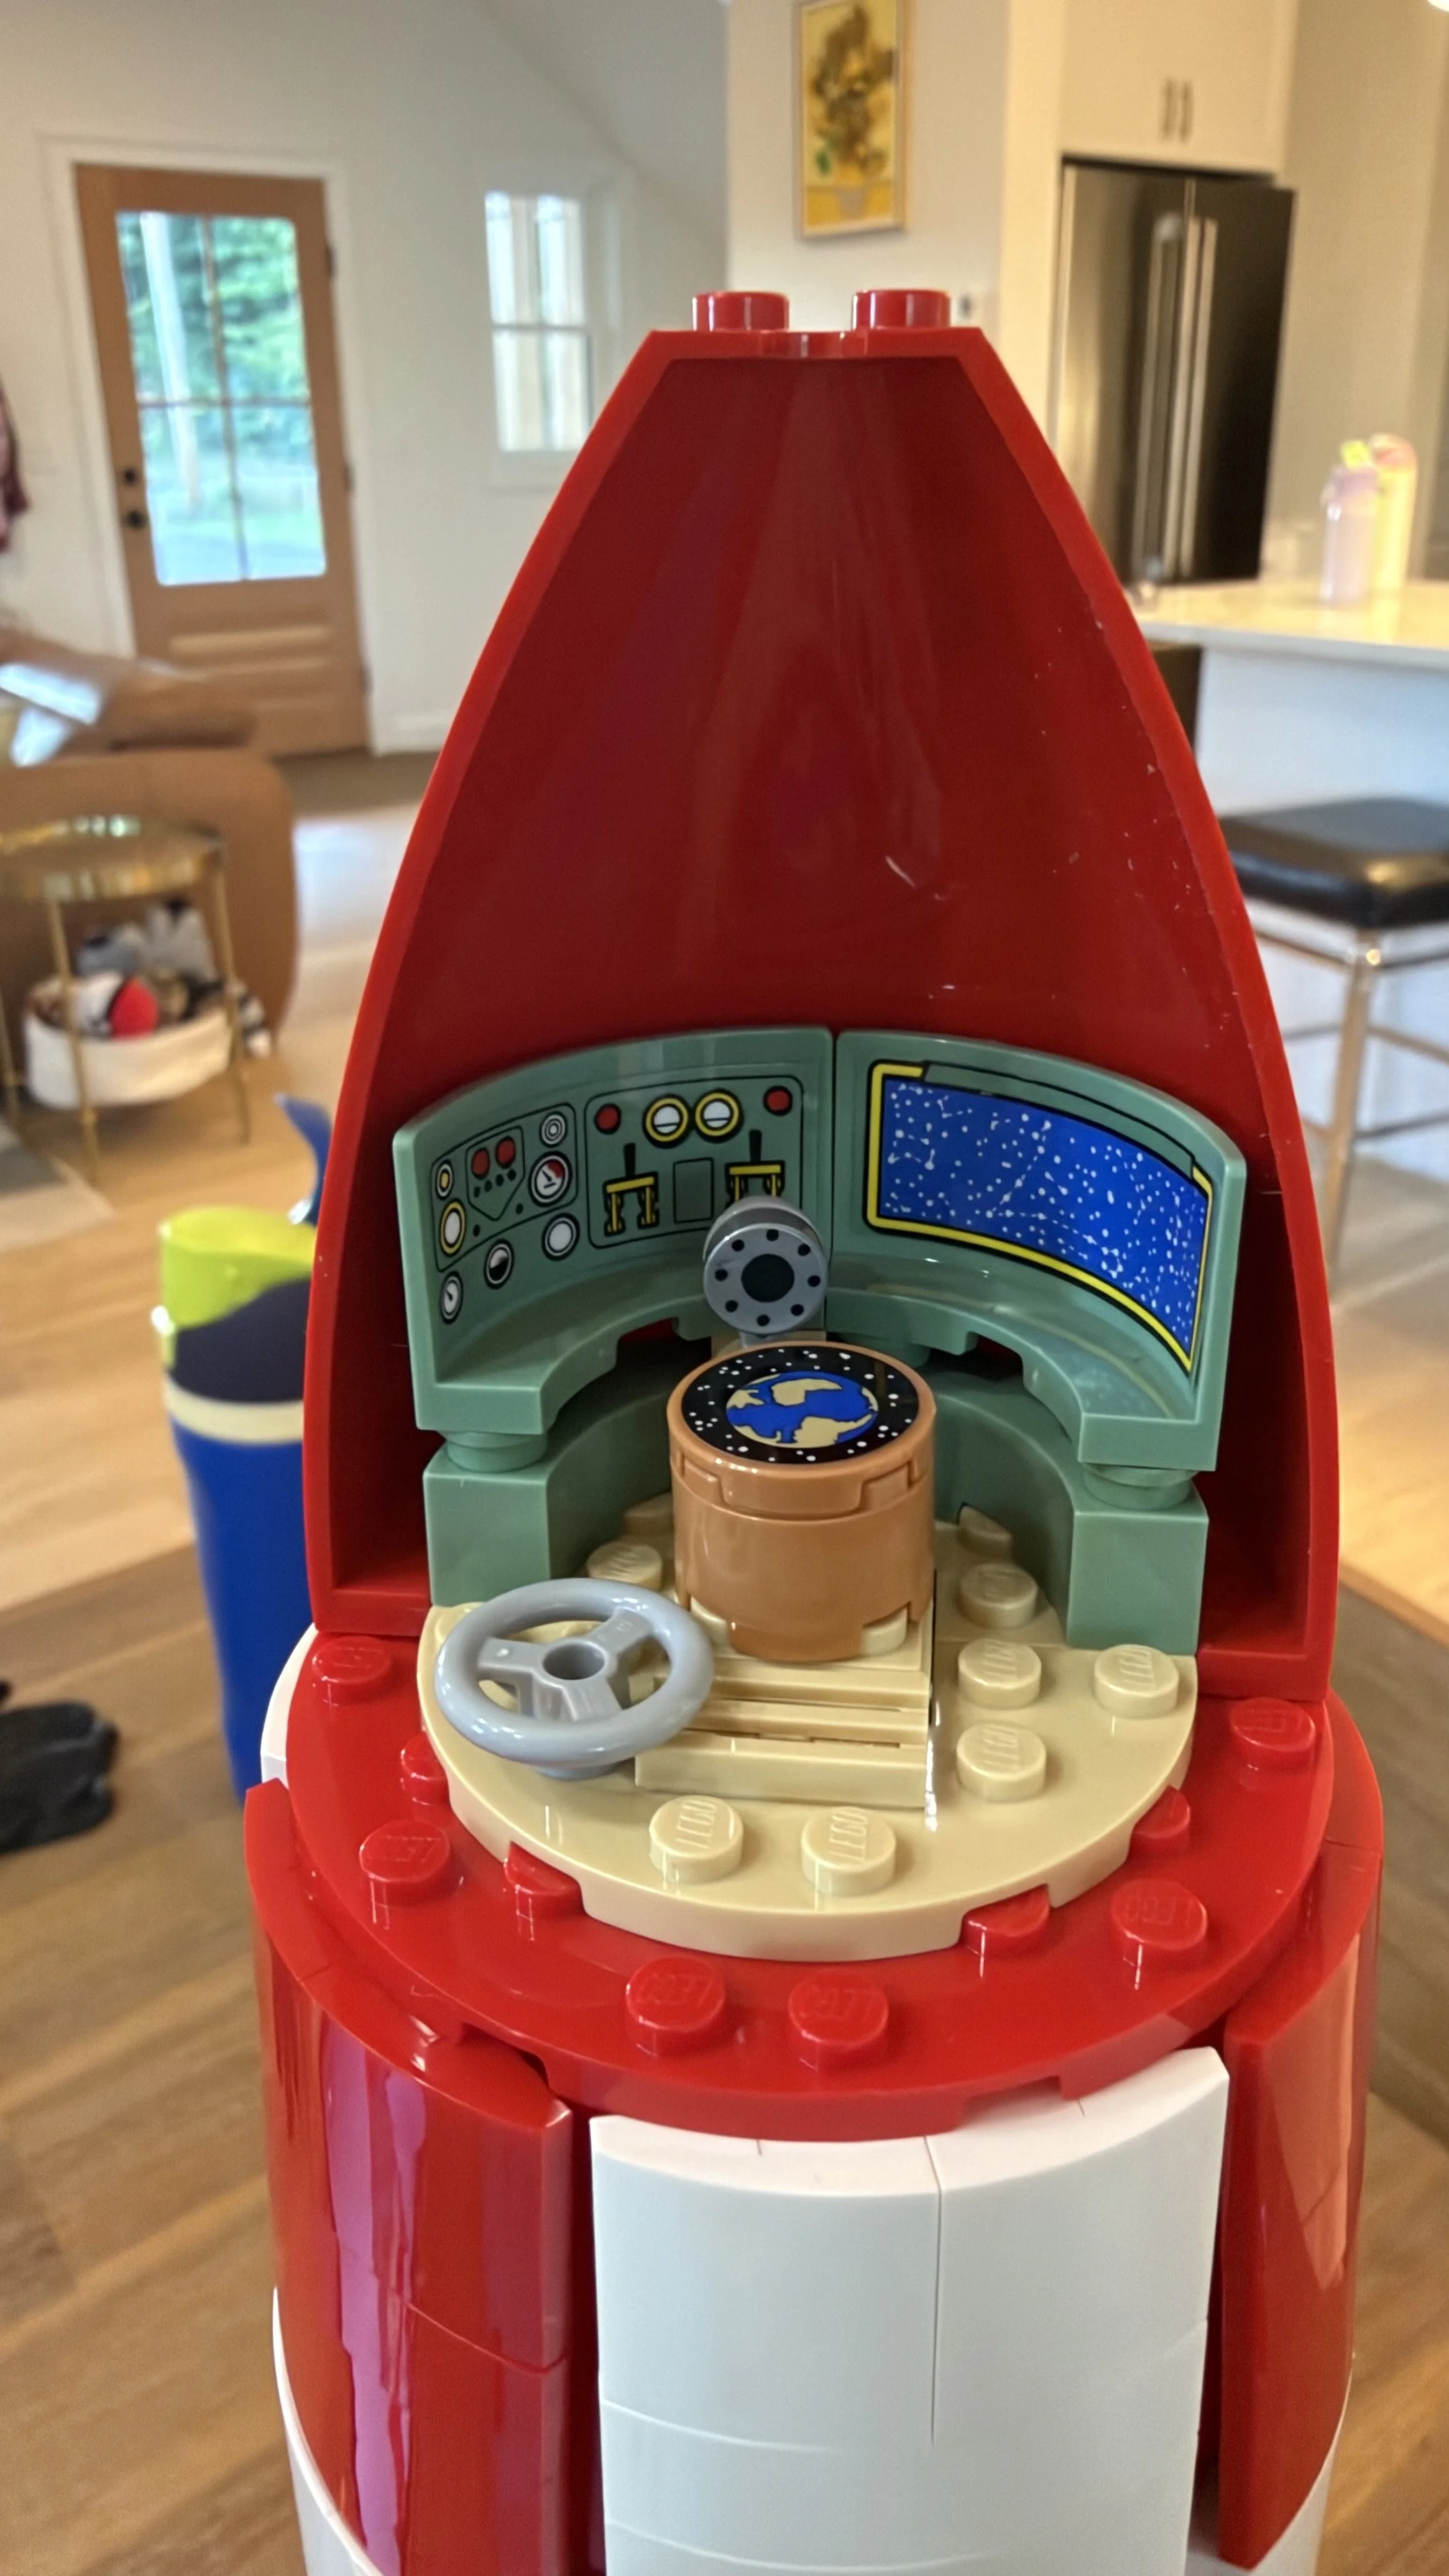
The hidden control room is one of the best finishing details, complete with printed-style controls and a rotating cockpit assembly.
Display Quality and Stability
This is where all of the difficult internal construction pays off.
At roughly 20 inches tall, Tintin® Moon Rocket is a substantial display model. Despite that height, the completed structure feels exceptionally solid.
The three landing legs provide a wide, stable footprint, while the internal Technic framework prevents the rocket from feeling flexible or top-heavy.
Visually, the simple red-and-white pattern is extremely effective. The size of the model gives that otherwise straightforward color scheme plenty of presence.
There is also more detail than the exterior initially suggests. Removing a panel from the cone reveals the hidden control room, adding a nice interactive element to what is otherwise primarily a display piece. LEGO lists the completed model at approximately 49 cm high, 23 cm wide, and 20 cm deep.
Who Will Enjoy This Build?
Tintin® Moon Rocket is a particularly good choice if you enjoy:
Large display-oriented LEGO® sets
Technic-supported structures
Builds where internal engineering matters
Symmetrical construction
Iconic vehicles and rockets
Seeing a complicated frame gradually disappear beneath a clean exterior
You may enjoy it less if you dislike:
Tight Technic connections
Assemblies requiring significant finger pressure
Orientation-sensitive building
Repeated symmetrical sections
Small stickers on curved or detailed parts
The biggest consideration is the Technic work. If you enjoy understanding how a large model supports itself internally, the challenging early bags are likely to be one of the highlights. If tight Technic connections frustrate you, they may instead be the hardest part of the experience.
Final Verdict
A Challenging Internal Build With an Excellent Payoff
LEGO® Ideas Tintin® Moon Rocket 21367 is one of those sets where the finished model doesn't immediately reveal how much engineering sits underneath the exterior.
Bags 2 and 3 are legitimately difficult. Several Technic connections require precise alignment, substantial finger pressure, and careful attention to orientation.
But those sections also explain why the completed rocket feels so stable.
Once the internal structure is finished, the build becomes noticeably more relaxing. The exterior shell goes together smoothly, the landing gear is particularly enjoyable, and the final cockpit adds an excellent bit of character and functionality.
At almost 20 inches tall, the finished rocket has significant display presence without feeling fragile.
The difficulty is higher than its simple exterior might suggest, but in this case the challenge feels justified by the result.
Build time: 3 hours, 43 minutes
Difficulty: 7/10
Best feature: Excellent finished stability
Biggest challenge: Internal Technic construction
Favorite section: Landing gear in Bags 9 & 10
Stickers: 6
My verdict: Tintin® Moon Rocket is easy to recommend for experienced builders who enjoy structural LEGO® construction and want a large, exceptionally stable display model.
Want the Finished Set Without the Build?
The Bricksmith provides professional set assembly, rebuilding, disassembly, sorting, and restoration services.
If you own Tintin® Moon Rocket or another set and would rather have the finished model than complete the build yourself, send the set number or a few photos. You'll receive a written scope, price, estimated timing, and handoff plan before deciding whether to proceed.