
I put off building the Natural History Museum because of the $299 price tag. Then I got to Bag 14 and built a dinosaur so tall that the architect had to leave a hole in the next floor. The best part? I can lift the entire skeleton out and set it on the table. For someone who loves dinosaurs, history and space, this turned out to be a much better fit than I’d expected.
I’ve built Tudor Corner and the Police Station, so I had a pretty good idea what the first few bags would feel like. What I hadn’t counted on was enjoying the exhibits as much as the building. Even the curator’s desk, which almost disappears under the roof, gets a proper place in the build.

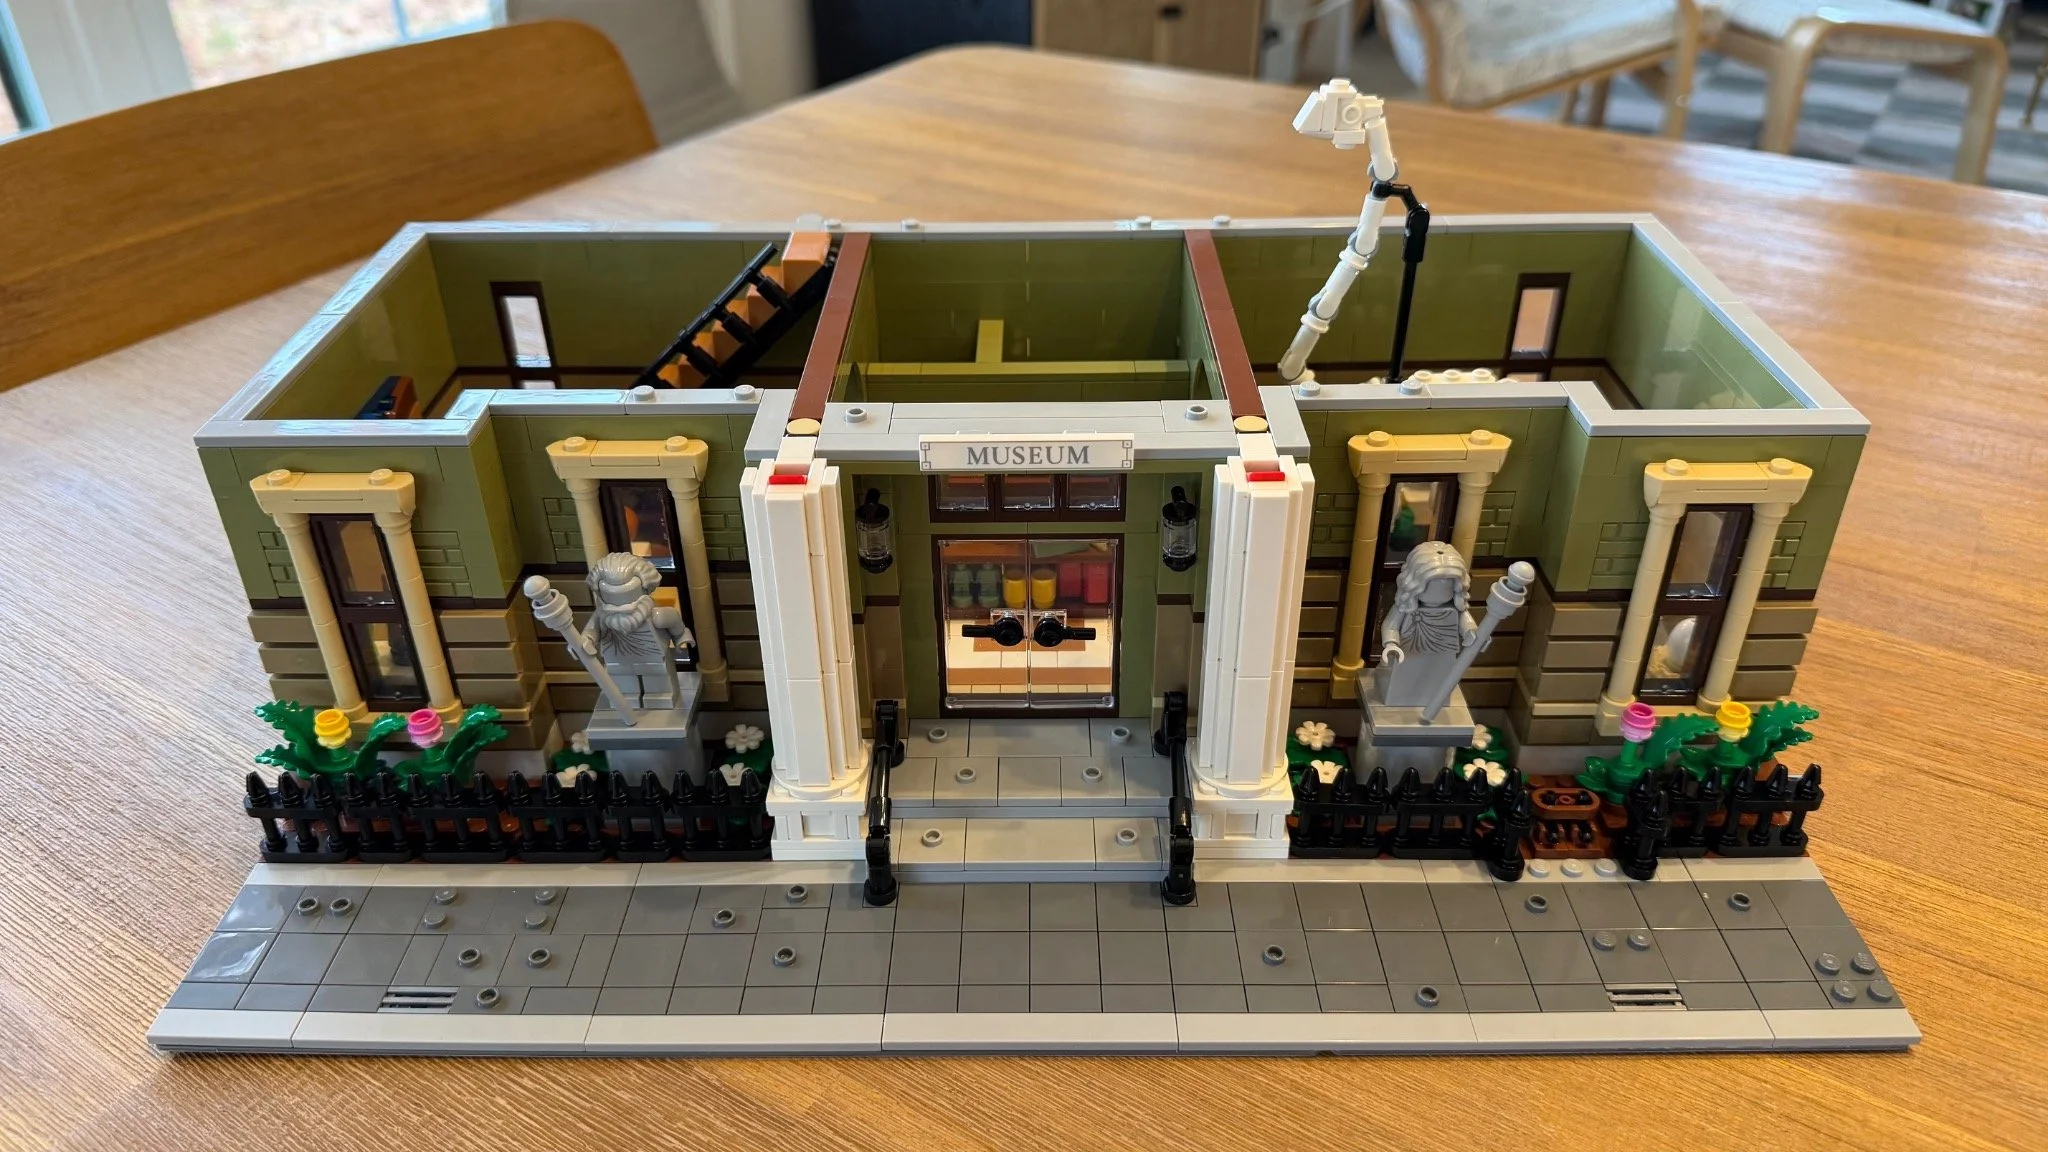
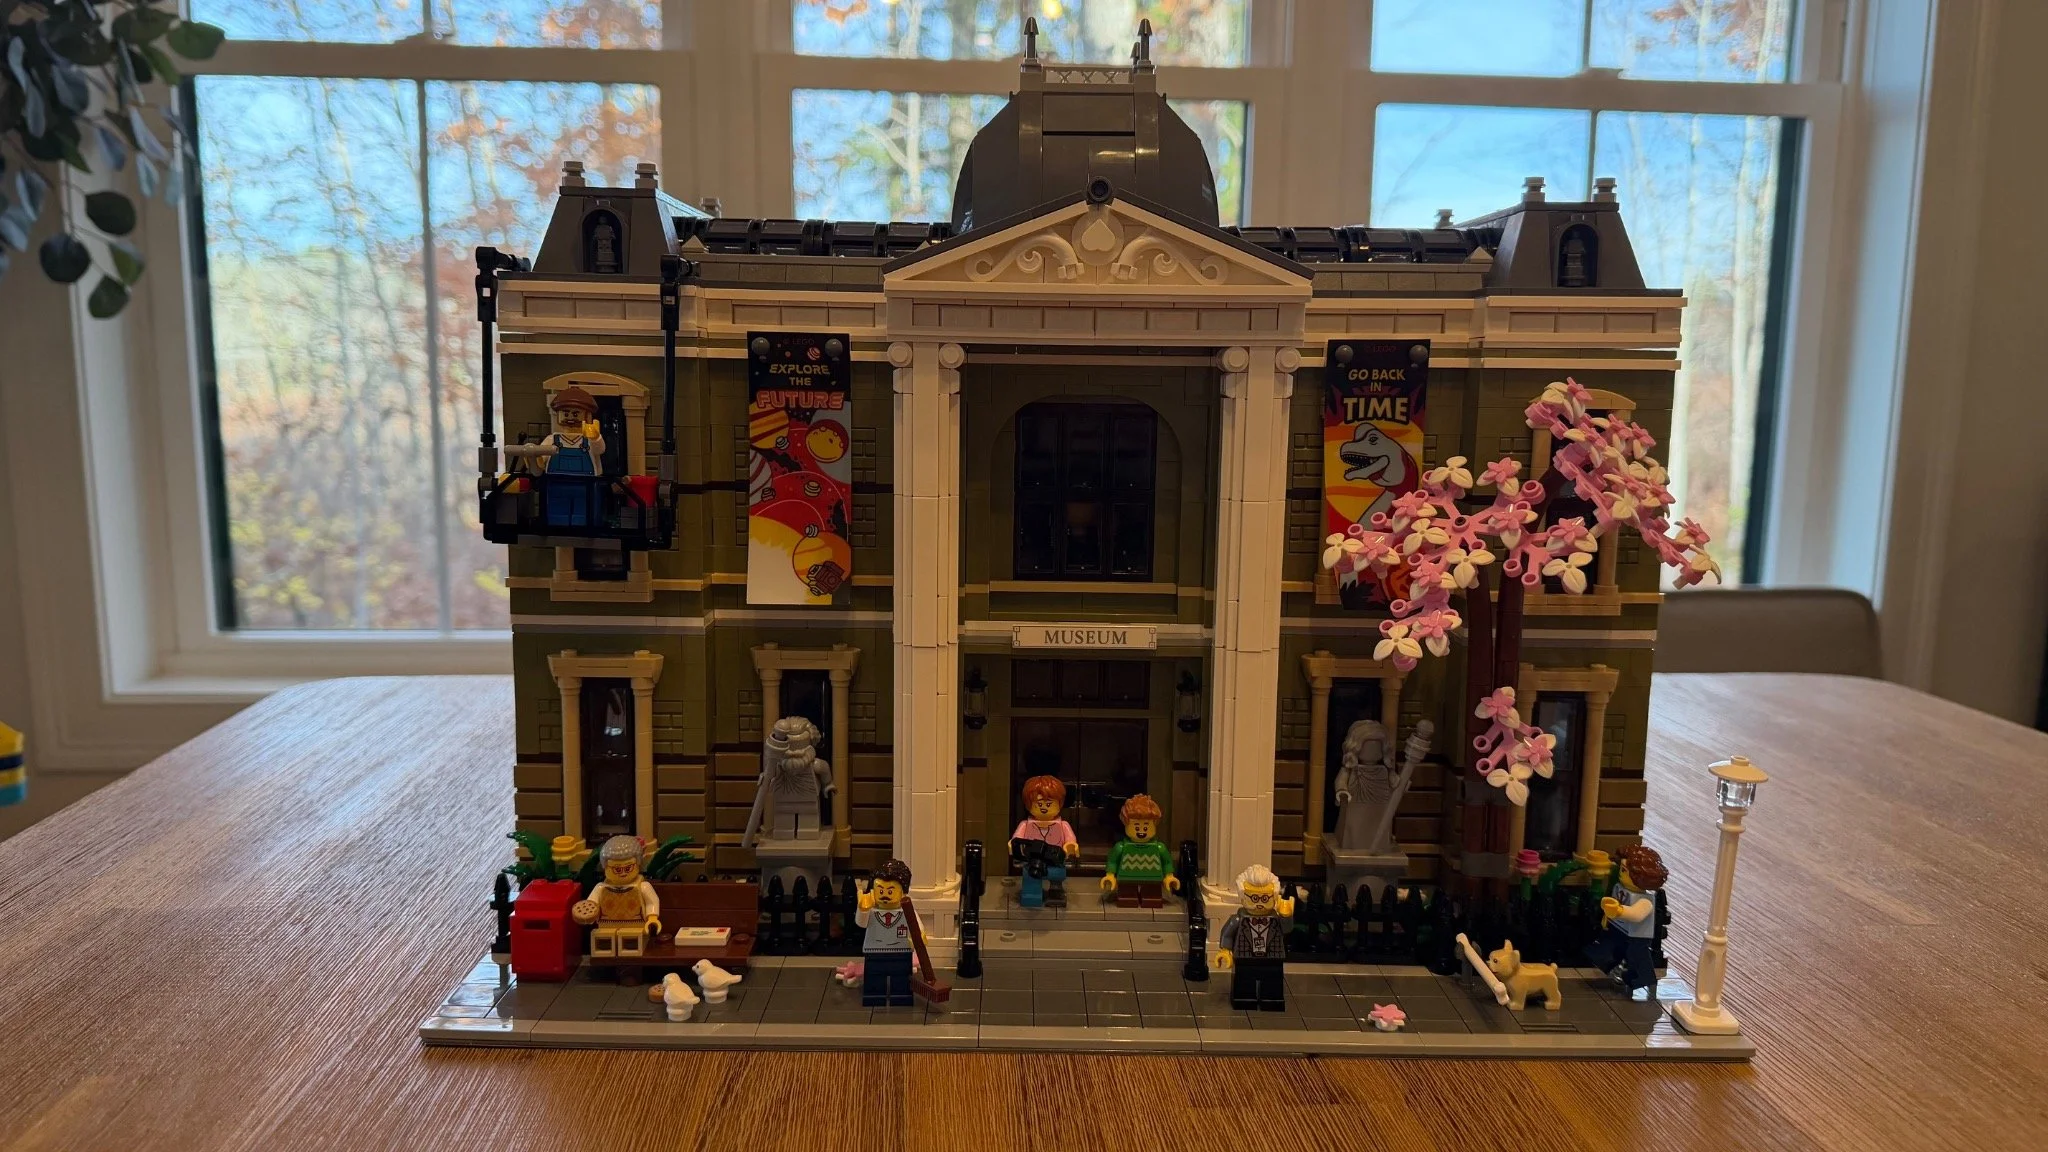
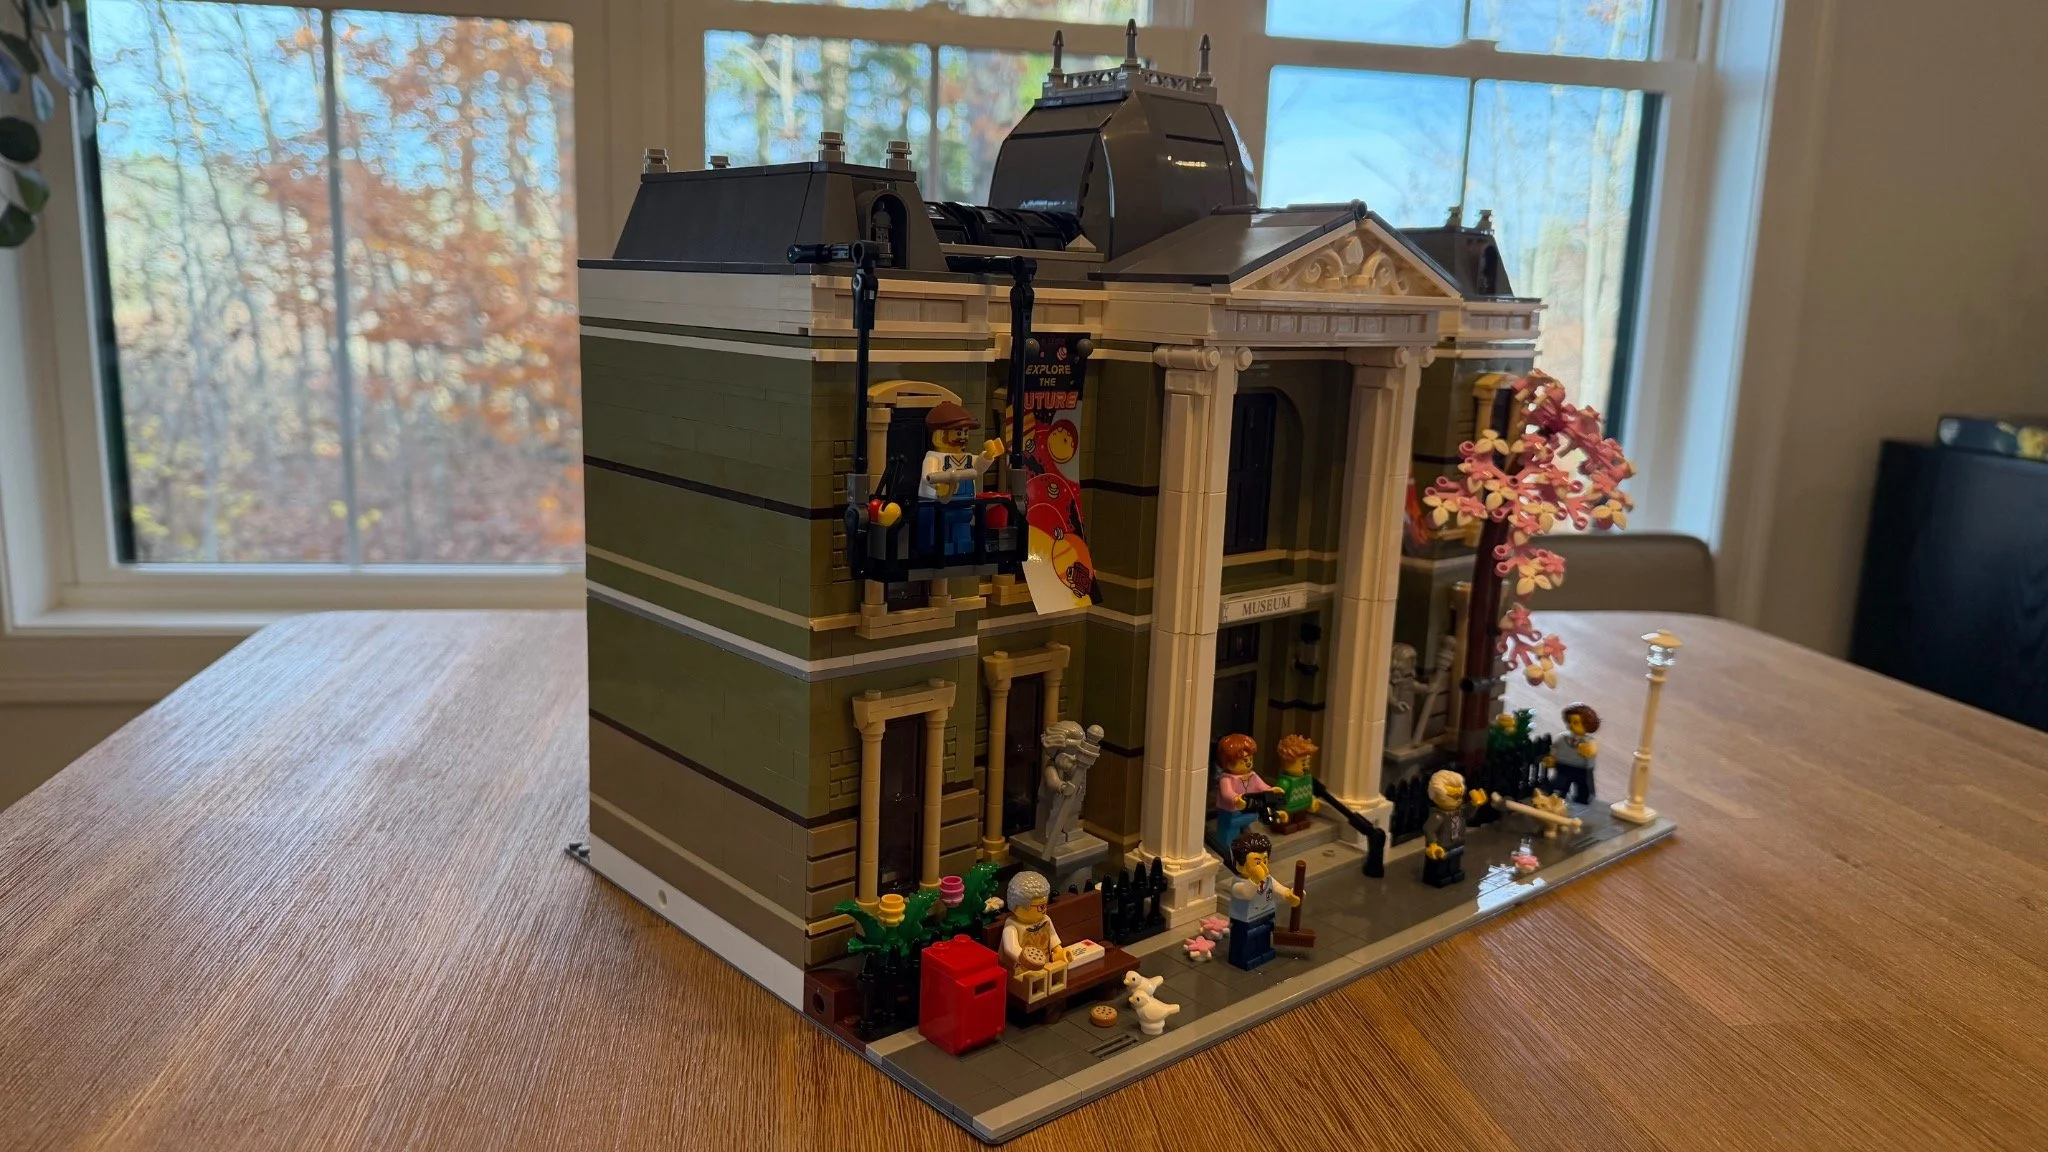
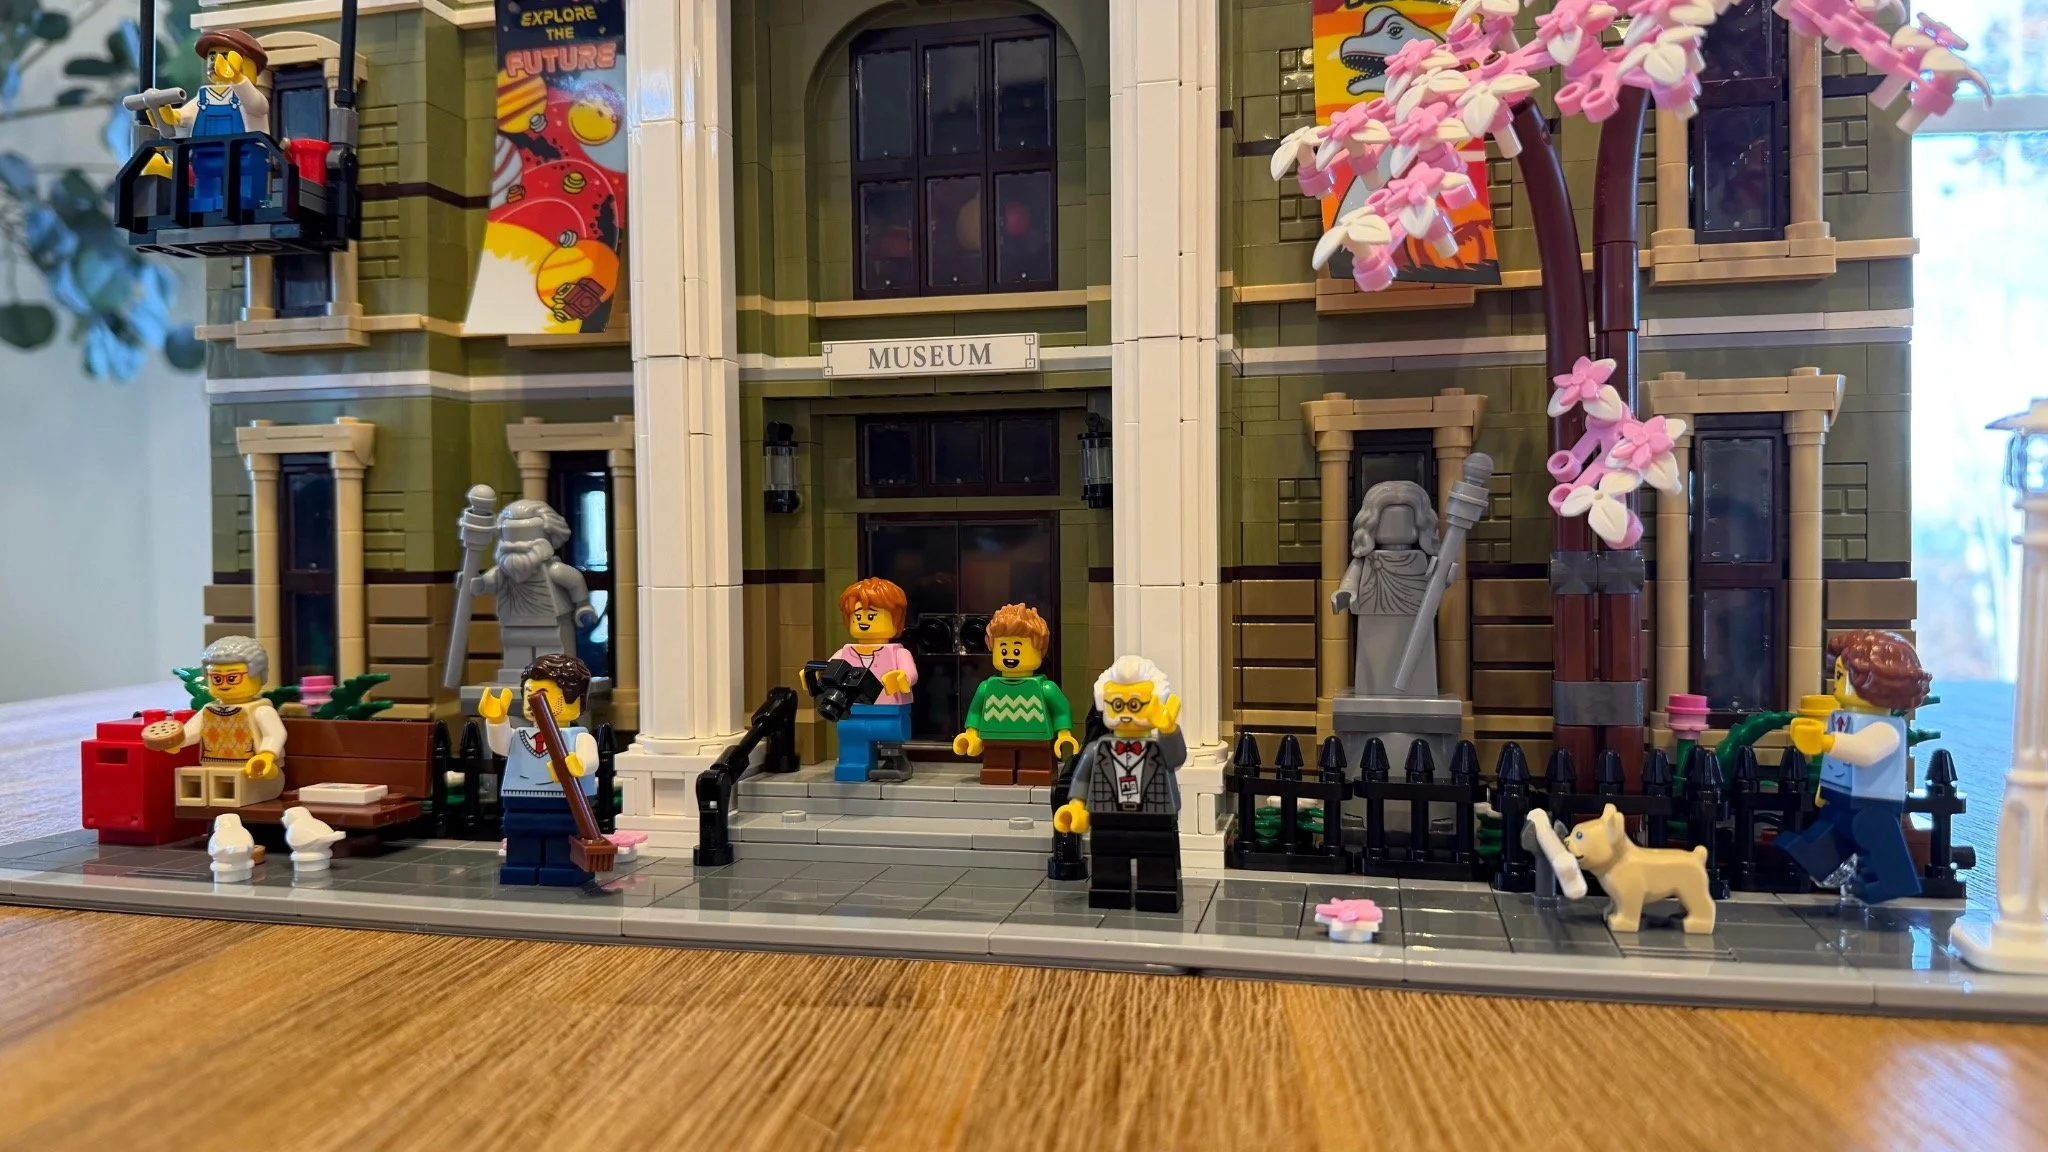
The Natural History Museum with both floors, the roof and the sidewalk scene in place.
At a Glance
Set: LEGO Icons Natural History Museum (10326), Modular Buildings Collection
Contents: 4,014 pieces, 33 numbered bags, seven minifigures, ages 18+
Display dimensions: About 39 cm wide, 25 cm deep and 31 cm high
My build: November 3, 2026 · about 12–14 hours, estimated · 552 main booklet steps
Bag averages out of 10: Difficulty 3.7 · repetition 5.3 · dexterity 4.5
Stickers: I didn’t apply any. The colorful exhibit banners are printed.
My overall rating: 8.4/10
View the Natural History Museum 10326 on LEGO.com
How to read the time and ratings
I used LEGO Builder and the booklet. I didn’t time individual bags or run a formal overall timer, and the app didn’t give me a build time. Twelve to fourteen hours is my estimate for the whole museum.
The three numbers beside each bag are editorial estimates based on the booklet and my notes. I didn’t score the bags as I built. Difficulty reflects understanding and orienting the assembly. Repetition reflects how often similar steps recur, even when I enjoy them. Dexterity reflects the precision, access or pressure a connection calls for. Each bag counts once in the averages. The 8.4 is my own verdict on building and displaying the set.
The build, bag by bag
Bags 1–3 · Beneath the museum
This is the familiar modular rhythm: sidewalk, tiles, then more tiles. I can get into a flow doing that kind of work. It helps that the museum rewards a close look even here. The cheese tucked into the foundation made me picture a mouse living under the floor. There’s no mouse to install. There are buried bones, though, and a little leak outside.
Bag 1 · First baseplate. The first patterned floor goes down beside a strip of sidewalk. The occasional exposed stud breaks the pattern for a reason.
Difficulty 2.5 · Repetition 7.5 · Dexterity 3.5
Bag 2 · Second baseplate. The wider plate meets the first to give the museum its 48-stud frontage. Line up the curb across the join.
Difficulty 3.0 · Repetition 7.0 · Dexterity 3.5
Bag 3 · Under the floor. The white plates start covering the little pockets below floor level. This is the moment to photograph the bones and the cheese.
Difficulty 3.5 · Repetition 6.0 · Dexterity 4.0
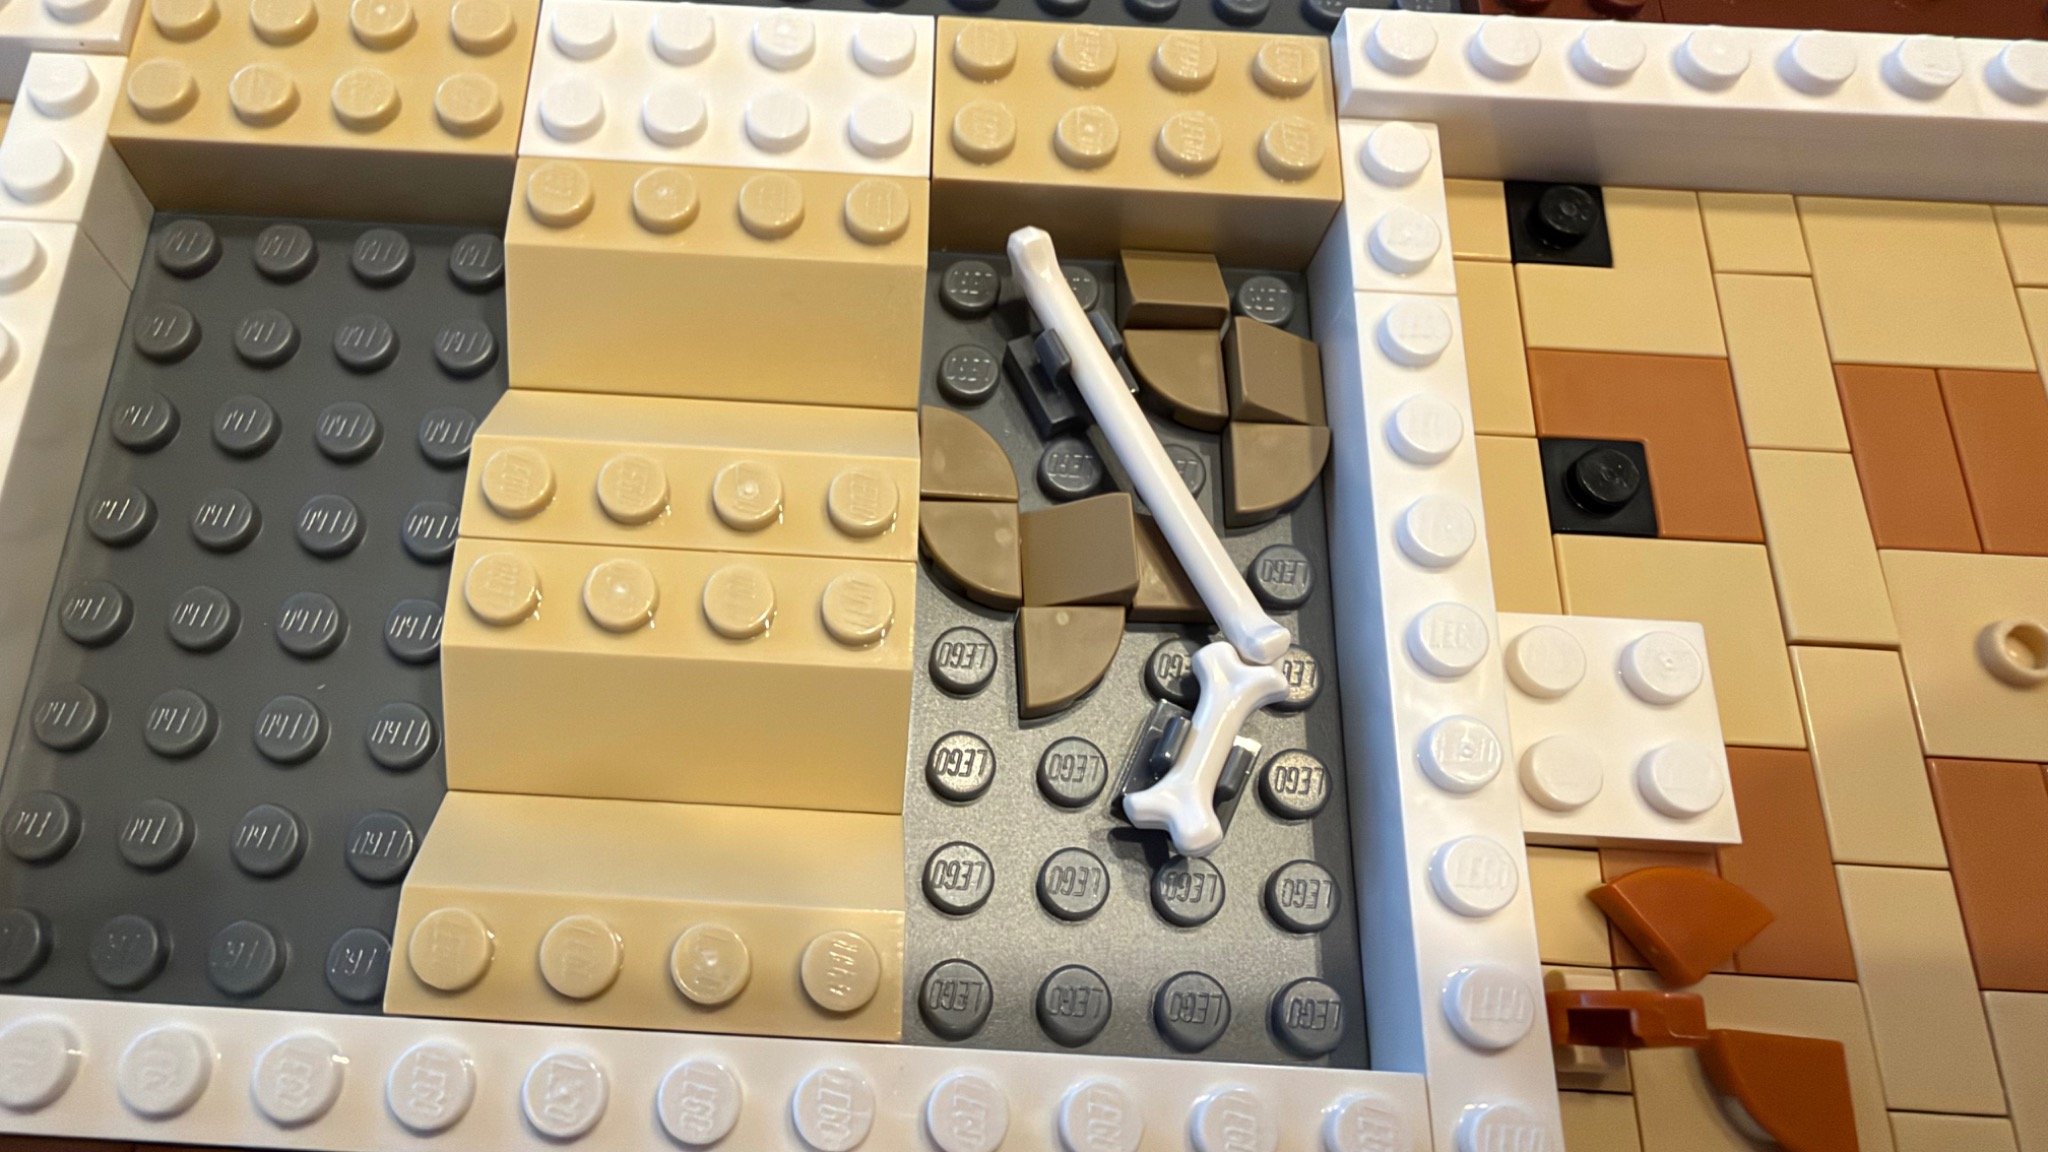
There are already fossils underfoot before the exhibits go in.
Bags 4–8 · Opening the ground-floor galleries
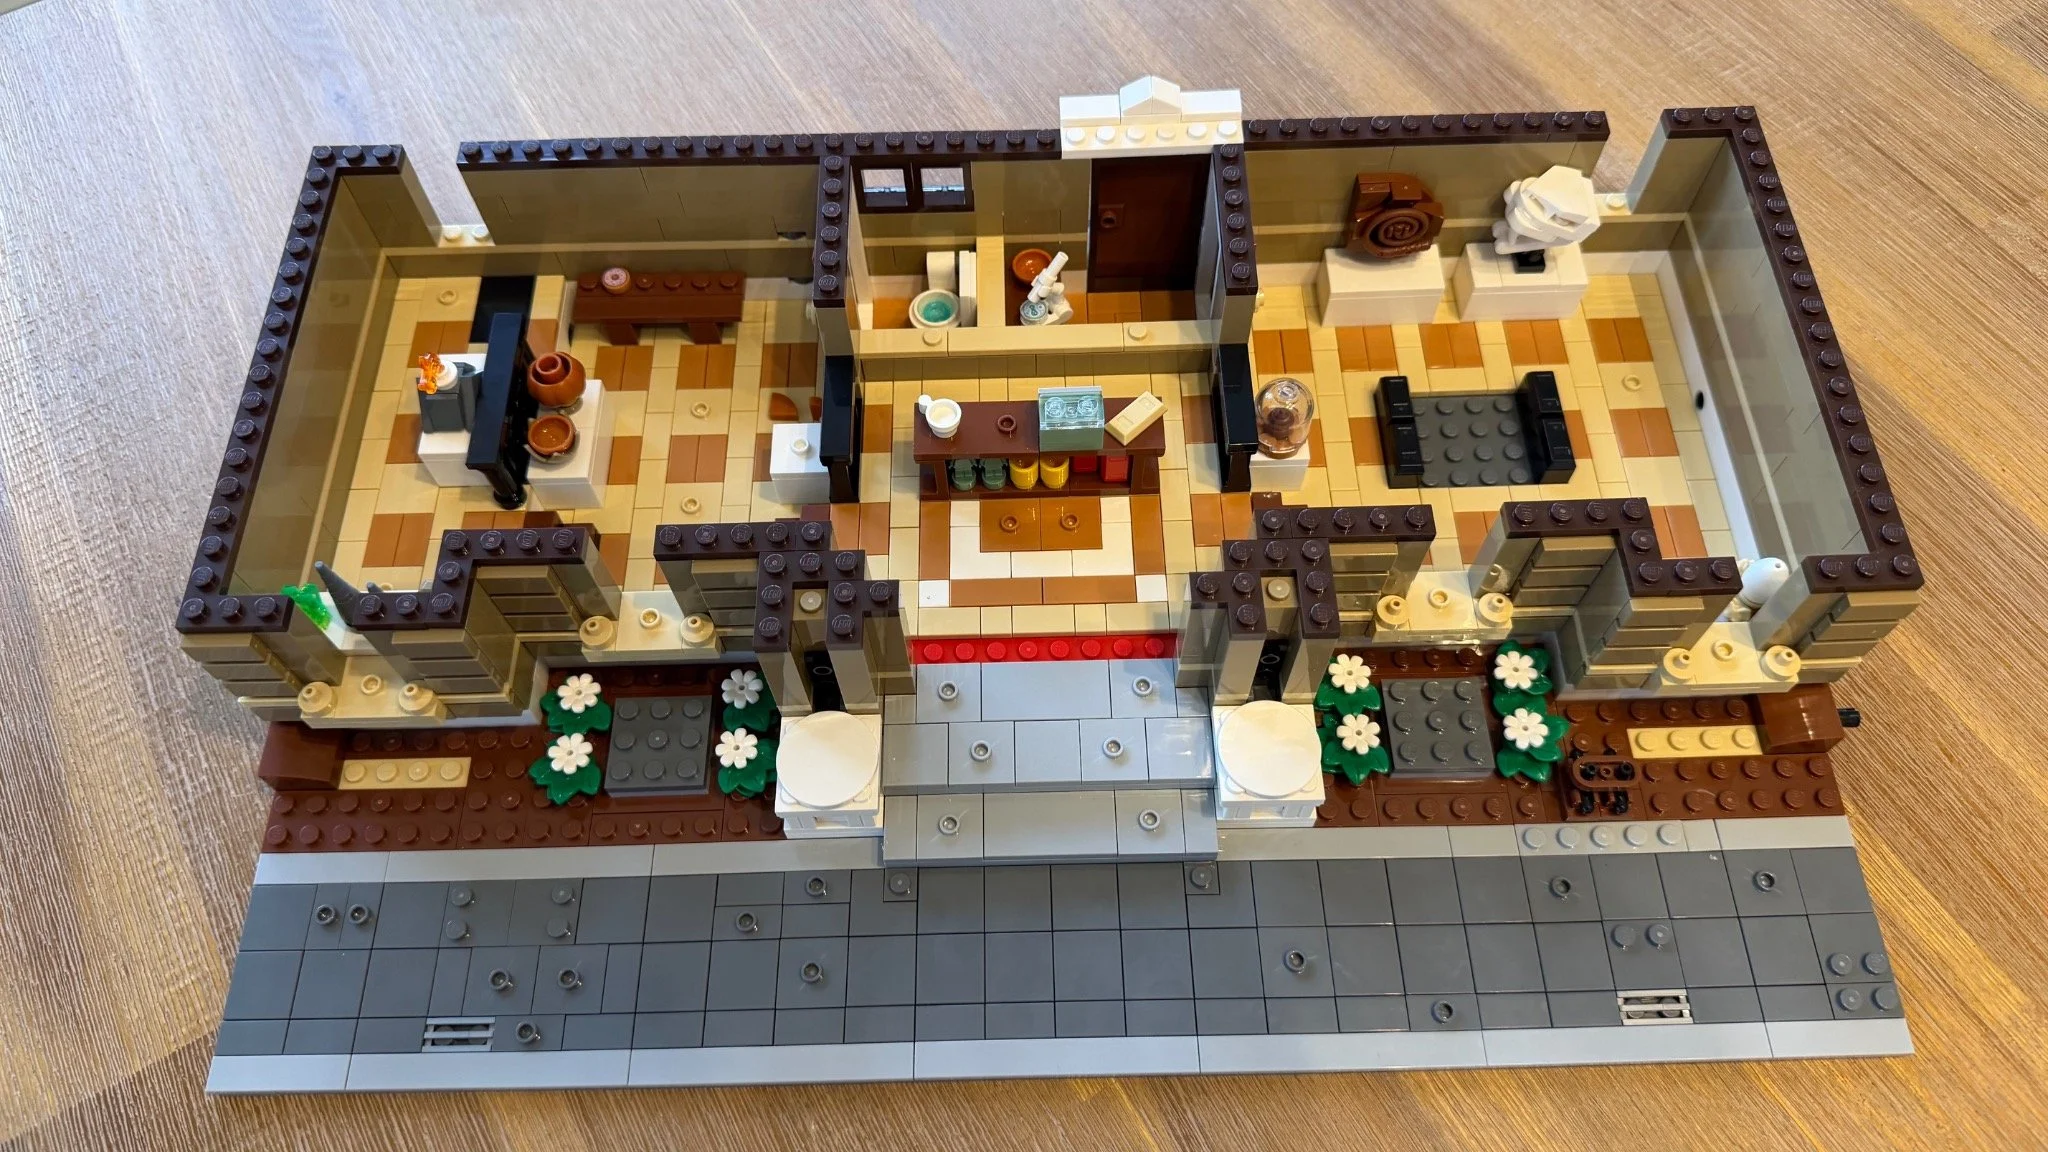
I liked seeing what qualified for a display case in this museum. A saber-toothed skull and rock specimens, sure. A piece of fossilized dinosaur poo? That one made the cut too. Across from the exhibits there’s a gift-shop checkout, and tucked behind it is a little bathroom with a toilet. You can see all of it at once while the walls are low.
Bag 4 · Finishing the floor. The remaining tile pattern outlines the rooms. Check the single exposed studs as carefully as the colored squares.
Difficulty 2.5 · Repetition 7.0 · Dexterity 3.5
Bag 5 · Benches and the perimeter. A bench gets a stray doughnut, while the first wall courses and paired bases establish the entrance.
Difficulty 3.0 · Repetition 4.5 · Dexterity 3.5
Bag 6 · The lower rooms take shape. The rear doorway and dividers turn colored floor tiles into recognizable rooms. The low walls still give a clear view inside.
Difficulty 3.5 · Repetition 4.0 · Dexterity 4.0
Bag 7 · Fossils and pottery. A skull, a fossilized dropping and a little volcano all fit into this run of exhibits. The scale changes with every plinth.
Difficulty 4.0 · Repetition 2.5 · Dexterity 5.0
Bag 8 · Framing the front bays. The front wall grows around the entrance and window bays. The counter and cases are still easy to see from above.
Difficulty 3.5 · Repetition 5.5 · Dexterity 4.0
A turn around the ground floor before the upper walls go on.
Bags 9–11 · Up from the shop floor
The windows and masonry felt familiar after other modular buildings. The exhibit that stood out here is flat against the wall: a little cutaway of Earth, with different colors doing the work of a museum label.
Bag 9 · Doors and olive masonry. The glass entrance and olive wall courses give the museum its street-facing outline.
Difficulty 3.5 · Repetition 5.0 · Dexterity 4.0
Bag 10 · A cross-section of Earth. A cutaway of the Earth joins the ground-floor collection. It is easy to miss among the wall-building steps.
Difficulty 3.0 · Repetition 5.0 · Dexterity 3.5
Bag 11 · Window rows. Dark window frames go into the repeated bays. Checking them from the front makes a reversed frame easier to spot.
Difficulty 3.0 · Repetition 6.5 · Dexterity 4.0
Bags 12–14 · The fence and the fossil
My least favorite job and my favorite assembly sit almost back to back. I liked how the staircase came together. I was much less happy about pressing all those little points into the black fence. Then I got to spend a bag on a Brachiosaurus, a build I’d gladly take out to show someone even if they had no interest in the rest of the museum.
Bag 12 · The first staircase. A long spine becomes a staircase as the individual treads and handrail go on. It is one of my favorite ways this building uses a narrow space.
Difficulty 4.5 · Repetition 5.0 · Dexterity 5.0
Bag 13 · Columns, statues and pointed fence. Matching white columns frame the doors. The front fence follows in runs of five and seven little sections before the two statues take their places.
Difficulty 4.0 · Repetition 8.5 · Dexterity 8.0
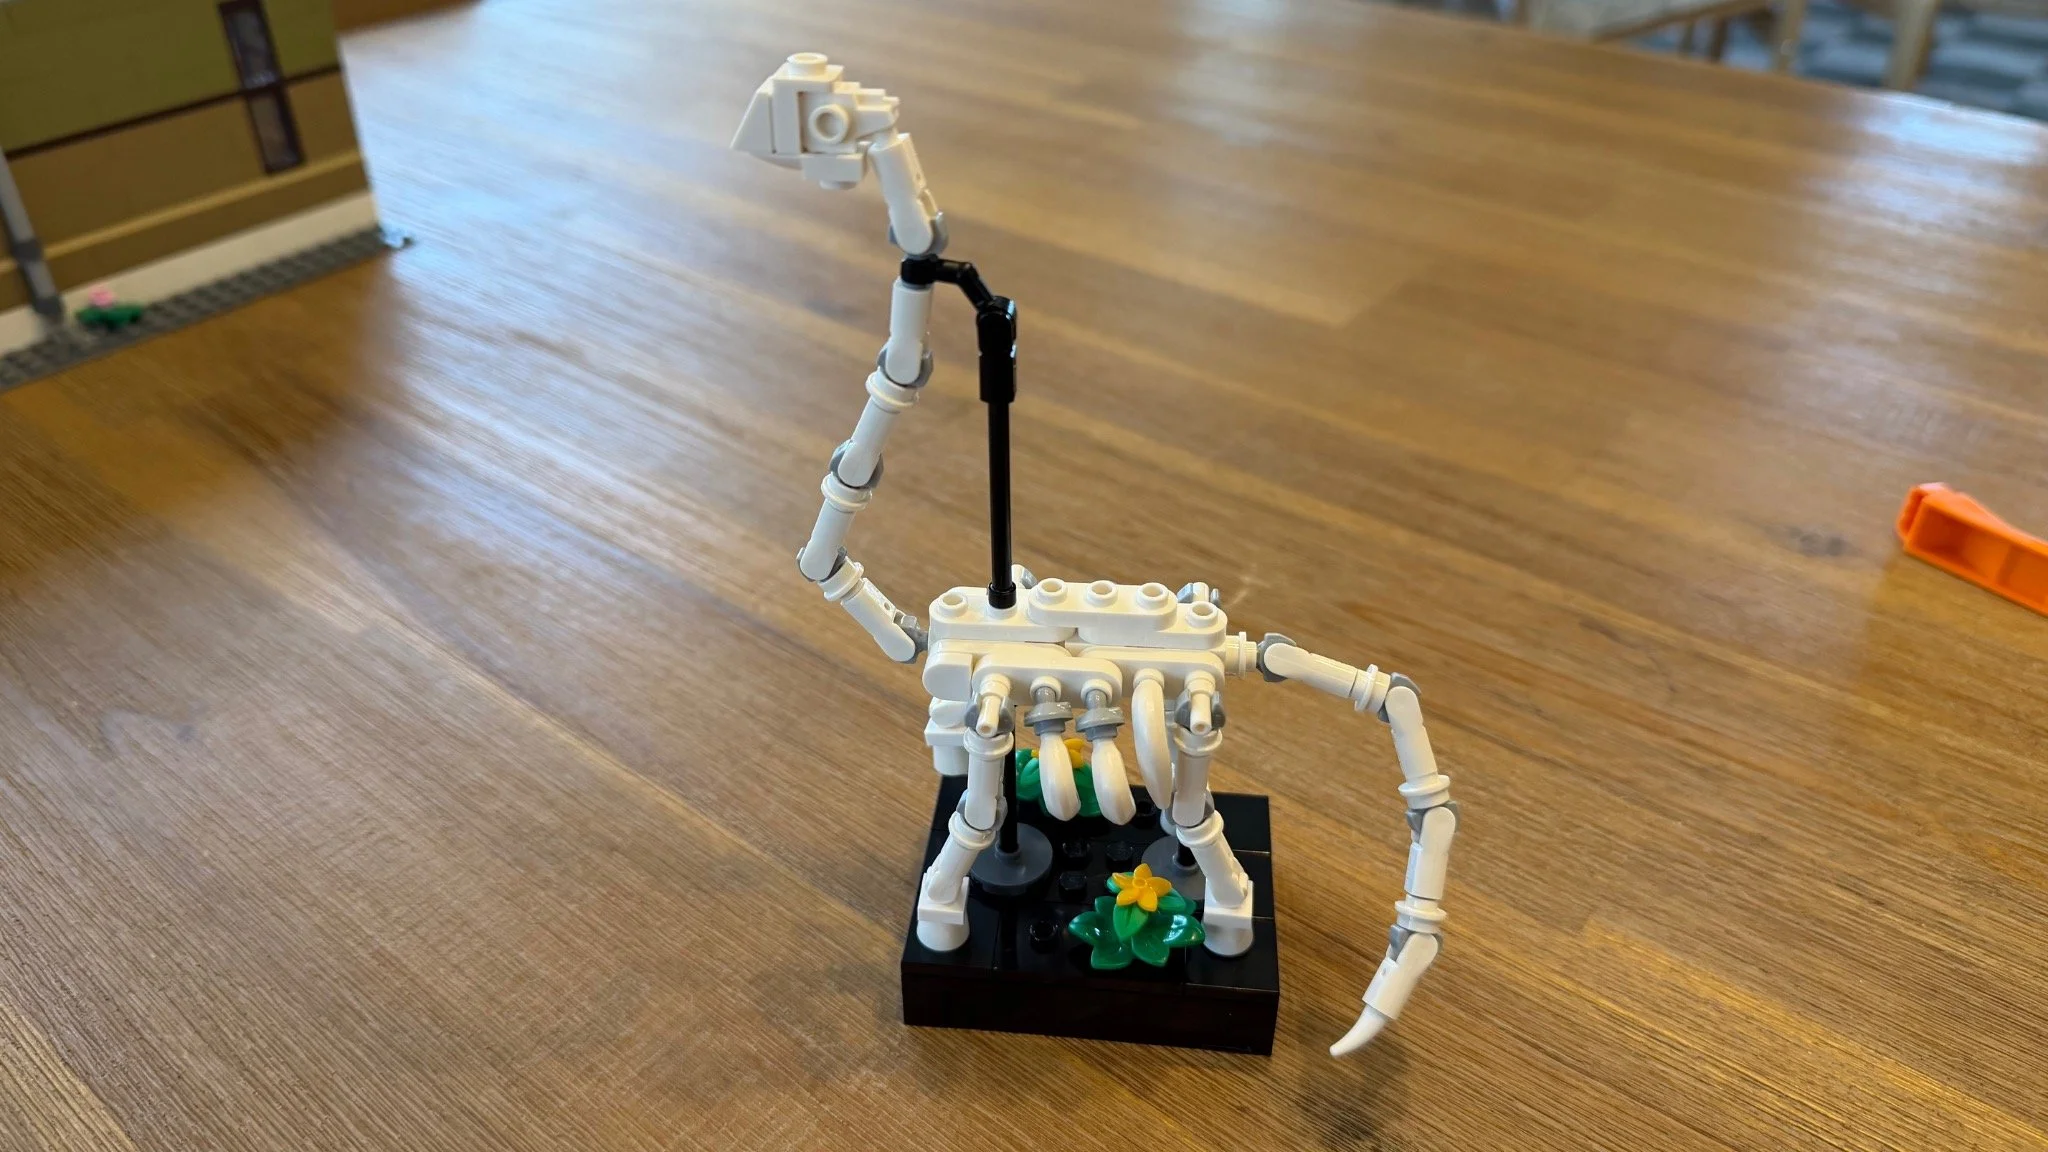
Bag 14 · The Brachiosaurus. Build the skeleton on its own plinth. Once it is in the gallery, the black support and that long white neck explain the height of the next floor.
Difficulty 5.5 · Repetition 4.0 · Dexterity 6.0
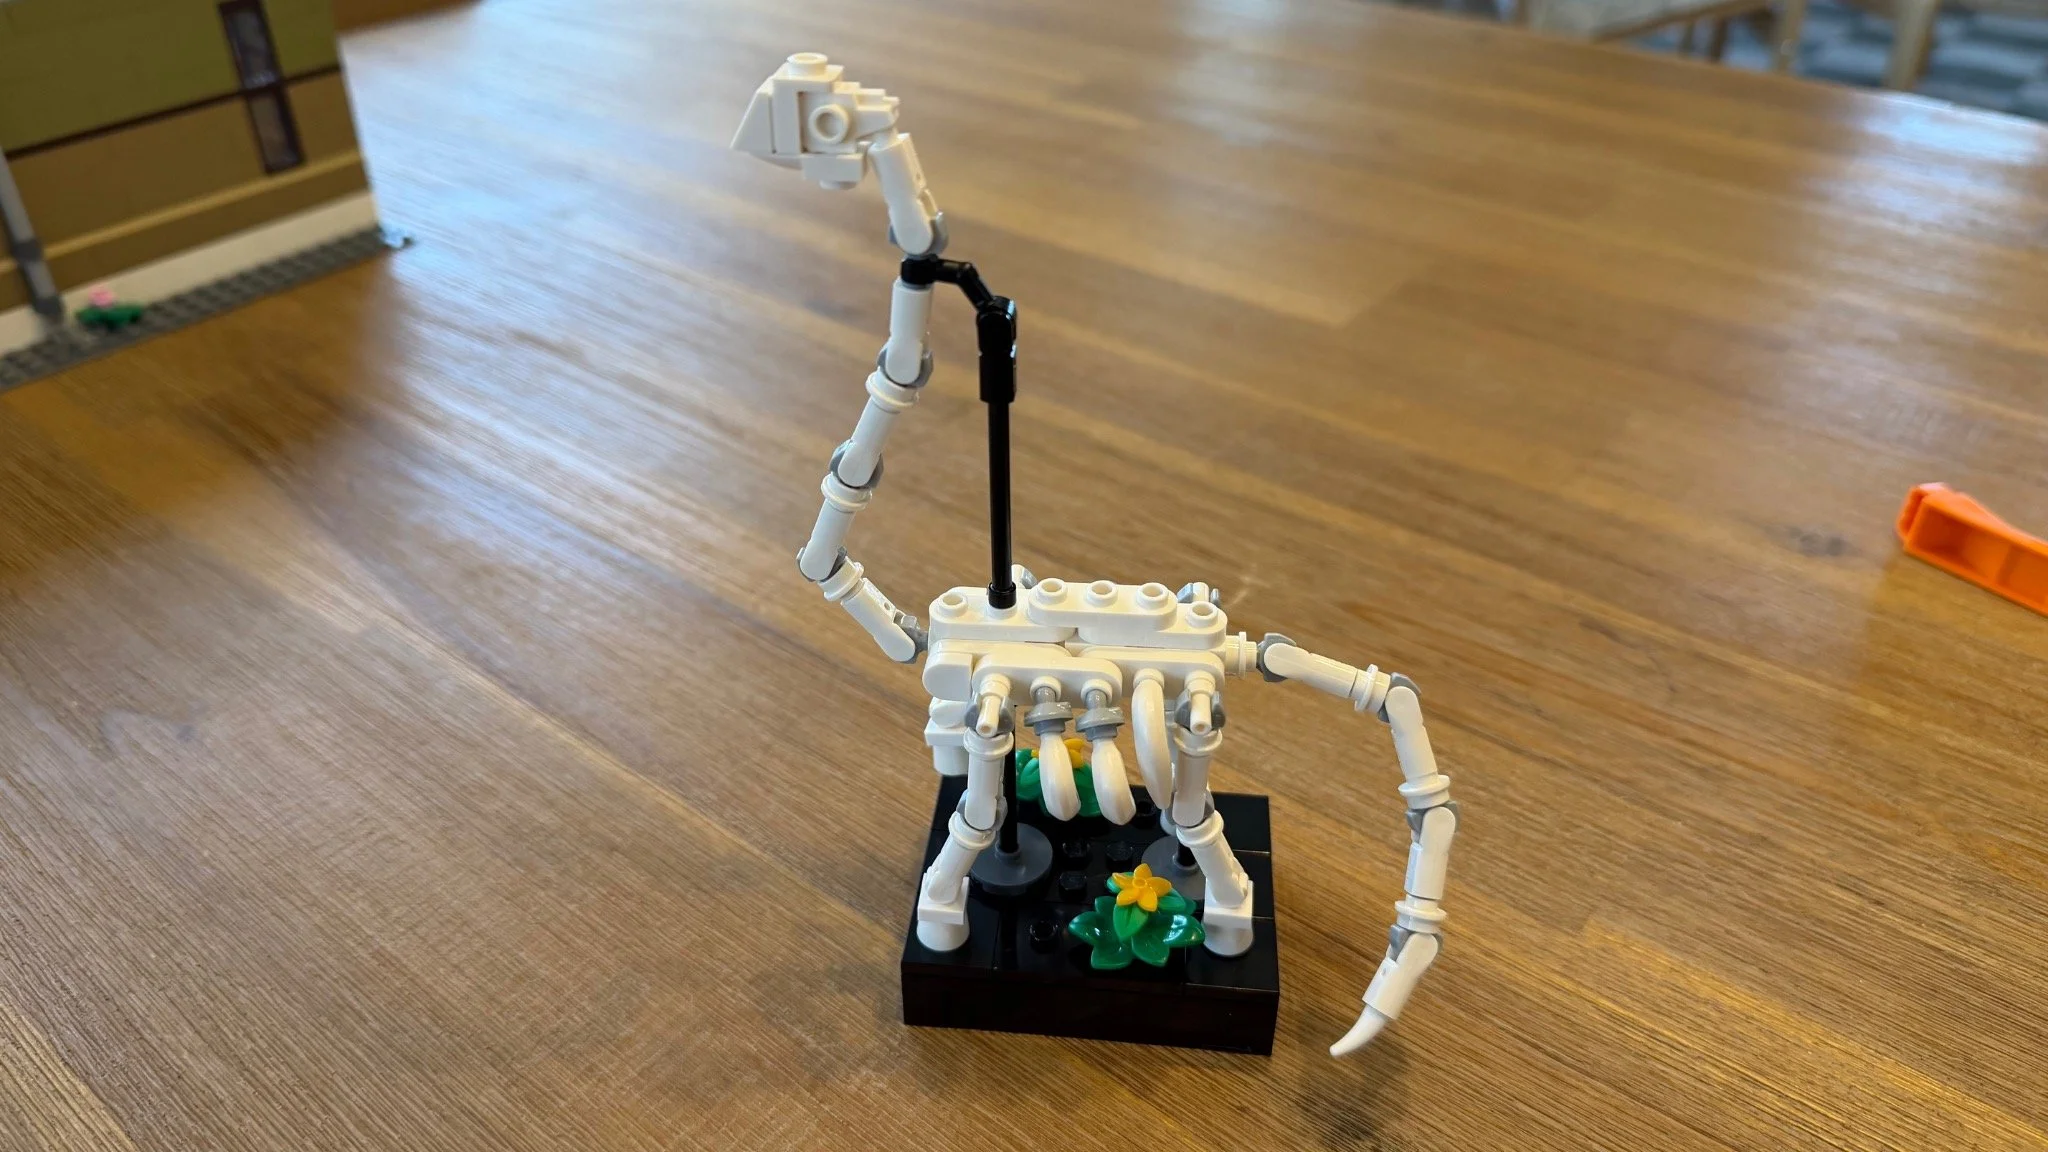
My favorite assembly, out of the building so you can see the whole animal.
The completed ground floor, from the front steps to the service door.
Bags 15–18 · Upstairs with the solar system
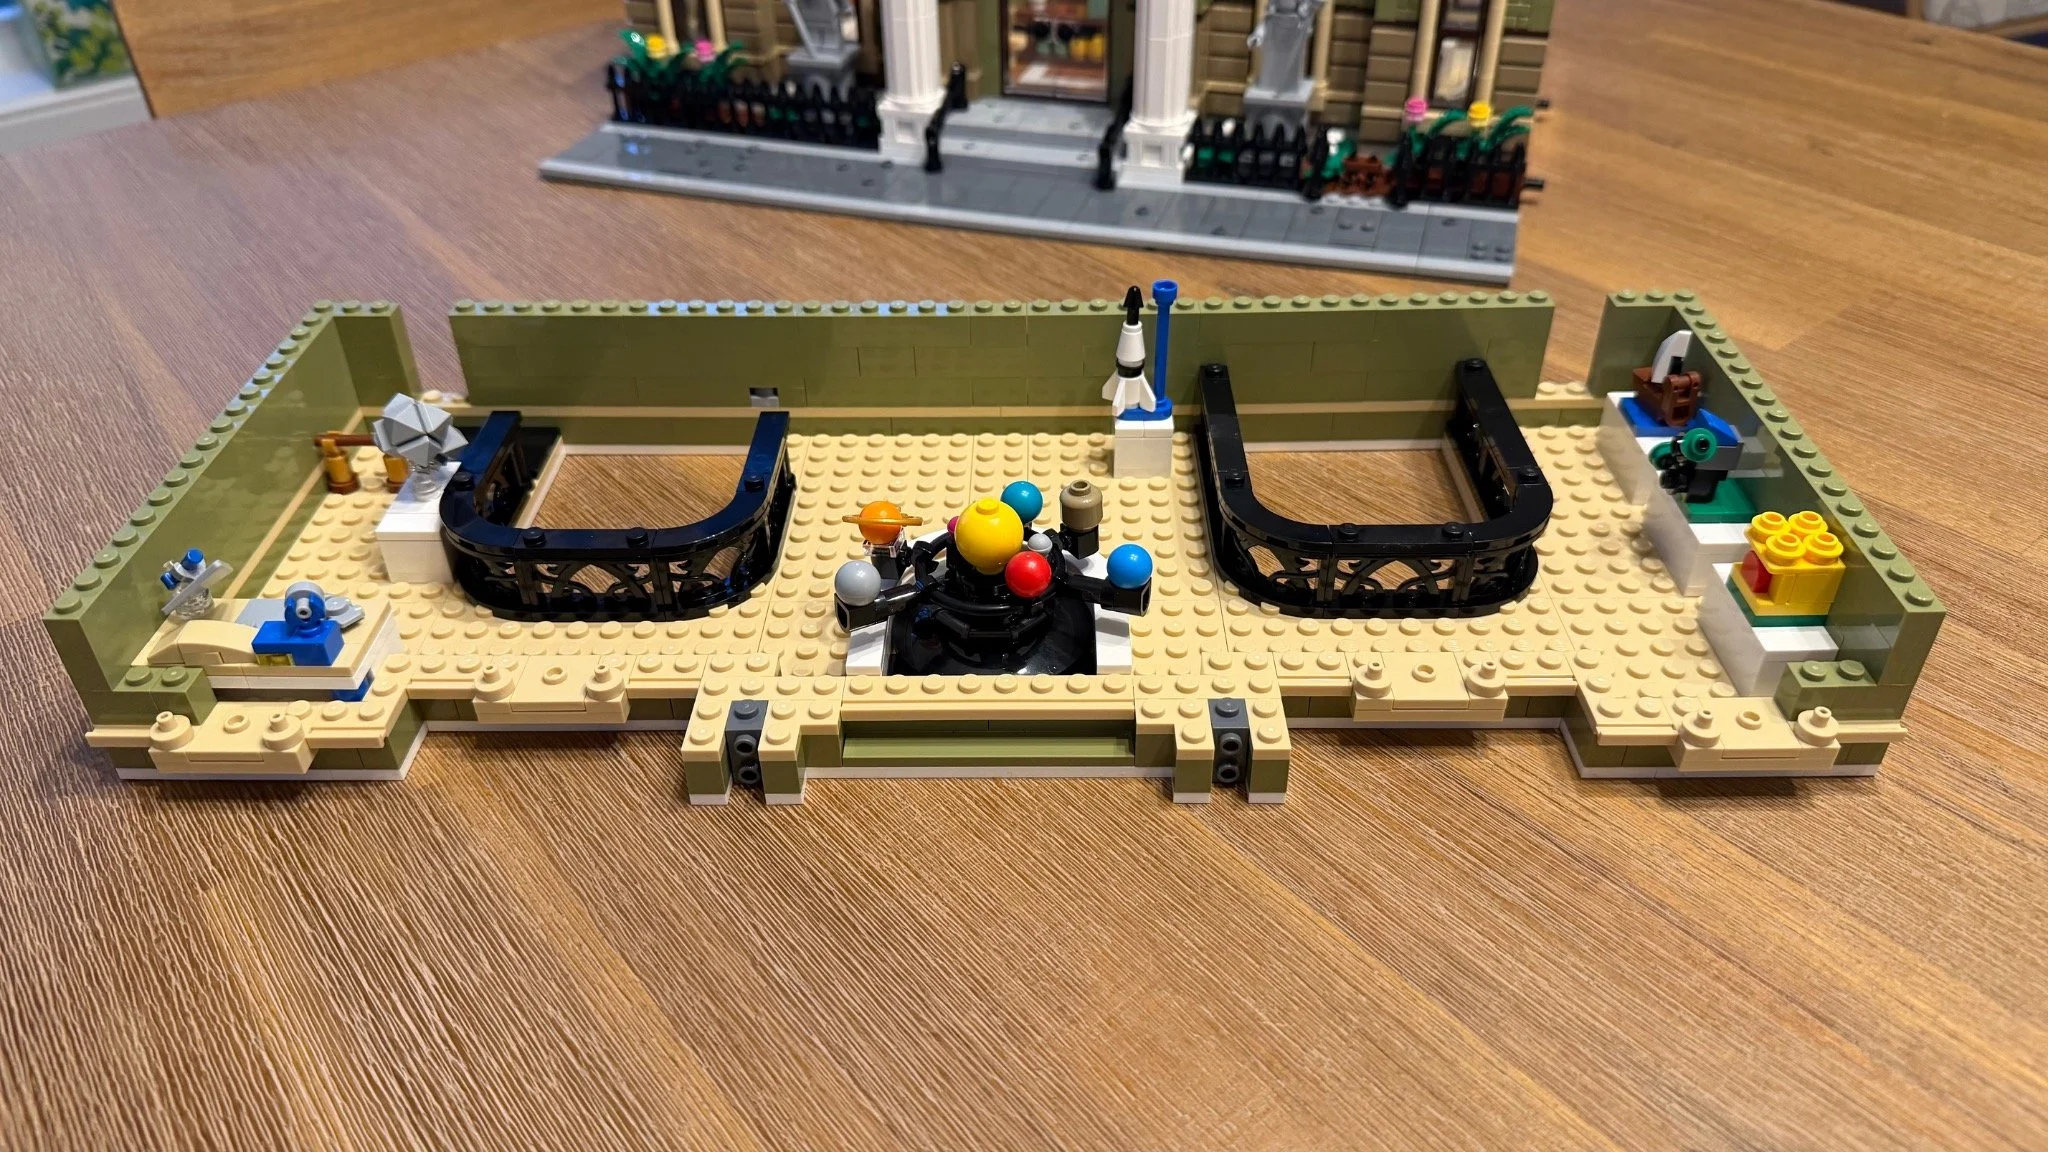
This was the surprise of the second floor. I enjoyed the first few steps of the solar-system model precisely because I didn’t recognize it straight away. Once the planets were in place, I got a run of new displays to build, one after another. If you love space, Bag 18 is one to look forward to.
Bag 15 · Building around two openings. The upper floor goes together flat on the table. Two open rectangles leave room for the stairs and the dinosaur.
Difficulty 3.5 · Repetition 4.5 · Dexterity 3.0
Bag 16 · The orrery base. The circular mounting area for the solar system interrupts the straight lines of the upper floor.
Difficulty 3.5 · Repetition 4.0 · Dexterity 4.0
Bag 17 · Planets and balcony rails. Curved rails ring the atriums. Small colored spheres around a central sun finally give the mystery exhibit away.
Difficulty 4.5 · Repetition 4.5 · Dexterity 5.5
Bag 18 · A museum in miniature. The upper galleries fill with miniature LEGO history and space exploration. Bag 18 was a favorite because I got to build the exhibits one right after another.
Difficulty 4.5 · Repetition 2.5 · Dexterity 5.5
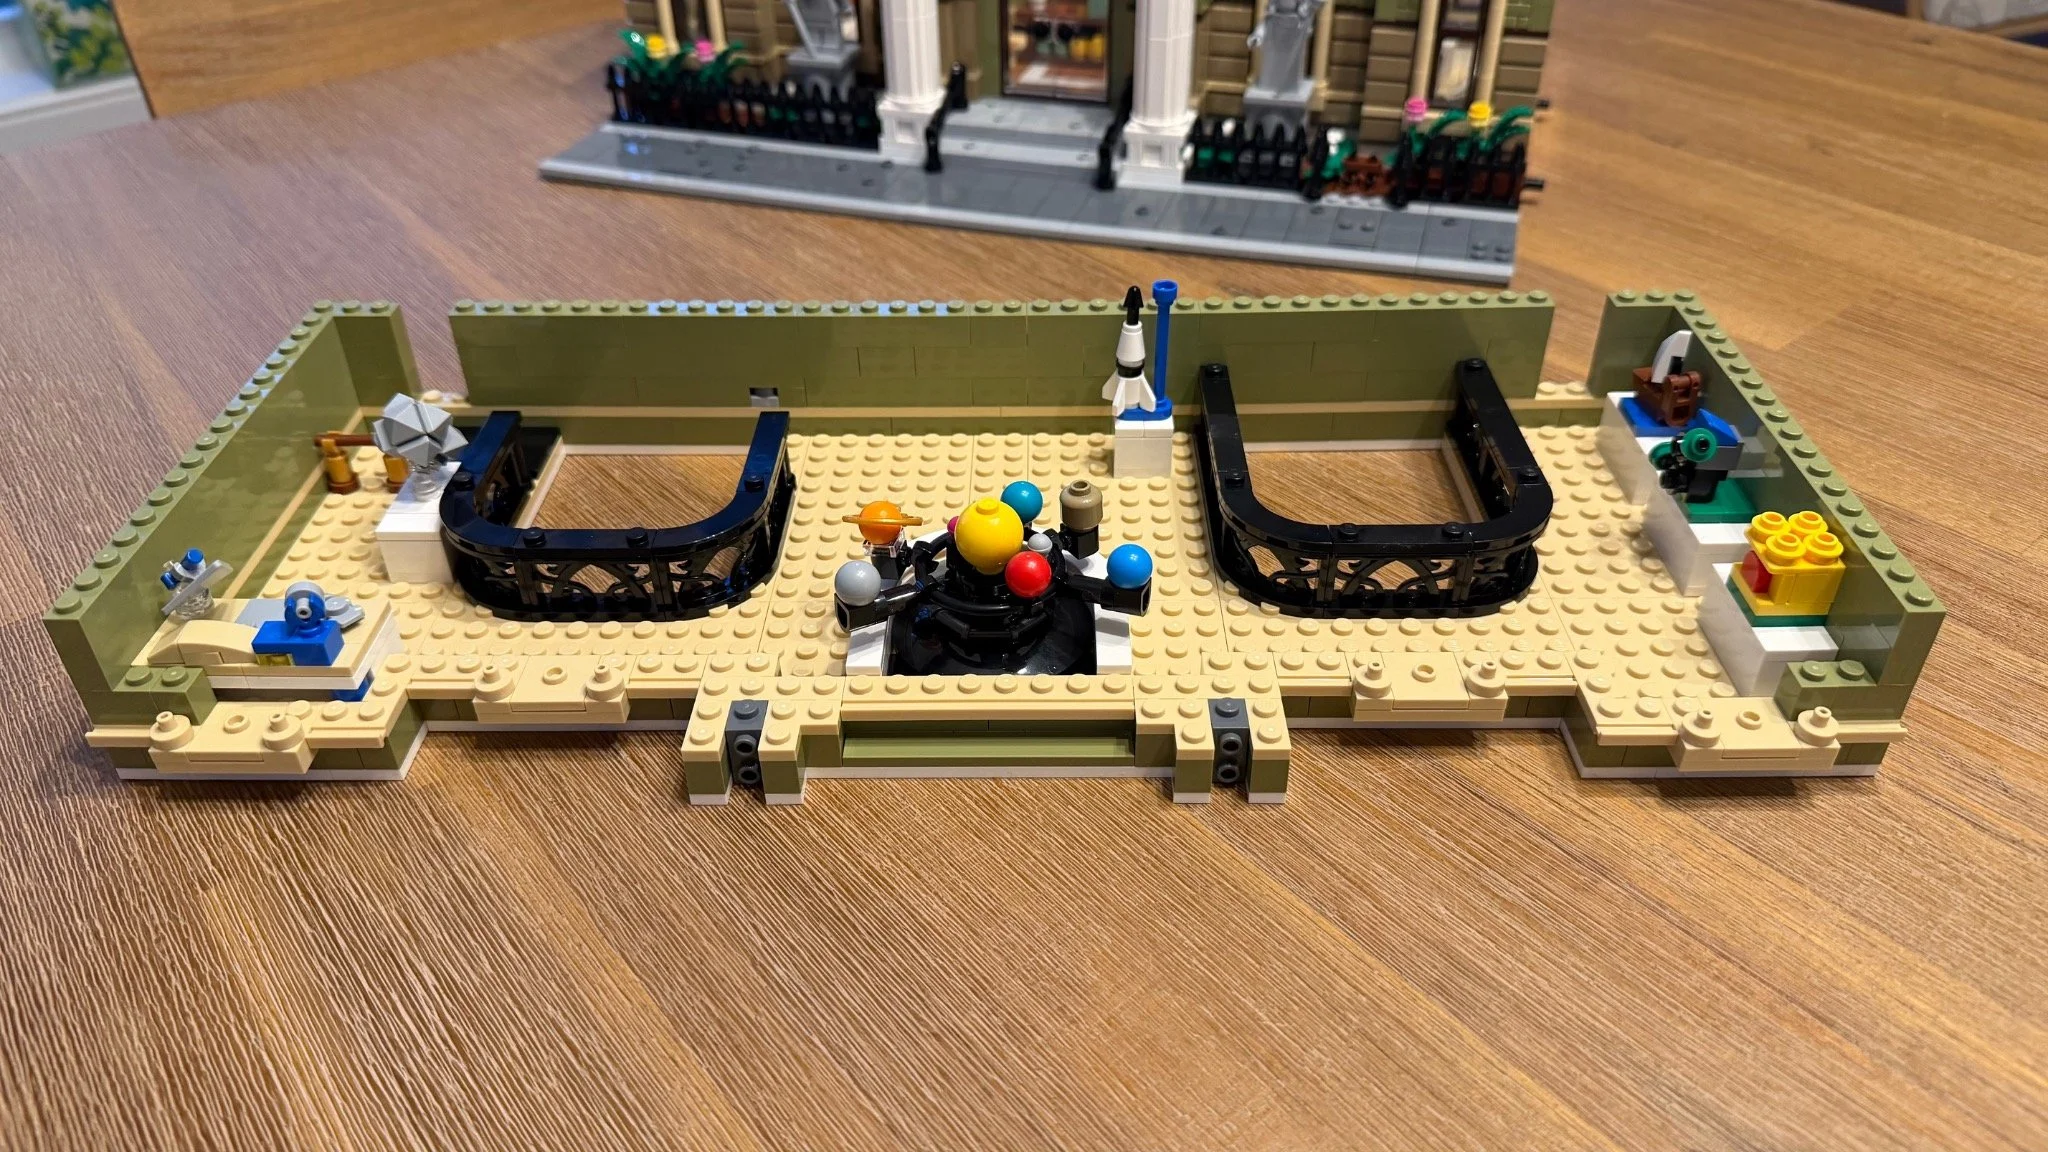
The solar system was the sleeper for me. Bag 18 fills the galleries around it.
Bags 19–24 · Giving the dinosaur its headroom
The long runs of brick and the matching pillars got repetitive here. The change of pace did give my fingers a rest from the exhibits. My payoff came when I put the floors together: the dinosaur stayed downstairs, but its head was suddenly part of the upstairs gallery.
Bag 19 · Another course of walls. The short upper-wall run leaves the exhibits exposed. The same olive bricks read very differently once the banners go on later.
Difficulty 2.5 · Repetition 6.0 · Dexterity 3.0
Bag 20 · Mapping a rocket’s orbit. The Earth map goes on the back wall with a clear curved line across its face. The big central window begins to frame the view from the street.
Difficulty 4.5 · Repetition 4.0 · Dexterity 4.5
Bag 21 · Raising the upper bays. The front bays gain height on both sides of the tall central window. Keep the two sides level as the courses go up.
Difficulty 3.0 · Repetition 6.0 · Dexterity 3.5
Bag 22 · Window pillars and trim. The upper windows get their slim tan surrounds. This was the stretch where doing so many similar pillars together wore on me.
Difficulty 3.0 · Repetition 7.5 · Dexterity 4.5
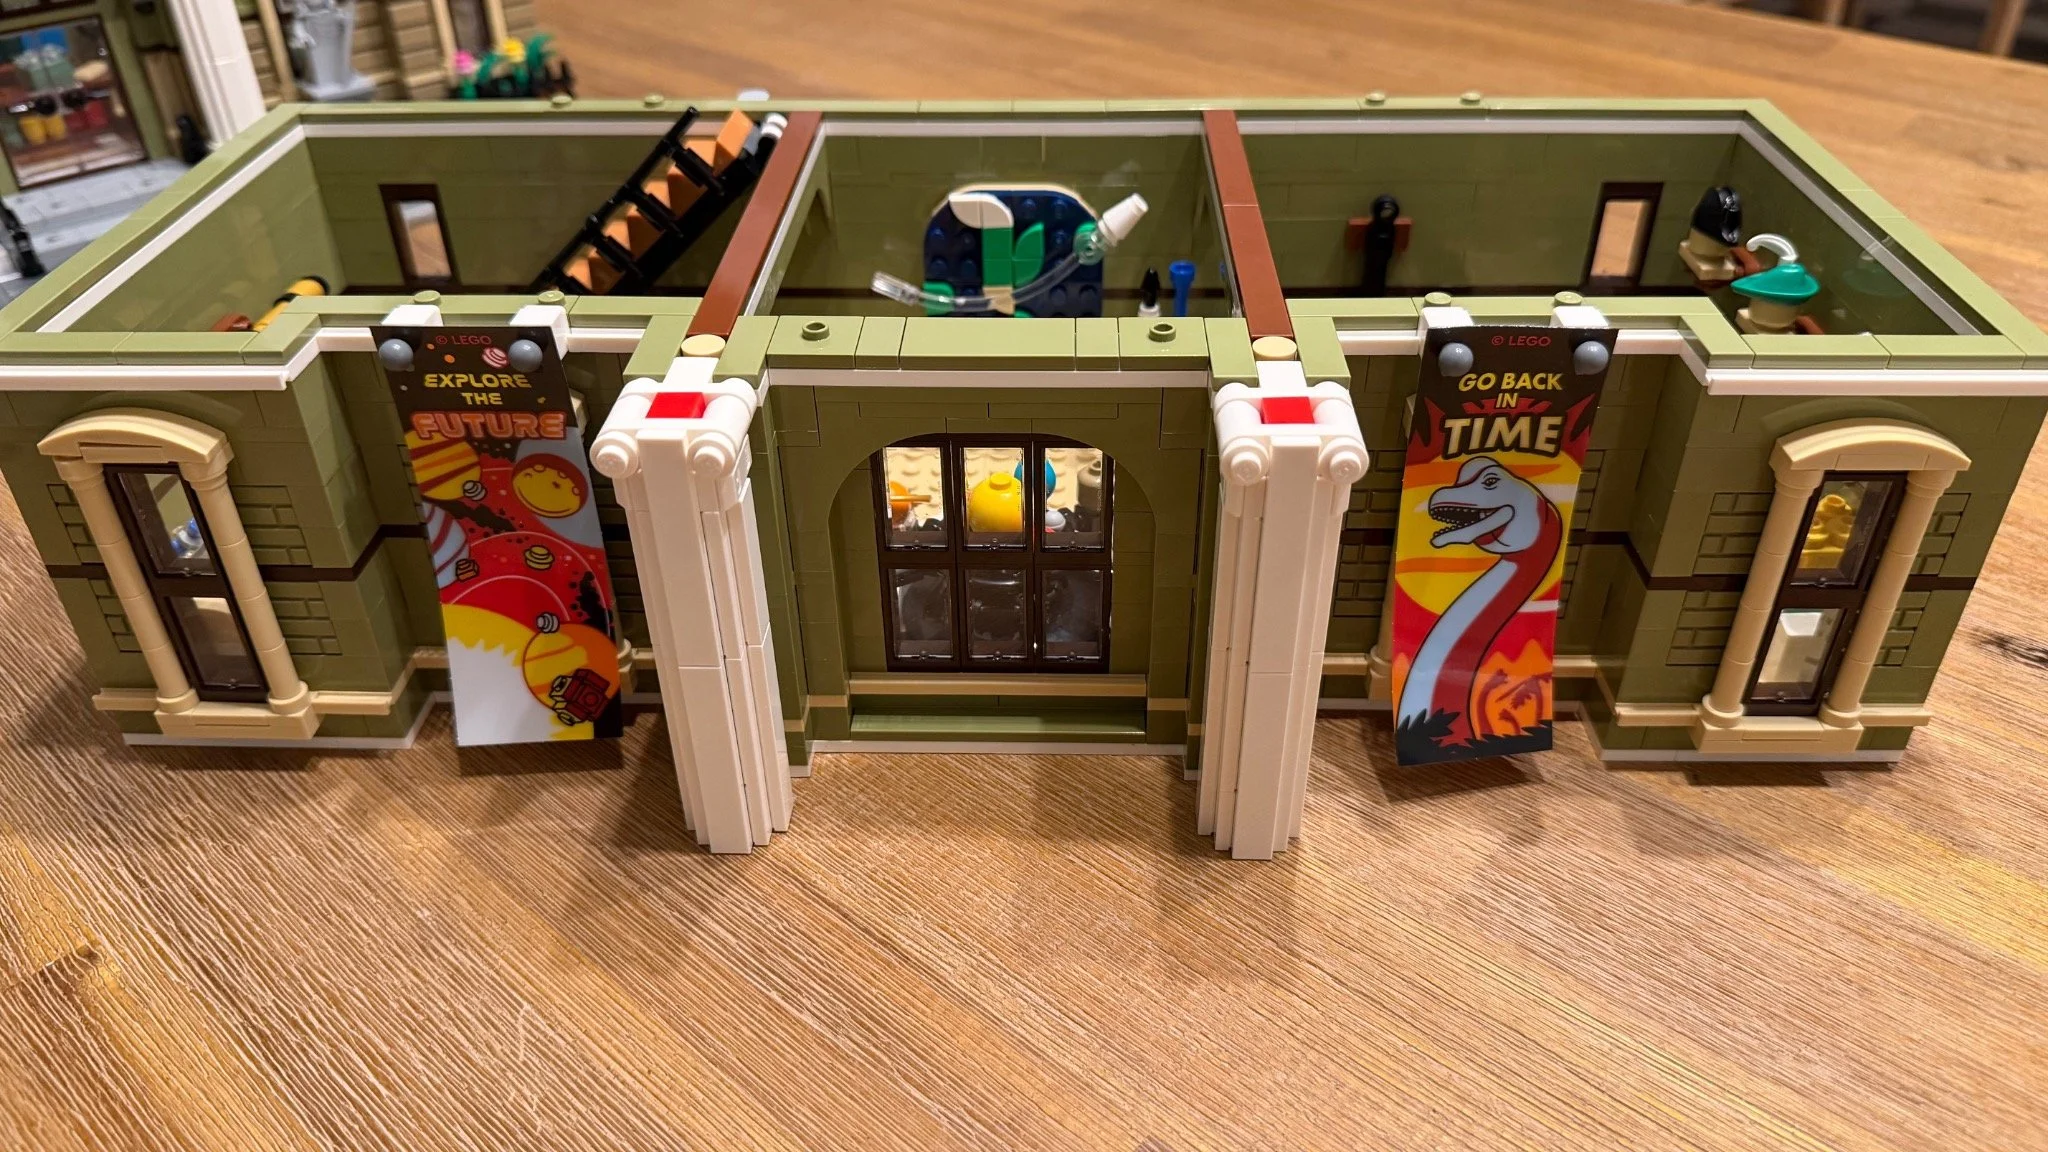
Bag 23 · Upstairs stairs and banners. Another narrow staircase leads toward the roof. Two banners turn a fairly restrained facade into an advertisement for what is inside.
Difficulty 4.0 · Repetition 5.5 · Dexterity 5.0
Bag 24 · Stacking the floors. Paired white column extensions complete the facade as the upper floor settles over the ground floor. Watch the dinosaur’s head through the right-hand opening.
Difficulty 4.0 · Repetition 5.0 · Dexterity 4.5
Bags 25–28 · A roof with an office inside
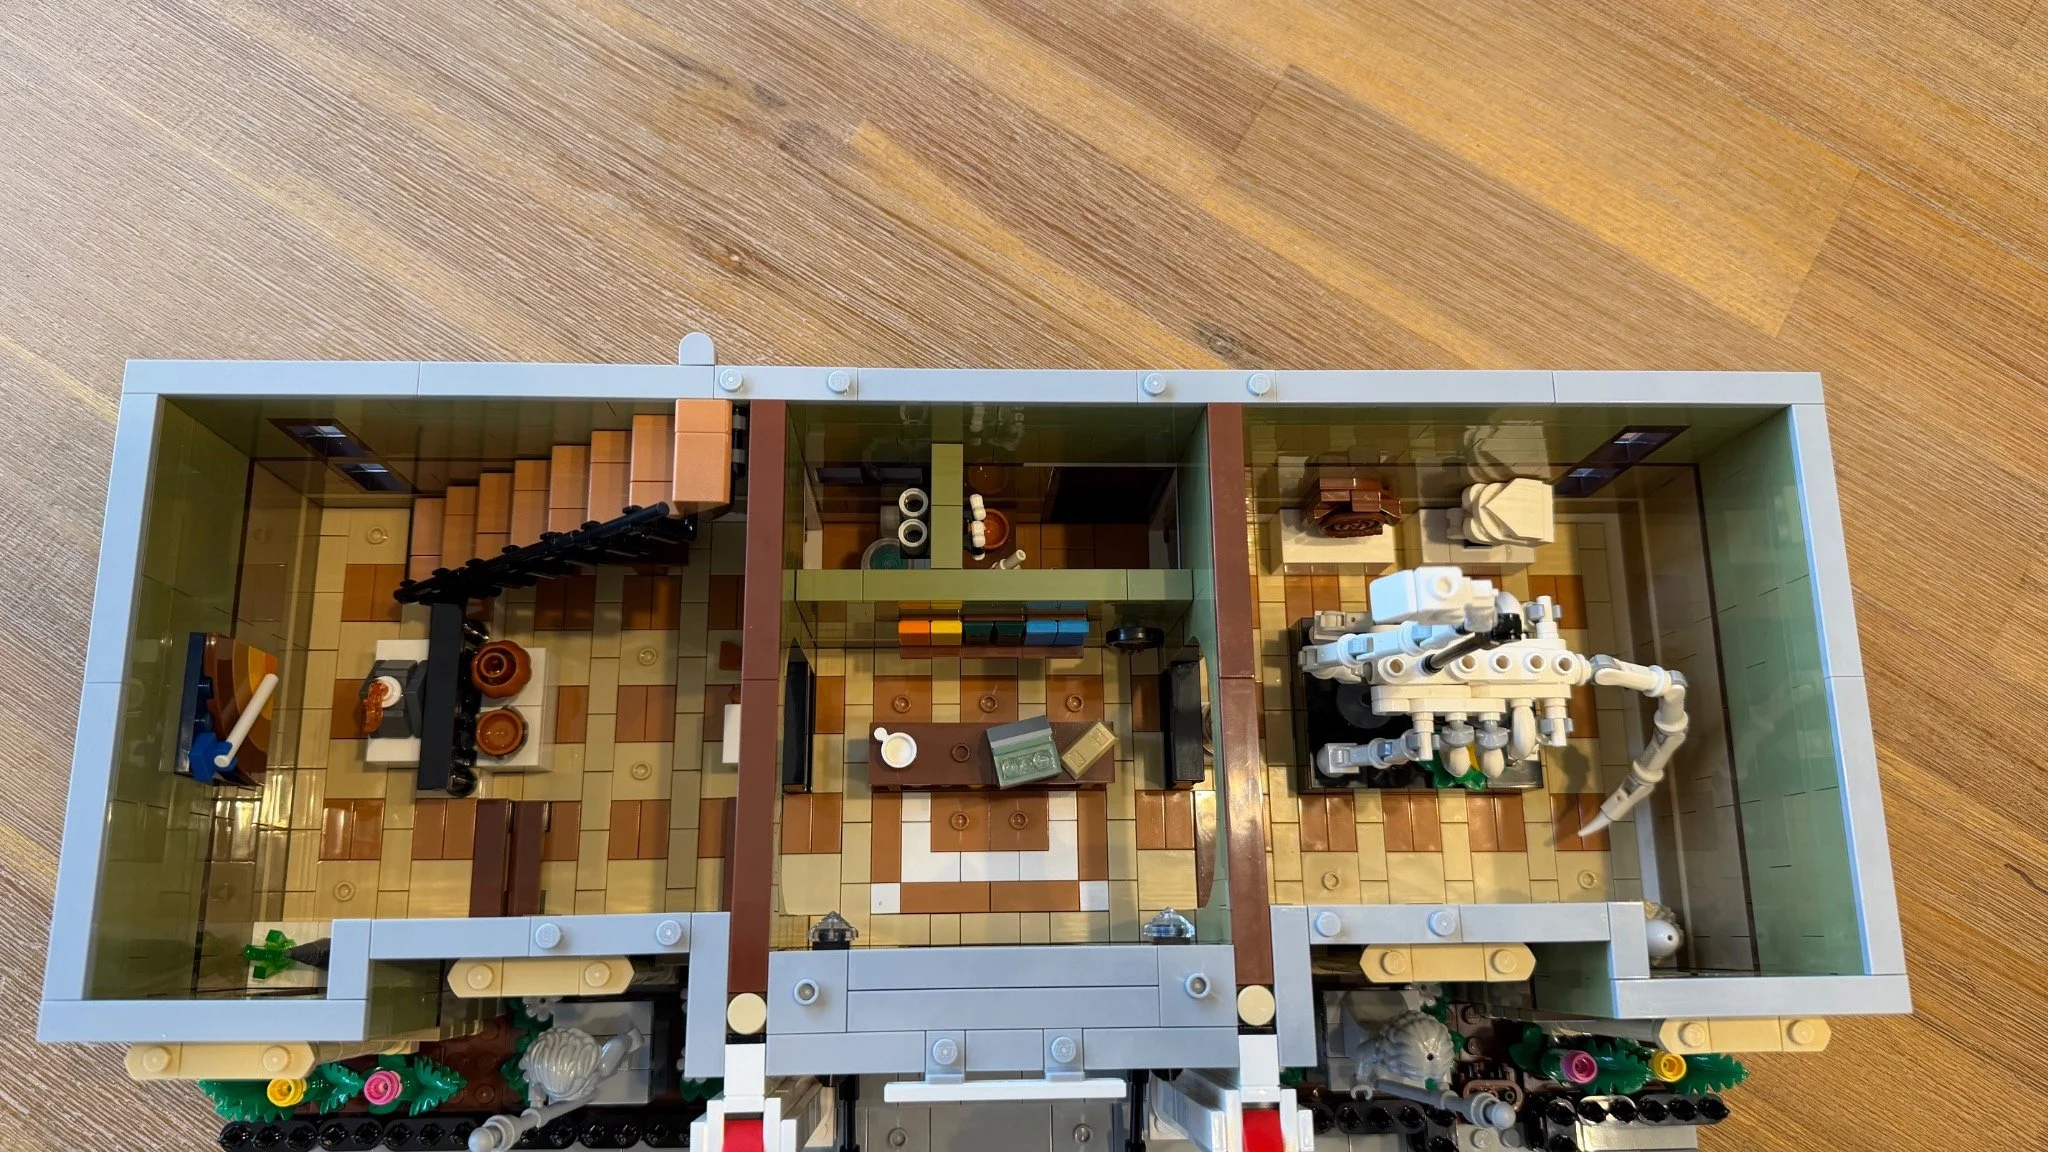
The roof frame was simple enough to settle into. Then, right in the middle of that big rectangle, the build narrowed down to one person’s desk. Look at it from behind the chair while the office is open. The typewriter and map are much easier to appreciate now.
Bag 25 · A separate roof frame. The roof starts as another broad, flat module. Its open rectangles will eventually carry the two long skylights.
Difficulty 3.5 · Repetition 4.5 · Dexterity 3.0
Bag 26 · Skylight channels. Long dark strips outline the roof openings. Small yellow flowers sit down inside the roofline.
Difficulty 3.0 · Repetition 5.5 · Dexterity 3.5
Bag 27 · Cornice and roof hatch. The white cornice runs around the edge while a brown hatch gives the stairway somewhere to lead.
Difficulty 3.5 · Repetition 6.0 · Dexterity 4.0
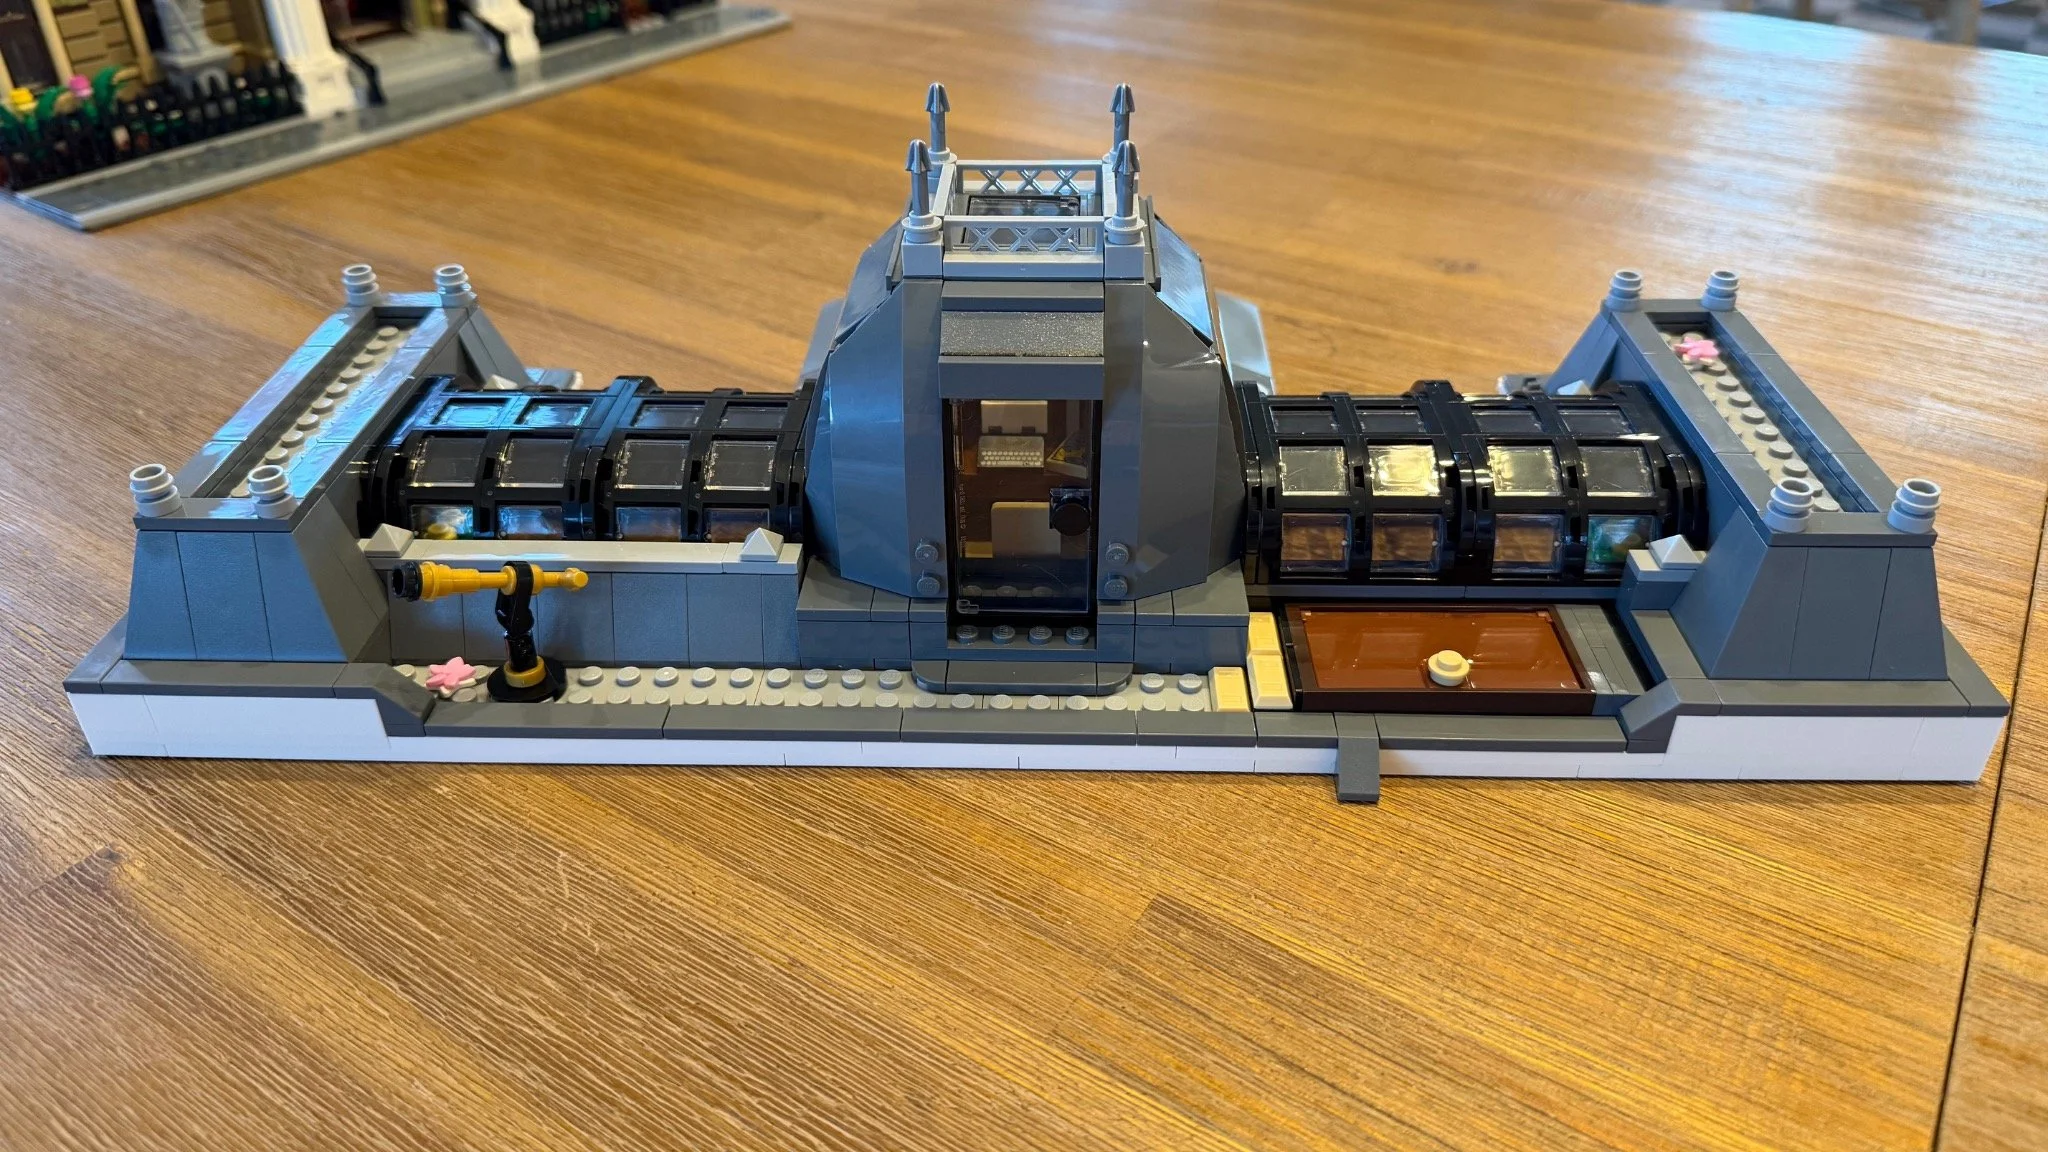
Bag 28 · The curator’s office. A desk, typewriter, map and display pieces fit between the skylight openings. This is the best time to see the room from the chair side.
Difficulty 4.0 · Repetition 2.5 · Dexterity 5.0
Bags 29–32 · Curving the glass and folding the roof
The skylights are my favorite part of the roof to look at. The little triangular roof over the entrance was my favorite part to put together. The pictures make the angled panels look fairly involved, but mine folded down smoothly. The small silver points up top were another story. Pushing them in reminded me of that front fence.
Bag 29 · Enclosing the office. Curved gray sections enclose the office, with four slender silver points above it. Those points took a tight push on my copy.
Difficulty 4.5 · Repetition 5.0 · Dexterity 7.0
Bag 30 · Roof ends. Matching end structures balance the office in the middle. The repeating slopes set up a symmetrical roofline.
Difficulty 3.0 · Repetition 6.5 · Dexterity 4.0
Bag 31 · Curved skylights. Window frames curve across the two atriums. Seeing straight-sided panes add up to a rounded roof was a highlight for me.
Difficulty 4.5 · Repetition 6.5 · Dexterity 5.0
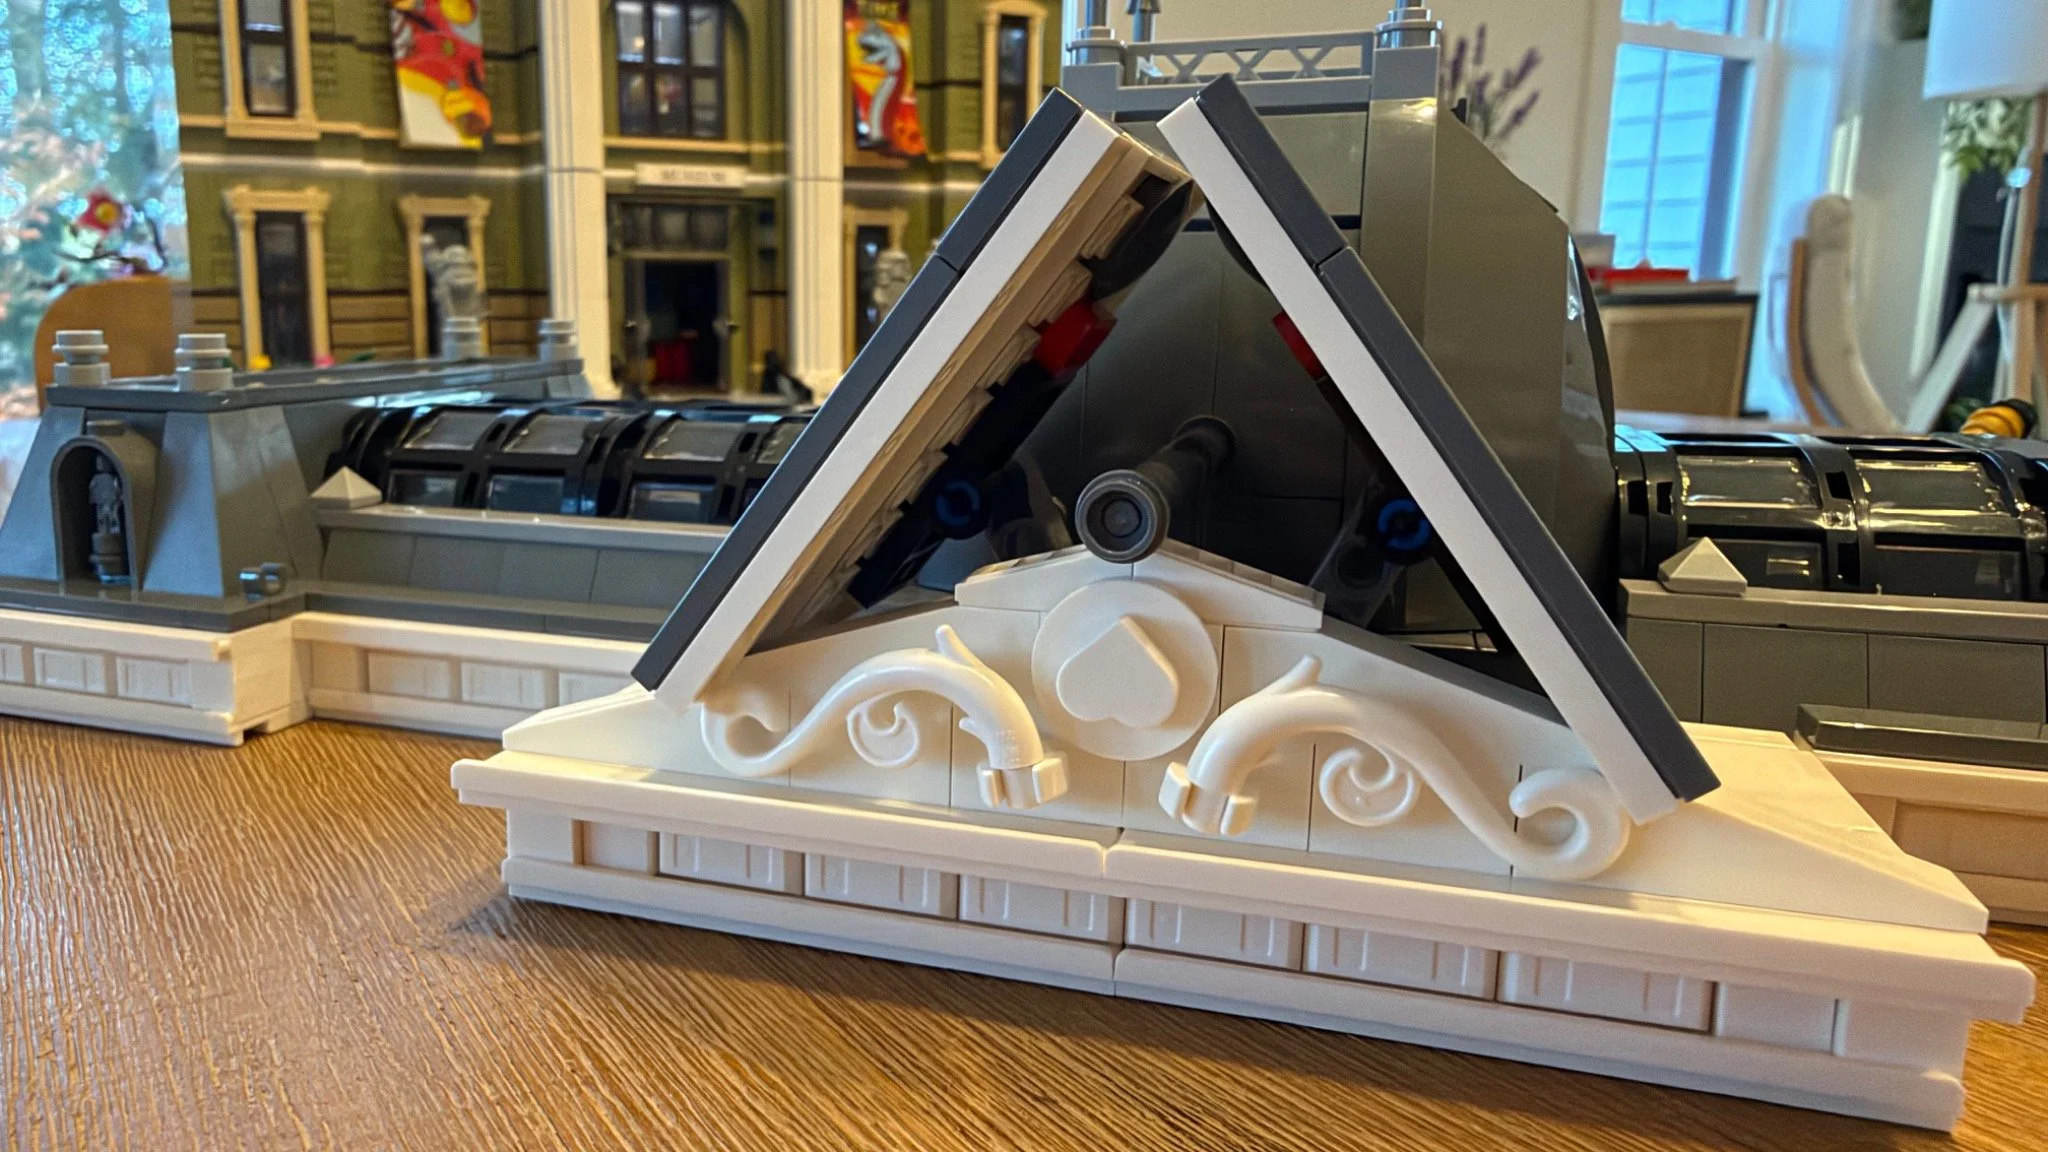
Bag 32 · Folding the pediment. Two gray panels fold down to meet the white triangular front. I was surprised how smoothly that Technic-supported shape came together.
Difficulty 5.5 · Repetition 4.0 · Dexterity 5.5
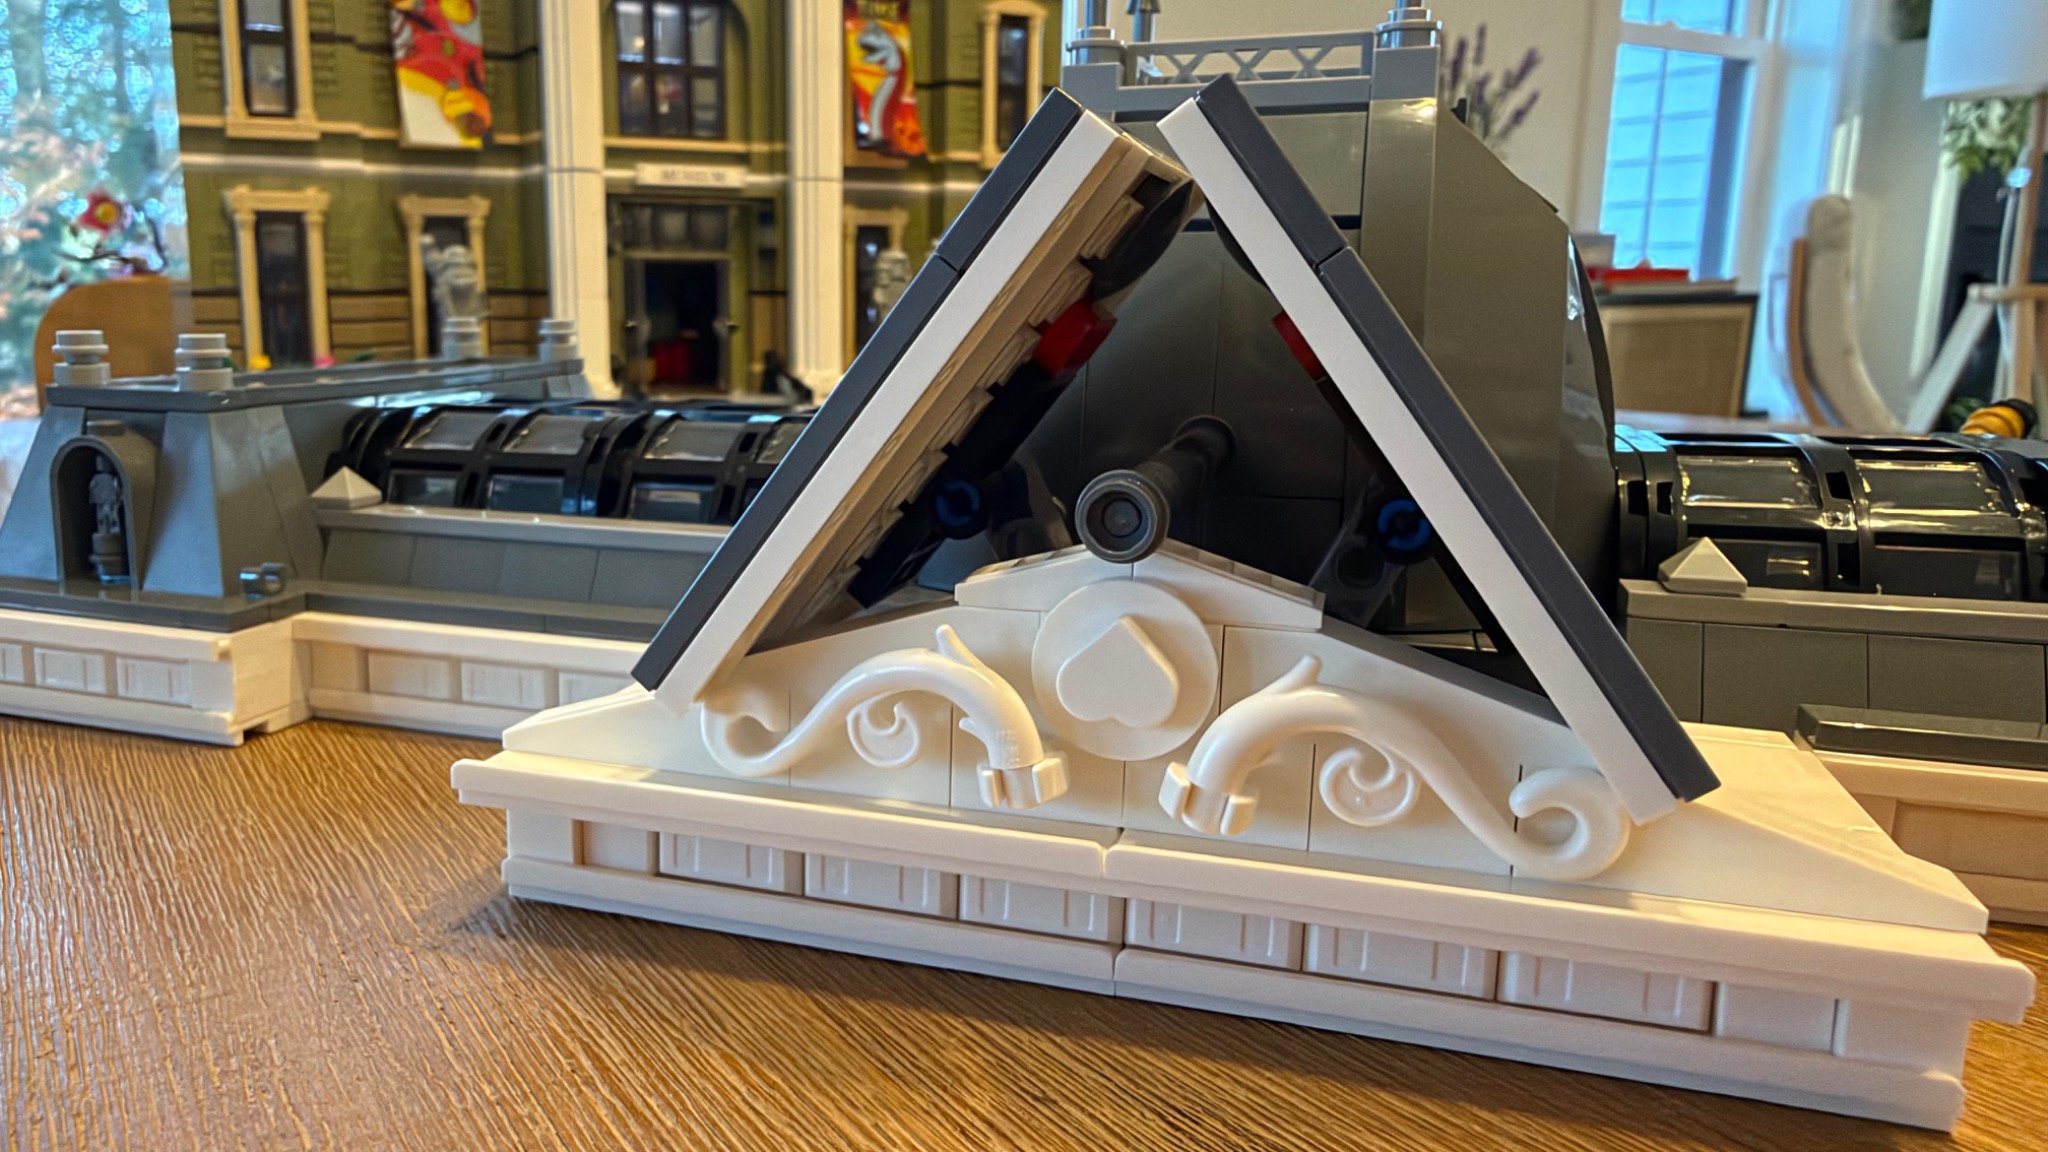
A look behind the pediment before the two sloping panels settle into place.
Bag 33 · Finishing the sidewalk
The suspended work platform is simple, and it gives the museum a reason to have somebody hanging outside a second-story window. The tree asked more of my fingers. In the main canopy I paired 14 little pink flowers with 14 white leaf sprigs, then fitted six more white sprigs into the pink branches. I like the way the blossoms frame the building enough that I’d leave the design exactly as it is.
Bag 33 · A street scene in bloom. The window washer takes up position and the cherry tree spreads over the sidewalk. The repeated flower-and-leaf connections were my least favorite part of building the tree.
Difficulty 4.0 · Repetition 8.0 · Dexterity 7.0
Build Progress
Start with the unpacked bags and follow the building up from the pavement. Use the arrows or thumbnails to pause at the exhibits before the next floor covers them.
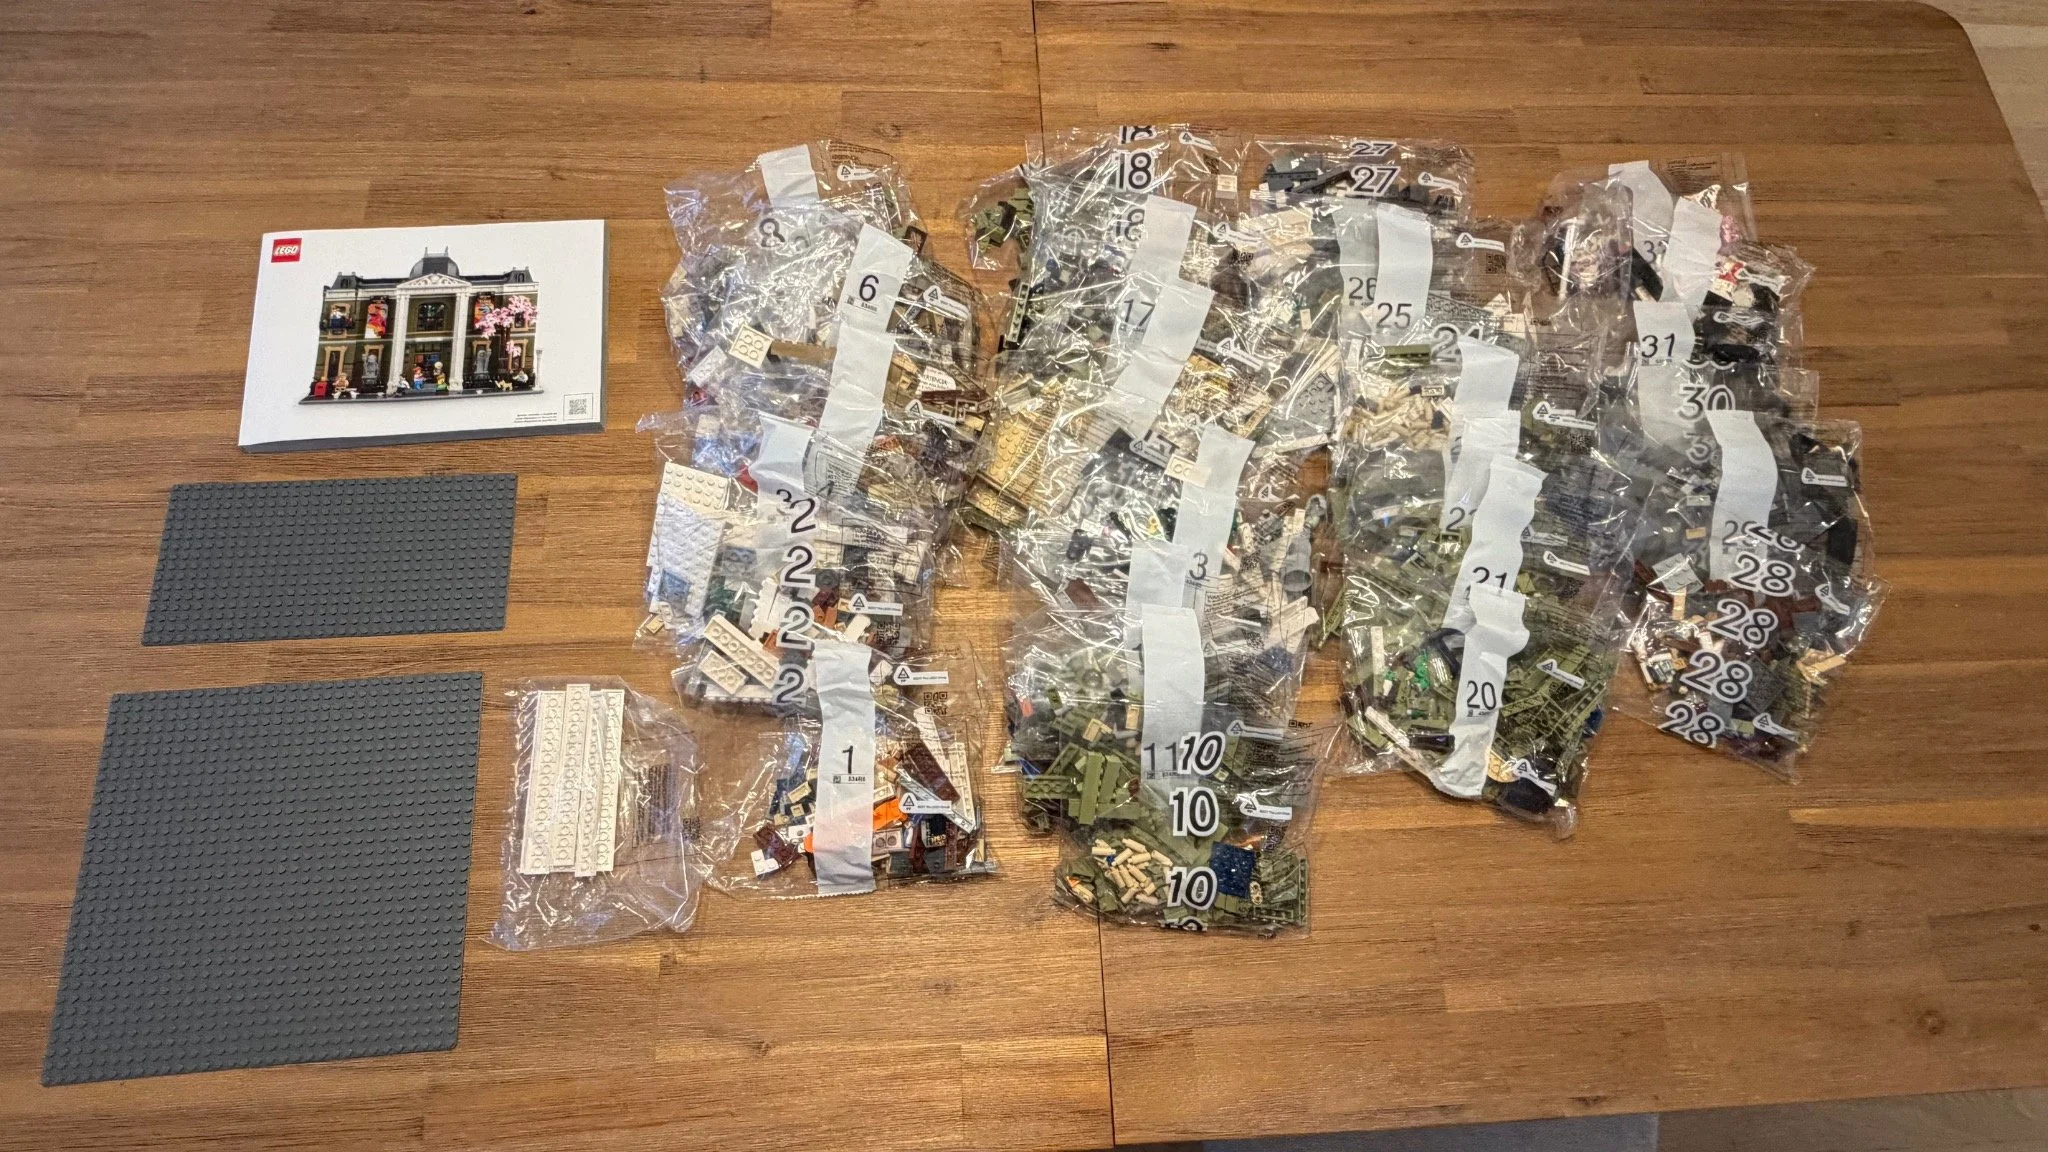
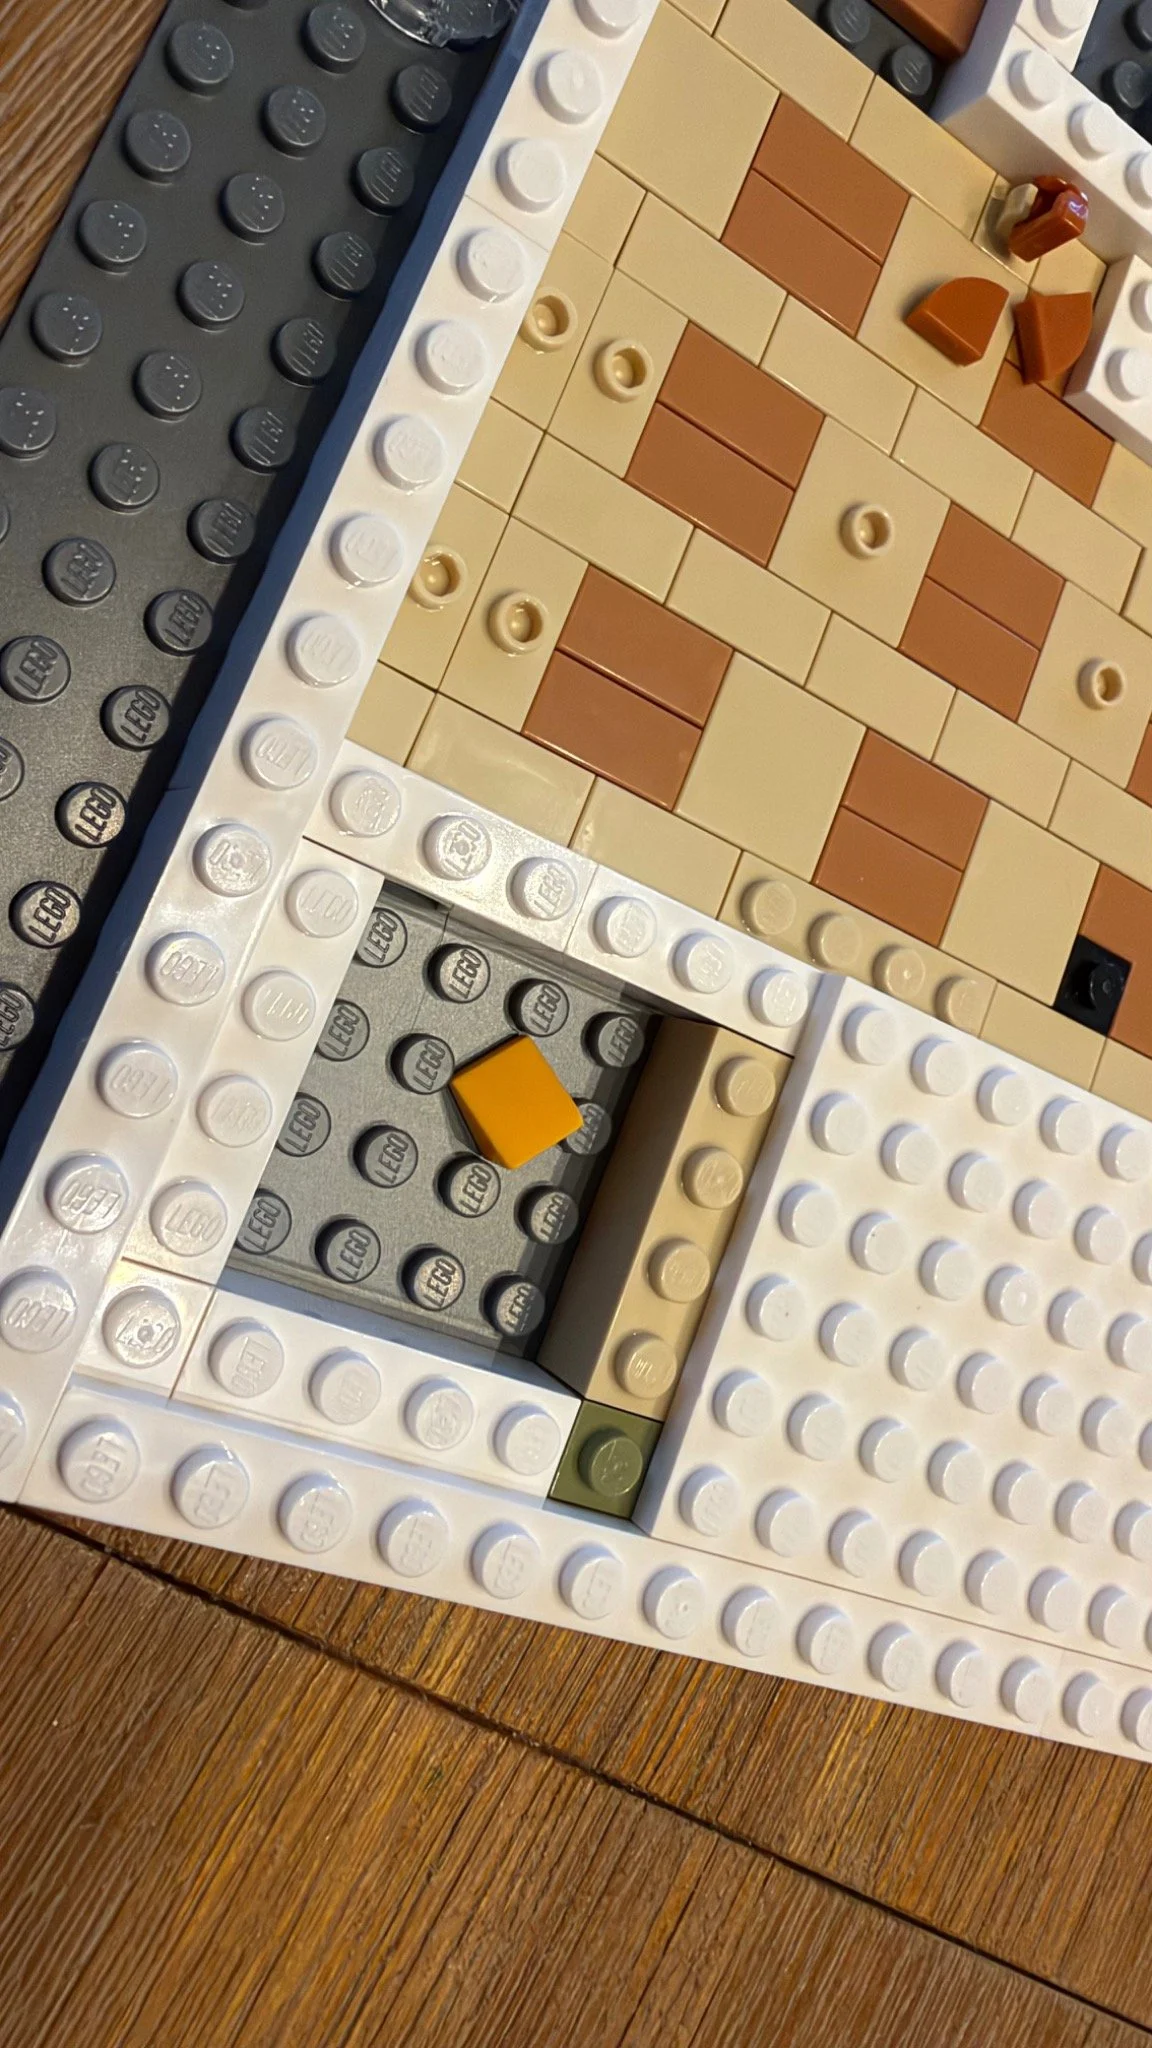
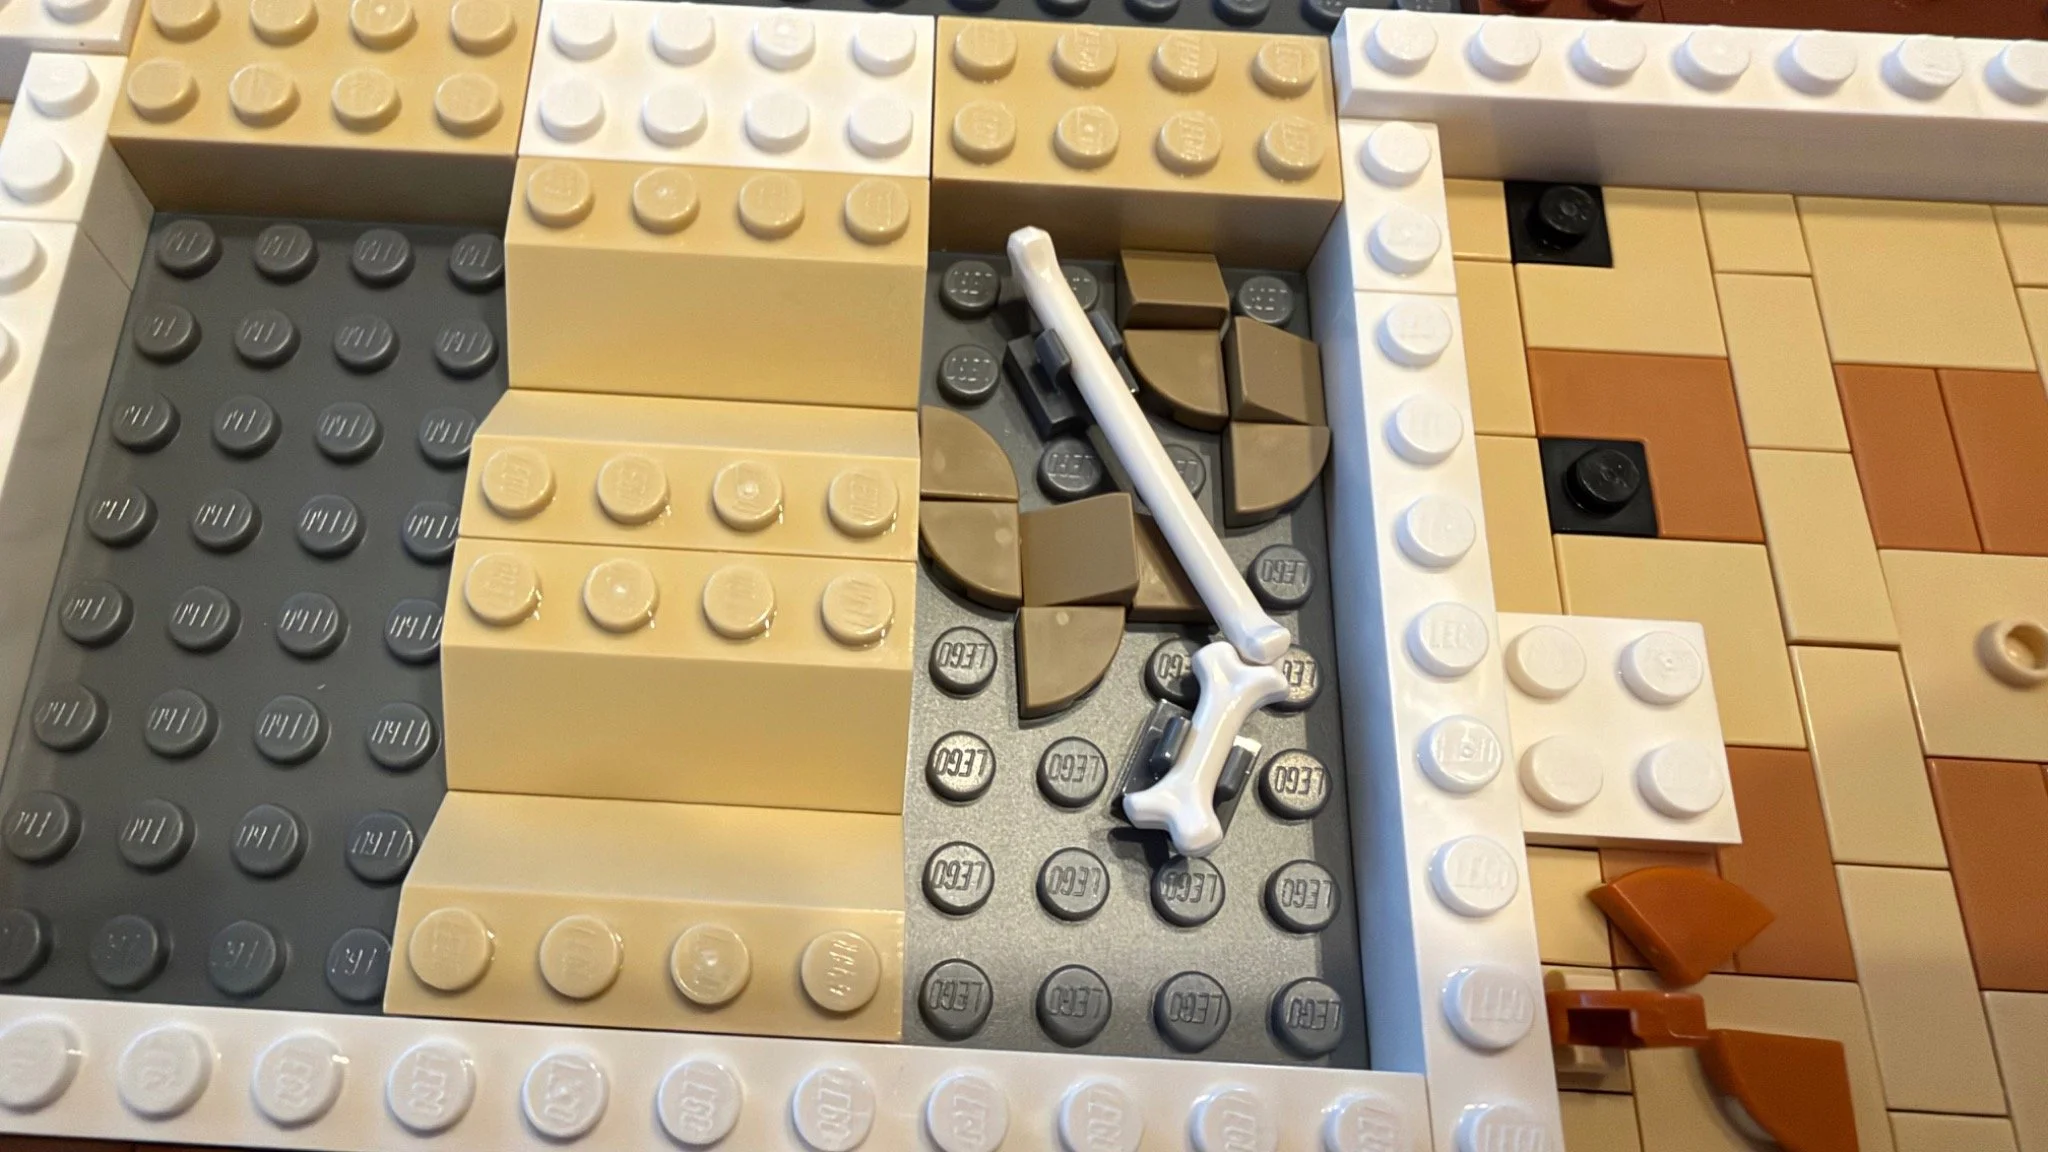
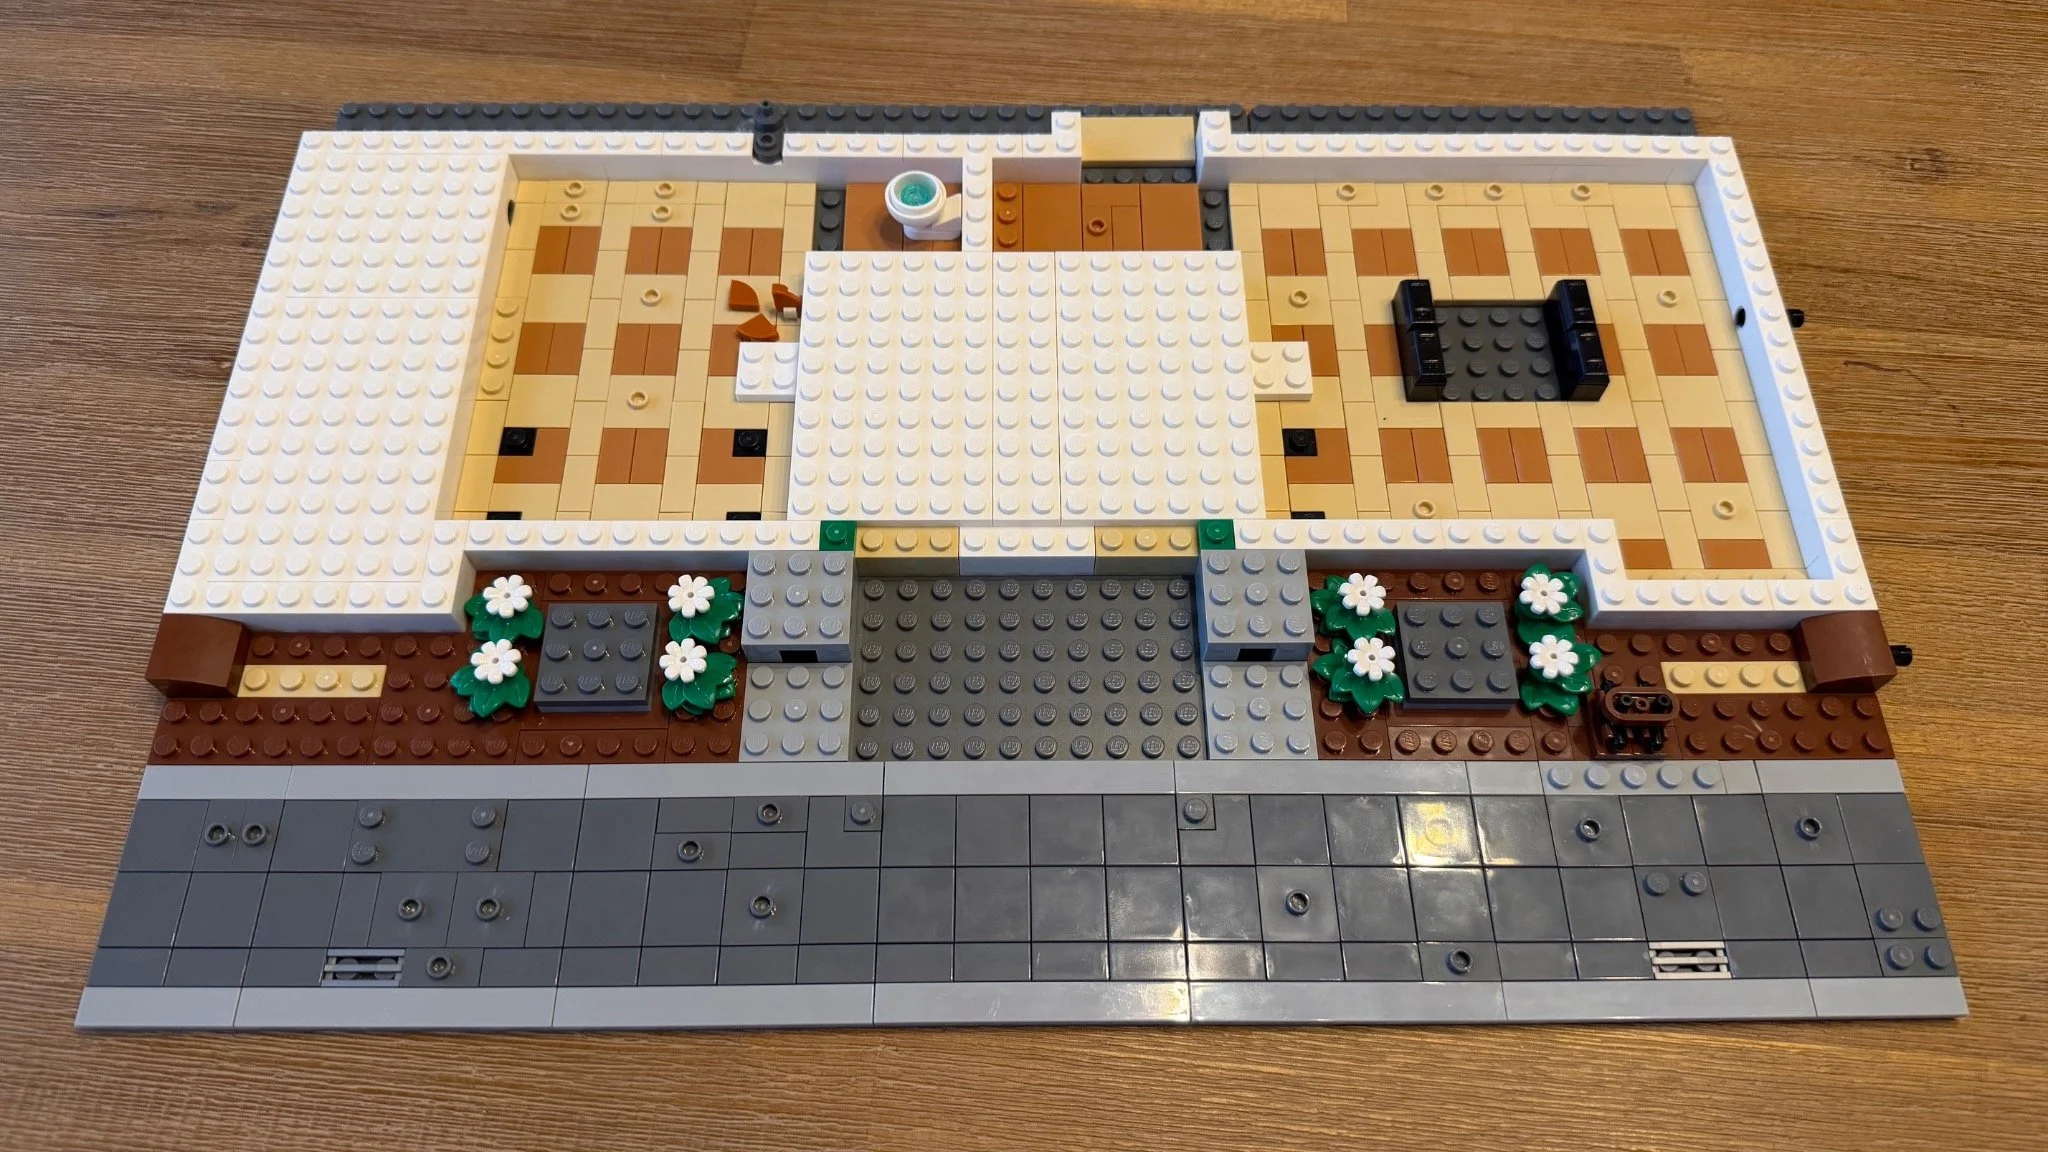
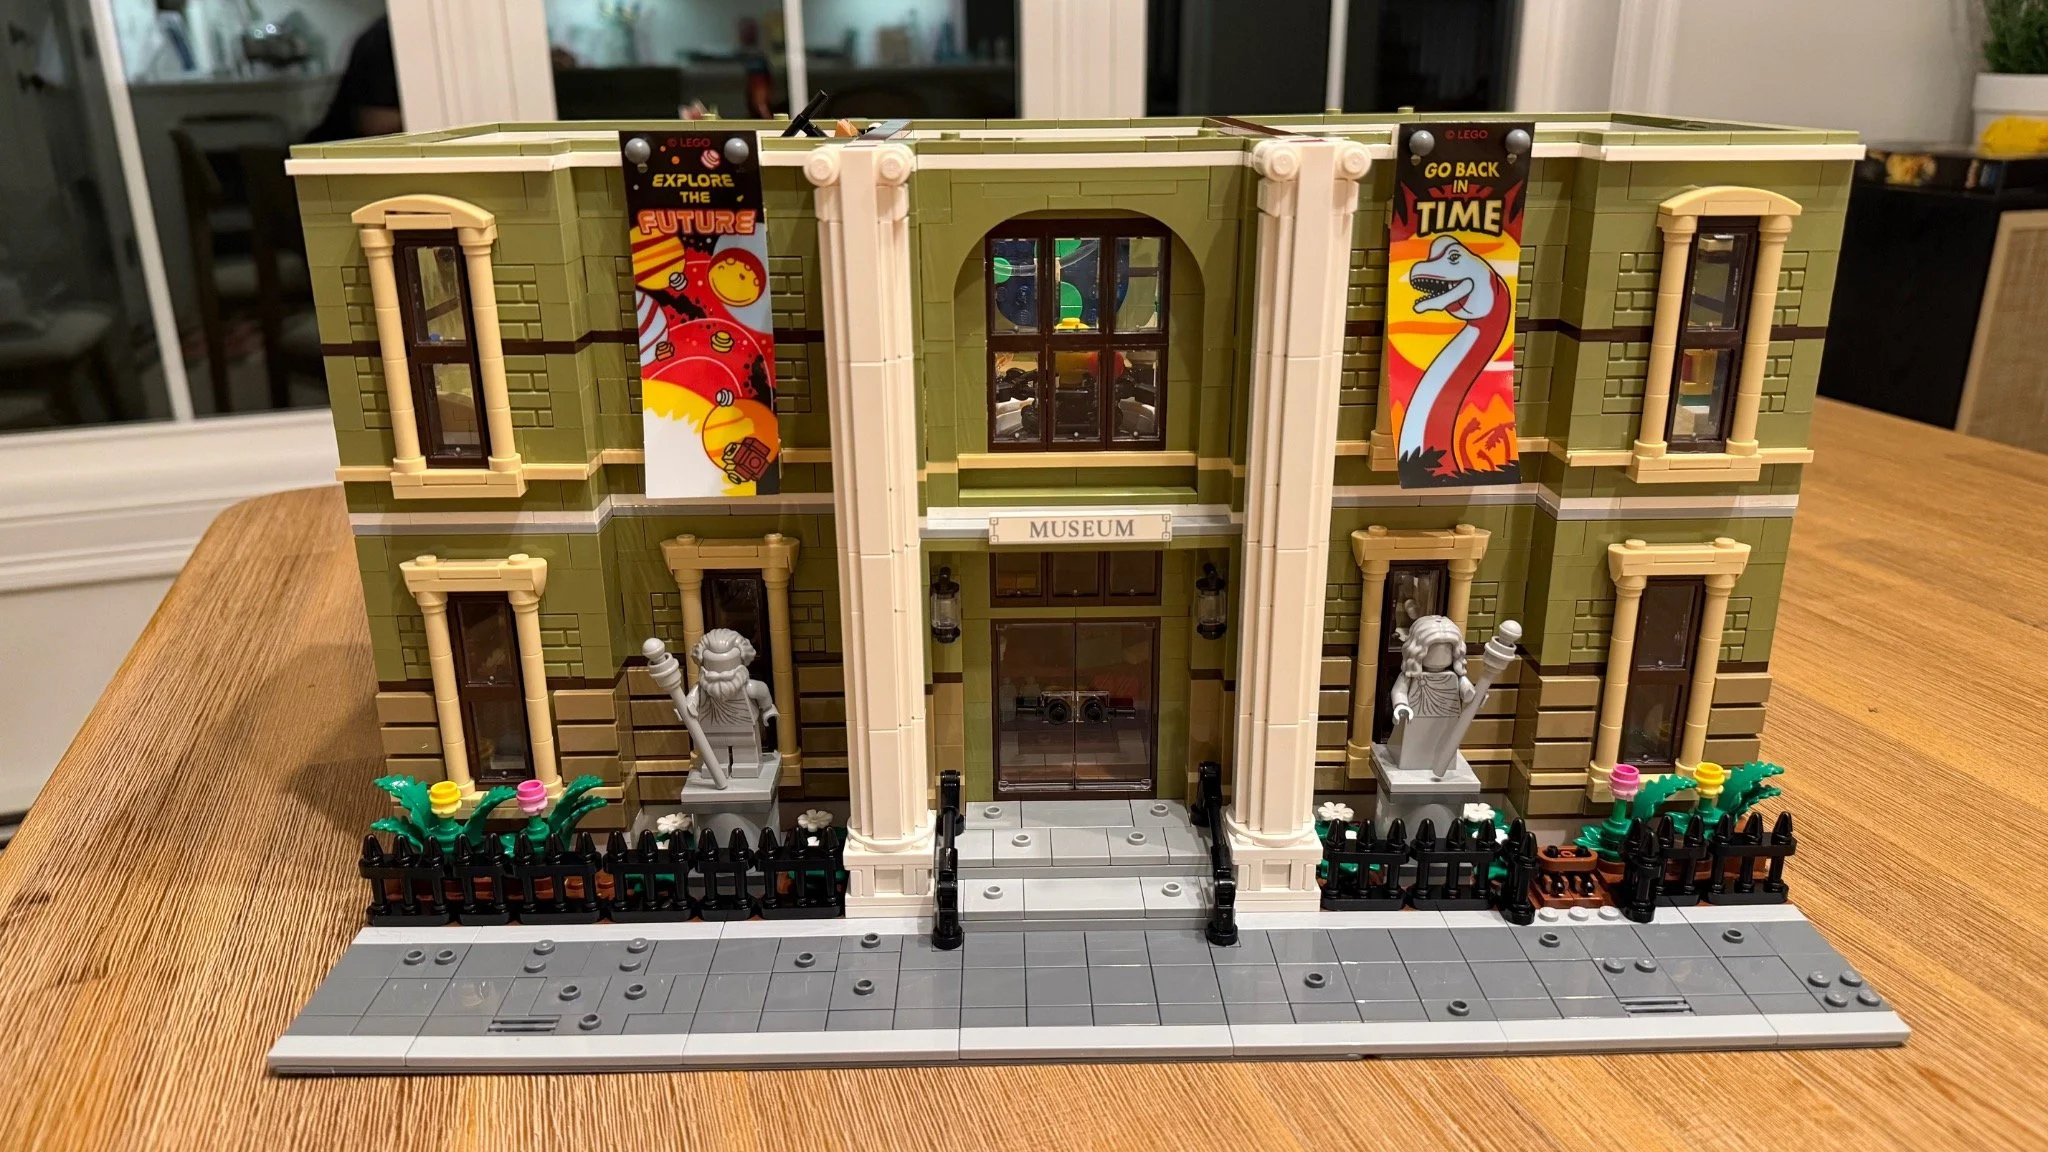
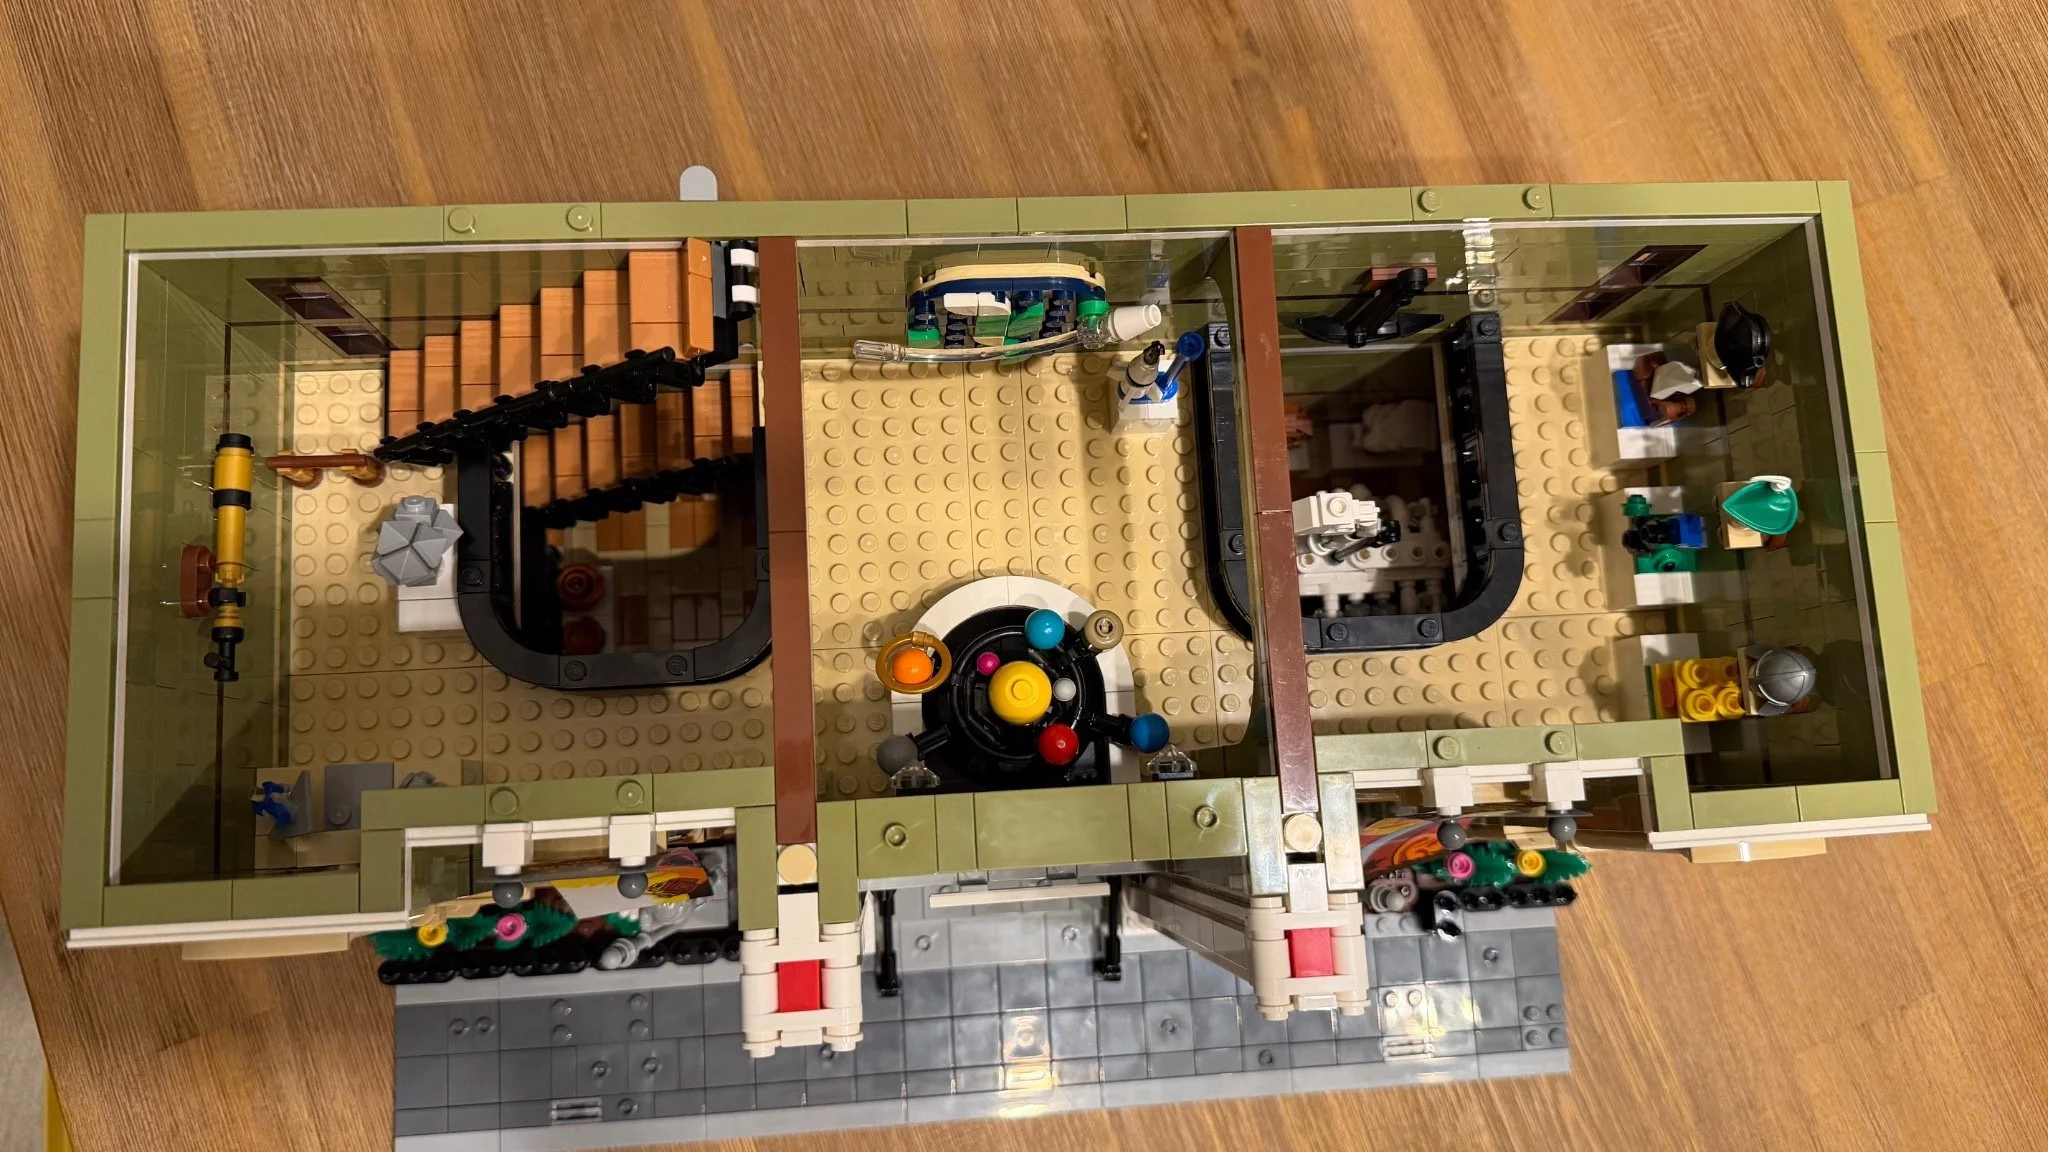
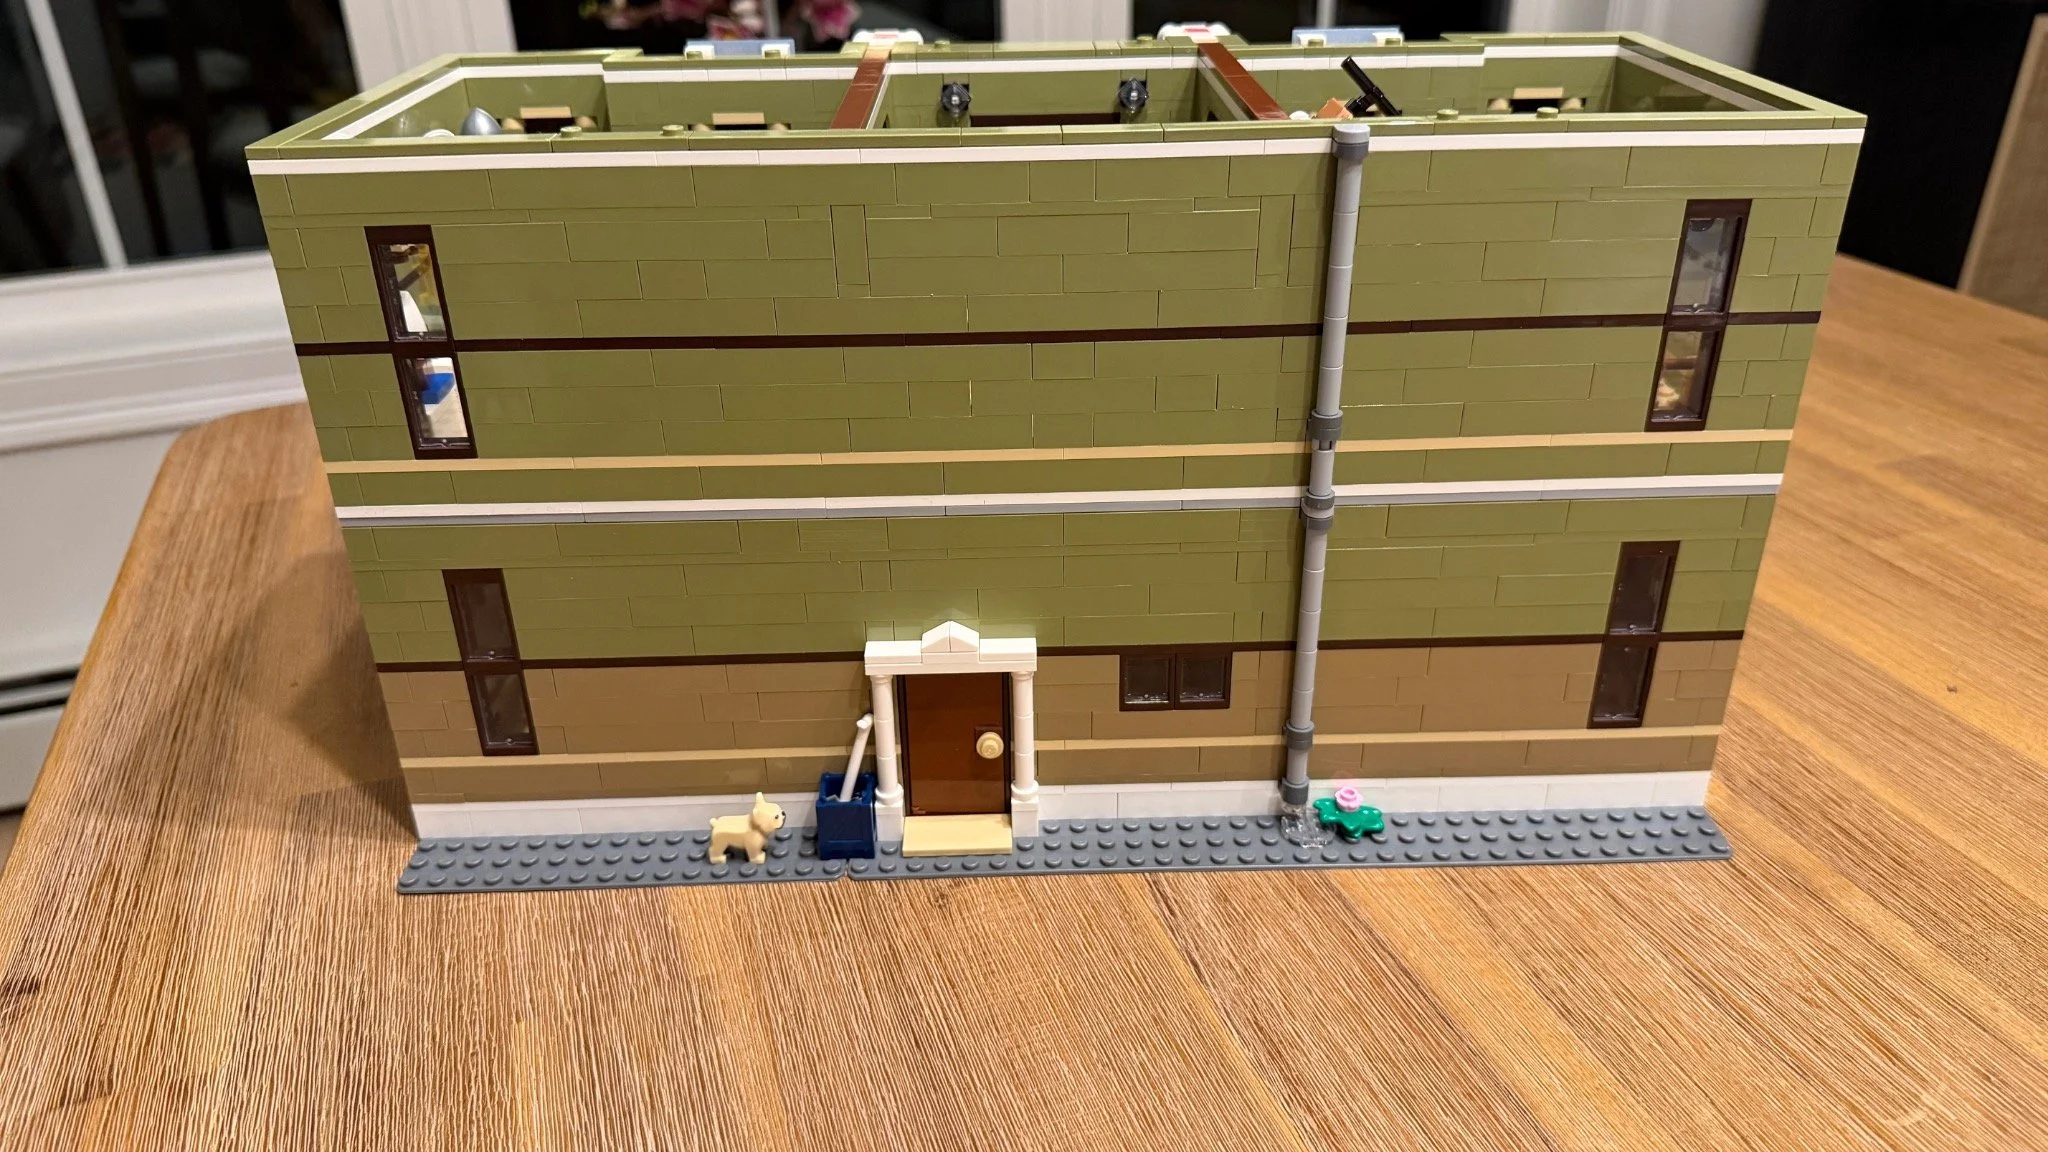
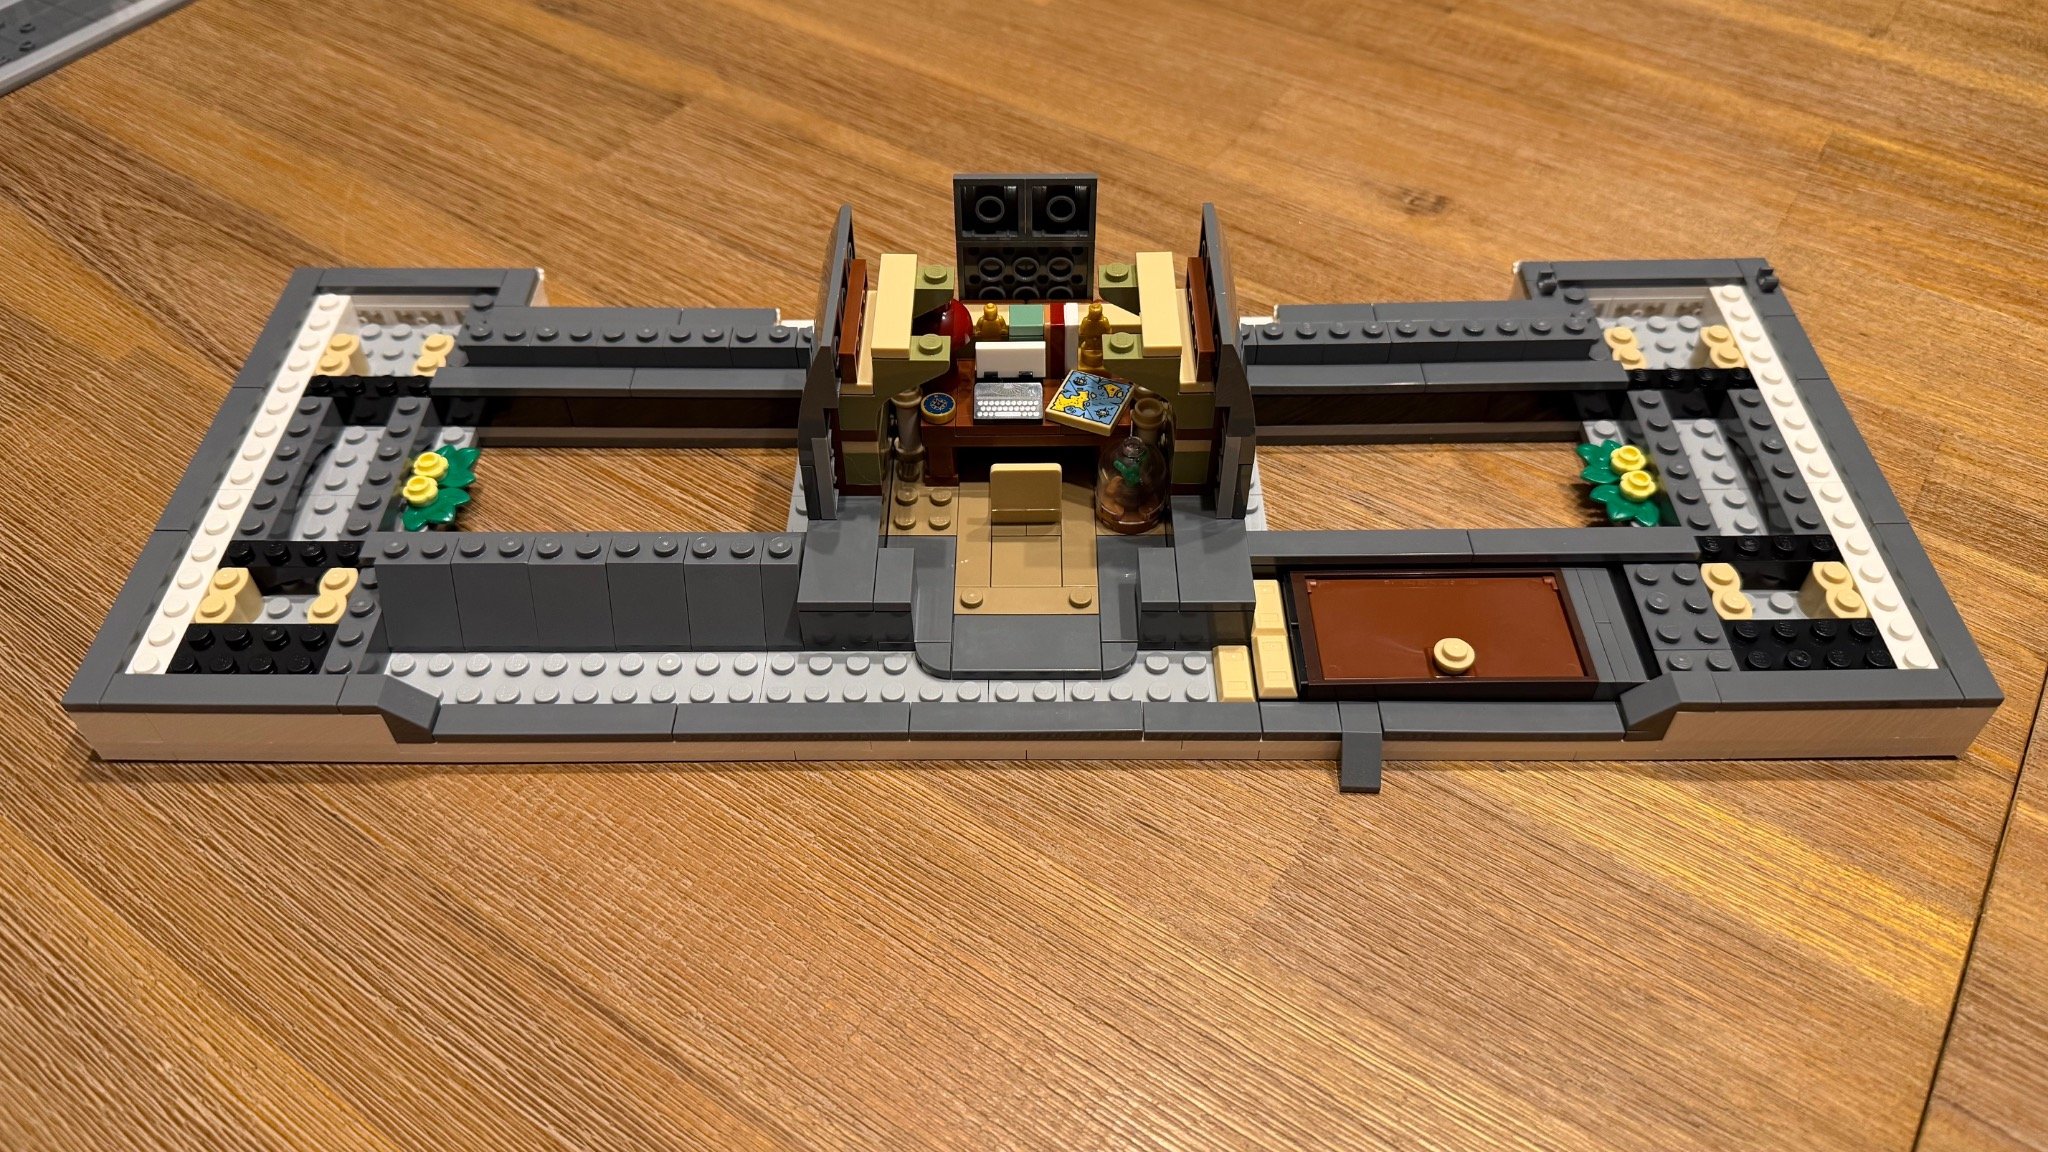
Slides 1–4 show the foundation and hidden pieces. Slides 5–9 tour the ground floor, 10–15 cover the upper galleries and stacked floors, and 16–18 show the office and roof. The last three put you out on the finished street.
Details worth looking for
A pair of white bananas makes a surprisingly good pair of ribs. Look closely at the Brachiosaurus on its standalone base. The curve that reads as bone is a familiar fruit element in white. From the front of the completed museum, you’d never get the same look at how that rib cage goes together.
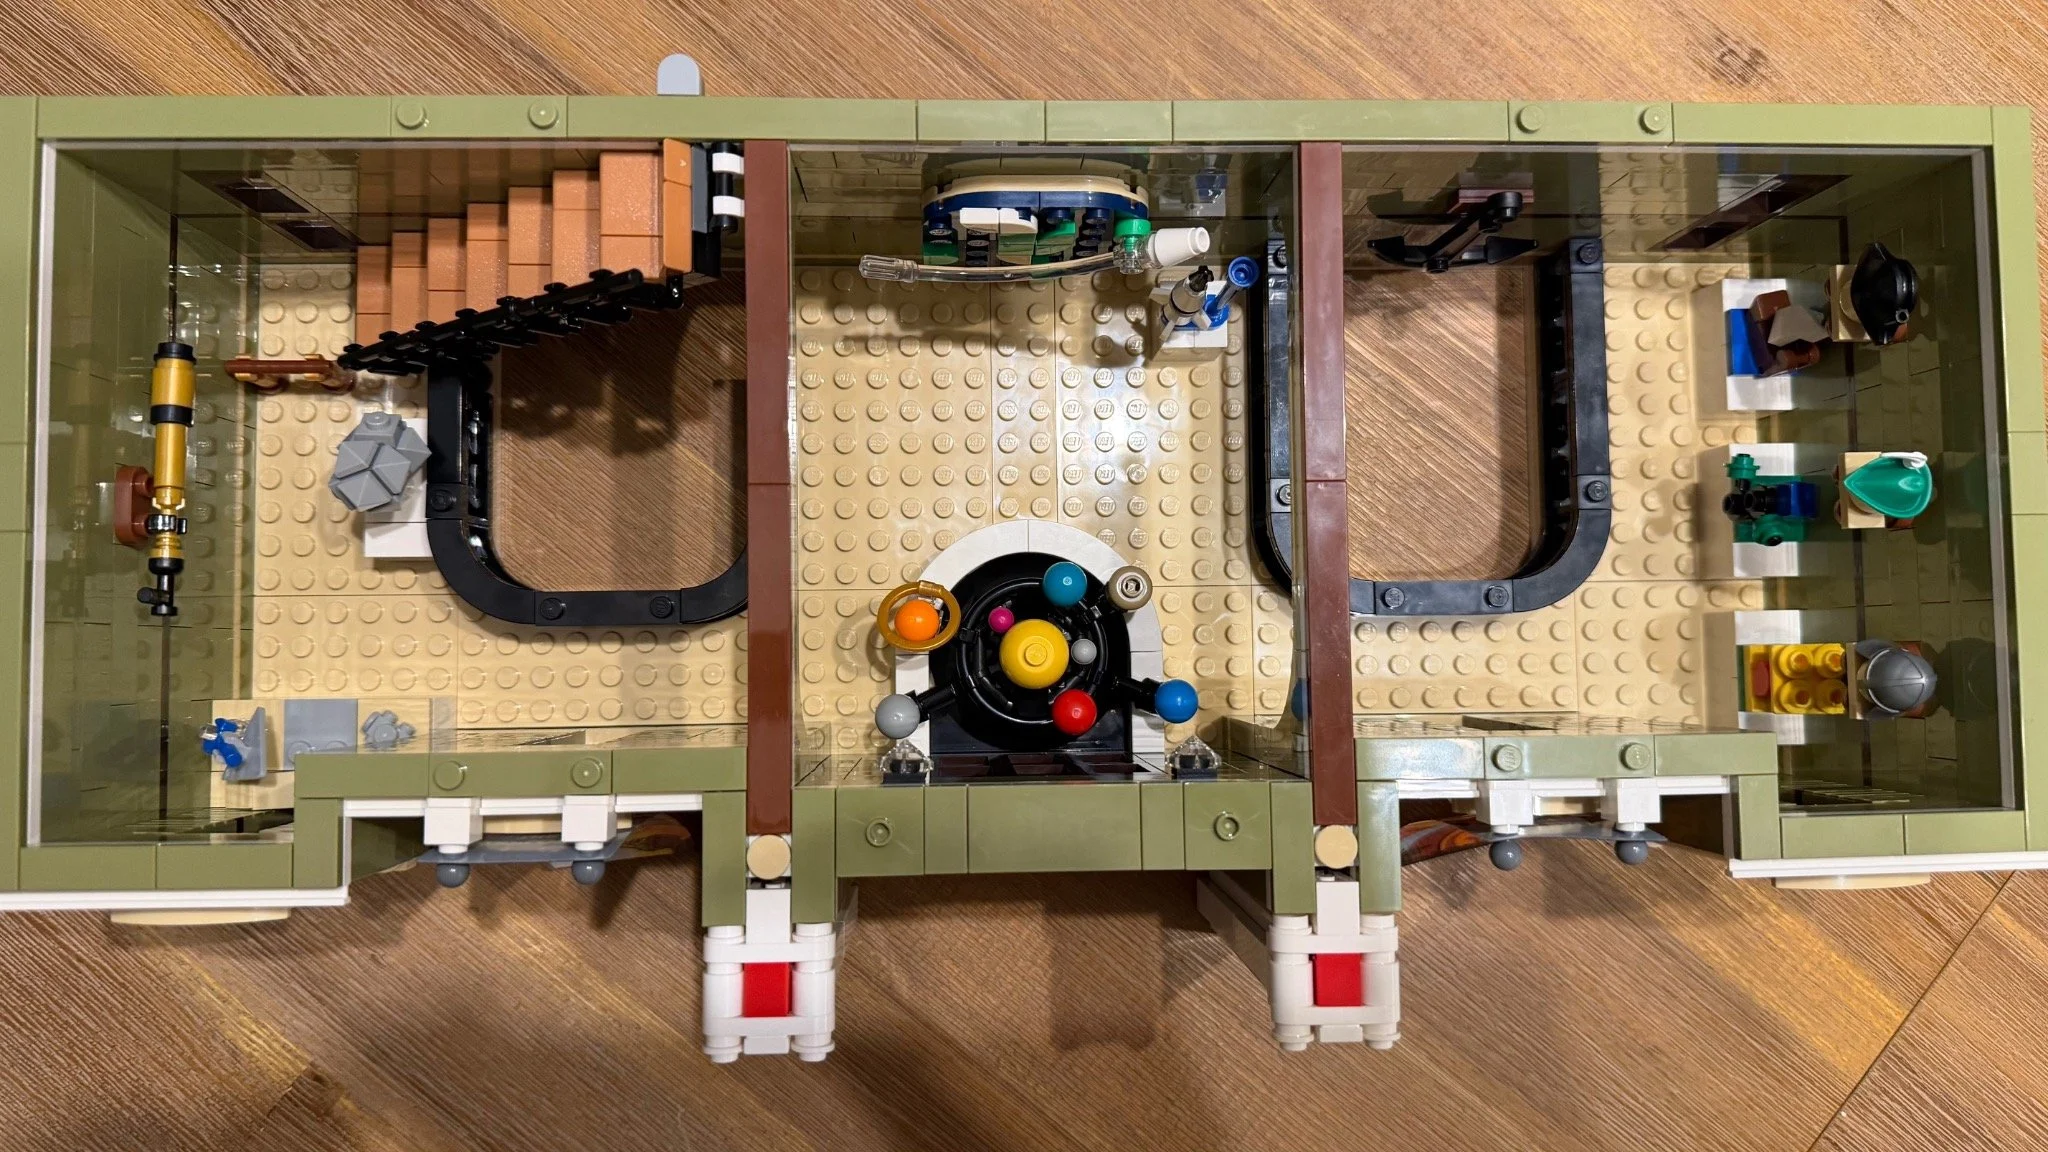
The museum collects a little LEGO history, too. Upstairs, the three miniature scenes read as a sailing ship, a forest hideout and a yellow castle. The hats displayed above them offer a second clue to each. Across the gallery, the space exhibits include a rocket on its stand, a gray faceted display, and a miniature command center and buggy. The orrery sits by the central window. A wall map picks out a rocket’s projected path, and a telescope fits along the wall. It’s a lot to discover before the roof goes on.
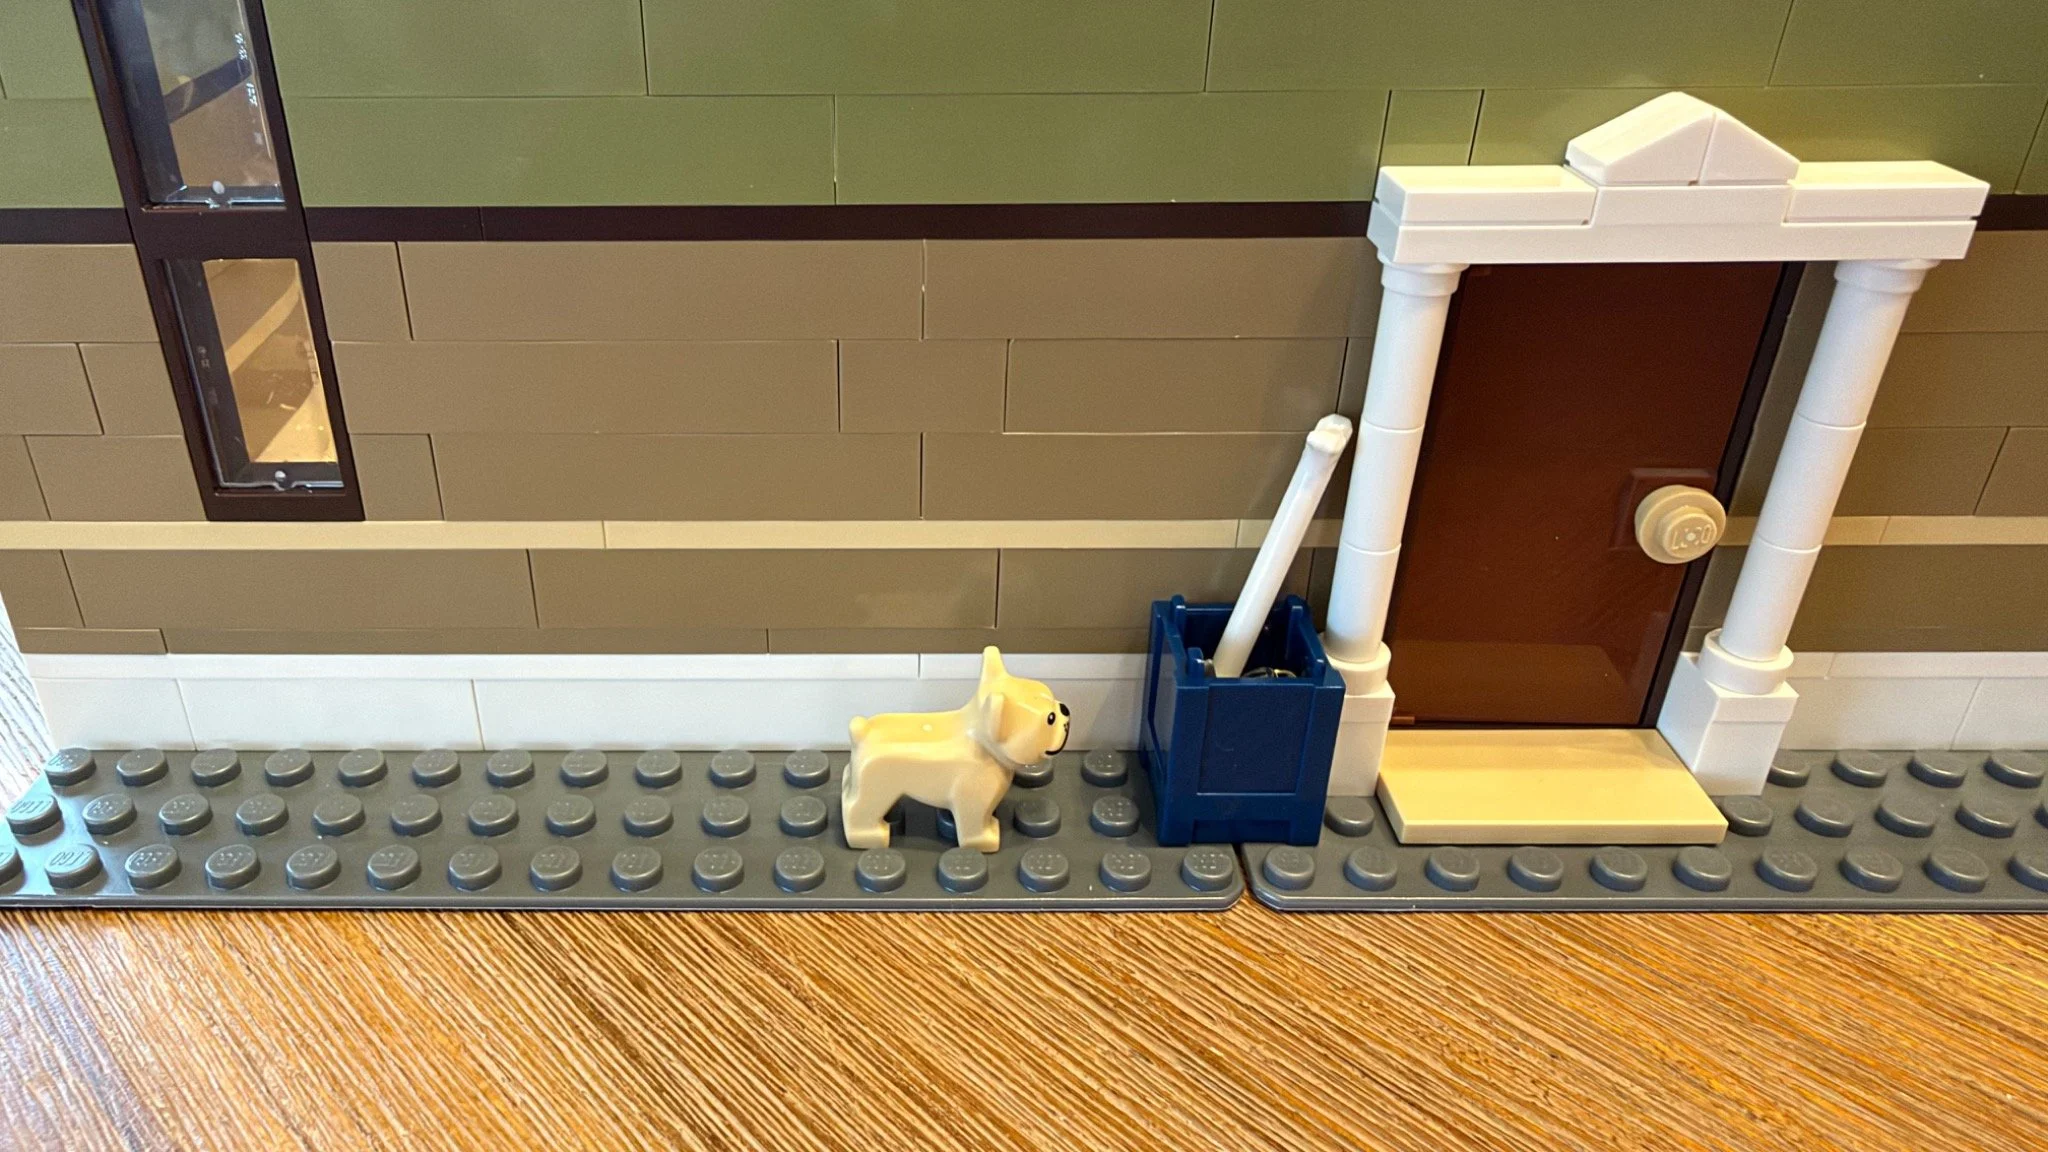
The bone has a second act. At the back door there’s a dog eyeing a bone in a blue bin. The booklet tells a little story about the puppy making off with it and a museum employee chasing it down. I set my finished sidewalk up with the bone in the dog’s mouth. It’s a good reason to photograph both sides of this modular.
Stability, access and shelf space
The completed building felt very stable on my copy. The roof and upper floor lift off for access, and the skeleton sits loosely enough that I can take it out for a closer look. When putting the upper floor back, sight down through the right-hand opening and give the neck room as you lower it. The building itself is much easier to handle than some of the small displays inside.
At 39 cm wide, this is the biggest modular I’ve built. I’d give it a shelf of its own or pair it with something small. If the shelf above sits close to the roof, leave room to bring the model out onto a table. So much of what I like about it is below those skylights.
My verdict: 8.4/10
What I liked
The removable Brachiosaurus. It looks good enough on its own plinth to display separately, yet putting it back makes the most of both floors.
Building the exhibits in sequence. The solar system crept up on me as I assembled it, and Bag 18 gave me a shelf’s worth of little discoveries in one sitting.
The stairs, skylights and folding roof. I’d put this among my most memorable roofs outside of Rivendell. The Technic-supported panels settle down at just the right angle against that white trim.
The museum feels occupied. A gift-shop counter, printed banners, a curator’s office and a worker outside the window all give the building a life beyond its front elevation.
What I didn’t like
The pointed front fence. My least favorite assembly. Doing the same fiddly connection along both beds felt excessive, even though I’d keep every section in the finished display.
The upper window pillars. Building the matching sets in succession made this the slowest-feeling stretch for me.
The tree canopy. I like its color and the way it hangs over the sidewalk. Getting all those small flowers into their leaves was another matter.
I’d build it again. For a modular fan who likes the rooms as much as the facade, the museum earns its shelf space. I’d also recommend it to a history or space fan who wants a medium challenge and enjoys small builds. A newer or younger builder would benefit most from a second pair of hands at the pointed fence and the blossom branches.
More from The Bricksmith
For another building that rewards looking inside, try my Restaurants of the World: Italy review. Its tiny kitchen makes a good comparison with the museum’s gift counter. You can also browse all my Build Guides.
Need help with your own modular?
If a modular came apart during a move, send me a photo of the whole building, the section that separated and any loose pieces. I can help you work out whether it needs a small repair or a floor-by-floor rebuild. I also assemble new sets, with local pickup and return in Greater Portland, Maine. Explore The Bricksmith’s services.