
LEGO® Speed Champions Time Machine from Back to the Future 77256 Build Review
This may be my favorite small LEGO set of the year. The Time Machine from Back to the Future packs a surprising amount of character into a compact DeLorean, with movie details that made every bag enjoyable.
I built the road version for this review. The instructions were easy to follow, the finished car feels very stable, and it rolls smoothly. The main challenge comes near the end, when the flexible cables need to be fitted around the body.
My set rating: 10/10 • Overall build difficulty: 5/10 • My recorded build time: 1 hour 16 minutes
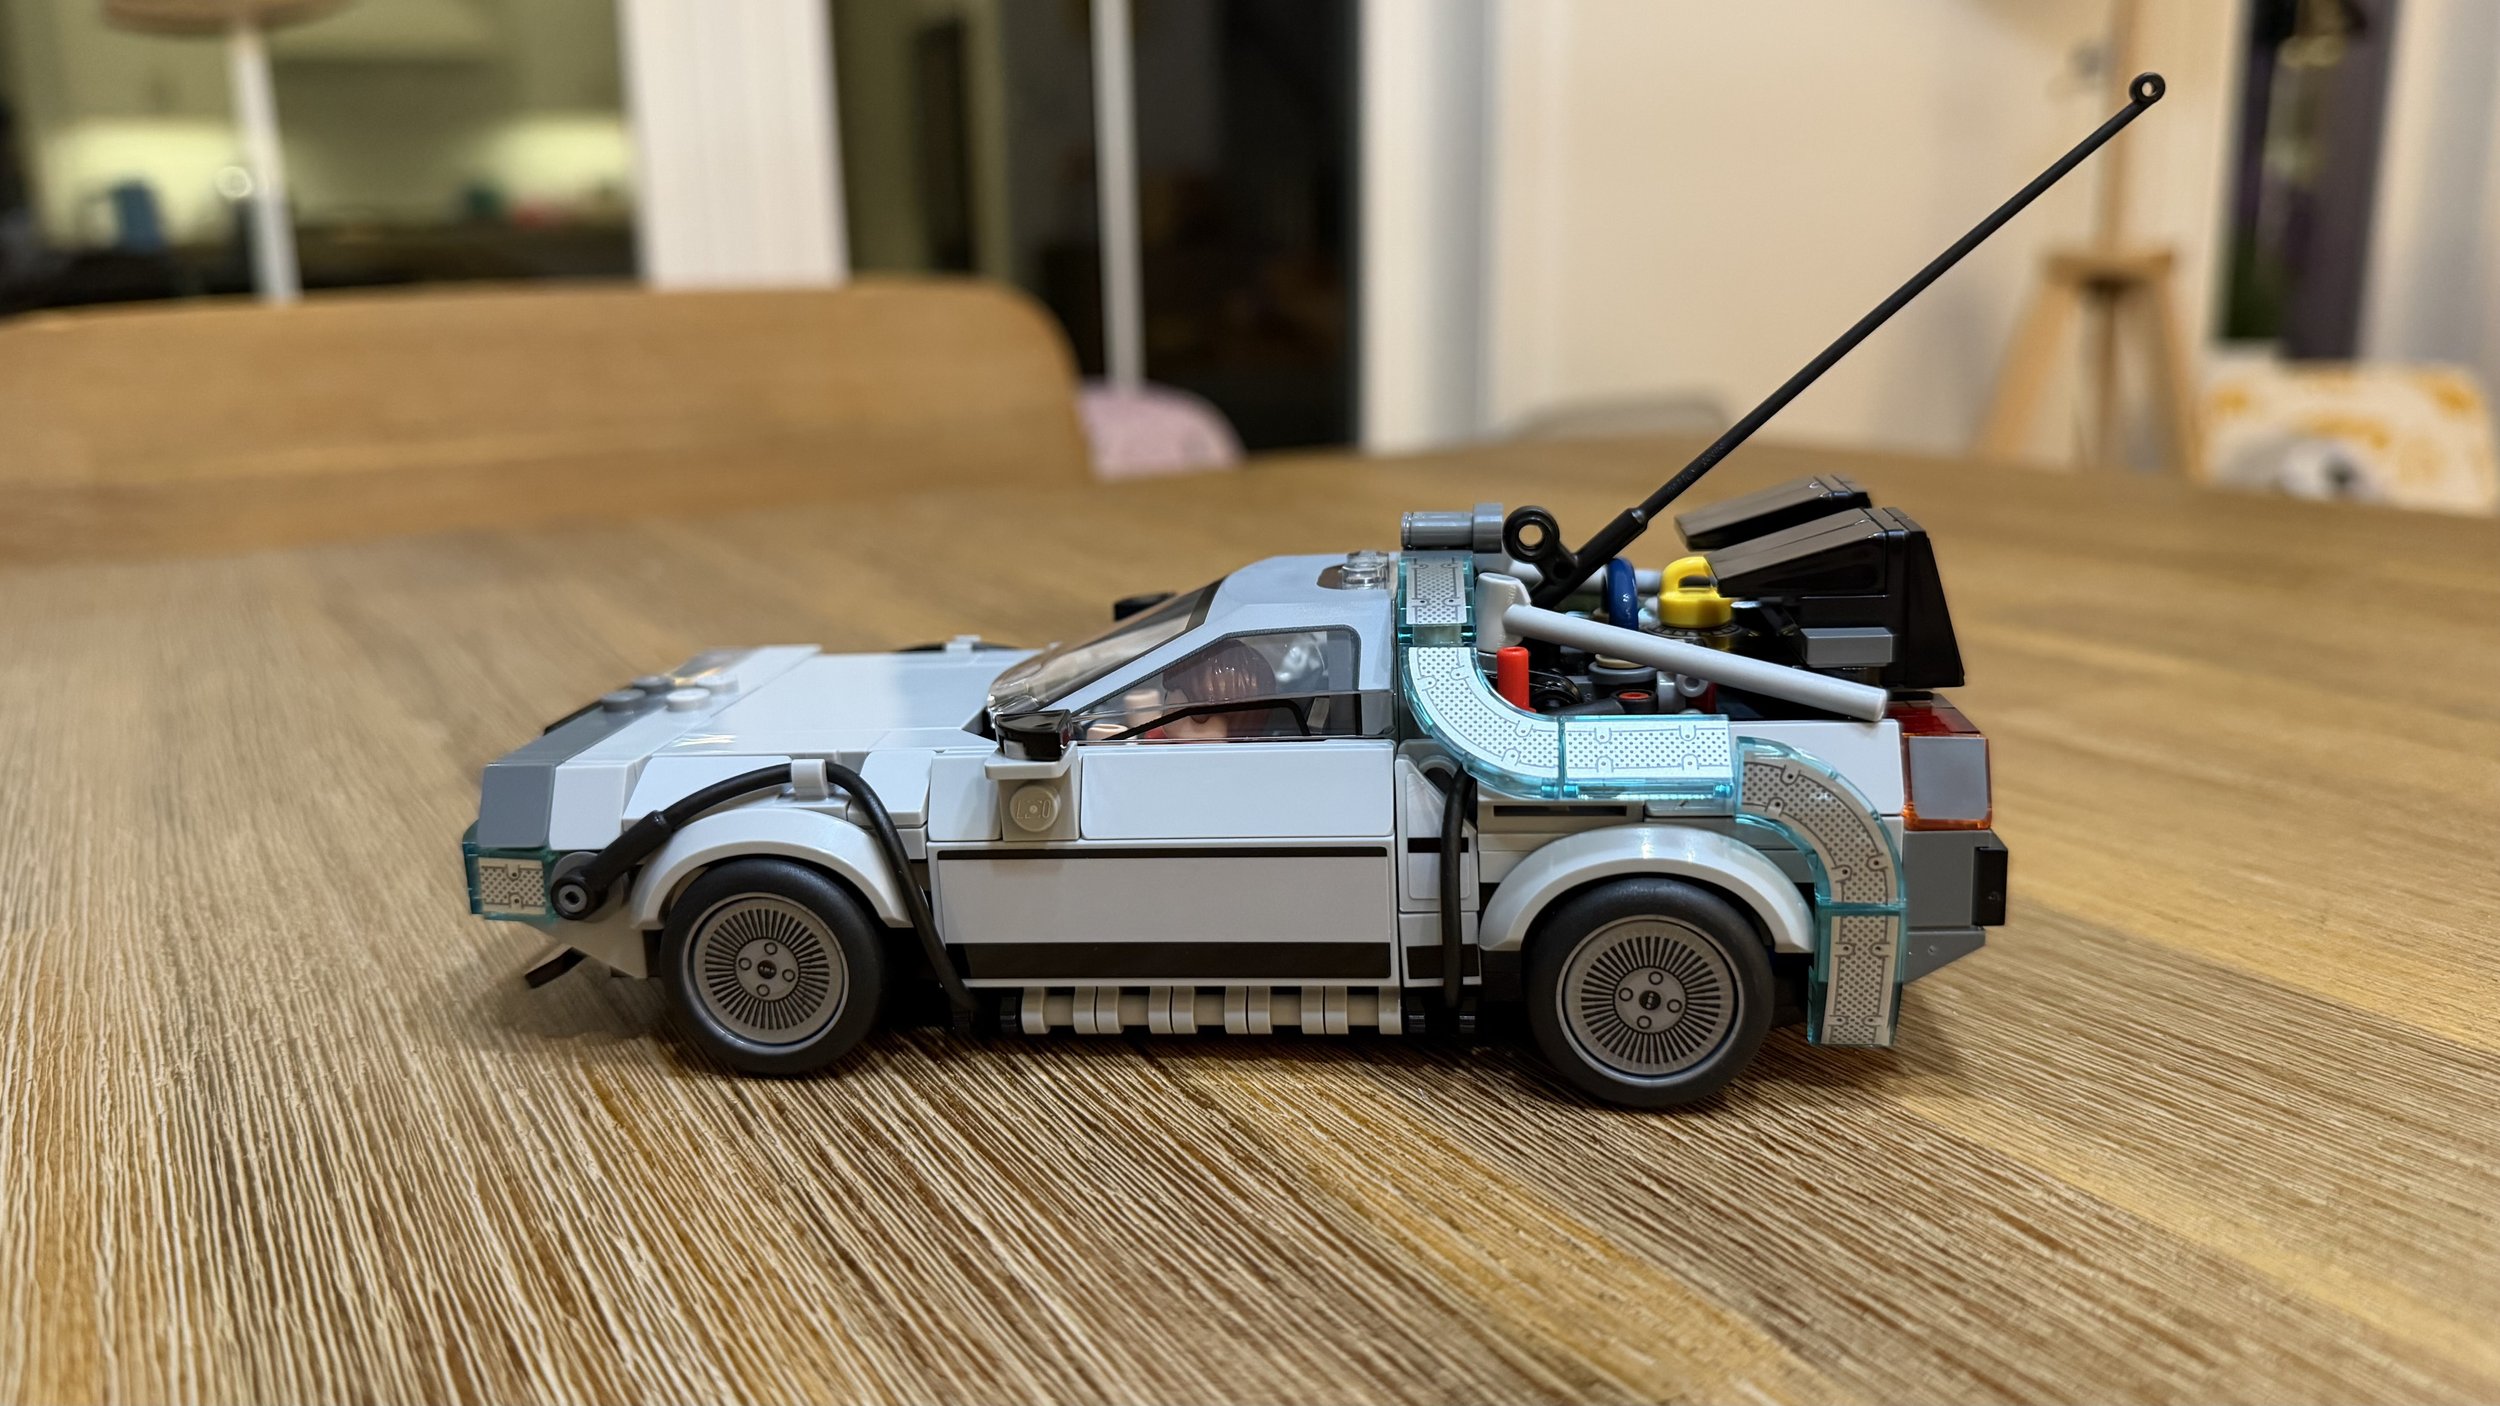
The completed DeLorean in its road configuration, with the side cables and time-machine details in place.
At a Glance
Set: 77256 • LEGO Speed Champions
Pieces and bags: 357 pieces • 5 numbered bags
Instructions and stickers: 226 steps • 6 stickers
My recorded build time: 1 hour 16 minutes
My ratings: Set: 10/10 • Difficulty: 5/10
Instruction complexity: 2/10
Dexterity / connection difficulty: 6/10
Finished stability: Very stable in my build; rolls smoothly
Minifigures and age guidance: Doc Brown and Marty McFly • LEGO age recommendation: 9+
LEGO listed dimensions: Over 4 in. / 10 cm high, 6.5 in. / 17 cm long, and 2.5 in. / 7 cm wide
LEGO US price: US $27.99, checked September 26, 2026; prices may change
Official set information: LEGO Time Machine from Back to the Future 77256
What Is the Time Machine Like to Build
Choose your preferred configuration before you start. The set offers a road version and a flying version; I chose the familiar DeLorean with its wheels on the ground. This review covers that build.
The experience is enjoyable from the opening bag. Doc Brown and Marty McFly appear immediately, and small details such as the printed keypad make the car feel connected to the film long before the body is finished.
The instructions themselves are straightforward. The difficulty comes from working in a small space, aligning stickers, and making a few precise connections. That is why I rated instruction complexity 2/10 but dexterity and connection difficulty 6/10.
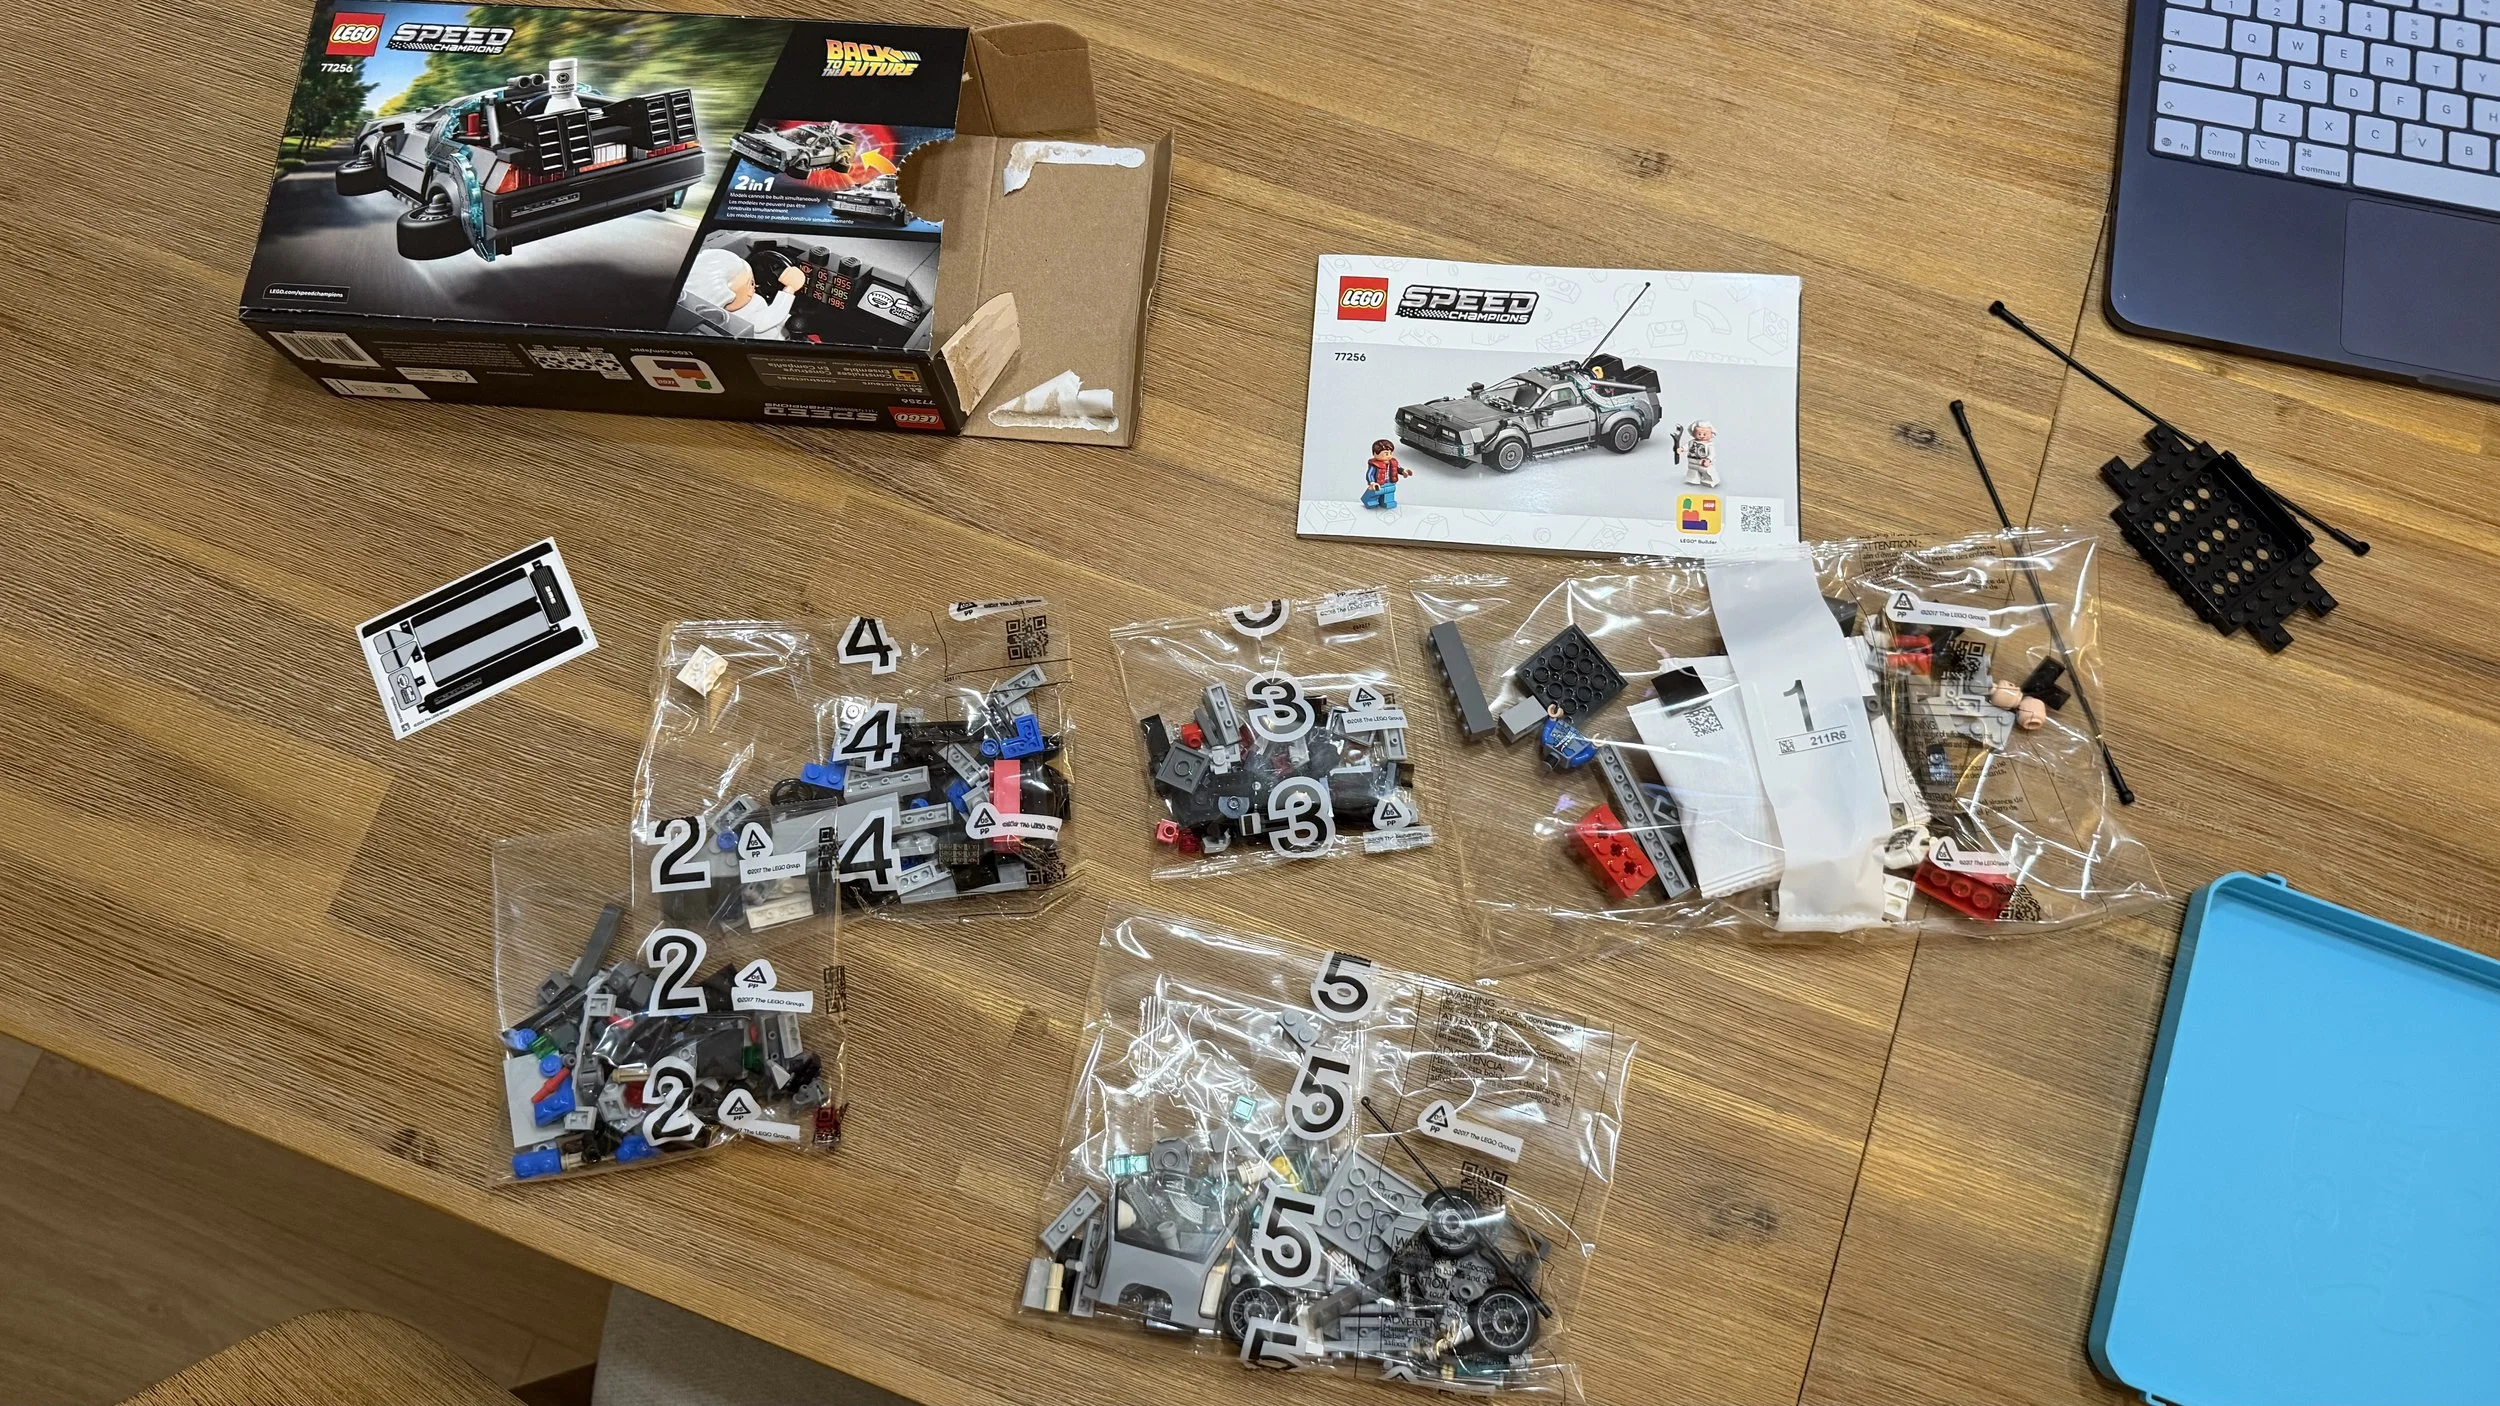
Five numbered bags, the instructions, sticker sheet, and loose structural pieces before the build begins.
Bag-by-Bag Build Notes
Bag 1: Minifigures and the First Car Structure
Ratings: Difficulty: 2/10 • Repetition: 2/10 • Dexterity: 2/10
Bag 1 is a great start. You build Doc Brown and Marty McFly first, and both minifigures are full of personality. I was also pleased to find printed details early in the build, including the time-machine keypad.
The car begins with its frame and rear wheel arches, using the larger chassis piece supplied outside the numbered bags. There is a Technic axle to fit, but the construction is otherwise straightforward. Nothing in this opening section felt especially demanding.
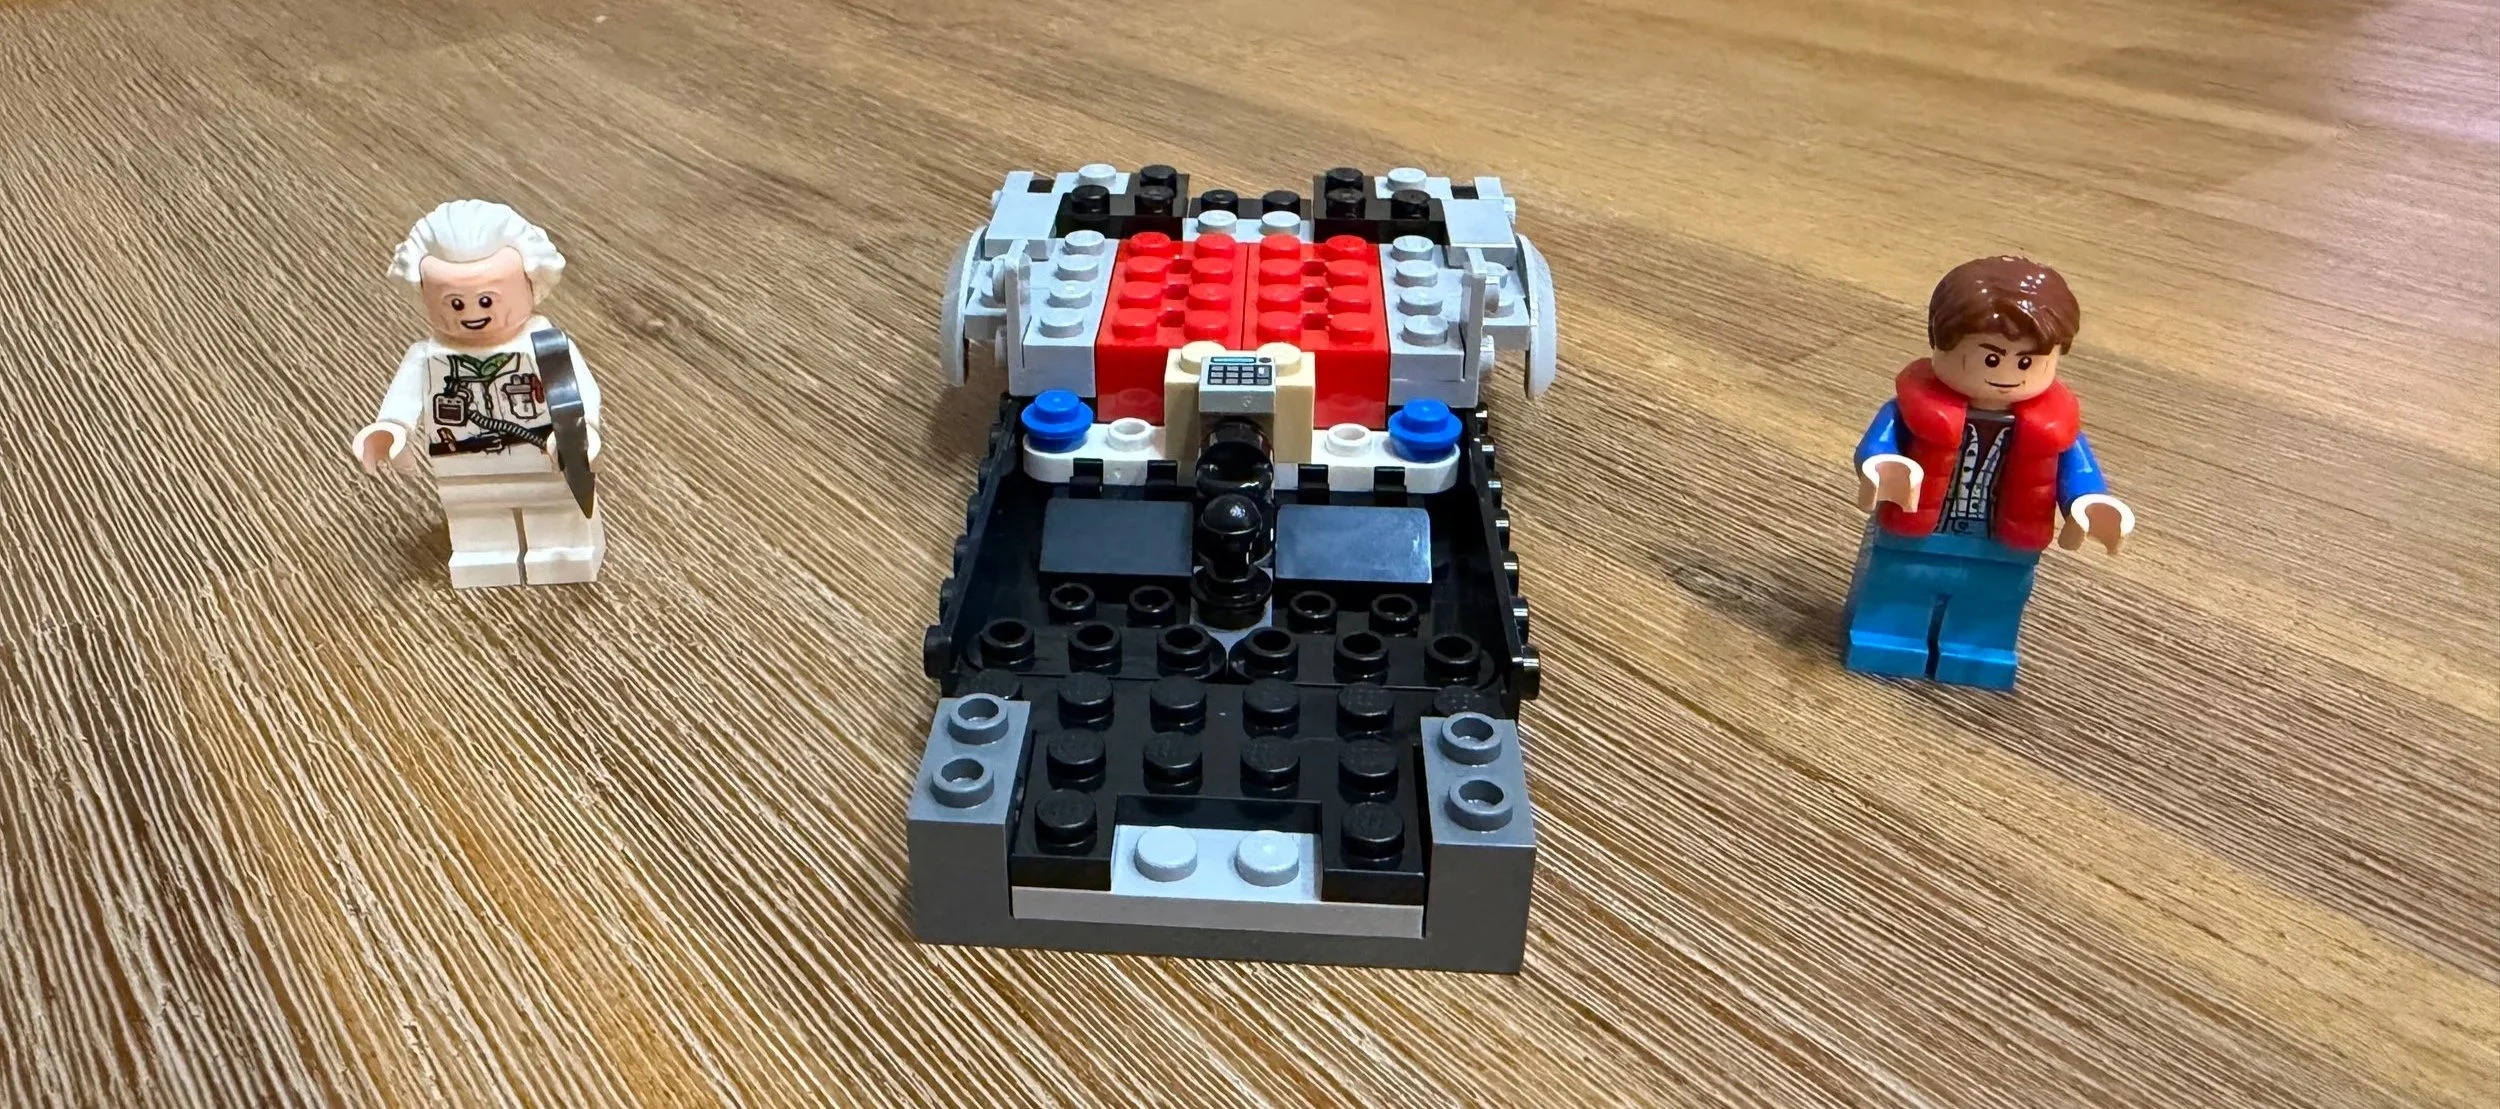
Doc Brown and Marty McFly beside the early car frame, with the printed keypad already installed.
Bag 2: Rear Bumper and Interior Details
Ratings: Difficulty: 4/10 • Repetition: 4/10 • Dexterity: 4/10
This smaller bag begins with a row of eight small headlight bricks attached to a long plate. Two gray slopes soon reinforce the assembly, but attaching the completed bumper to the car frame takes a little care. Check that all eight bricks sit flush before moving on.
The long DeLorean sticker adds the rear bumper branding. I use the edge of a brick separator to help position long stickers like this. The rest of the bag brings in the seats, red and green indicator details, and the first equipment at the rear of the time machine.
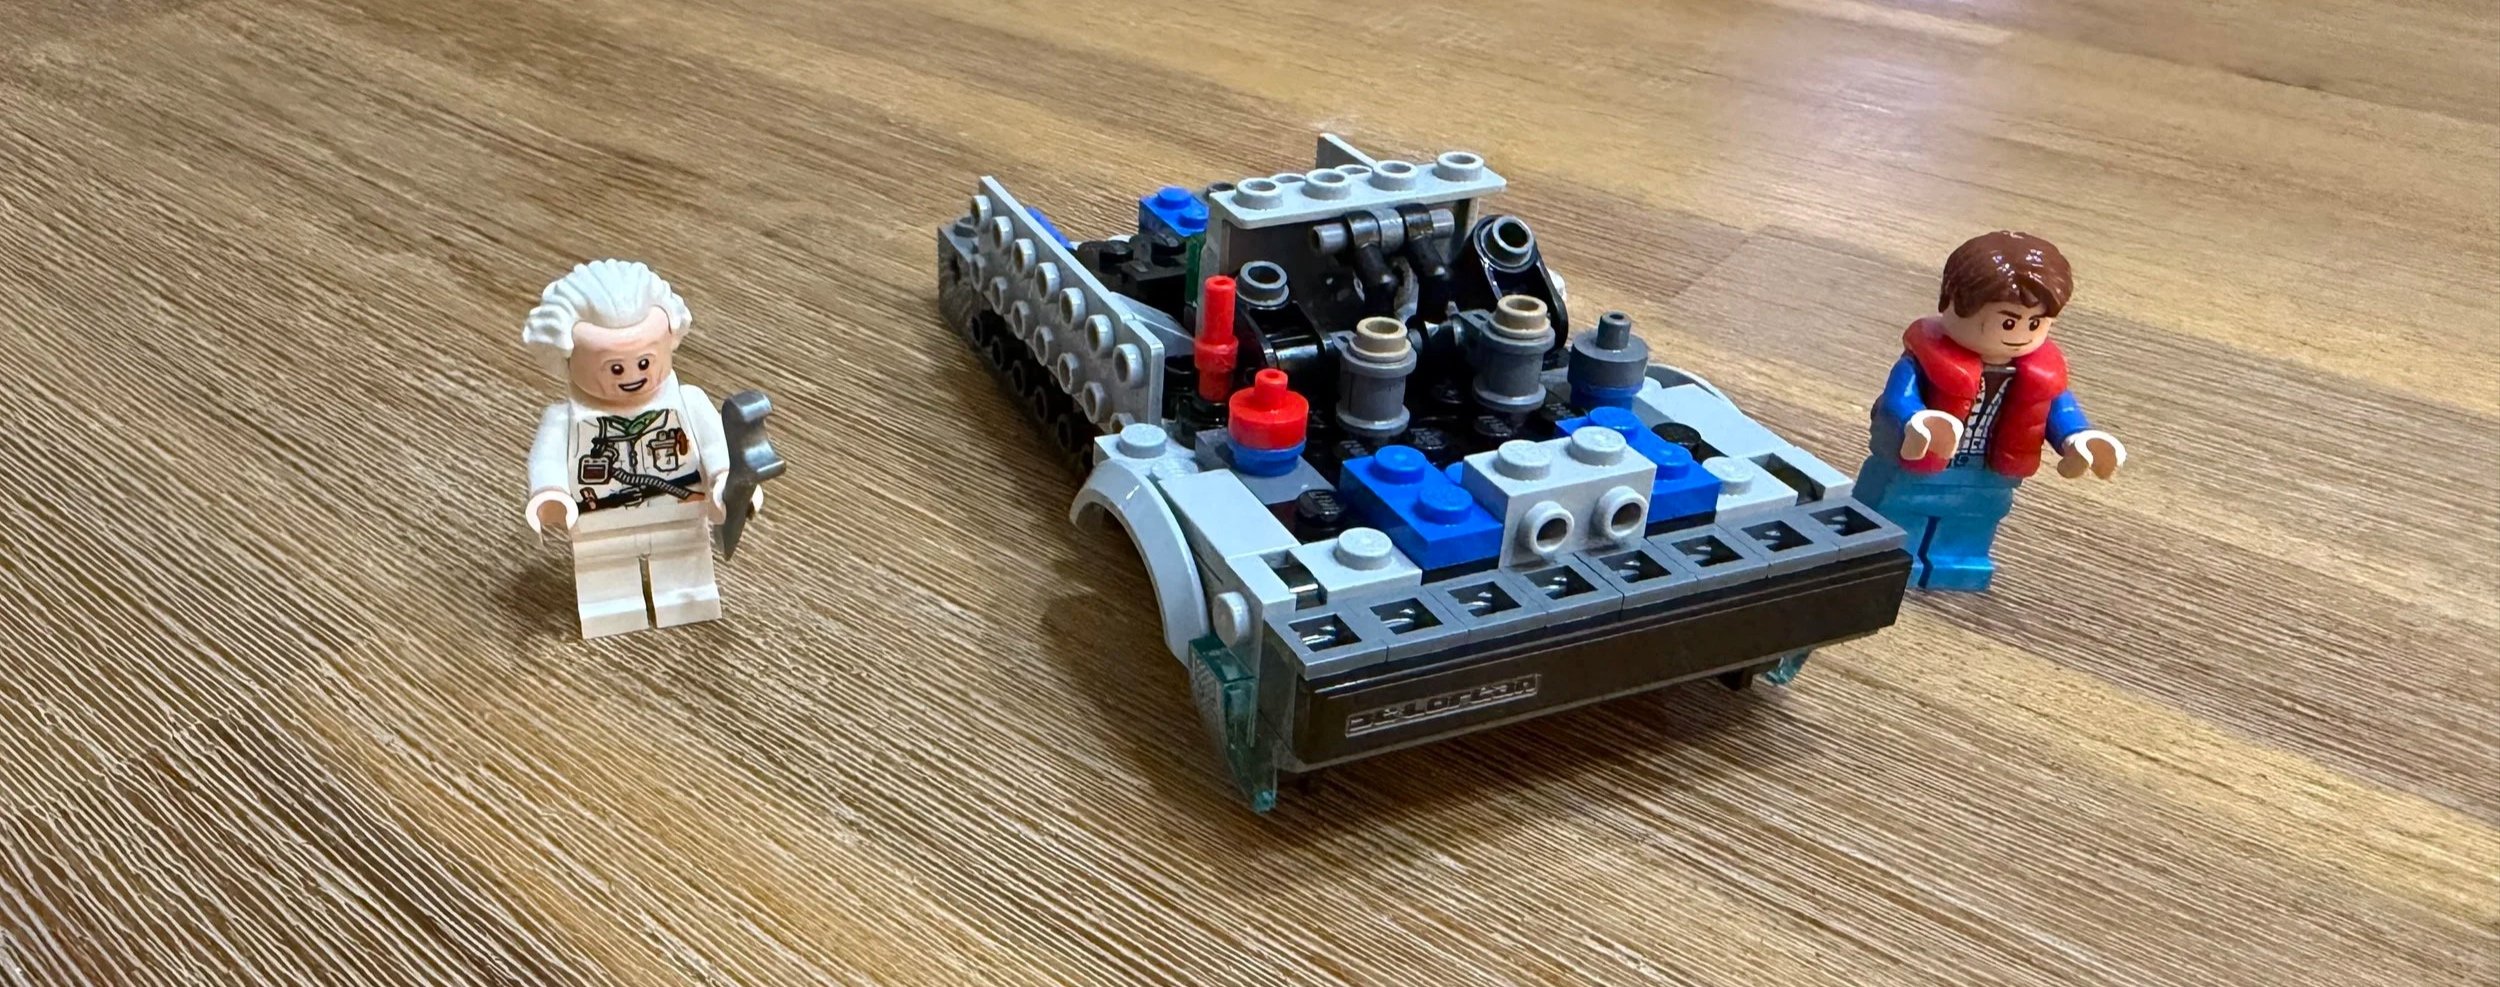
The rear bumper and early time-machine equipment begin to give the chassis its recognizable shape.
Bag 3: Rear Vents and Taillights
Ratings: Difficulty: 5/10 • Repetition: 6/10 • Dexterity: 6/10
Bag 3 builds out the equipment at the rear of the car, including the vents and taillights. These details make a big difference to the finished look, but many of the pieces are small and take steady hands to position.
There is more repetition here as the rear details come together. I still enjoyed the work; this was a section where taking my time with the smaller connections paid off.
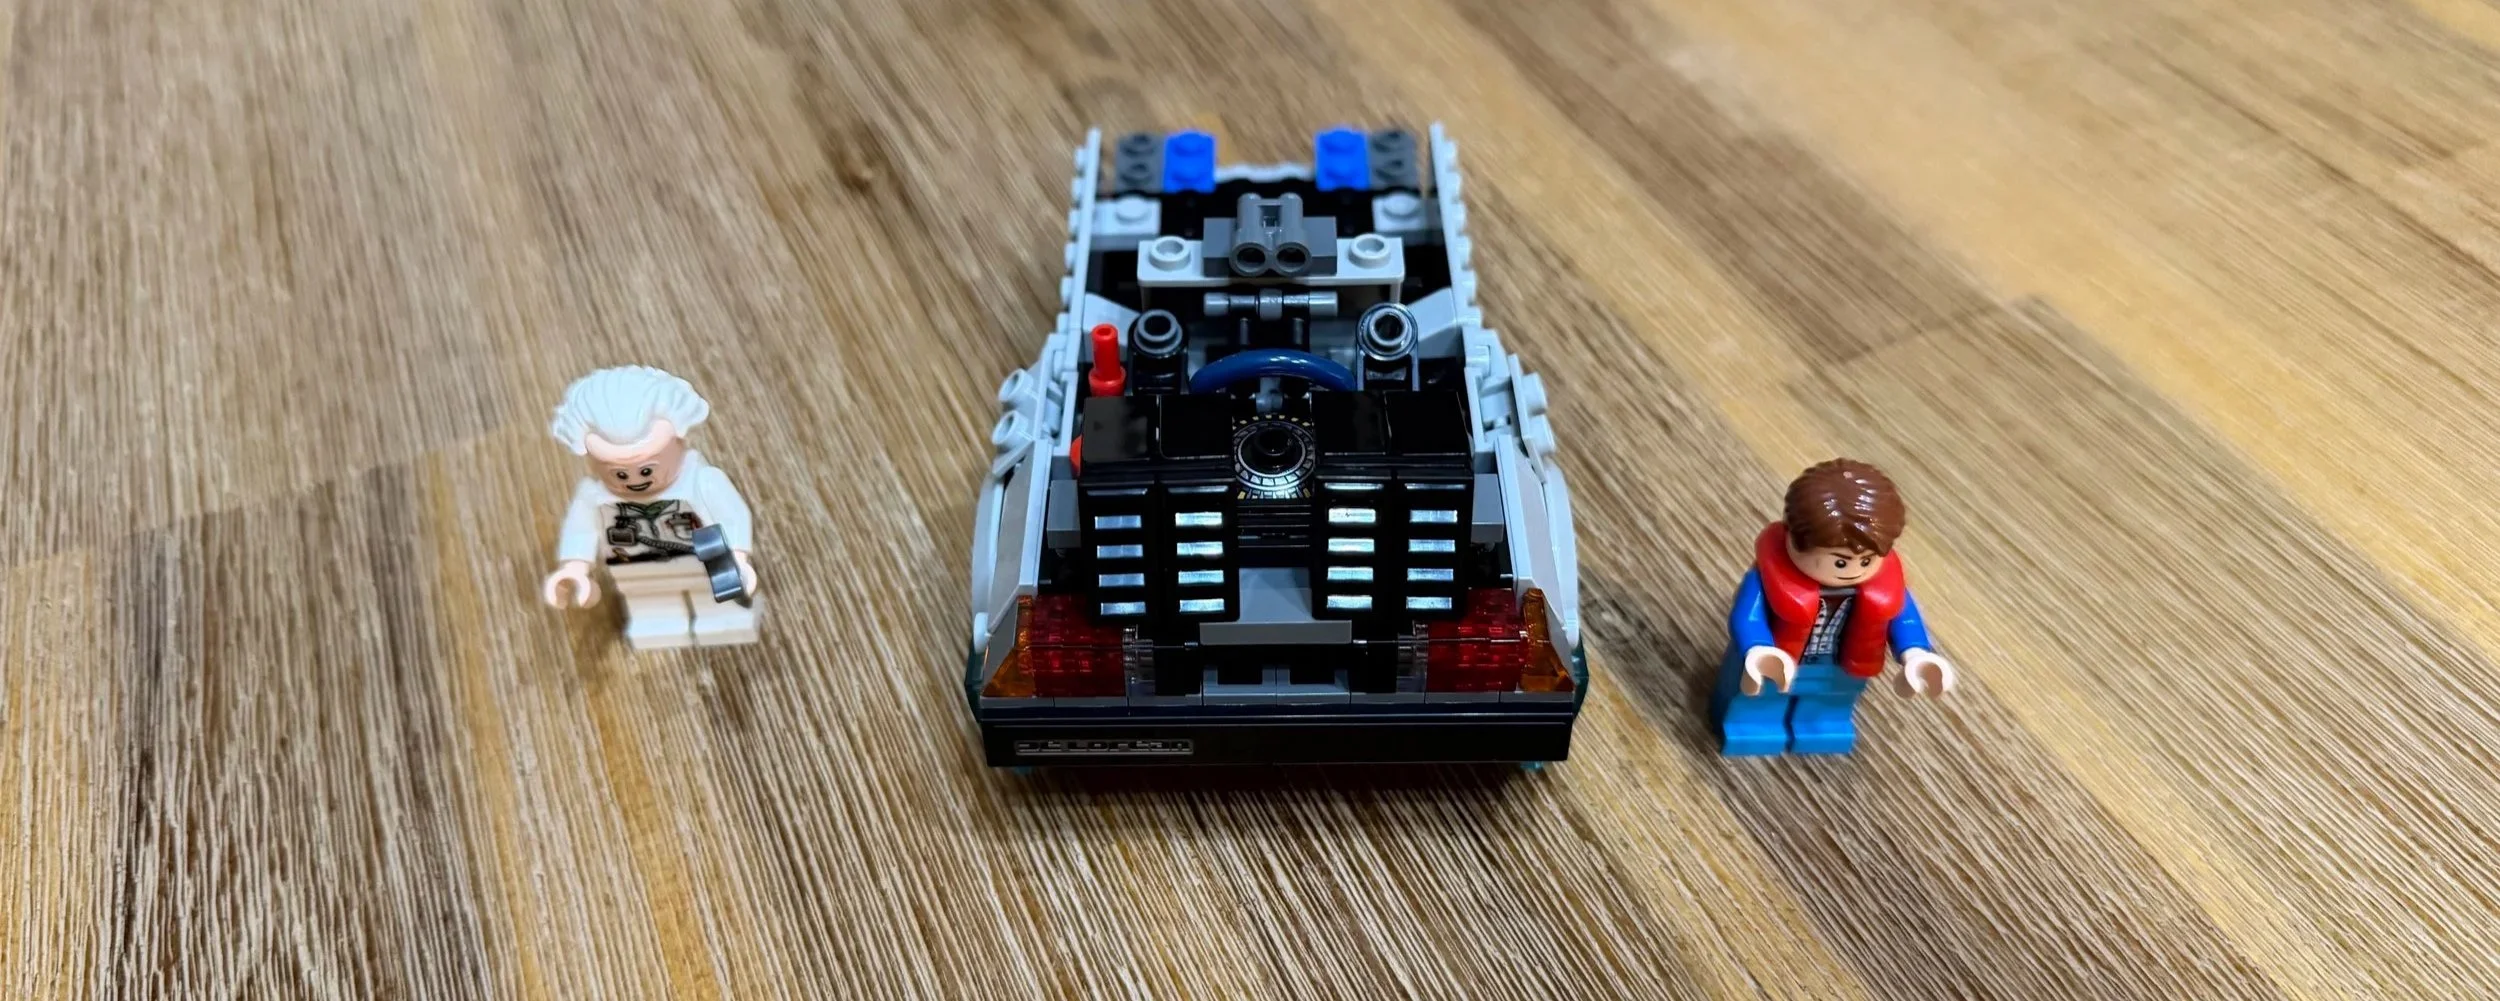
The rear vents and taillights take shape as the smaller time-machine details are added.
Bag 4: Doors and the Time-Circuit Dashboard
Ratings: Difficulty: 3/10 • Repetition: 6/10 • Dexterity: 3/10
Bag 4 completes the doors, with repeated small bar-handle pieces helping create the detailing along the sides. The construction is easier on the fingers than the previous bag, although the repeated door work raises the repetition score.
Take a moment to check the orientation of the door-trim stickers before applying them. The thick black band needs to follow the correct edge of each panel.
The dashboard is one of my favorite details. The time-circuit dates and plutonium-chamber gauge give the interior a lot of character for such a small model. The bag finishes by starting the front of the car and its bumper.
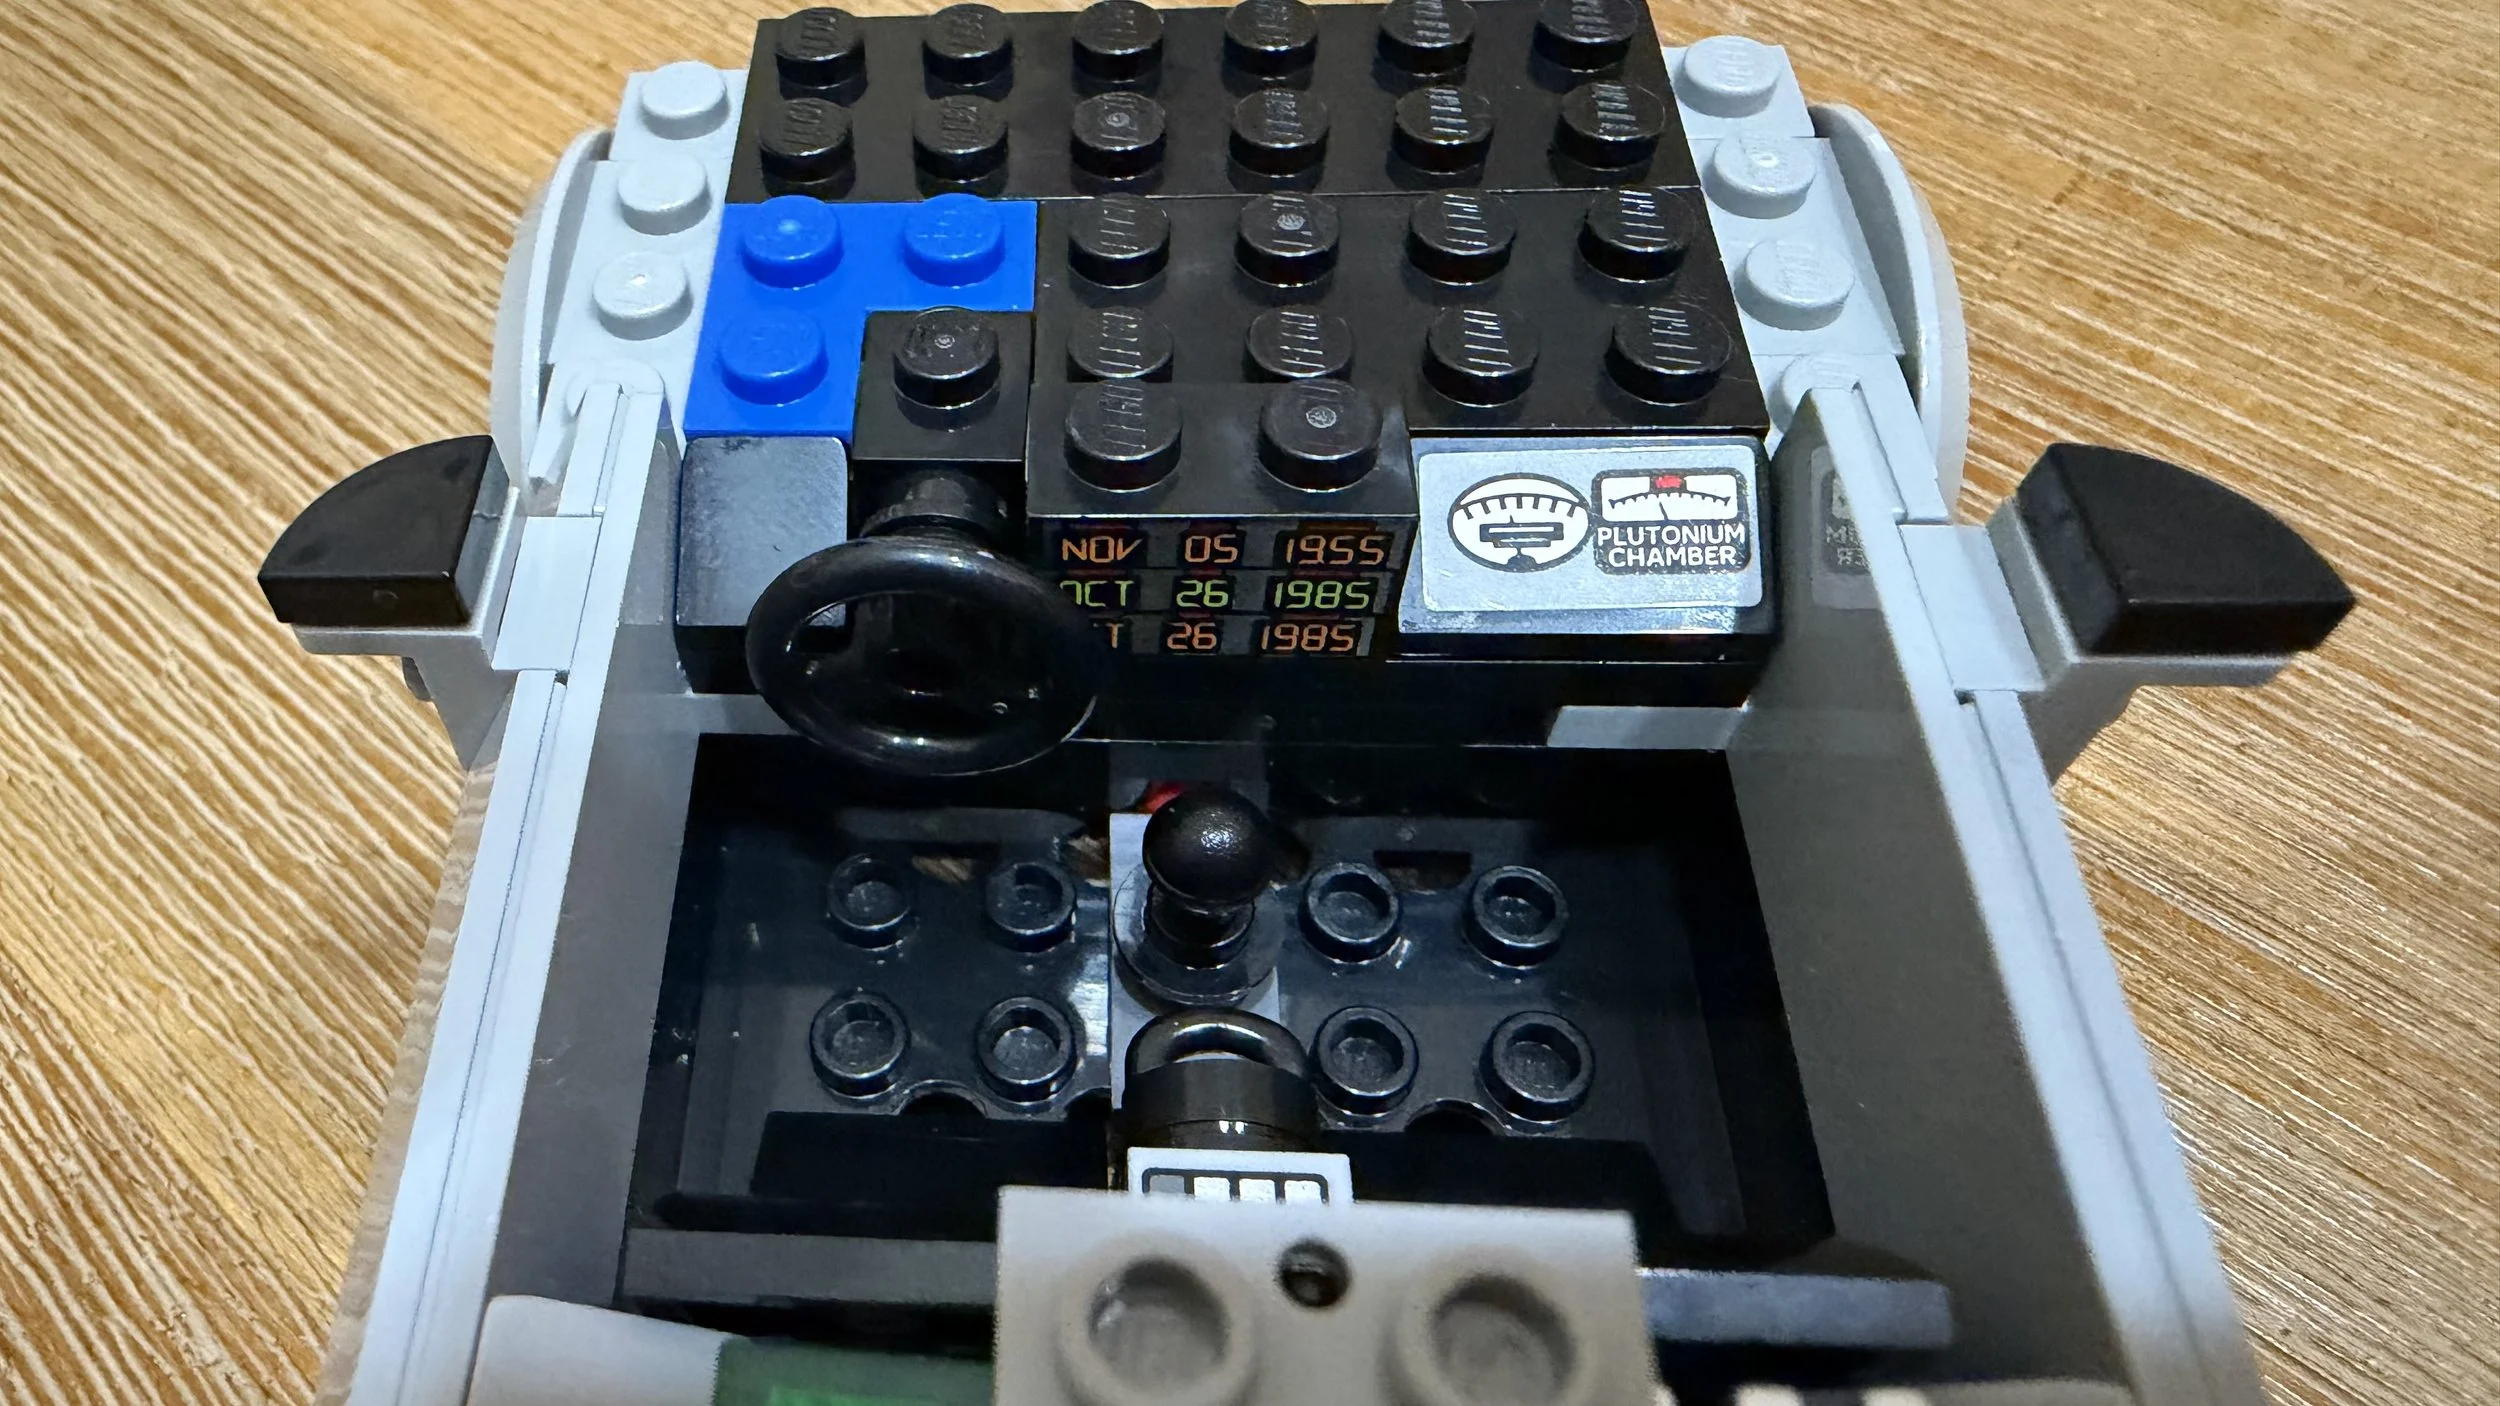
The time-circuit dates and plutonium-chamber gauge add recognizable movie details to the dashboard
Bag 5: Flexible Cables and the Finishing Details
Ratings: Difficulty: 6/10 • Repetition: 2/10 • Dexterity: 8/10
The final bag was both the hardest and my favorite. The hood, headlights, and DMC grille bring the front of the DeLorean together, before the flexible side cables introduce the most demanding connection in the build.
Fitting those two tubes was the hardest step by a significant margin. I found it easiest to attach the stud connections on each side first, then guide the tubing into position behind the door. Once seated, the tubes felt secure.
The remaining power-tube details and roof finish the silhouette. Adding the OUTATIME license plate was the perfect final touch. This bag asks the most of your fingers, but seeing the completed DeLorean come together makes it especially satisfying.
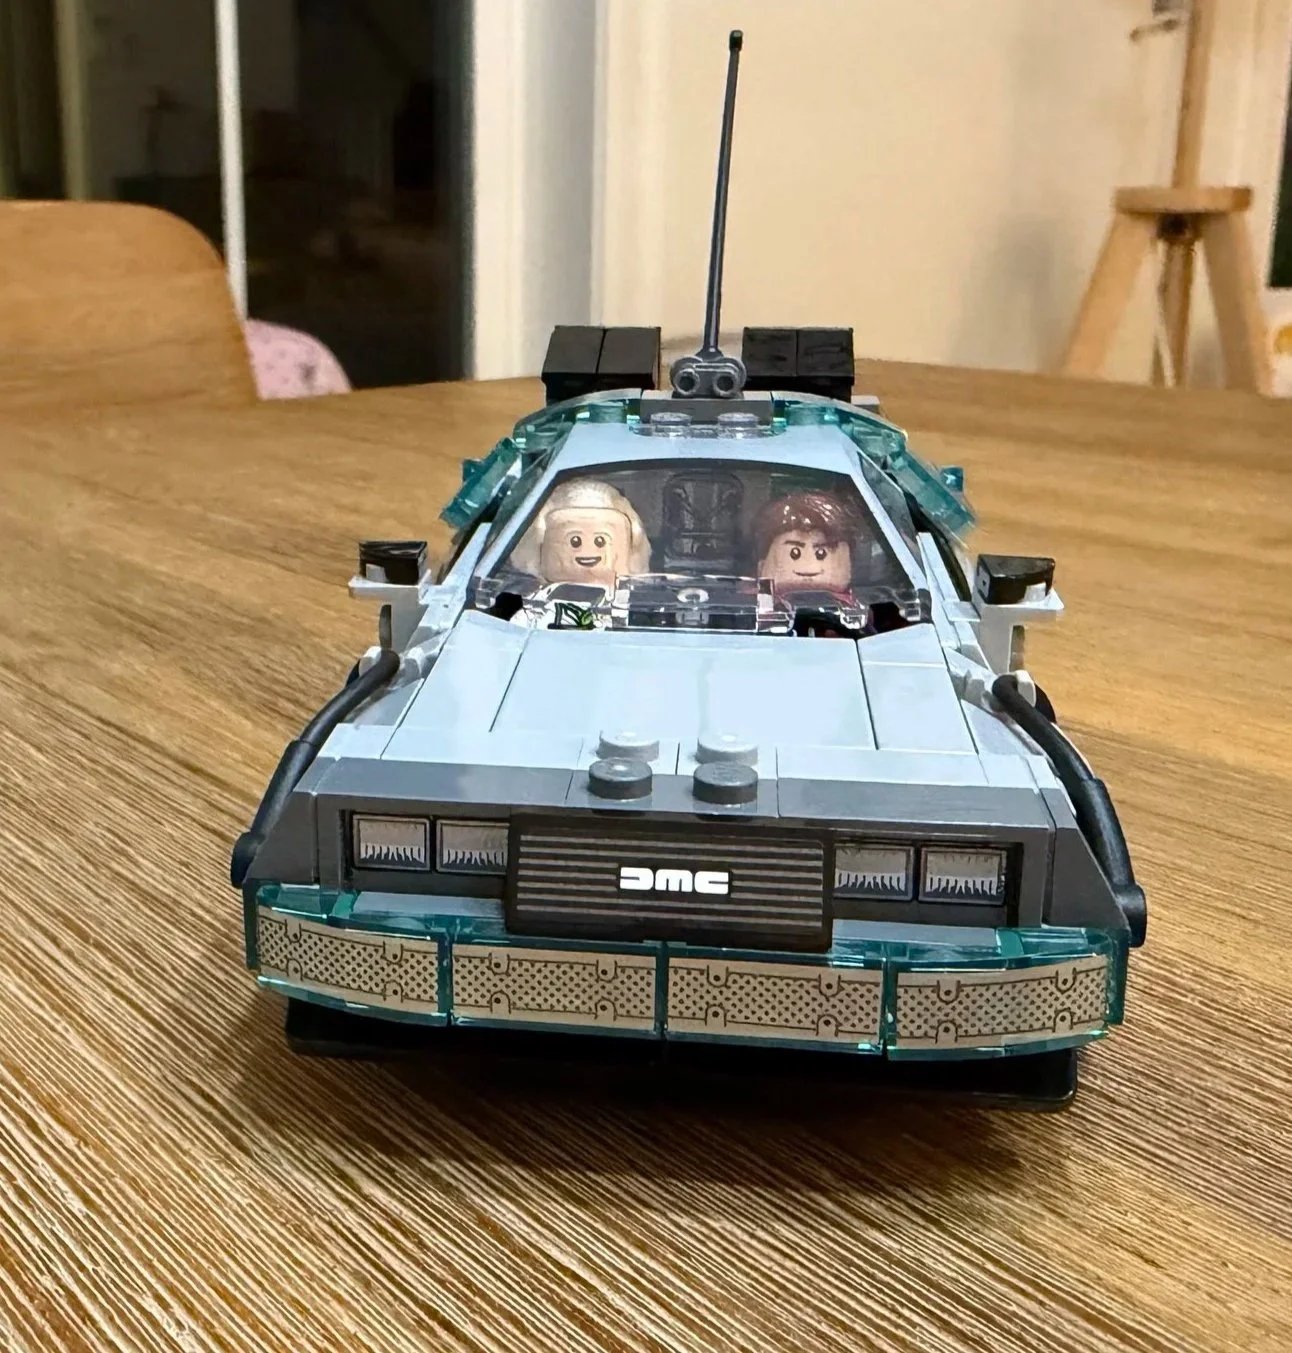
The finished front end with the DMC grille, side cables, and both minifigures inside.
What Could Someone Struggle With?
The main challenge is fitting and aligning small parts. The instructions are clear, but a few steps need more patience and hand control than the size of the set might suggest.
Flexible side cables. The final tubing connection is the biggest difficulty spike. Take your time guiding the tubes around the body, and support the surrounding structure as you work. The attachment order that helped me is described in Bag 5.
Long stickers and door-trim orientation. The bumper sticker needs careful alignment, and the thick black edge on the door stickers must face the correct direction. Check the illustration before pressing a sticker down fully.
Rear bumper alignment. In Bag 2, make sure the row of small headlight bricks is level and tightly connected before attaching the assembly to the frame.
Small rear details. The vents and time-machine equipment involve repeated work with small pieces. Builders who find small connections difficult may want help with this section and the final cables.
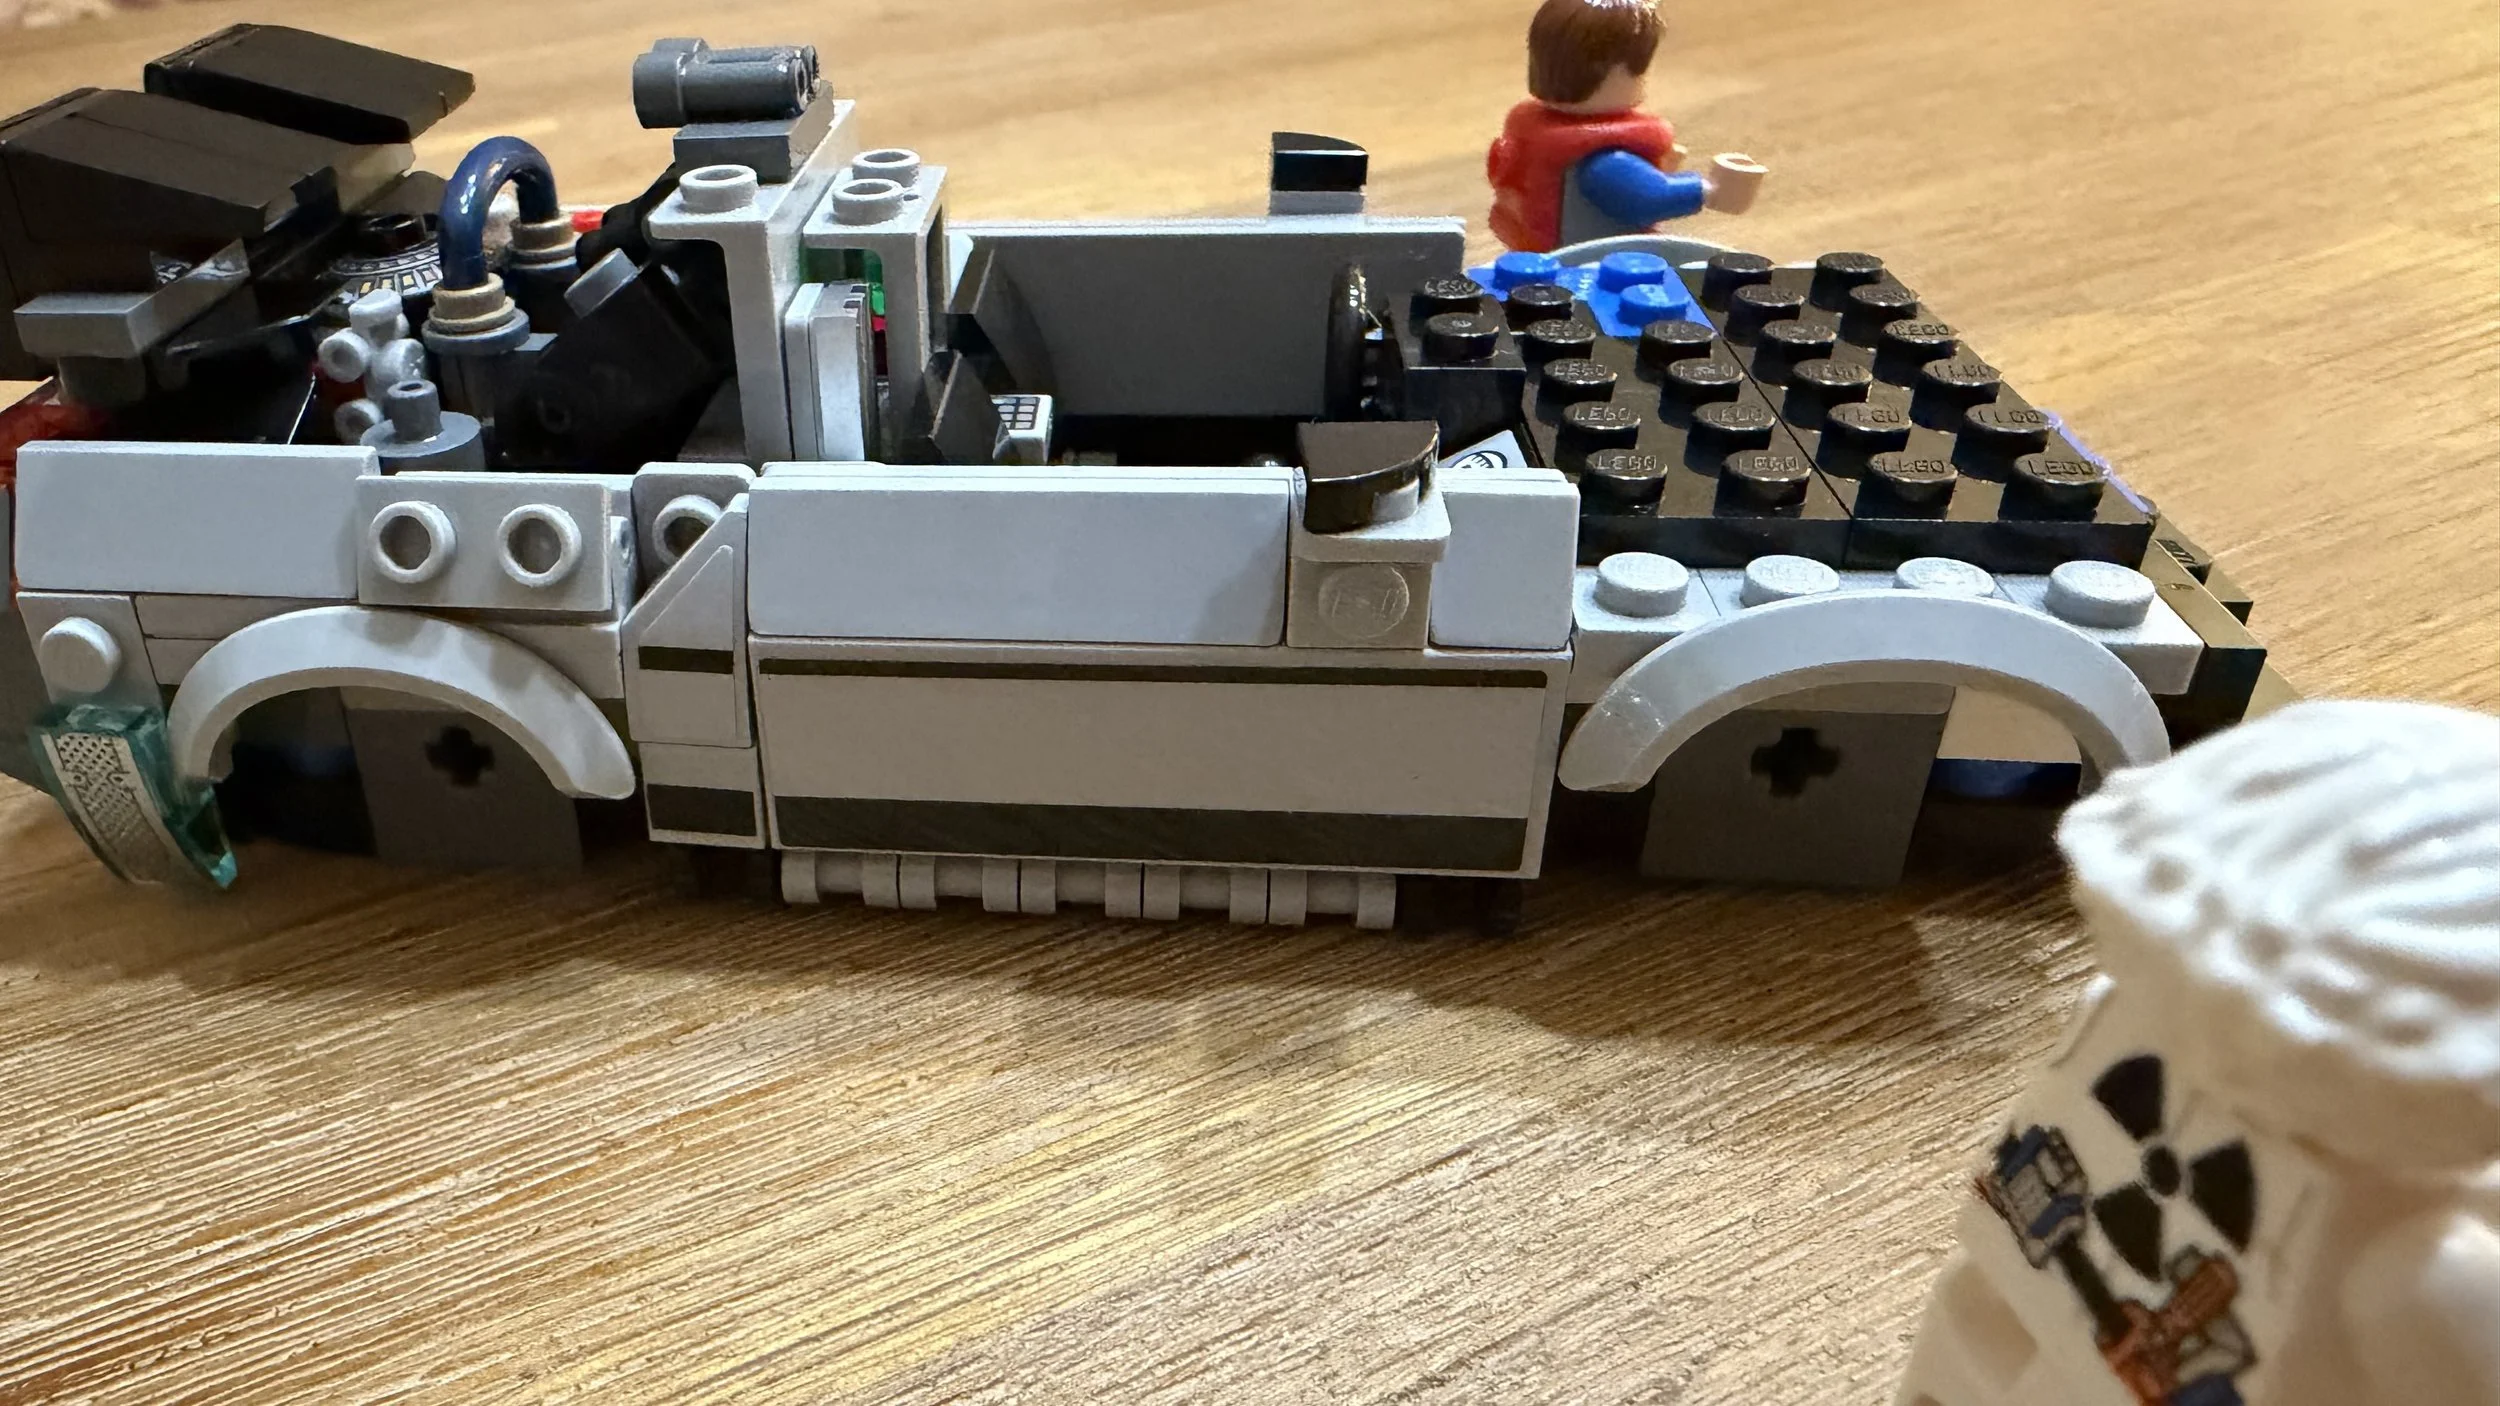
The door trim shows why sticker orientation matters; check where the thick black band belongs before applying it.
Display Quality and Stability
The finished DeLorean is a beautiful little display piece. The silver body, blue detailing, rear vents, and OUTATIME plate make it immediately recognizable, and the compact size makes it easy to appreciate the whole model at once.
It also feels very stable in my build and rolls smoothly. The flexible tubes that took the most effort to install felt firmly seated once they were in place. That combination of detail and solidity is a large part of why I enjoyed the finished model so much.
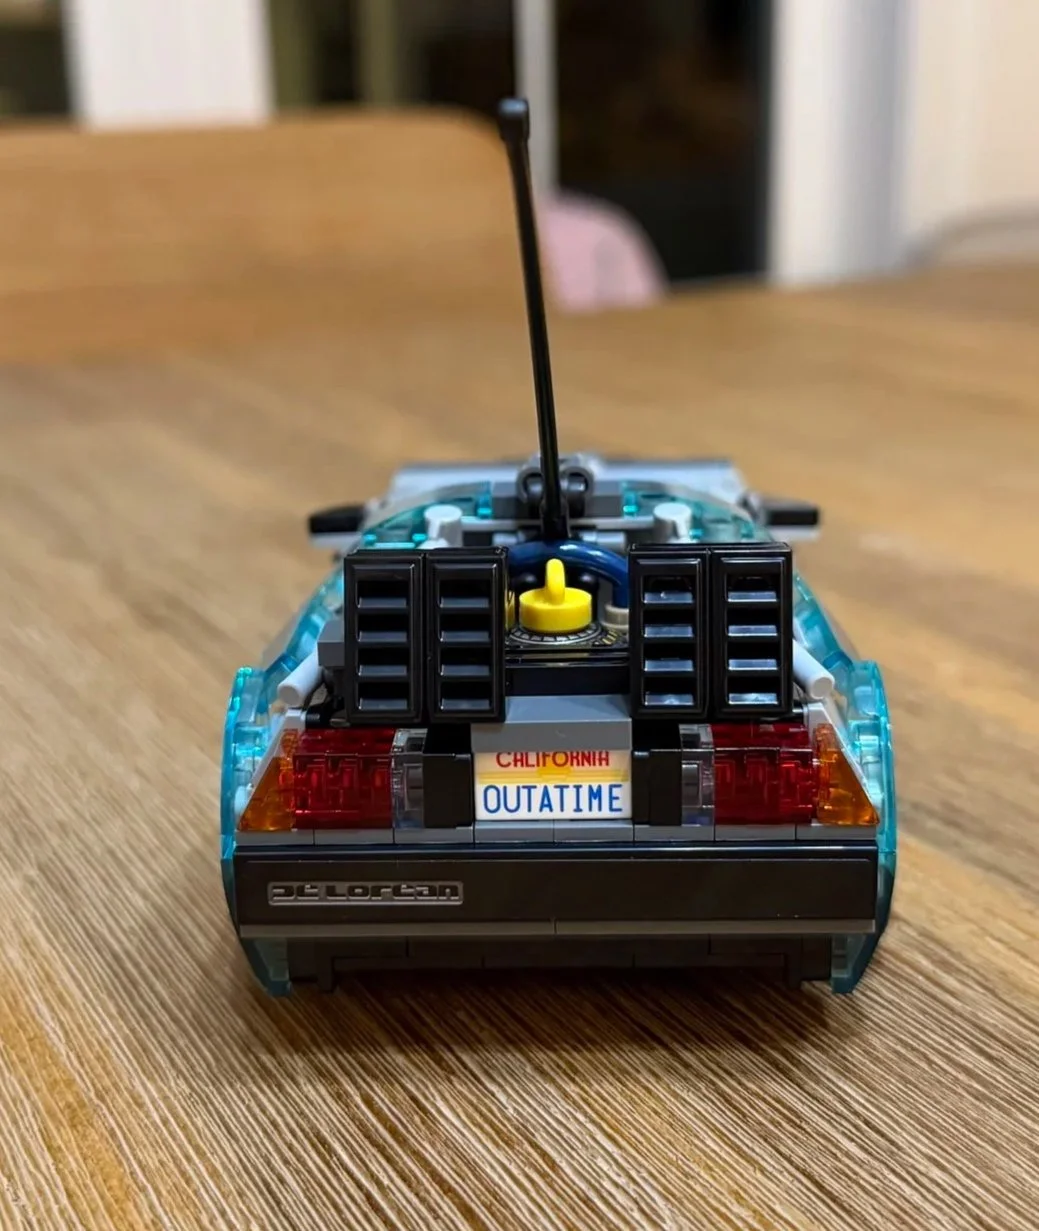
The rear view brings together the vents, taillights, DeLorean branding, and the OUTATIME license plate.
Moving, Rebuilding, and Disassembly
For moving the completed model, I would support it underneath the chassis and protect the tall rear rod, mirrors, and external cables from pressure. The car feels solid on the table, but those projecting details still deserve care during transport.
If I were restoring a partially damaged example, I would check the bumper alignment, rear equipment, and cable connections closely. During disassembly, I would release the tube connections carefully and keep the small rear assemblies organized. A repair or mail-in assessment would depend on photos of the actual condition and a suitable packing plan.
Who Would I Recommend LEGO 77256 To?
I would especially recommend this set to Back to the Future fans, Speed Champions collectors, and anyone who wants a detailed movie vehicle in a small display footprint. Builders who enjoy recognizable details will find plenty to appreciate. Those who find small connections or sticker placement difficult may want a little help with the trickier steps.
Final Verdict
This may be my favorite small set of the year. I enjoyed every bag, and the finished DeLorean delivers exactly the nostalgic display appeal I hoped for. The minifigures, dashboard, rear equipment, and final license plate all contribute to a model that feels full of character.
Bag 5 is the clear difficulty peak, but it is also the most rewarding section. The cable connection takes patience; the finished result made that effort worthwhile for me. At the listed US price of $27.99 when checked, I consider this excellent value.
My set rating: 10/10
Overall difficulty: 5/10
Hardest bag: Bag 5, especially the flexible cables
Easiest bag: Bag 1, which I rated 2/10 for difficulty
Favorite bag: Bag 5
Least enjoyable section: None stood out; I enjoyed the build throughout
My verdict: An easy recommendation for Back to the Future fans who want a compact, satisfying build with a very stable finished model.
Want the Finished Set Without the Build?
The Bricksmith helps with LEGO set assembly, rebuilding, disassembly, sorting, and re-bagging. If you would like help with this DeLorean or another set, send the set number and a few photos. You will receive a written scope, price, estimated timing, and handoff plan before deciding whether to proceed.
Local pickup and return are available around Greater Portland, Maine. Mail-in projects are considered individually and require approval before shipping.