
LEGO® Ideas La Catrina 21372 Build Review
A beautiful display model with clever construction, a gradual difficulty ramp, some repetitive dress sections, and absolutely no stickers.
I built LEGO® Ideas La Catrina 21372 from start to finish to see how long it actually takes, where the build becomes challenging, and what builders should expect along the way.
My build time: 3 hours, 20 minutes · Difficulty: 5/10
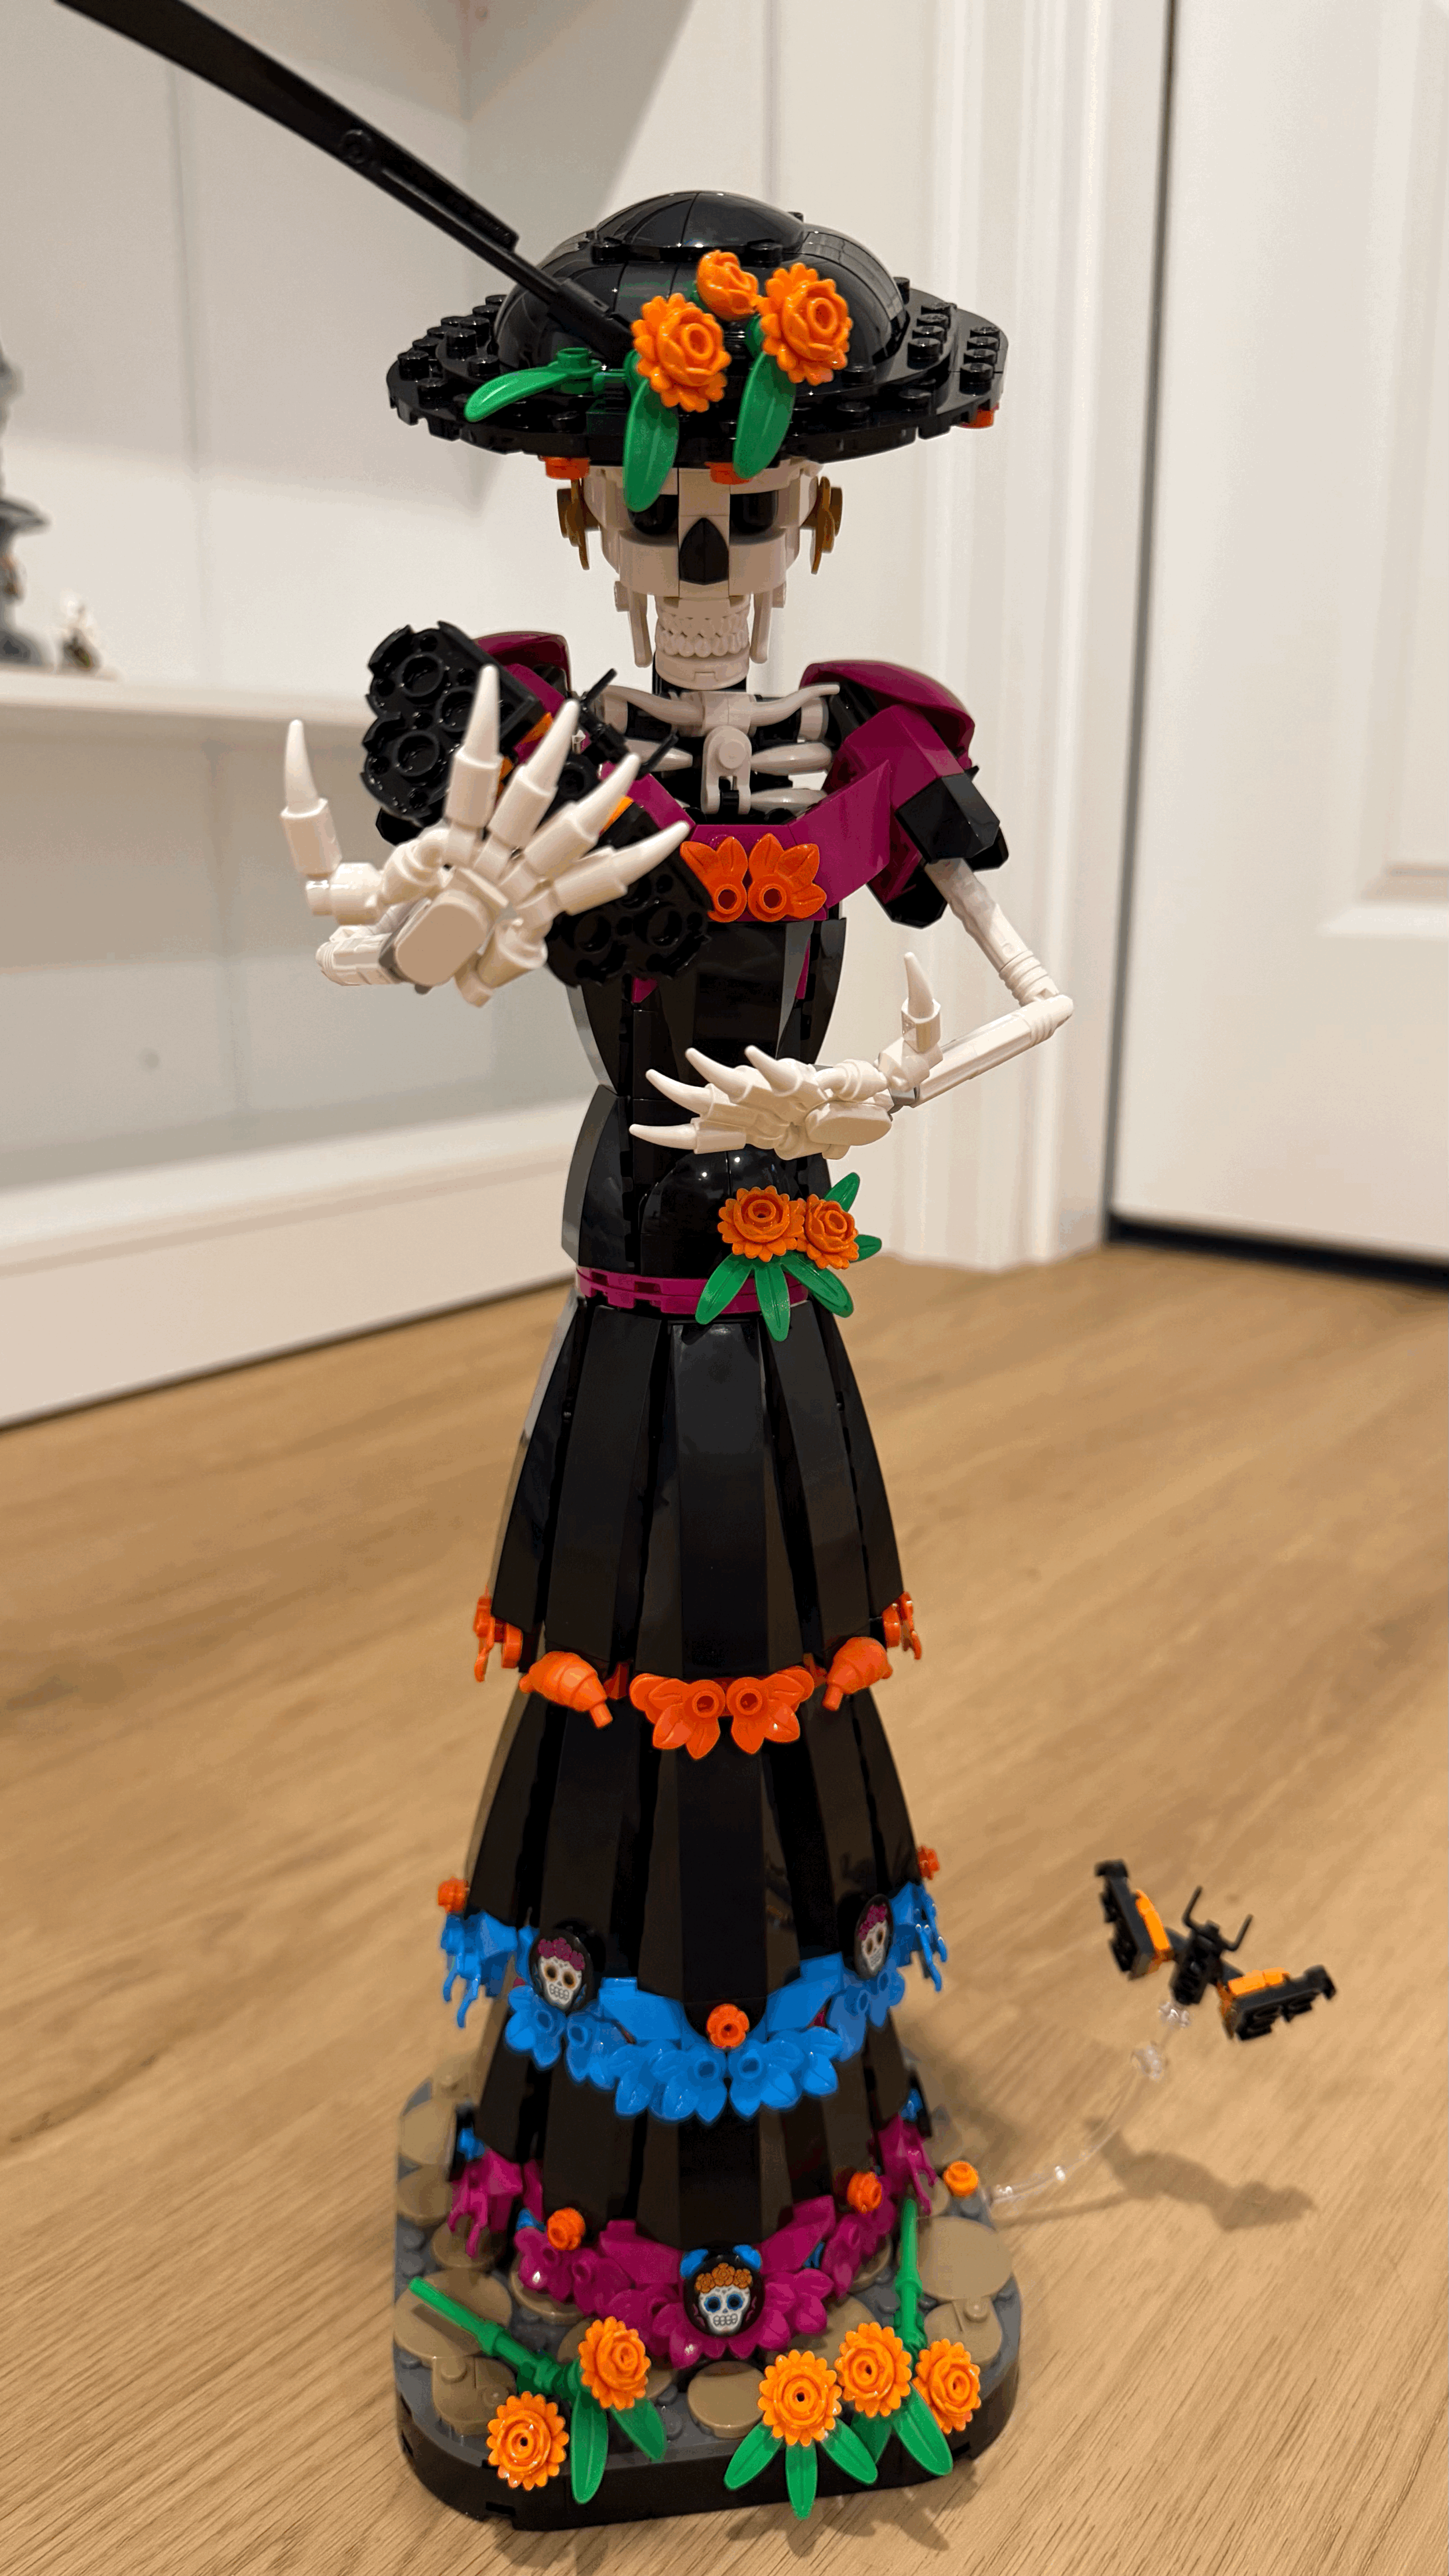
LEGO® Ideas La Catrina 21372 after completion.
La Catrina 21372 at a Glance
Pieces: 1,212
Bags: 12
Instruction steps: 738
My build time: 3 hours, 20 minutes
My difficulty rating: 5/10
Stickers: None
Finished stability: Excellent
Recommended age: 18+
Finished height: Over 17 in. / 43 cm
LEGO lists La Catrina as a 1,212-piece LEGO Ideas display set for ages 18+, standing more than 17 inches tall when complete.
Official set information: LEGO® Ideas La Catrina 21372
The Short Version
La Catrina is an enjoyable build that occasionally suffers from repetition but rewards you with an exceptionally attractive finished display.
The designer does a good job breaking up the repeated construction of the dress with different techniques, decorative elements, structural supports, and increasingly detailed sections as the model grows.
The difficulty progression is particularly good. The first two bags are straightforward, while later bags introduce smaller connections, Technic elements, fragile assemblies, and increasingly precise decorative work. Bag 12 is easily the most demanding.
Despite the height and narrow shape of the finished model, La Catrina is surprisingly stable. It is easy to carefully reposition and adjust the pose without feeling fragile.
And one detail many builders will appreciate: there are no stickers.
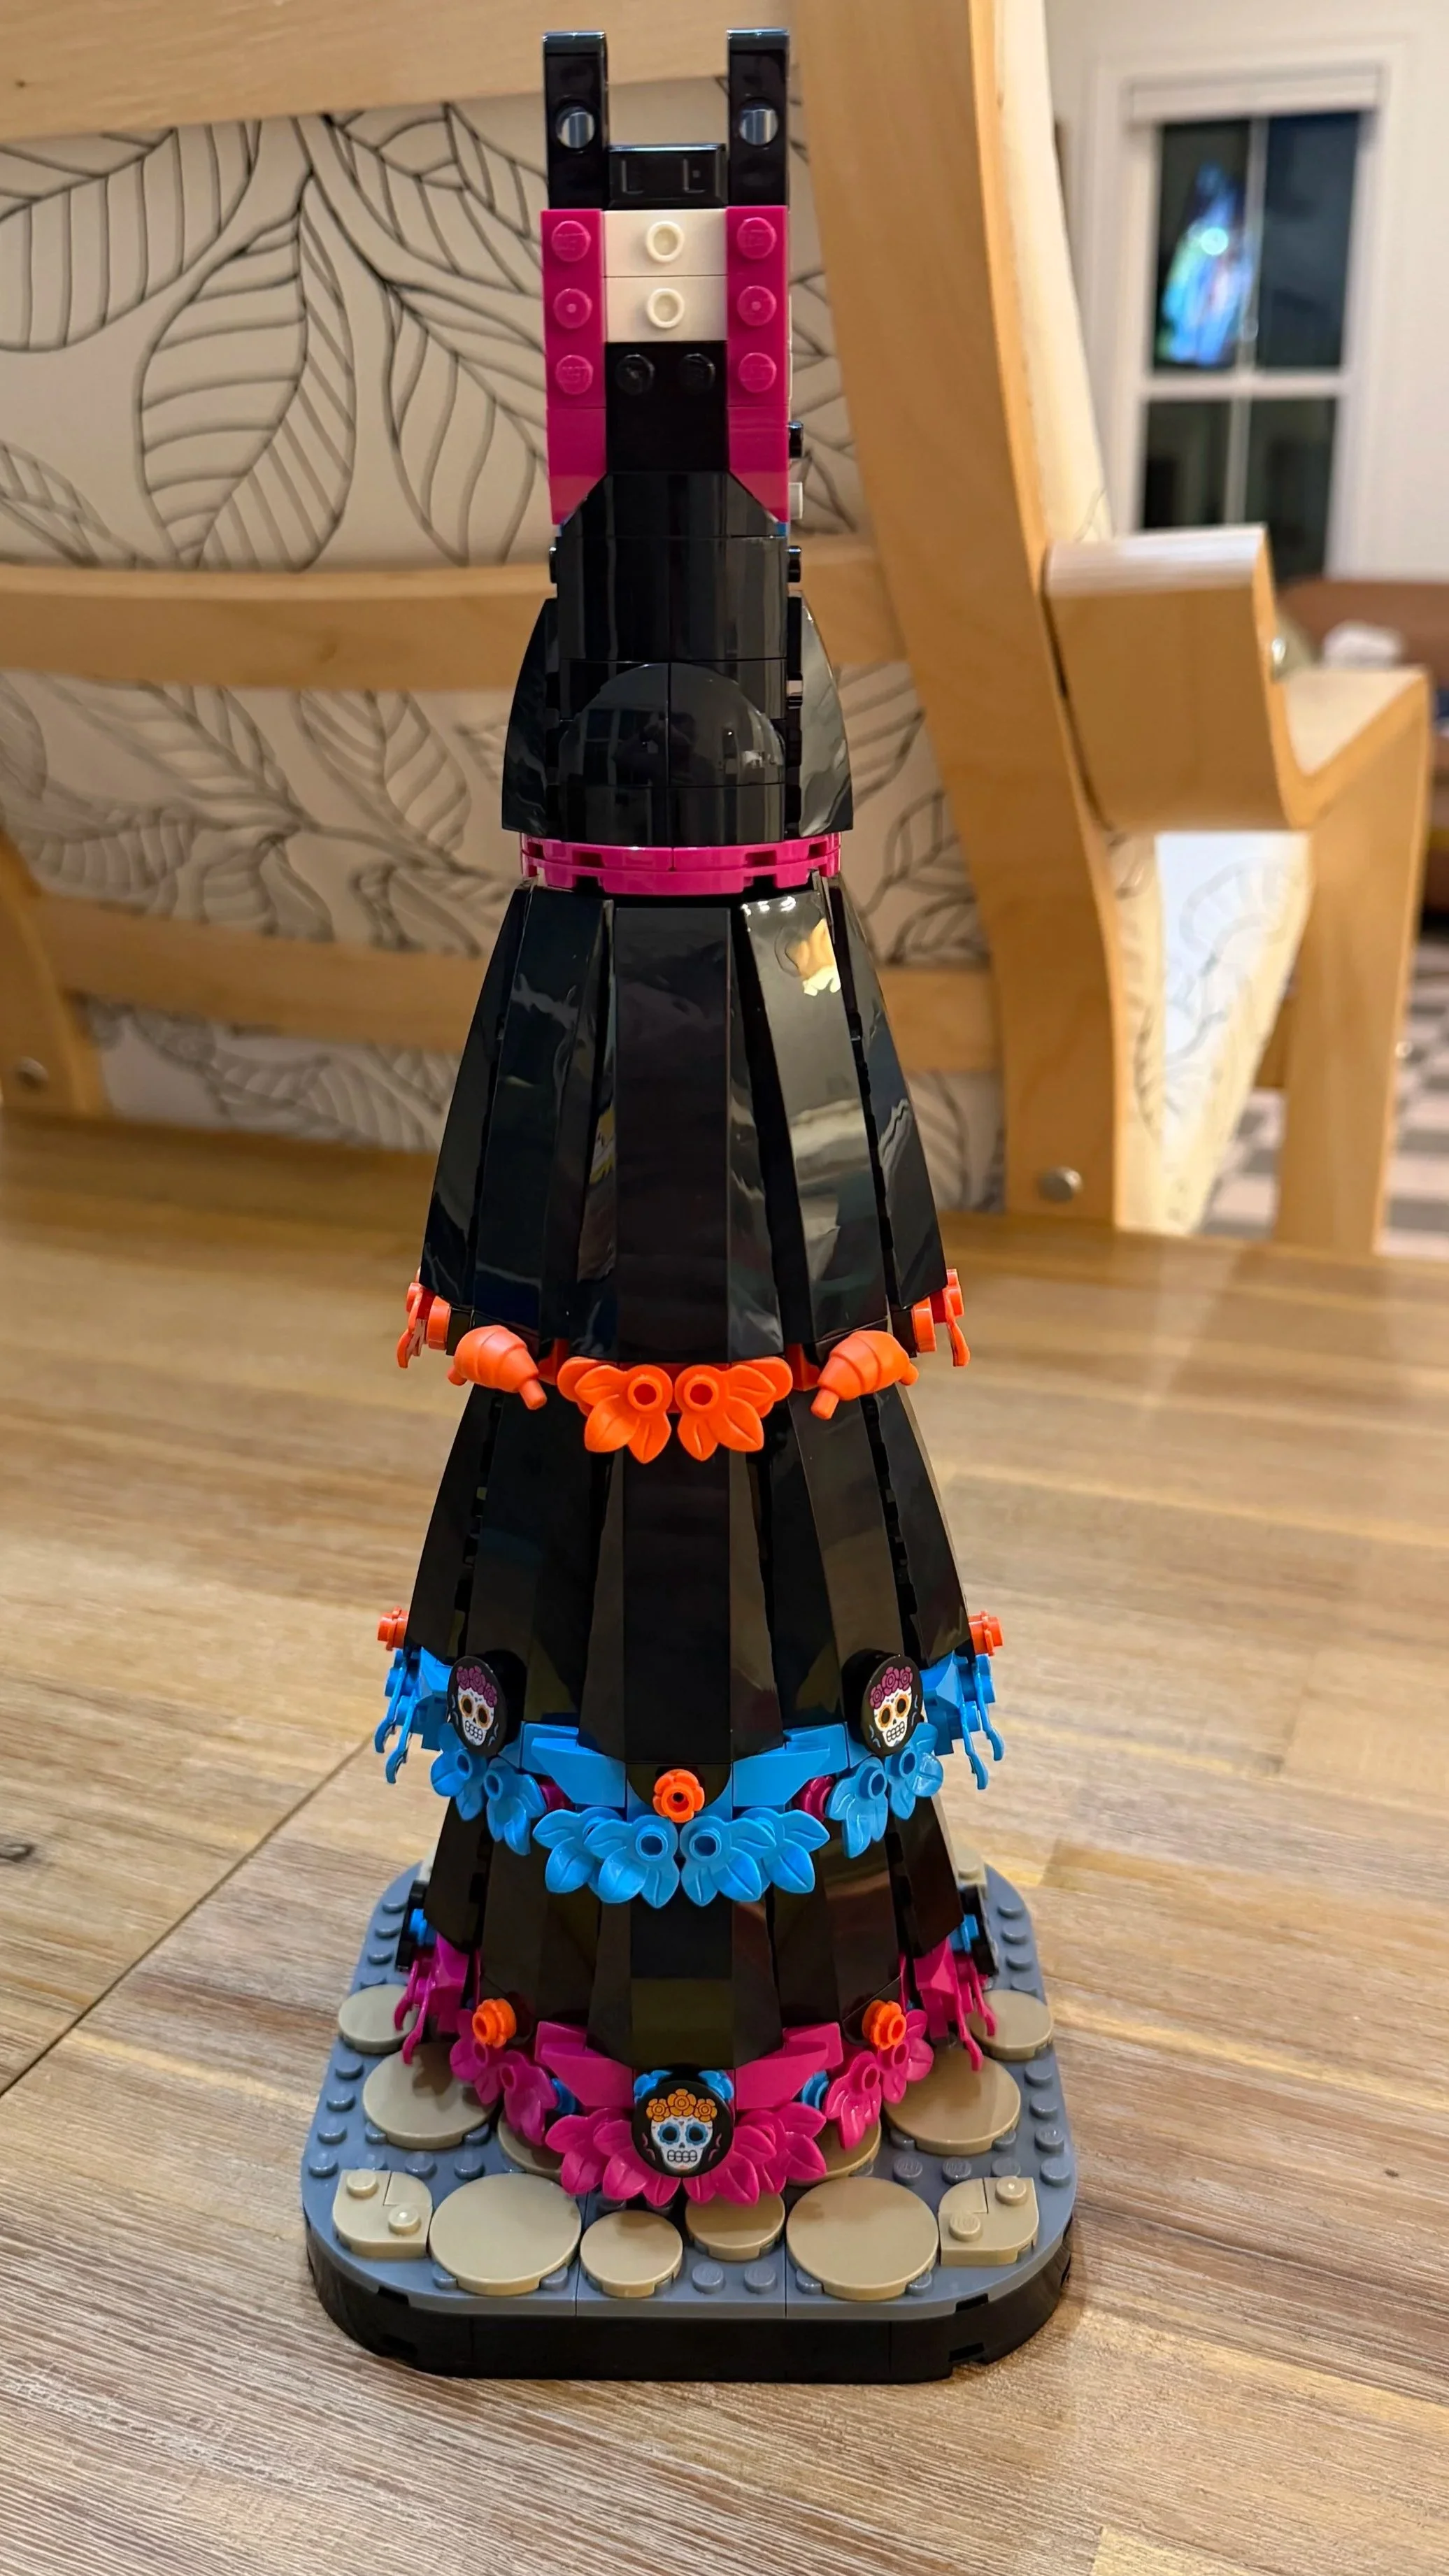
By the later dress stages, the visual payoff starts becoming clear.
What Is La Catrina Like to Build?
La Catrina starts much more simply than the finished model suggests.
The first two bags establish the base and central support structure and move very quickly. There is also a small heritage-themed Easter egg hidden within the interior structure.
From there, much of the first half of the build is dedicated to creating the shape of the dress.
This is where the set's biggest weakness appears: repetition.
Several dress panels use similar construction methods, particularly through Bags 3, 5, and 7. Fortunately, the techniques change enough between sections to keep the build from becoming completely monotonous.
The repetition also serves an important structural purpose. As the model grows, the reason for the internal Technic connections becomes increasingly apparent. They create a remarkably sturdy core for such a tall and narrow display model.
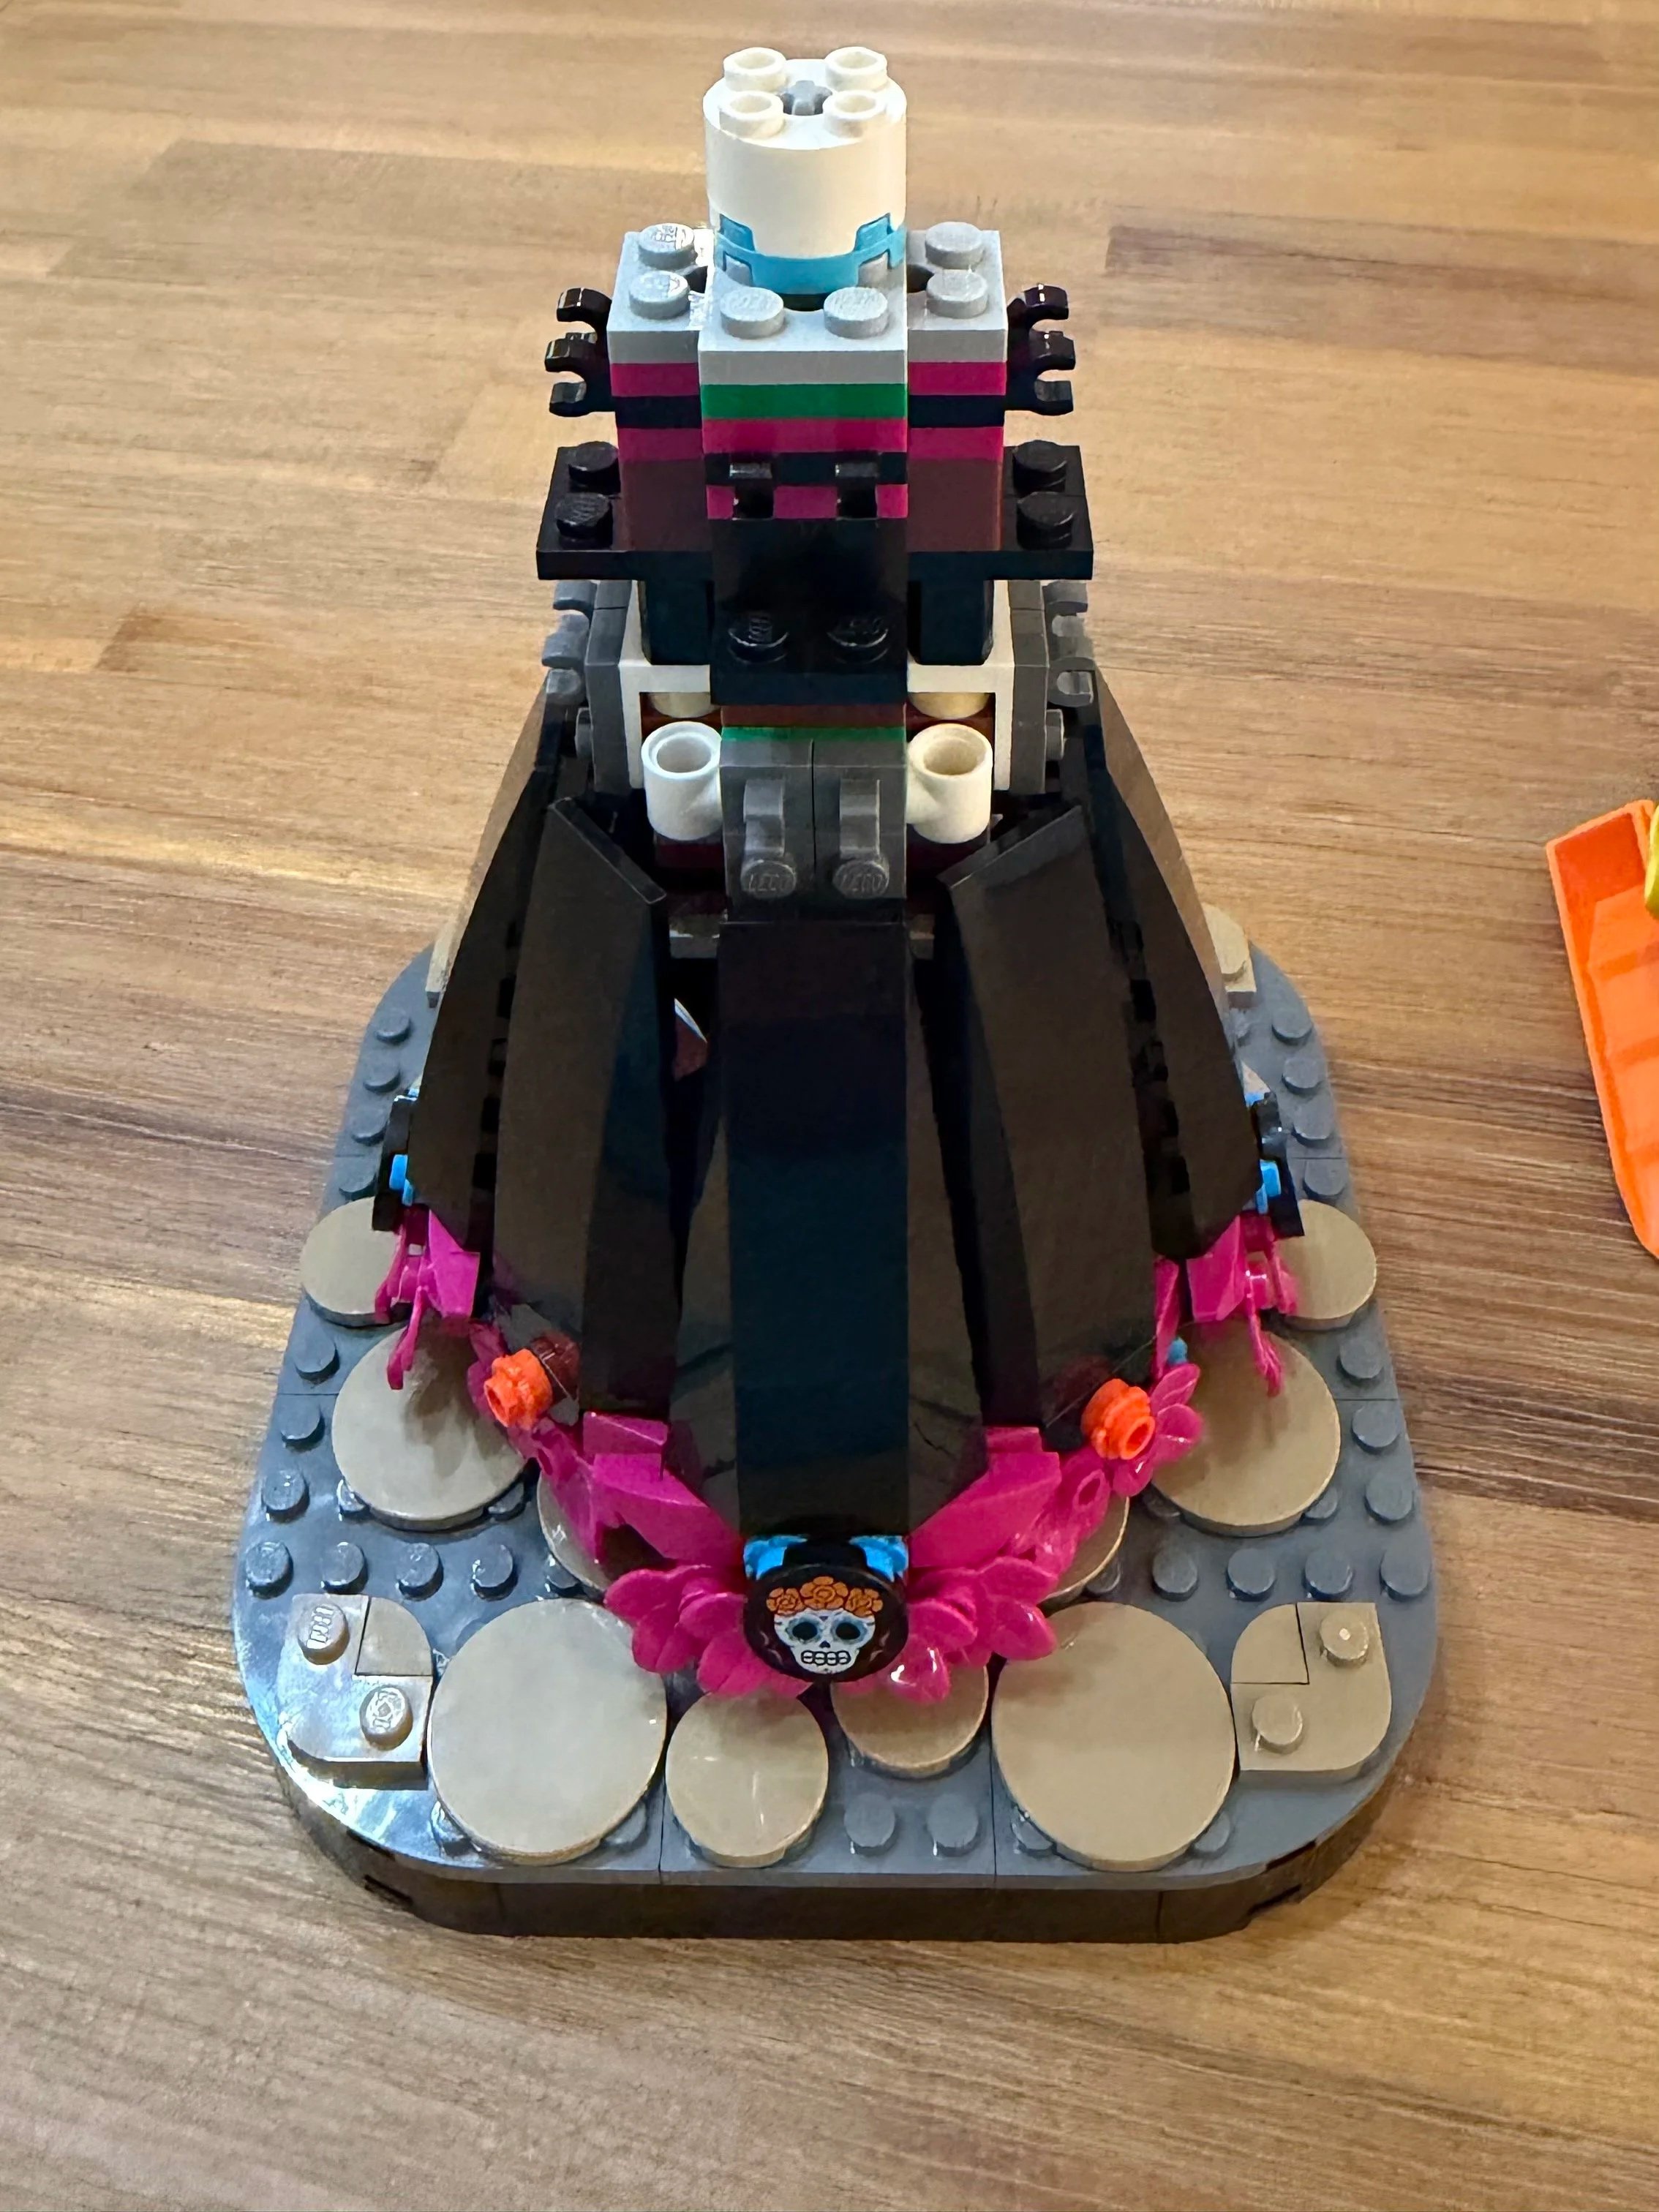
The internal structure gradually disappears as the exterior dress panels are attached.
Where the Build Gets Difficult
My overall difficulty rating is 5/10, but that number doesn't tell the full story.
This isn't a consistently medium-difficulty build. It starts easy and becomes progressively more demanding.
The biggest challenge isn't understanding the instructions. It's finger dexterity and connection force.
Several sections require Technic elements to be aligned precisely before being pushed firmly together. Some dress panels also require substantially more pressure than I expected before they seat correctly.
That becomes especially noticeable around Bag 7, when some of the more demanding dress connections appear. By Bag 8, the construction moves into the torso and the connections become smaller and more delicate.
The upside is stability. Once those assemblies are secured, they provide extremely solid attachment points for the exterior model.
Experienced adult builders should find the set very manageable, but builders with limited hand strength or dexterity may find a few connections frustrating.
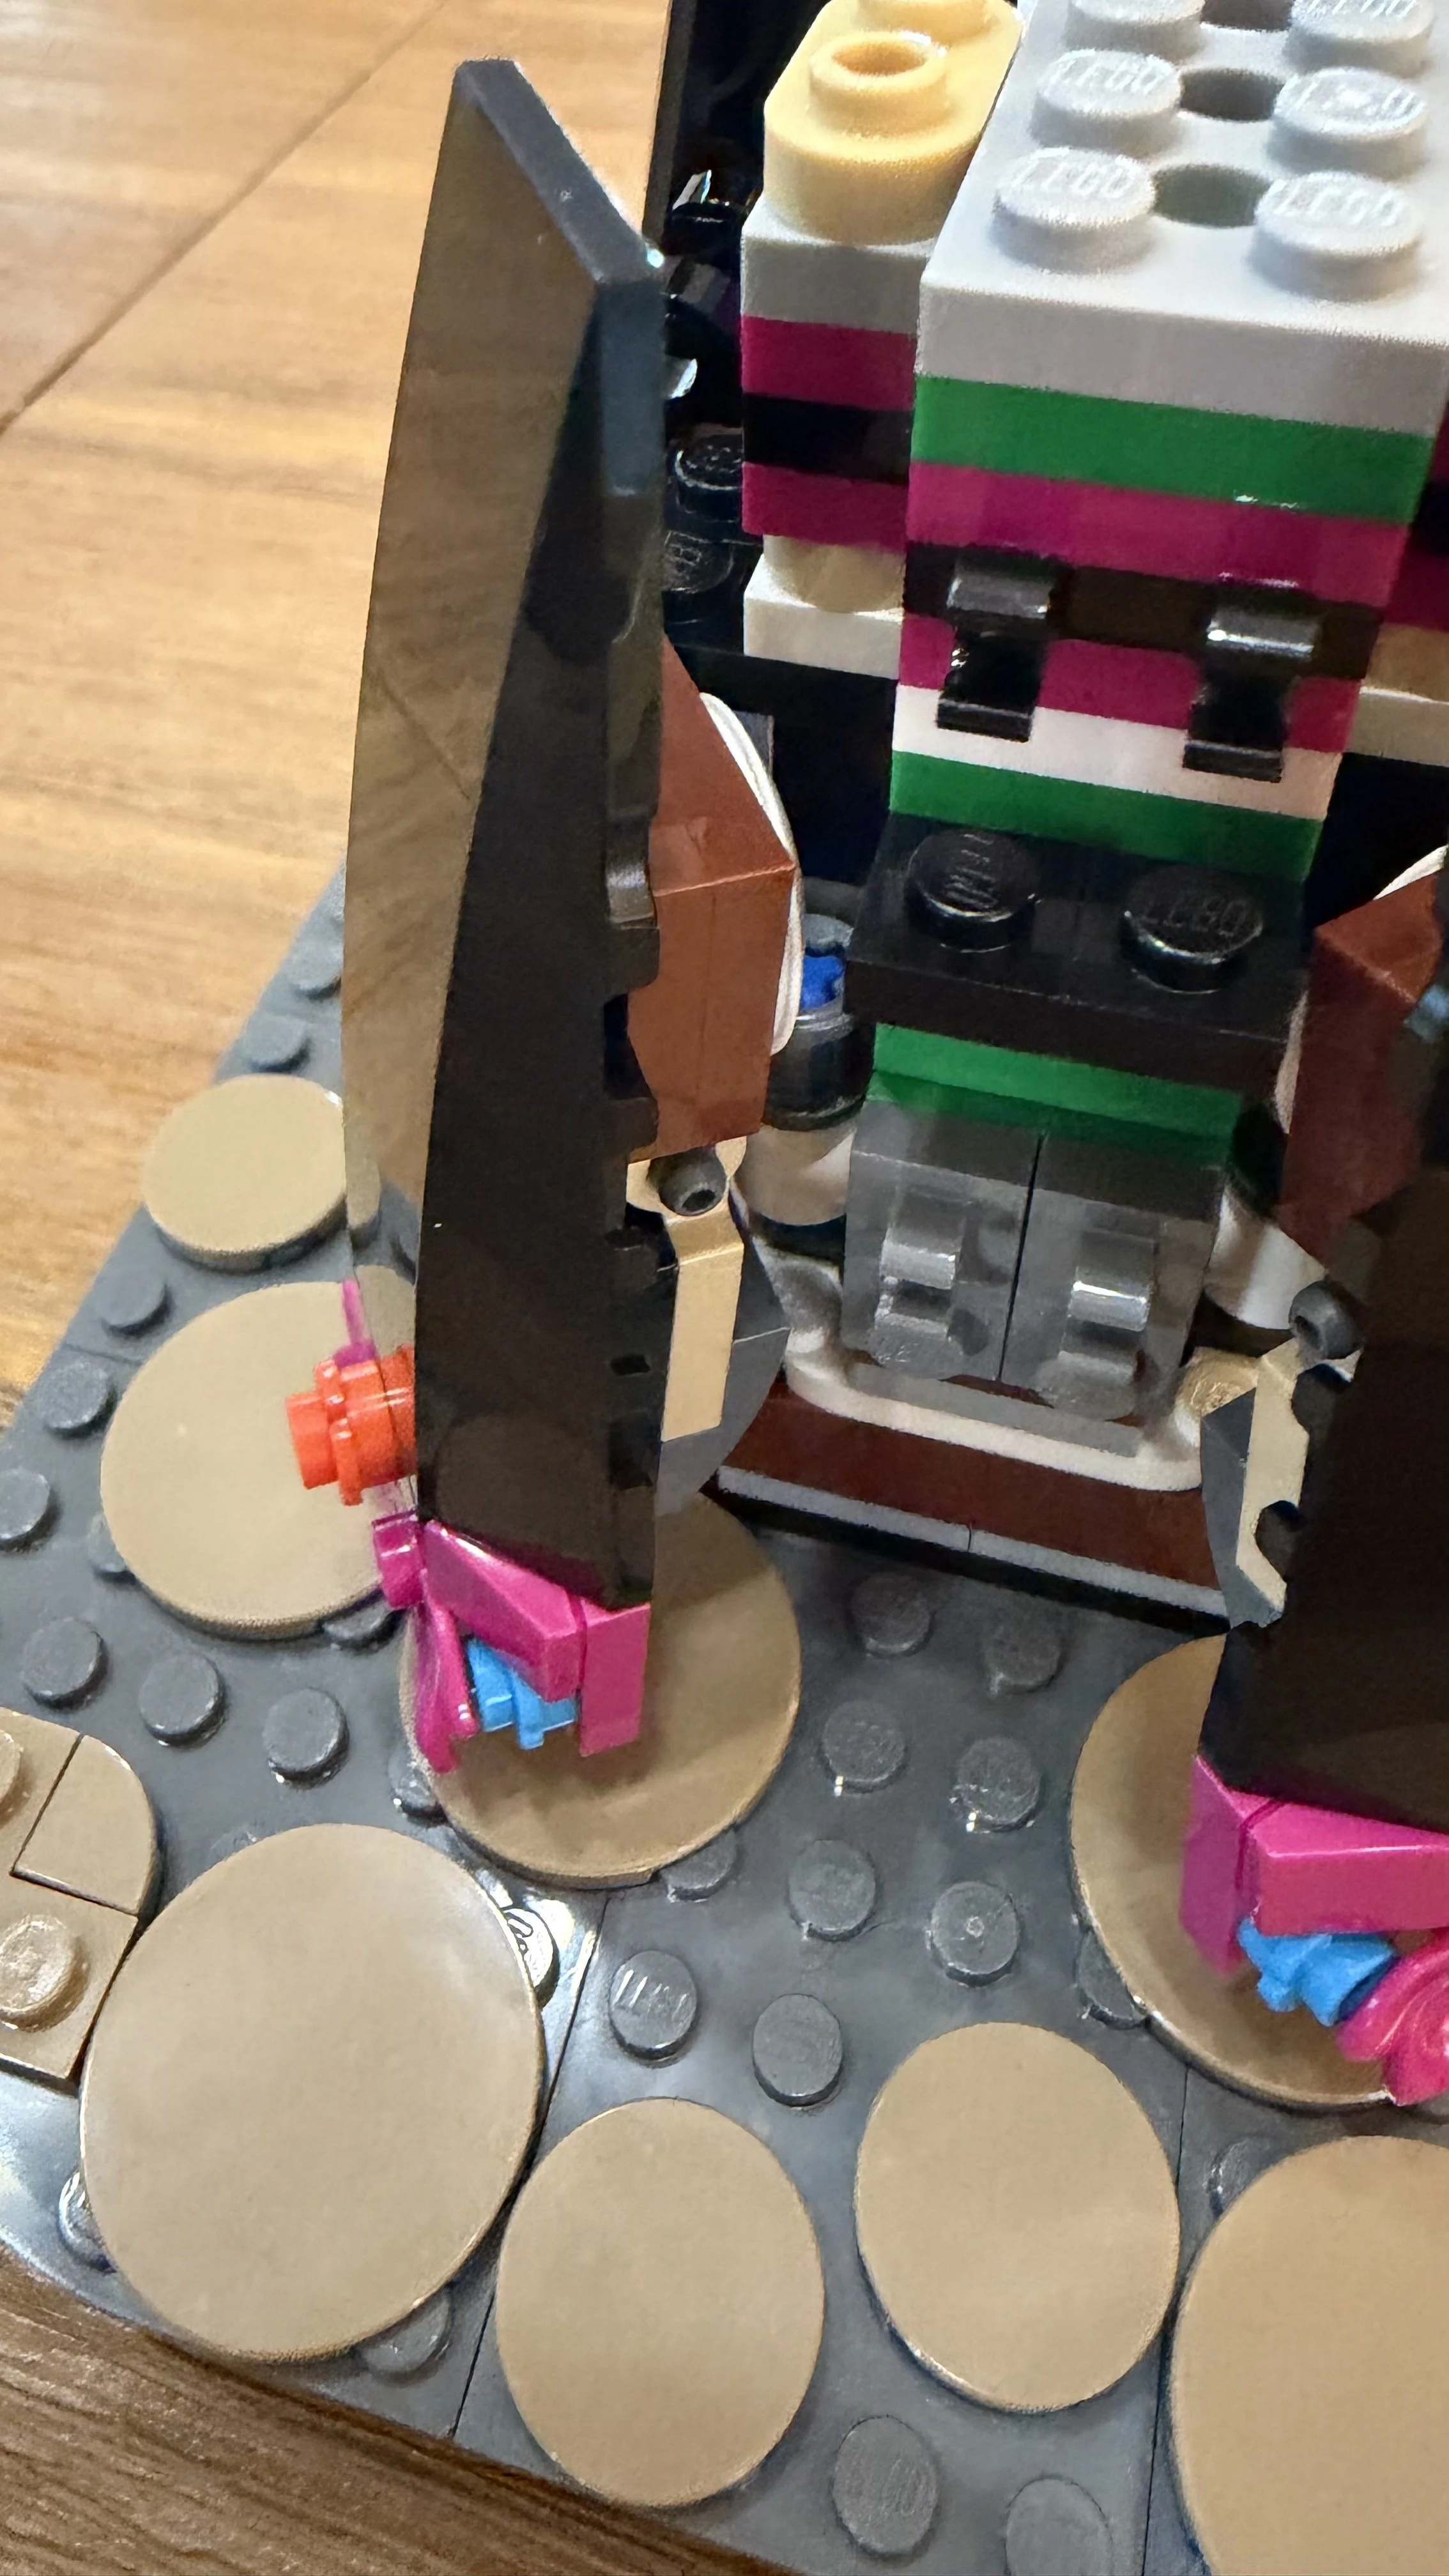
Several dress panels require careful alignment and firm pressure.
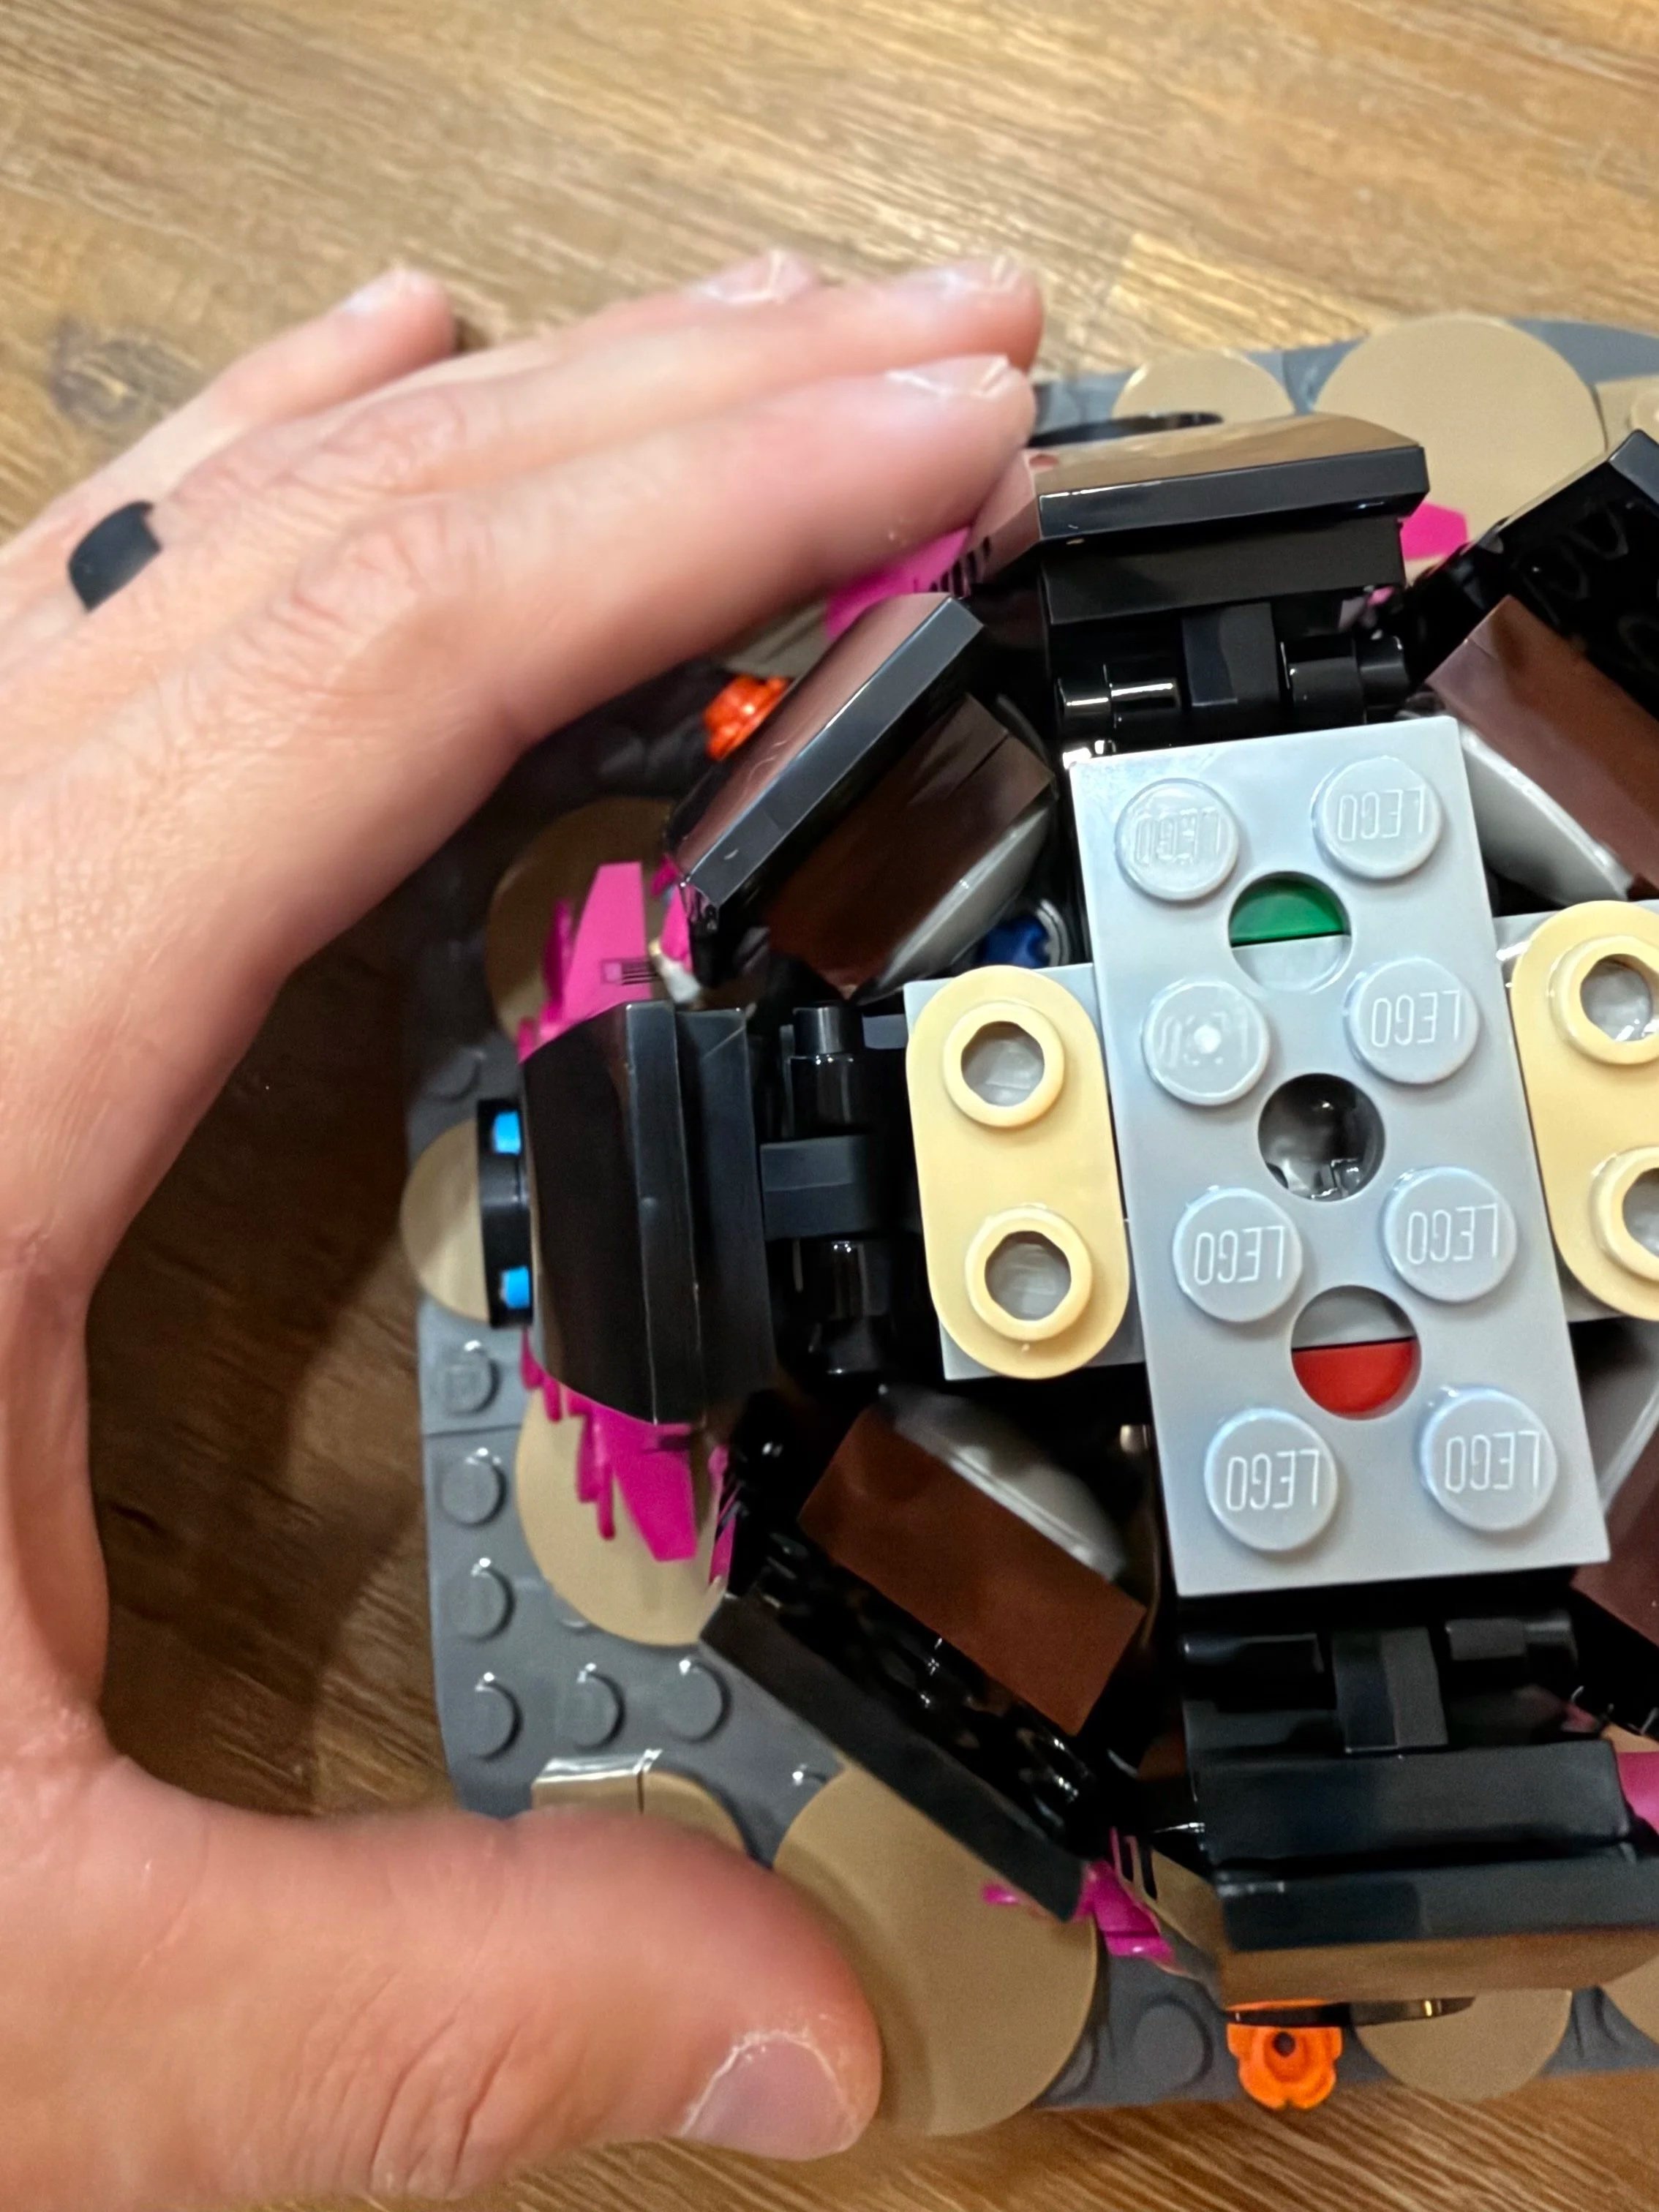
Later connections become more compact and physically demanding.
Bag-by-Bag Build Notes
Bags 1–2: Base and Internal Structure
These bags are fast and straightforward. The base establishes the footprint while the central structure begins supporting the figure. There is also a small hidden heritage-themed detail inside the structure.
This is easily the simplest portion of the build.
Bag 3: The Repetition Begins
Bag 3 introduces eight similar dress-panel assemblies. Four use Technic connections that can be challenging for builders with less hand dexterity. The other four require a smooth but fairly strong push to lock into place.
This is the first point where physical assembly becomes more demanding than interpreting the instructions.
Bag 4: Structure and Stability
A small and relatively quick bag. Most of the work extends the vertical support inside the dress, including two important Technic connections that add stability.
Bag 5: More Dress Construction
This section is very similar to Bag 3 and is probably where builders who dislike repetition will notice it most. Fortunately, the visual payoff is beginning to become obvious.
Bag 6: Building Upward
Bag 6 focuses on adding height. The central cube-like structure is enjoyable to assemble and adds some welcome variety. There are a few tighter connections, but the bag itself is relatively small.
Bag 7: The Model Starts Coming Together
Another round of dress panels, although the construction varies enough to stay interesting.
There is some clever parts usage here, including croissant elements incorporated into the decoration. This bag also makes the purpose of the earlier Technic structure much clearer.
Several dress-panel connections require substantial pressure, with the final two being particularly difficult. Once complete, however, La Catrina really starts looking like the finished display model.
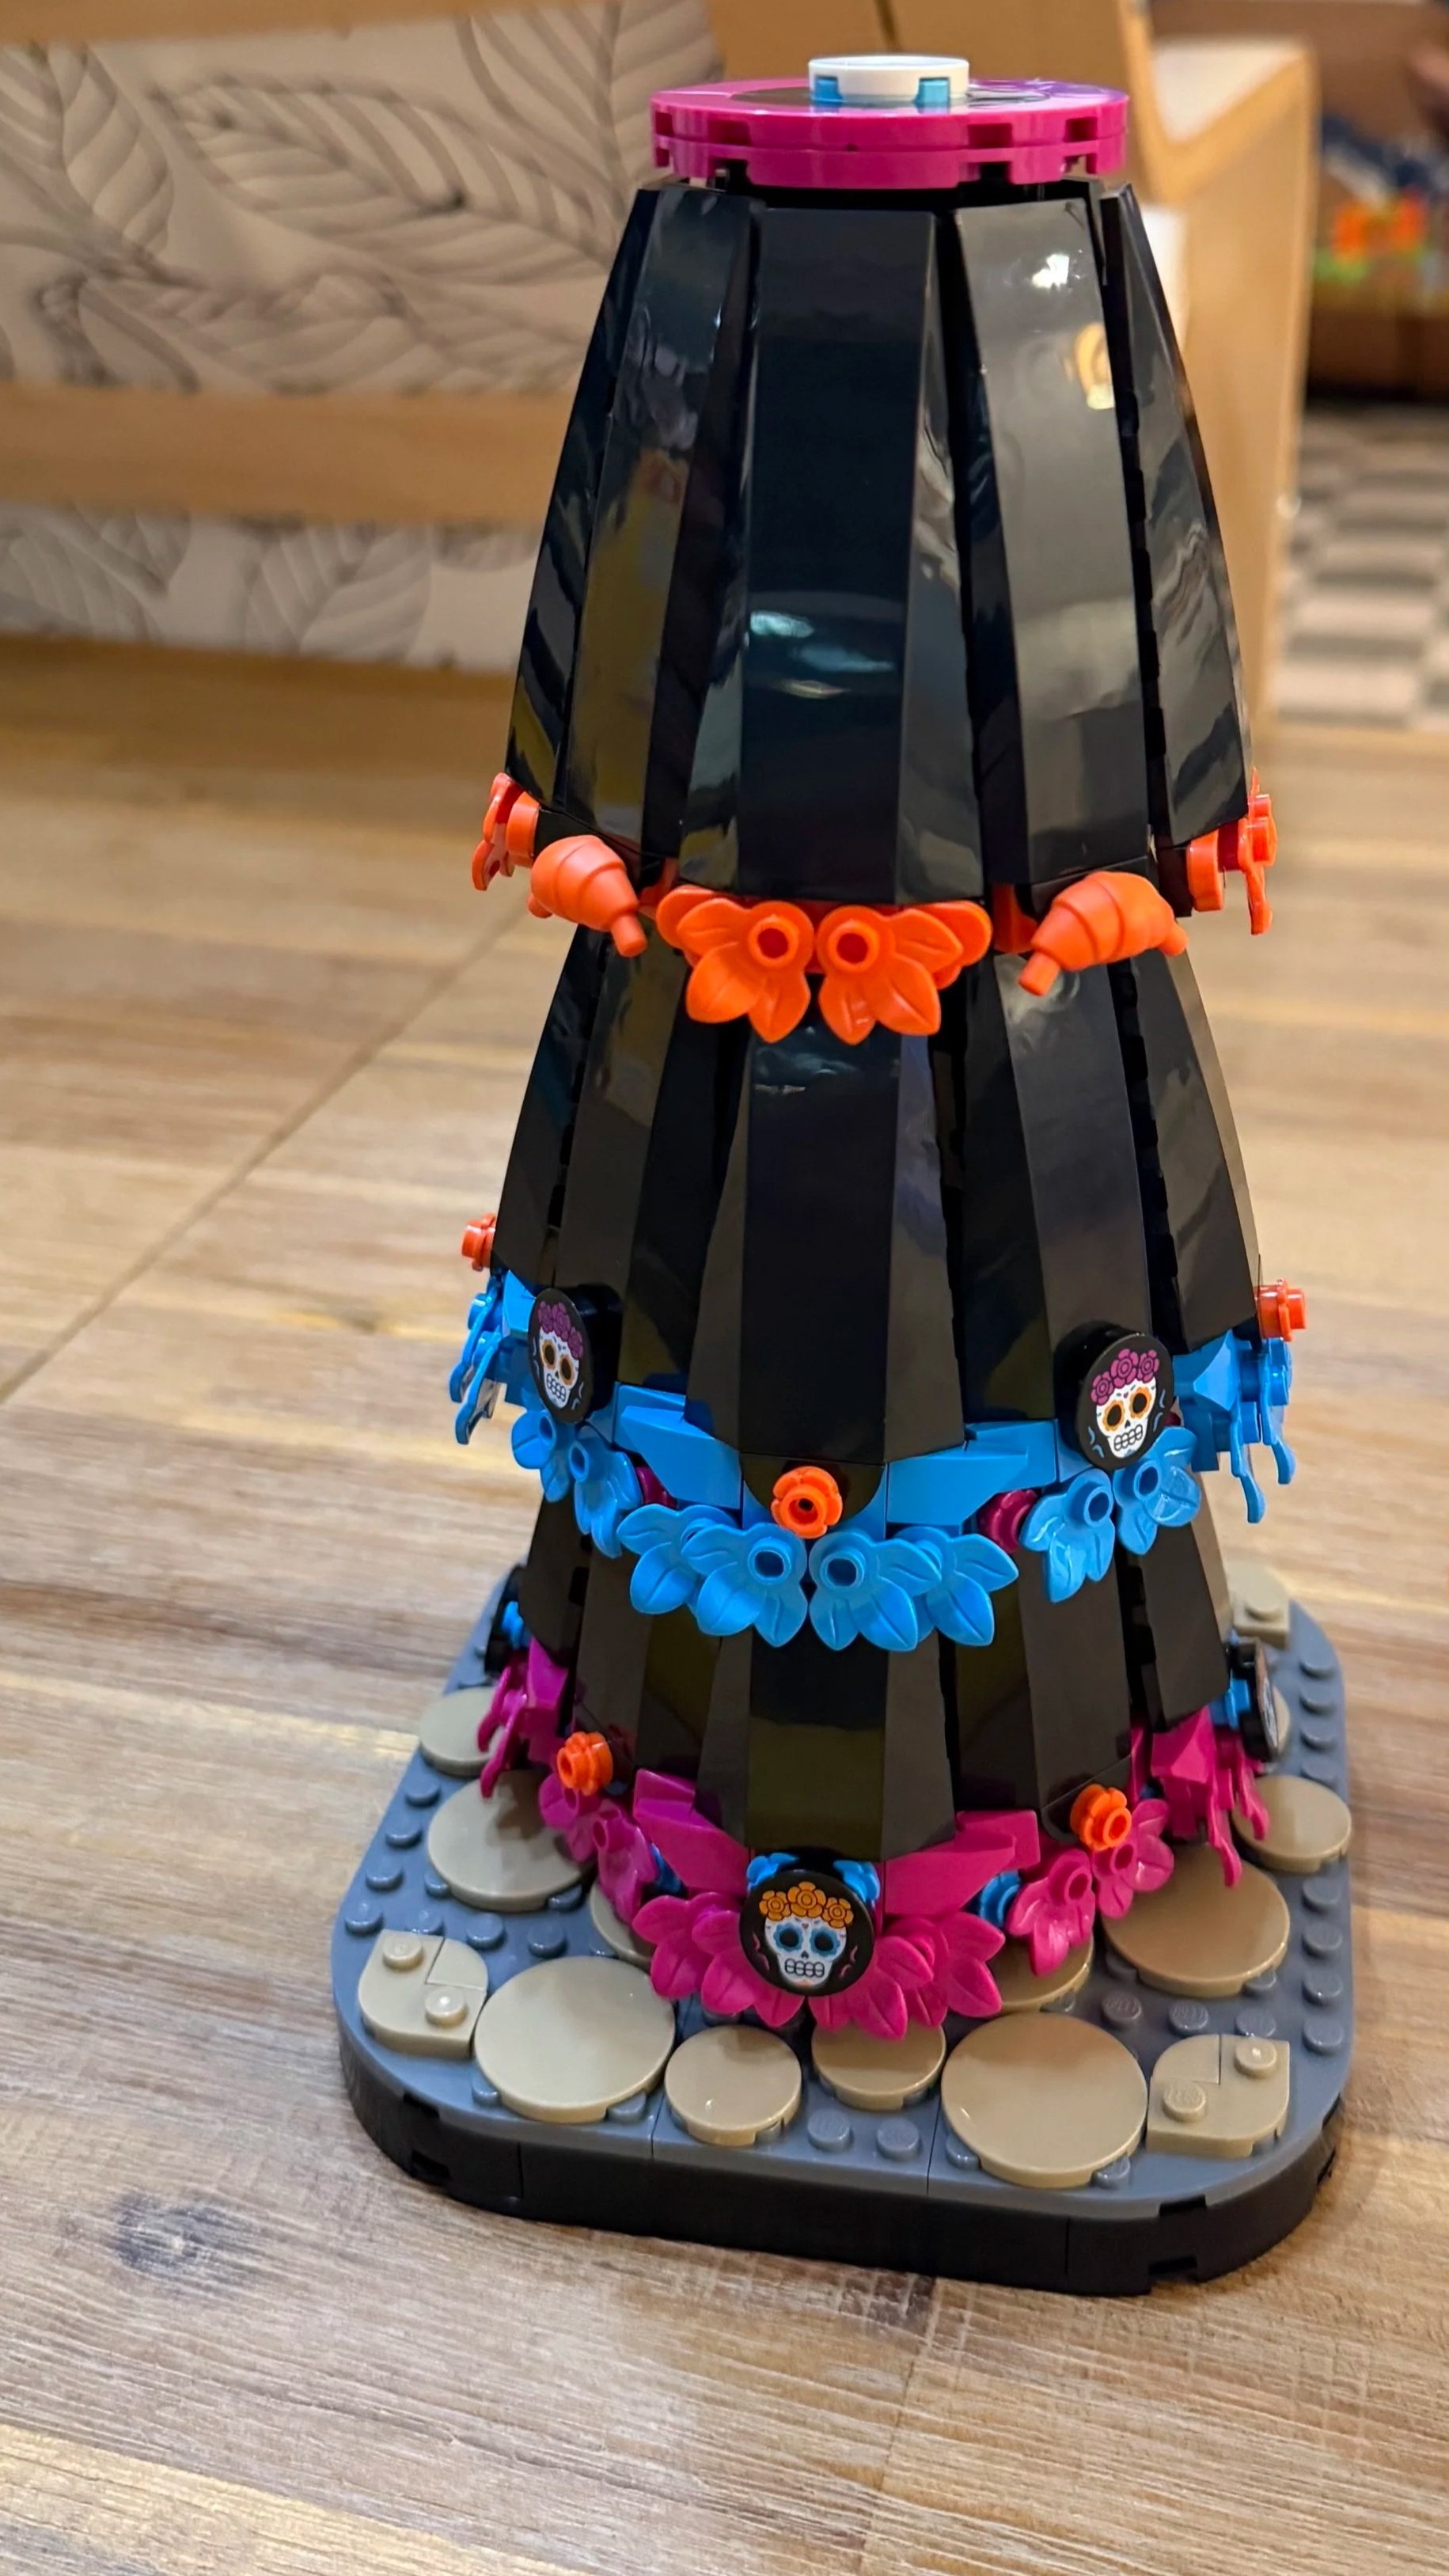
Around Bag 7, La Catrina begins to take on the proportions and appearance of the finished model.
Bag 8: Torso
The build changes considerably here. Instead of repeating the dress structure, you begin assembling the torso using several interesting techniques and much smaller connections.
Fine motor control becomes more important. Two Technic subassemblies are difficult both to construct and to attach to the torso, but once installed they provide excellent support.
Bag 9: Details Arrive
Bag 9 contains many smaller elements and offers the most varied sequence of steps up to this point.
The Technic connections used for the arm bases require precise alignment and can take some effort to slide into position. You also begin adding distinctive skeletal details, including the rib cage.
This is where much more of the model's personality begins to emerge.
Bag 10: Arms and Hands
The piece count drops again as the build focuses primarily on the two arms.
The arms are enjoyable to construct, although several Technic connections require firm pressure. Attaching the completed arms to their ball joints is comparatively easy.
The hands are much more meticulous, but the finished result is excellent.
Bag 11: Building the Skull
Another smaller bag, but considerably more intricate.
The skull uses many small elements and some unusual construction methods. Pay particular attention to the orientation of the boomerang-shaped elements used on the left and right sides.
The completed skull feels surprisingly sturdy. That's helpful because connecting it securely to the torso required considerably more force than I expected.
Bag 12: The Hardest Part of the Build
The final bag is easily the most challenging.
Most of the hat uses larger pieces, but several corner elements are hollow and unexpectedly difficult to secure. The structure becomes dramatically more stable once its internal support is installed.
One particularly clever technique allows the hat to be flipped while remaining securely connected during construction. There is also an imaginative use of a long sword element as a feather.
Once the main hat structure is complete, the build shifts almost entirely to tiny decorative details. The flowers are meticulous and sometimes difficult to snap into place, while the final moth assemblies are challenging but rewarding.
This final portion requires significantly more finger dexterity than anything earlier in the set.
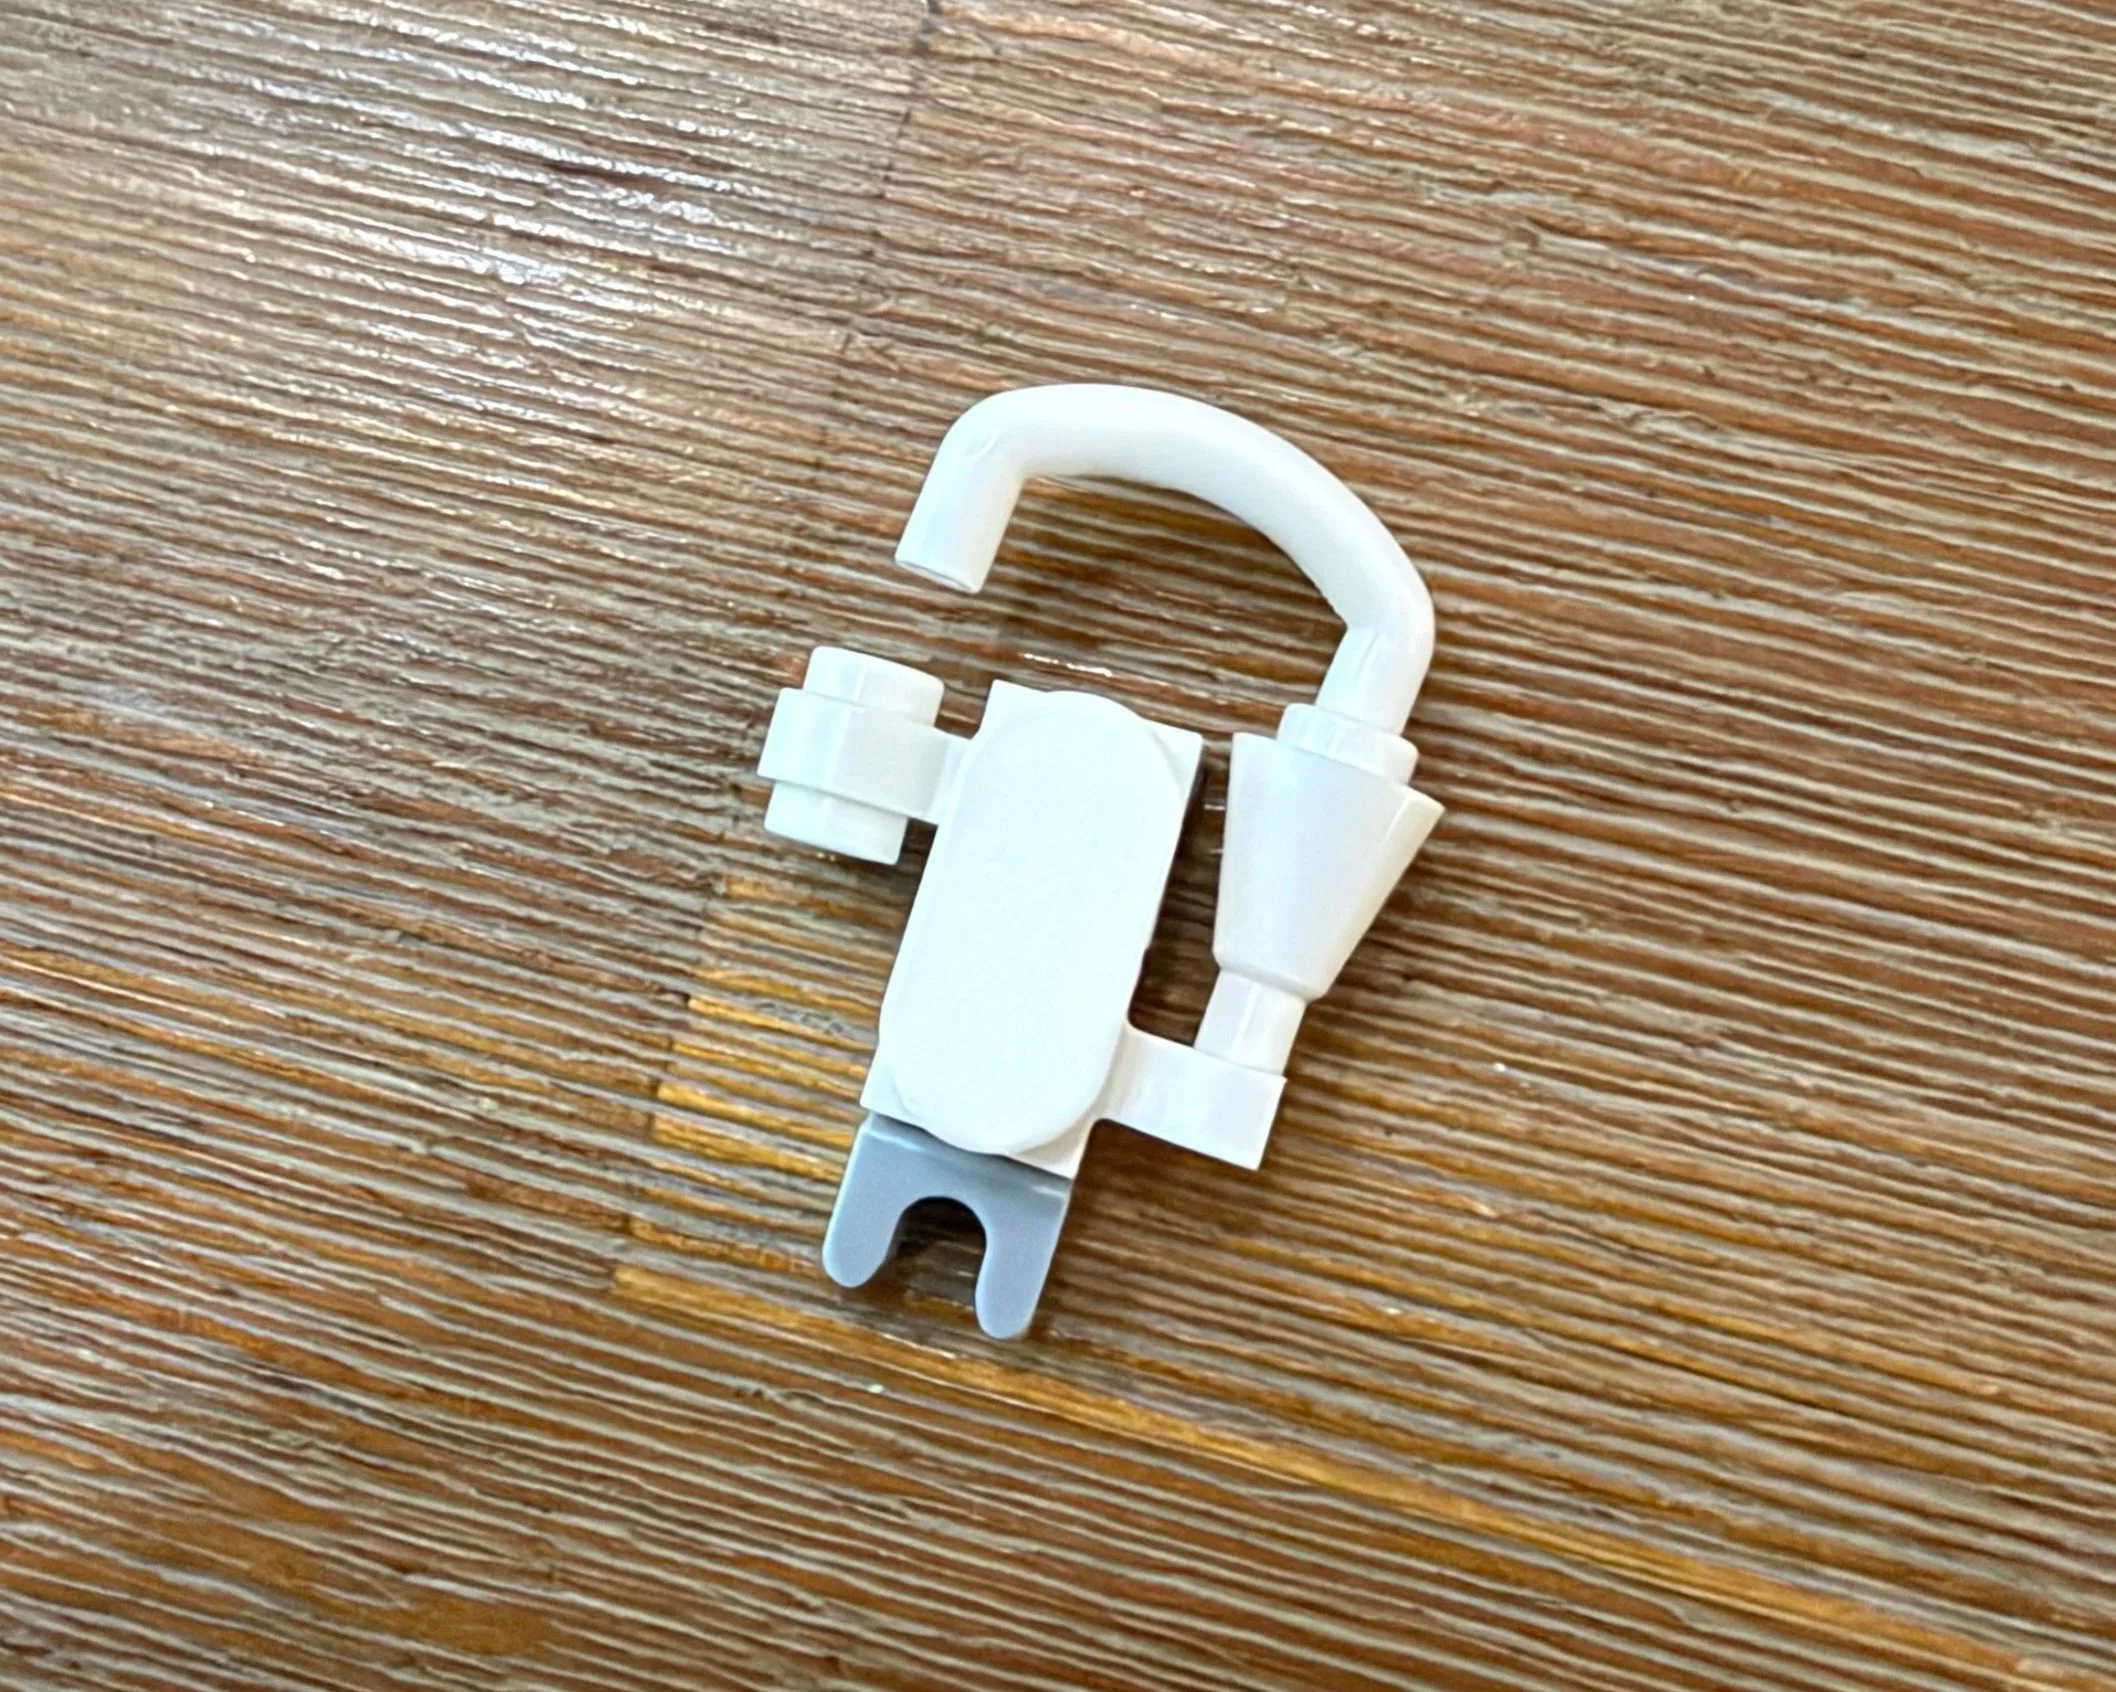
The final bags rely much more heavily on small, detailed assemblies.
Display Quality and Stability
This is where La Catrina really succeeds.
The combination of glossy black dress panels, bright pink, blue and orange decoration, sugar-skull details, skeletal arms, and the oversized hat makes the finished model substantially more visually impressive than many of the individual construction stages suggest.
Despite standing over 17 inches tall, the completed model feels remarkably secure. I found it easy to reposition the figure and adjust the pose without feeling like the structure was going to separate.
That makes La Catrina a more practical model to move around a shelf, office, or display space than its height might suggest.
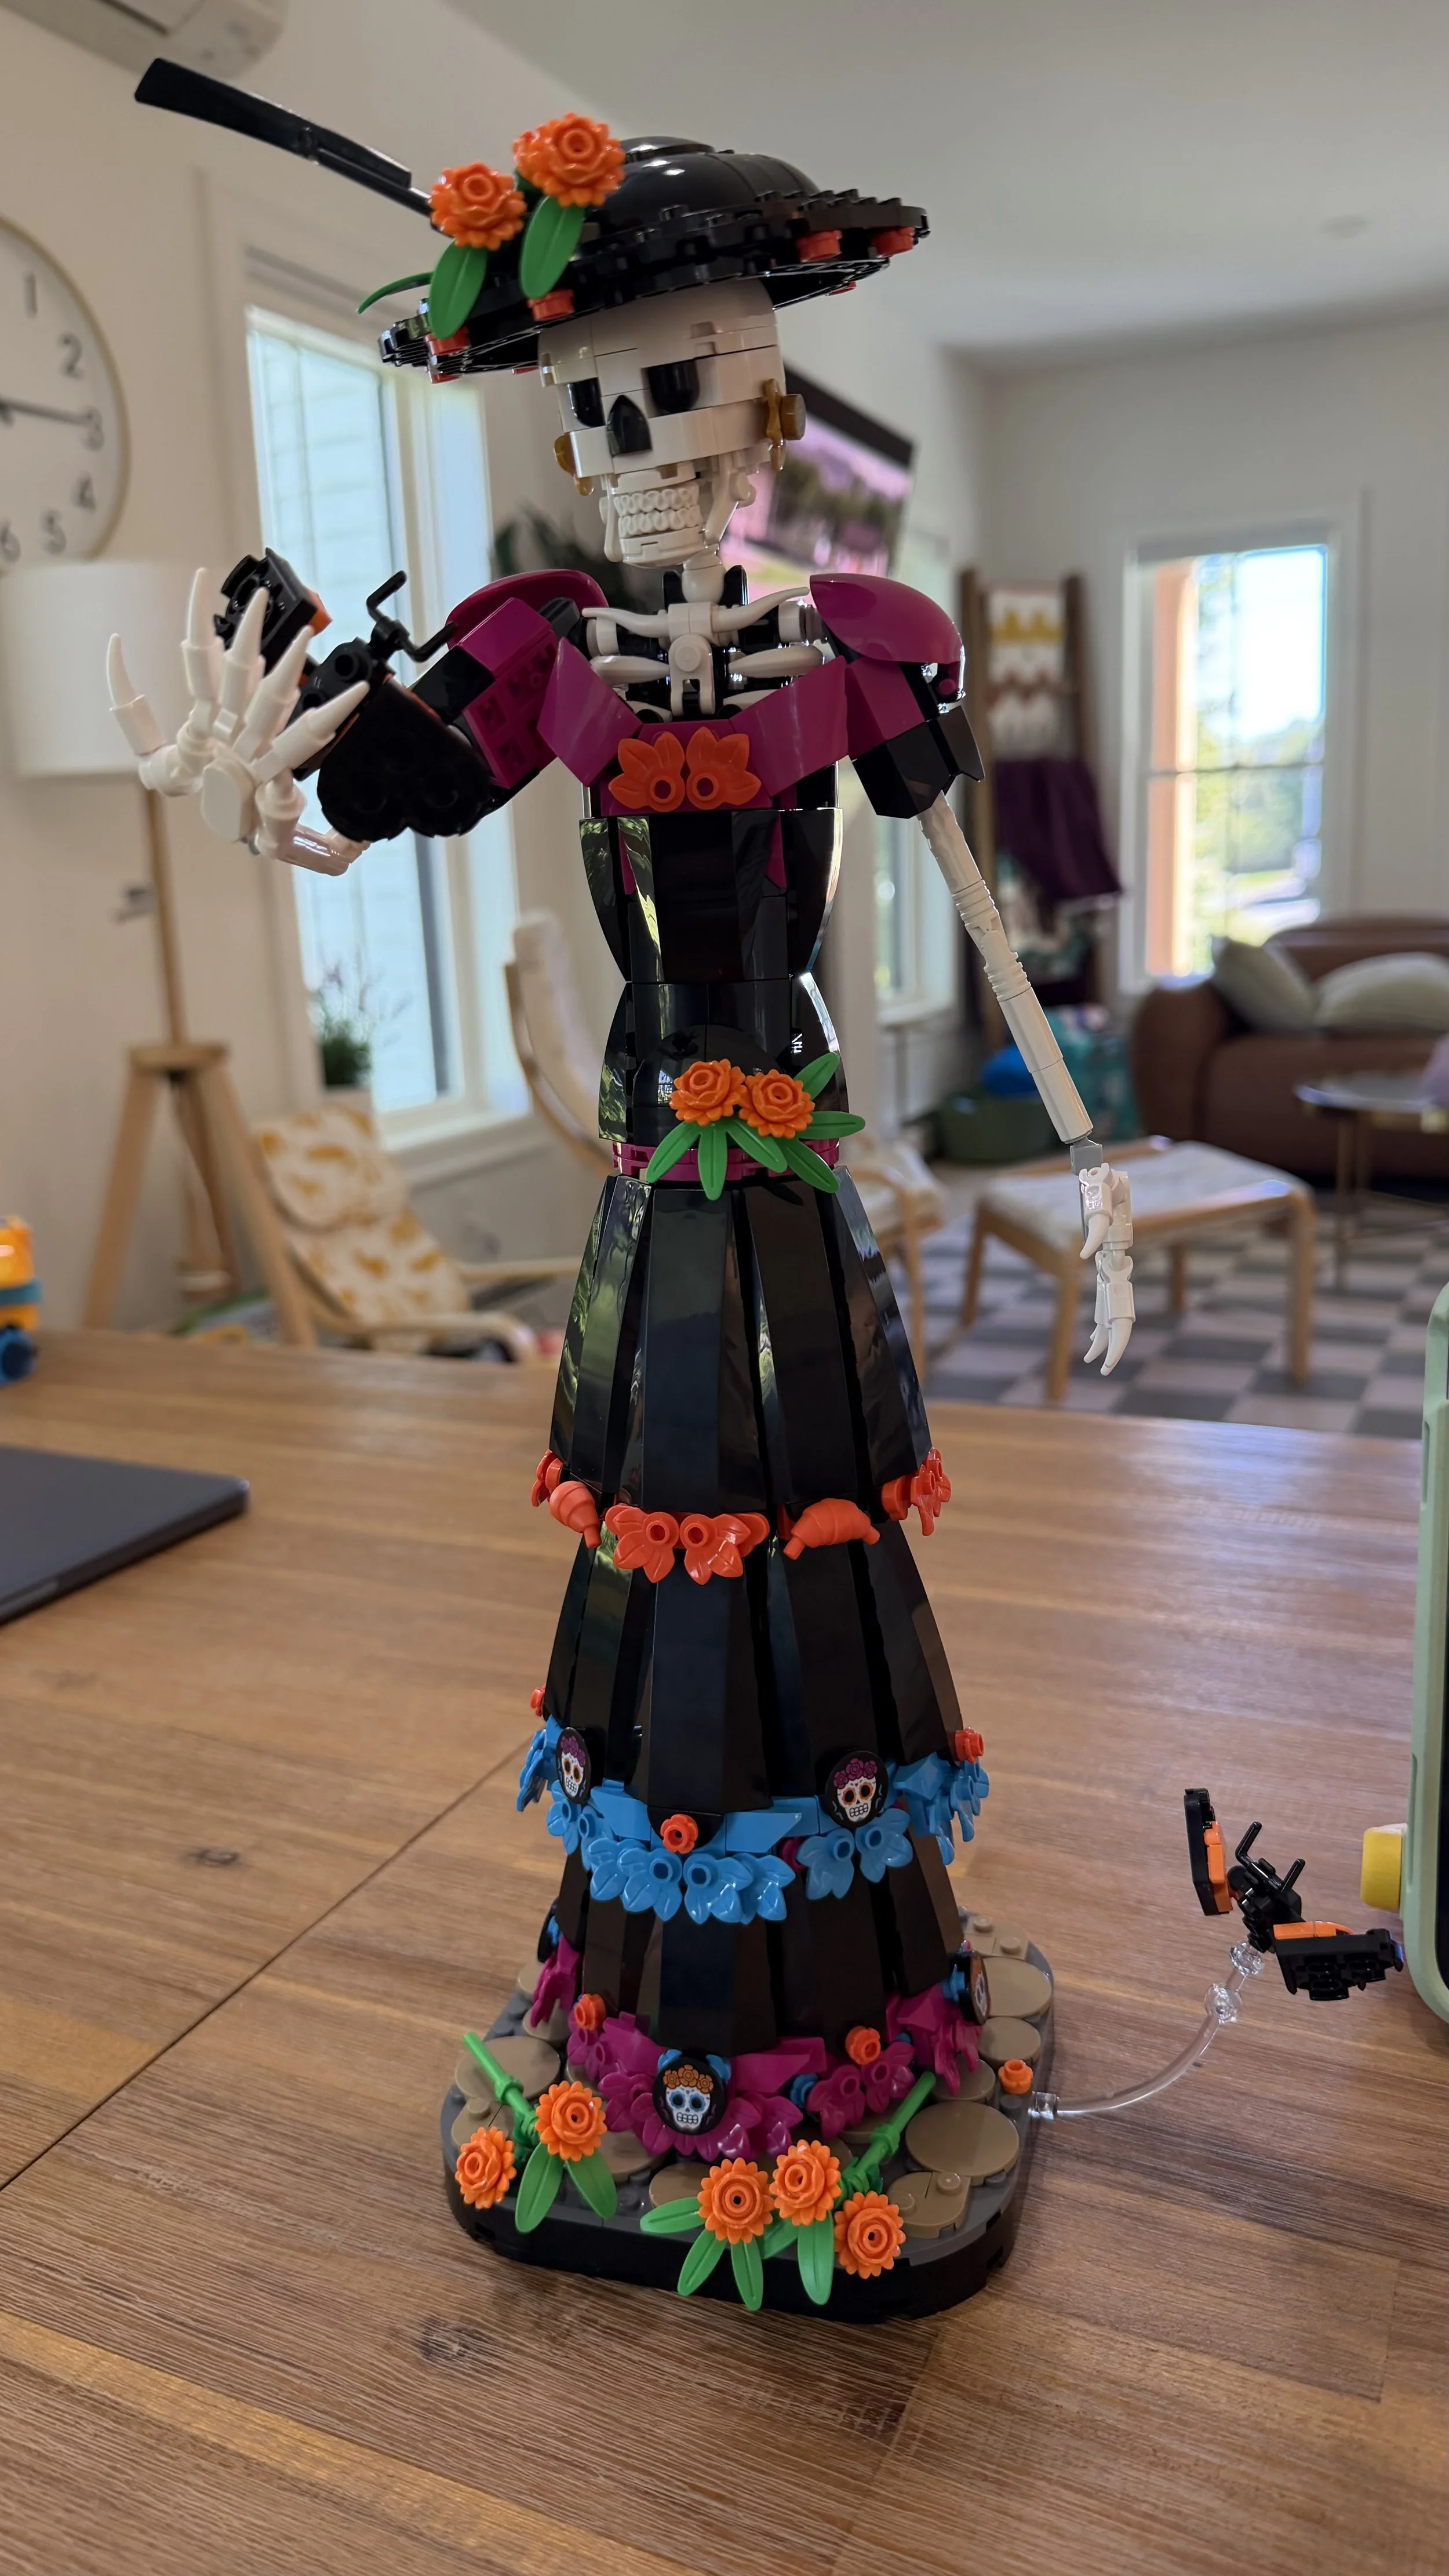
The finished La Catrina is highly poseable and surprisingly stable for such a tall display model.
Who Will Enjoy This Build?
La Catrina is a particularly good choice if you enjoy:
Display-oriented LEGO sets
Unusual construction techniques
Decorative detailing
Skeletal or anatomical builds
Models that gradually become more complex
A finished model that feels substantial and display-ready
You may enjoy it less if you dislike:
Repeated subassemblies
Firm Technic connections
Small, precise decorative work
Builds requiring frequent finger pressure and dexterity
The repetition never ruined the experience for me, but it is noticeable.
Final Verdict
A Repetitive Build in Places, but a Gorgeous Result
LEGO® Ideas La Catrina 21372 was a fun build with an excellent difficulty progression for a display model.
It begins simply enough to settle into the project before gradually introducing more complicated connections, smaller assemblies, skeletal details, and decorative work.
There is repetition, particularly throughout the dress, but the construction varies enough and reveals new details often enough that it rarely feels like you're simply rebuilding the same section over and over.
The final bag is a meaningful jump in difficulty and requires considerably more dexterity than the beginning of the set.
The payoff is an exceptionally attractive model that is sturdy, poseable, and easy to reposition.
Build time: 3 hours, 20 minutes
Difficulty: 5/10
Best feature: Finished display quality
Biggest drawback: Repetitive dress construction
Pleasant surprise: No stickers
My verdict: La Catrina is easy to recommend to builders who prioritize the finished display piece and don't mind some repeated construction along the way.
Want the Finished Set Without the Build?
The Bricksmith provides professional set assembly, rebuilding, disassembly, sorting, and restoration services.
If you own La Catrina or another set and would rather have the finished model than complete the build yourself, send the set number or a few photos. You'll receive a written scope, price, estimated timing, and handoff plan before deciding whether to proceed.
LEGO® is a trademark of the LEGO Group, which does not sponsor, authorize, or endorse The Bricksmith. This review reflects my independent firsthand experience building the set.